Sewing Vloggers

Showing posts with label blouses. Show all posts

Wednesday, February 22, 2023

A tale of two techniques - What would you do?

 The minute I saw Lucy of the vlog Sew Essential wearing this blouse I fell in love with the design. It was just so pretty and also so simple looking to make. It's feminine, would cover my skin from the summer sunshine* but still has that little peekaboo keyhole opening in the front bodice.  The full sleeves would make it quite comfortable in the heat of the season. This would have to somehow become part of my summer wardrobe. While I am not a jeans wearer at all, I suddenly craved a pair of straight legged, high waisted jeans in the darkest wash I could find just to wear this shirt, like darling Lucy. One step at a time! 

*(You may remember my bout with squamous cancer and the fact that melanoma runs heavy in my family. My sweet baby brother just got over his third serious bout a few weeks ago. I am now ever conscious of being comfortably covered in the sun.) 


My first step was getting the pattern, Simplicity 9469, a simple matter of waiting for a sale at Joanns! As my planets lined up I had to wait thru a couple of sales before I was able to pick this up but that was taken care of and now it was fabric time! Or will it be jeans? I went for the fabric first because I came across the lovely 100% cotton lawns now being carried at Joann's. I particularly like the prints mimicing the Nani Iro prints from Japan. I fell and bought a lovely blue version. 
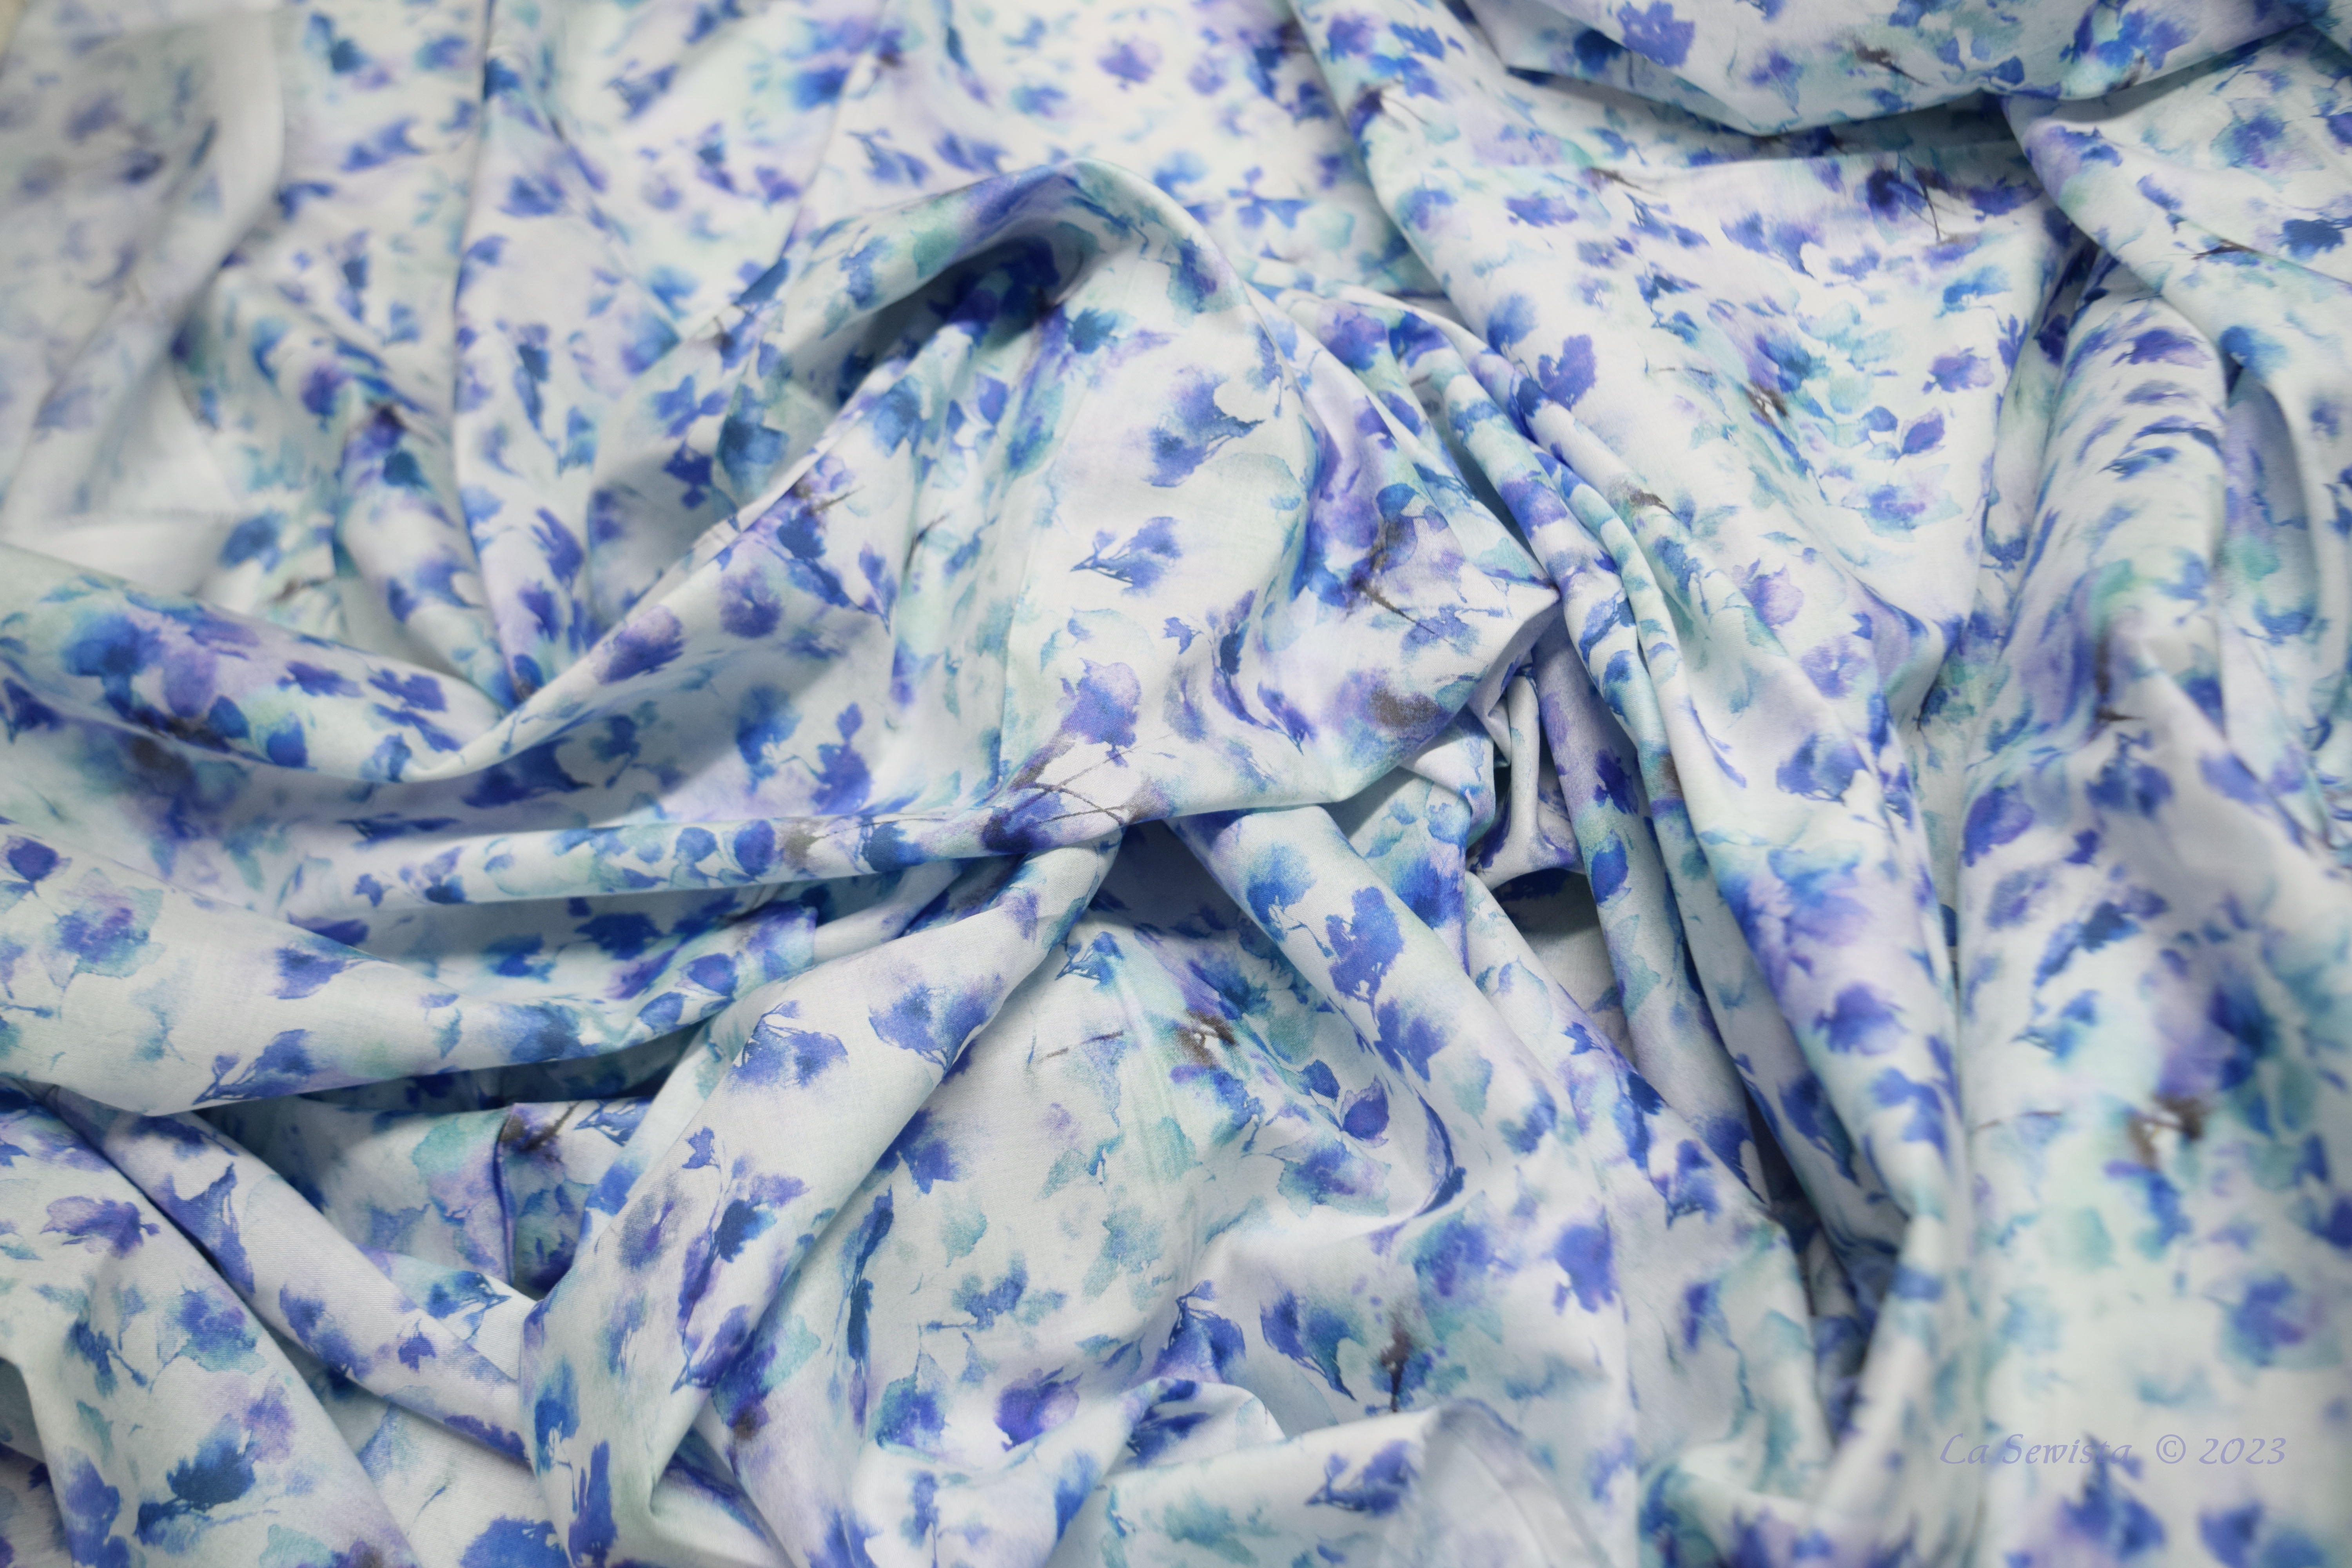

It is soft, really pretty, not sheer but very light and it washed and dried beautifully. I had no shrinkage at all except for the selvedges. We used to run into this a lot with custom drapery fabric and the workrooms would always cut the selvedges off before even thinking of cutting the fabric. I will do the same here as it tightens up and could distort any pattern pinned on the edge. This was only one selvedge on one side! Other than that it was lovely perfection. But, but,,,,,, yesterday I was in the store and the lovely lawns were on sale for a dollar less per yard than the original sale price i had paid. How could I walk away from that? 


I bought a pink splotchy version.  I plan on making two of the same shirt now, but just how will I make them? That's my dilemma? 

You see, from the get-go I envisioned  the keyhole and the neckline to have a tiny bias binding with long ties that would be tied in soft little loops like Lucy's.  I also wanted and assumed there would be flat cuffs for the sleeves. 


That is not what the pattern has in mind, however. But, first, let's get something straight. I have no issue with facings at all. I know some do. That's them. I've made them for years and I have bound edges for years. Makes no difference to me skill wise. Now, stylistically, that's a different story. I had in my mind this delicate, floaty wisp of a shirt with teeny bound edges, French seams, etc. You can see in the pattern directions, which are perfectly fine, that is not quite what I would get if I follow them. 

I had more in mind what I saw in this tutorial from Threads Magazine and this other one from Emmaonesock. 

So, that is my dilemma. I have two pieces of lovely fabric, perfect for the pattern design. Here are the pros and cons of the methods. 

Pros of Pattern Method: 

   *If I just understitch, the keyhole and neckline would have a really clean turned edge. I like that idea a lot. 

     * Interfacing will offer support for the neckline and keyhole area which will in turn offer some support to the xtra weight of the puffy sleeves. 

Cons: 

     * This is a fussier construction, in my opinion, with more steps.

      * Possible show thru of the facing to the top of the garment. Don't know yet. 

Pros of Tiny Binding Method:

   * Delicate looking, in line with the delicacy of the color and print. 

   * Would accentuate the near sheerness of the fabric. 

   * Would not take as long to do as the facing treatment. 

 Cons:

    * No support offered for any area.  Tips of the  keyhole will really droop if not tied tightly. 

     * Would be harder to correct mistakes. 

     * Would look almost  sheer and thin. Not sure if that is good or bad.  

     * Would it look cheaper? Not sure.....

So, here is what I have decided............I am going to try each technique on each of the shirts. I think. Deal breaker would be my first shirt is so fabulous I will just stick with that method. The first shirt will be the blue one, with facings. What would you do and/or what do you think?......Bunny.......my threads are ready for your answers! Happy Sewing!


Thursday, December 2, 2021

Butterick 5861 and I'm ready for Woodstock!


I really enjoyed making this top.  I know, the fabric is a bit crazy but I like it. I have always been a fan of Picasso and this print sucked me right in because of that.  The construction was unique and challenging, the fabric a delight to sew and the pattern a design that brought me back to 1968 and fantasies of bell bottom jeans with embroidered gussets and me and my friends with our thumbs out on the hiway hitch hiking. Yeah, we actually did things like that back then and survived.  

I have a lot to say about this top so grab a bev and have a seat. It was a fun ride, so much so that I've already started on tunic #2!


Pattern:

I saw this pattern, Butterick 5861,  made up in a FB group I frequent and just fell in love. I am generally not a tunic person but the style of this one, the options for embellishment, and the memories it brought back all came together to motivate me to search it out on the web. I kept waiting for it to go on sale and it just wasn't happening at that time.  Then one of my cyber sewing friends, una amiga Boricua, Ada Garcia, of Puerto Rico, messaged me and told me she had the pattern in my size, would never make it and would gladly GIVE it to me. What could I say? We talked, figured it out, and next thing I knew this lovely graced my mailbox. Thank you so so much, again, Ada. Besicos!


There are issues with the pattern so I will get those out of the way first. It is HUGE in the bodice. I made the smallest size, a size 8 for a 31 1/2 inch bust. The bodice for this size is 50 INCHES! What you see above takes out 4 of those fifty inches! Thank you, PR, for the heads up on that!  

Next the neckline, on a petite, goes lower than I am accustomed to. That's OK. Generally, I wear my necklines a little higher and have already cut version #2 without thinking but would cut it higher in the front. I also have two rather heavy beads on the front ties and I think they are pulling it down. So you may want to reduce volume if you make this unless you would like that extra ease. 


This is a pattern where you really have to pay attention. I will come right out and say this is not a beginner's pattern. You will quit sewing on those shoulder yokes. I will get into that further on. I love the shoulder yoke detail shape and placement.  They fit perfectly. 

This pattern is long as well.  I cut off 3 inches. I have a mini skirt on. It would have been as long as the skirt if I hadn't so watch that length!

Positives: The volume, while a lot, is comfy and gracious. I solved the volume issue with a thin belt. I prefer to emphasize my waist anyway. 


Much better proportion, don't you think? 

I also cut back my sleeve length two inches but that was a general petite thing. I love the sleeve fullness. 


This pattern has shirring in the back at the waist which I do like but it will get hidden by the belt. More on that in construction. 

The pattern offers 4 interesting views. Two button down the front with long tucks and one of those has a contrast band.  Then there are two that don't button down the front but have insets at center front. The CF insets have tie closures and surface embellishment that matches the surface embellishment also on the shoulder yokes. I love the shoulder yokes on this top. 


I did no surface embellishment or insets on my version. I wanted it very plain due to the vivid design of the print fabric.  I accomplished that by simply cutting the CF on the fold and adding a faced slit.  More on that in a bit. 

Fabric:

This is from Fabric.com and described as a "Telio rayon slub challis". It was a delight to sew. It had a tendency to shift and ravel like most rayons but this was tamed with spray starch. I cut out my pattern pieces and by the second piece saw this problem. I proceeded to cut and then  took them all to the ironing board where I sprayed each seam area lightly and ironed with a dry iron. Then I repeated the process. All seam edges got this double starching.  After that the pieces were put back on their pattern tissue and trimmed and recut as they had stretched out of shape in that process. You can see the distortion below. A lot of recutting and a lot of scraps to prove it! 


Starching kept the raveling to a minimum.  I would definitely sew this fabric again,


Construction:

I made changes to the construction due to my fabric and style choices. First change was making all seams into French seams. Next I decided to use the Burrito method for the faced shoulder yokes but let's start with the elimination of the embellished inset at upper center front bodice first. I decided to make a simple slit neckline at CF and even did a practice version on a scrap first just to be sure I could pull it off.  There was enough going on with my fabric choice and I felt no further embellishment was needed. 


A line was established down center front. A piece of the fashion fabric was fused to woven cotton fusible. It was cut into the shape I wanted for the facing, which was small, and the edges were serged. 


I simply sewed down the slit in a 1/4 inch seam and sewed across the bottom in a small curve. No fuss. 


Next come my changes to the shirring on the back of all the views. I went into this in detail in a previous post as I know a lot of people out there are making shirred garments right now and those elastic threads are failing. This method, which I detailed here, is stronger and I personally like the look of the triple zig zagged elastic better. It's a little fussier but you don't have to wrap any bobbins with elastic thread and I do detest doing that. 

Now it was time to deal with the shoulders. The pattern has you simply treat the two layers of the shoulder yoke, top and facing, as one and sew it into the sleeve and bodice with a simple seam.  I wanted something cleaner than that. I did a classic burrito method which was really simple here. 


I sandwiched the sleeve between the fashion fabric and the facing piece and stitched all three layers together. Seam was then graded, pressed away from the sleeve and voila!  This unit was then attached to the bodice front and back with French seams, all clean. Nothing on the inside of this garment is open other than the serged inset facing edge and bottom hem. 

A lot of attention has to be paid her to where the yoke piece fits in on the sleeve. One maker on Pattern Review inserted it upside down/backwards.  The longest edge, opposite the neckline is stitched to the gathered sleeve. Of the two remaining short edges, the longest edge of those two goes to the front bodice and the short edge goes to the back bodice. Follow the notches down on the sleeve if you are confused, The pattern instructions are very confusing on this. Just take your time and it will make sense. Here is how it all lays out.


Like I said, this is not a beginner pattern. 

After this it was smooth sailing with French seams easily accomplished on this fabric. The last challenge was the neckline. This requires a long bias strip that was first sewn into tubes/ties other than the neck area. That was left open to be sewn separately to the neckline and then finished with hand stitching on the inside. I did mine opposite. It just seemed to lay better when tied if I did and I fell stitched it on the front side with tiny stitches. You can get a better idea of how that came out on the close up above of the shoulder neckline area. Just click these to get them larger. 

On my next version I will interface the bias strip in hte neckline area just to help it lay a bit flatter. We'll see how that goes. 

In Conclusion:


I really enjoyed this pattern. Why? It was very challenging, the fabric, the design, the construction, my chosen changes and the pattern itself. I really enjoyed making it. It is definitely not for a beginner, IMO, and that is something I very very rarely say. I am happy with the outcome, WITH A BELT, and know I will wear this a lot. I wore it on Thanksgiving and it was a hit. Left a lot of room for turkey, too! I recommend if you are up to a challenge and looking for a top that is comfortable and feminine and will work on any woman's shape.  You just never know when the sixties will call and want you back. You'll be ready!

                                                     ***************


This is a peek at version #2. The fabric is far less cooperative, a rayon georgette crepe or what we used to call "crepon". The shoulder insets and CF inset, well, I did my own thing. I made bias tubes, tied them in knots and ran them down the pattern pieces instead of the turned tucks the pattern calls for. More on that later! Six hours making  tubes and knots!!! Happy Sewing!...............Bunny


Sunday, January 24, 2016

vogue 9162, Some serious petite-ing!

 Work has begun on a new white shirt. I really liked this design by Katherine Brenne for Vogue, 9162. I like the tailored hi-lo hem as the higher front gives more leg length for me and the back covers my bum. Something about those curved hi-lo hems just doesn't appeal to me, however.  As I often advise. I took a close look at the pattern photo. Look with me here. The mandarin type collar is very deep, something that may be out of proportion to my petiteness.  The same goes for the pocket. These are intentionally large details but I think they still are not the right size for someone five feet tall and not too wide. The armscye seam is barely above the elbow.  Then there was the issue of width. I know this is supposed to be a wide bodice but I just wasn't feeling sure about it all. .  Time to flat pattern measure!

This top is 63 inches wide in the extra small size, sorry, just way to much for me. It was clear this pattern would require some major "petite-ing" to work on my frame. 


When I sew I always start with the smaller details. I took one quarter inch off every edge all around the pocket. That meant that the facing wouldn't fit. I had a brain fog moment or maybe just over thought, but something told me not to do the same with the pocket facing. Yikes, would the edges, the curve, not fit if I did?  Rather than spend time with this math moment, I cut back the vertical edges the same 1/4 inch and folded out the remaining 1/4 inch across the facing, perpendicular to the grain. It works. 

Next was dealing with that deep collar. 

Again, I folded out a quarter inch across the center of the collar, perpendicular to the grain.  Once that was made permanent by fusing a strip of leftover interfacing to the back, it was time to cut. 


In my wild enthusiasm here, I took a pic of me truing the seam for the largest size but you get the idea. The edge was trued. The seam allowance attaching to the neckline was not altered in any way.  Now for that amplified bodice! 

Nowhere on the pattern is offered finished measurements. Really, Vogue? Is it assumed that this is so stinkin' big that it doesn't matter? Well, it does matter. I am making the extra small. It is for a 29 1/2 inch bust.  I haven't seen that measurement since I was prepubescent, way pre pubie. I went ahead and measured the width. There are no pleats in the back. The bodice width at the waistline and hem is 63 (yikes!) inches and that is for the XS!. I do think I can let a bit of that go.

Four inches were taken out of the back bodice, two on each side. Then two inches were taken out of the bodice left and right, two different pattern pieces, so a minus of 8 inches total. This leaves a bodice width of 55 inches. I will live with that as this is a BIG shirt and the bodice should be wide. But when the bodice is wider than I am tall, well that's a problem. Once the width was folded out vertically the shoulder seams needed to be trued as shown in the pic above.

When all is said and done, will this swamp me? Will it look totally out of proportion? Will the ninth planet remain hidden behind the sun? I don't know the answers but we will find out soon enough, at least on the first two questions! Talk to Neil Degrasse about the third question.

*******************************

I found this little number in the clearance area at Joanns. Imagine, a bound buttonhole tool! I haven't read the directions yet but am anxious to give it a try. Has anyone ever used one of these?...Bunny

Sunday, June 8, 2014

The Oopsie Shirt done good! McC 6076

I am fine with the Oopsie Shirt and really think I will get a lot of use out of it. I've decided it can be worn as a jacket with a cami or as a shirt. Either way, that back godet made the difference.


Pattern:
This is McCall's 6076, one of my TNTs. The collar is cut on, which I love. The sleeves are 3/4s with a slit and foldback cuff, my kind of sleeve, no buttons. It seems everything I make now has 3/4 sleeves. I find them just so comfortable. I read somewhere once that a woman's wrists look good, not matter what her weight or age. I think that stuck in my head somehow! I would definitely recommend this pattern. It has princess seams front and back, great for fit. But you all know how I had to change up the back!

For some reason this top was asking to be worn as a jacket and I like that.

Fabric:
The shirt is made from 100% cotton eyelet. I have no idea where I got it.  Half way through the project I realized that I put no effort into matching the eyelets, which you know I lost sleep over ; ). I was ready to wad it but a good night's sleep and a Eureka dream moment put the idea of a godet in my head. It really was driving me crazy enough that the eyelet pattern not matching affected my sleep!


Construction:
You can see how the godet totally takes your eye off of any pattern matching issues. It was easy to insert. I did curve the hemline longer than the shirt hemline as I knew it needed that to hang straight. You can see how that worked in the pick above.

Because of the sheerness of the fabric I did a few experiments to get the right seam treatment. I ended up pressing the seams open, cutting them back on each side to a 1/4 inch and then topstitching one eighth inch away on each side of the seam. I did this with all seams, including the godet. The hem was double topstitched. Classic white buttons with the BHs done on old Ken, the buttonhole king.

Other than the matching issues this is a really easy shirt pattern to make up and I highly recommend it. It s pretty conducive to embellishment and other interpretations. It would be great for a beginner not quite ready for a collar band type installation. Add in the princess seams to insure a good fit and you have a winner here.

I want to thank my hubby for taking these pics. We used my Galaxy tab. Not quite as sharp as the dead DSLR but Christmas is coming, someday.

***********************************************

In the queue are some jeans. The pattern is made and I hope to get to them soon. I am using the sloper and DVD from Sure Fit Designs. However, it's time for another vakay! Hubby and  I and some great lifelong friends are all headed for the Thousand Islands. While I hope to get another post in before leaving, I am not sure. Happy sewing....Bunny

Tuesday, November 19, 2013

Tunic #2, Vogue 8924

This is my second iteration of Vogue 8924, that tenty little tunic that is so comfortable to wear and looks great with leggings and boots. You can see the first here.  I have worn it numerous times to work. Between rushing in the morning and looking frazzled in a dark winter evening, a self modeled picture isn't coming any time soon. But Graciela, today's name for the form, will accommodate the modeling! One day the form will get a proper name. I am trying out several and leaning heavily toward Graciela.

Pattern:
Vogue 8924, a simple, widely cut tunic with a shaped hem and large pockets.


Fabric:
This is a polyester dotted blouse weight for lack of a better term. I keep buying gray lately, which does give me wardrobing advantages, but I always feel I have to add a spike of color. I did this here with  some yellow and white retro buttons and a bit of shibori stitching in yellow on the back above the pleat. This fabric is very drapery, different from the first iteration, so looks good with a belt and has more of a blouse look. 
Construction:
I did a few changes to the pattern this time. Because I was using a nasty synthetic and because somehow the stay stitched neckline stretched out getting the bodice to fit the collar was a bit of a challenge. Here you can see the nastiness.
A natural fiber would have eased in and pressed out nicely but petroleum based fabric just does not do that. What to do?  I fudged and fiddled and decided it looks great with the collar turned down, not my usual style. I found a good break point for the placket and added a button there and I think it worked out fine.

 I also  changed out the pockets to something a little more fun. Actually it was all about funning up the dour gray fabric. On the pockets I flipped a corner down and secured it with another retro button as you can see in the second picture above. 

This was all pretty much stitched and serged. Nothing fancy happening here. But I did get a good basic garment that has been perfect for  work with some leggings, shoebooties, and a long  sweater vest. Library ladies wear lots of sweaters.  I did get lots of positive feedback when I wore it. And I was comfortable, something oddly becoming more important with each day. I love how this looks from the back. 

While I think I may make more tunics, I think I will retire this pattern for now. I definitely can see it for the summer in some linen with slim white crops. Highly recommend. 
*********************************************
 My holiday sewing is all out of the way now and I will get going on my winter coat. Finally! I have cut and prepped the pattern and interfacing, a hair canvas sew in. To keep things nice until I get to work on them further I rolled up the tissues on cardboard tubes, one for lining, one for fashion fabric. Have my muslin fabric at the ready and just need to cut. I am thinking this could be a simple project. We'll see....Bunny

Thursday, May 9, 2013

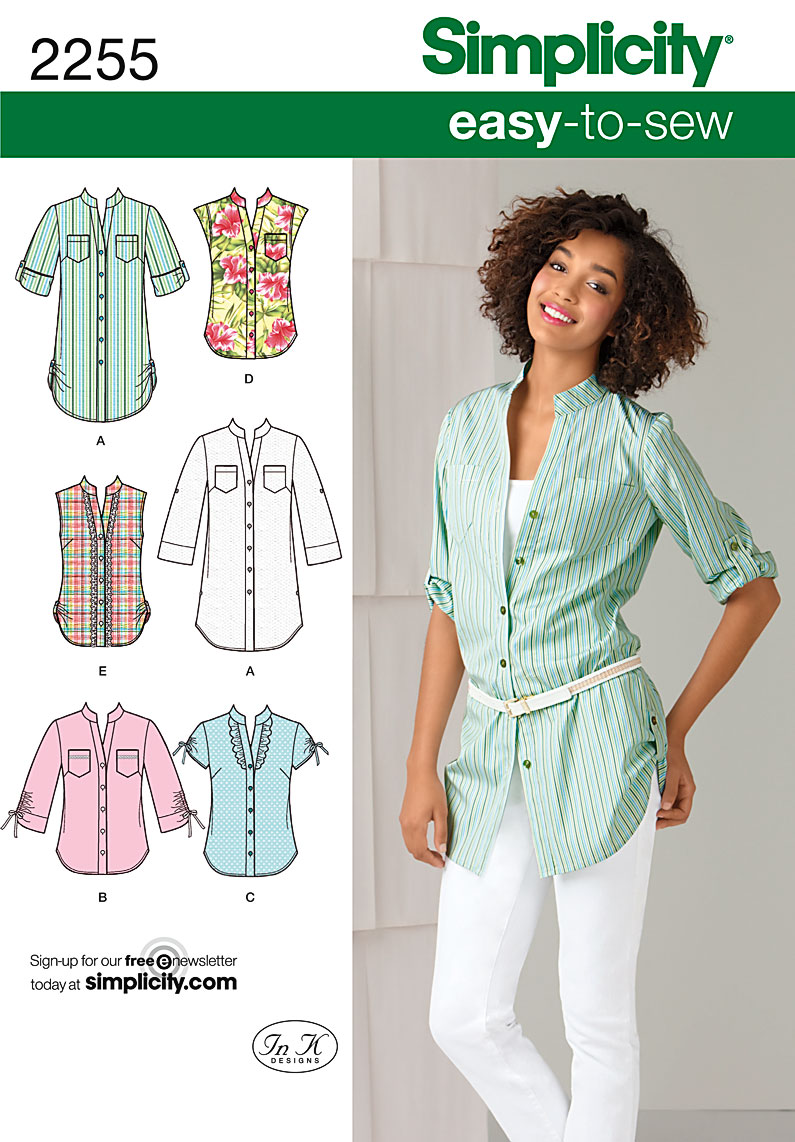
Simplicity 2255, a Skill Builder


There is nothing fabulous or outstanding about this effort. It is a basic mandarin collared, 3/4 sleeve, pocketed shirt. Will I wear it a ton? You bet! I love my white shirts and this is a classic throw it on.

Pattern: The pattern is Simplicity 2255, described as a tunic. I call this a skill builder because it has the mandarin collar, a good step before a notched collar, pockets to make and line up, and a simple finish to the sleeve hems. The pattern has various sleeve options and lengths.


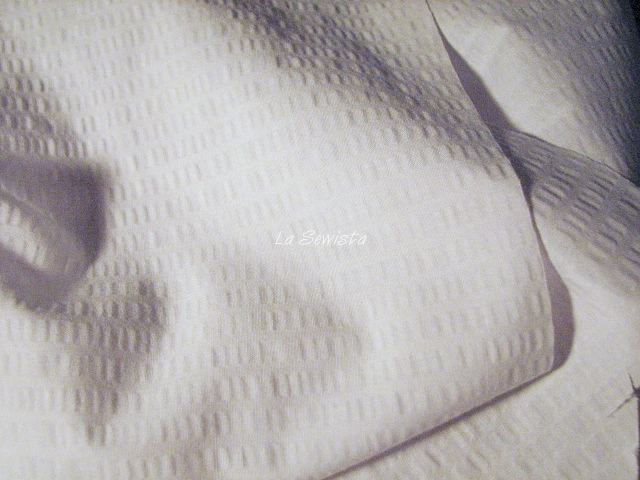
Fabric: The shirt is made with 100% cotton seersucker. You'd never know, however, that it was seersucker as the required pressing and later washing and repressing seems to have removed any semblance of lines of pretty puckers. That's OK. I still have a nice white shirt that washes beautifully. 

Construction: I took a bit of liberty with the pattern, but not much. Tunic length patterns do not work for me so I opted for the shorter version, View B. I did not do the gathered sleeves however, choosing instead to make a deep hem at the cuff area. Three quarter sleeves are my go to. I did my usual "petiting" of the pattern as described in the tute in the sidebar on the right.

The hem was made a bit more "shirt tail" with a higher curve added to the side area. I think that is a more flattering look for the hippy among us and I'm not talking 1968 here.

All seams except the armscye were french seamed.The armscye was stitched and serged. 


The sleeves on this pattern are really well  drafted. I did "petite" them but they fit into the armscye beautifully. 
I followed the template for button placement. The buttonholes came out wonderfully with my trusty old Kenmore but as you can see the placement doesn't work. I think the top buttonhole is maybe meant to be left open as it pulls the whole CF when closed. The neckband tapers out to the shoulders so making the button where they specify is like putting a square peg in a round hole. Next time I will make the first top button mid pocket  and let the band fall where it is cut to fall. For now I will wear it open with a cami. The blouse fits much better with that top button open. 

Conclusion: This is a simple, no nonsense shirt, one that will be a wardrobe staple and also give you some good skill building opportunities. I may make this again, but my preferred tailored shirt pattern is one with a shoulder princess seam, all the better to fit, my pretties.   I would definitely recommend this to a newbie who wants to try the next level after managing tee shirts, or anyone who is on a white shirt binge and looking for a classic.....

***************************************** 

Have you ever made something, loved it from start to finish, but then in the real world found that maybe you were always tugging at the waist, or the fabric was wrong and too hot to wear, or the style just not you? I am going to start doing "Reality checks". I will go back to some of the things I've made when an issue crops up and give you the real deal in the real world. Sometimes our imaginations exceed wearability or a technique turns out to be totally inappropriate or can be done better, things like that. What do you think of having reality checks on the reviews here?.....Bunny 

Sunday, March 31, 2013

White Shirt Number Two Begins

I've spent the weekend working on Simplicity 2255,  a blouse/tunic pattern with lots of variations, most of which I didn't like. But I have an ulterior motive with this one, a motive beyond another white shirt. My wardrobe needs white shirts. I love white shirts. But I also love chambray / lightweight denim shirts and my collection has unfortunately turned into house painting apparel. I love to wear a denim shirt BIG, so I can belt it, roll up the sleeve and my fave denim shirt of all time was one I inherited from my brother. That's the kind of big I like. This is something I can wear with a long gathered skirt, some capris and wedges, and dress up with lots of jewelry. I think you get the picture.

I am doing view B, without the ruching on the sleeves, too much foo foo. This blouse has bust darts that end in the pockets, sort of different and I am not sure I like that. I found I had to lower the pockets one inch to look right but I also had to lower the bust dart to fit right. So the pockets still had the bust dart ends inside of them, just lower to accommodate the effects of my personal gravity.  The back has  waist darts for a bit of curve. I left them out. I want a man tailored type shirt . This neckline isn't quite that but I was more concerned about experimenting to see how wide to make the bodice to get that man shirt look. I will then transfer that info to my denim shirt pattern, whatever that turns out to be. I also did an FBA on the blouse as well. I like the way it fits now. It is cut straight down from my armhole and is roomy and square, perfect. The length of View B fits me like the models blouse. If I did the tunic length it would turn into a dress.


The fabric I chose is a basic 100% cotton seersucker. I like it because it has some weight and is not sheer, unlike a lot of white shirtweights out there. But once it's ironed the seer doesn't sucker any more. It goes flat and I don't like that. I have prewashed and ironed this. I think when this shirt is done I will just throw it in the wash and drip dry and see if it puckers up again. I am pretty confident it will.

My last post I made a big deal out of flat pattern measuring. I did that here and added accordingly. I woke up in the night, really, with a Eureka moment remembering I didn't include the width of the CF band and was afraid the shirt would now be too big. Doesn't anyone else get those nocturnal Eureka sewing moments? Crazy! Anyway, it all worked out.

I just found this pic of McCall 6613, exactly what I had in mind for my denim shirt. I hope to wear mine a bit more elegantly than this pic though. Looks a tad too Adirondack for me.


At this point all is done on Number Two except the sleeve insertion and a bit of topstitching. I have been trying to get some early morning sewing in before I get ready for work and really have enjoyed that. So hopefully it won't be too long before this one is done and I move on to White Shirt Number Three, more, much more pintucks on that one!....Bunny

Tuesday, March 26, 2013

Cynthia Rowley Meets Chado Ralph Rucci

I''m half way into my next project, Simplicity 2192, A Cynthia Rowley design that's been around a bit and I think it pretty cute.
 
The top is a simple box with a faced curved hem. Boxy things don't always look good on me but I am putting summer comfort first here to get a blouse that will give me tons of wear this summer at work. This is also the first of my White Shirt Binge, with two others all lined up in the queue. 

The fabric is a nice hefty cotton with the usual 3 % lycra. It is the drape and look of a soft aged damask with a sort of reptilian design.

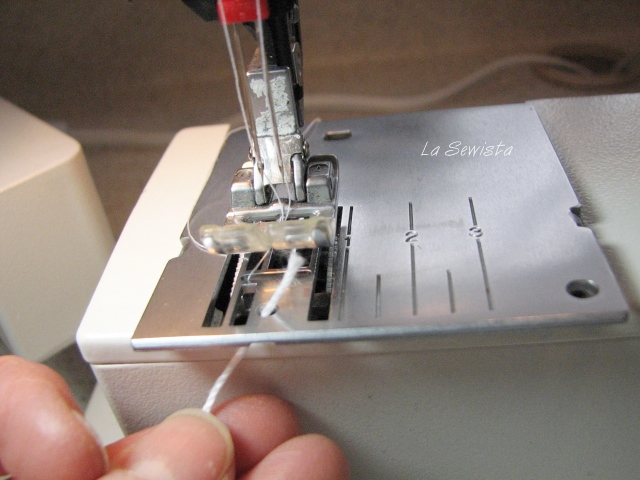
I started cutting the pieces and realized the pressing I did did not take out a crease. What to do? I decide a bit of corded  double needle pintucking would be the solution, very Chado Ralph Rucci.  Simple blouse, simple pintucking, so I ran a straight line of PT down the CF and CB and used my hip curve to radiate two more from the hemline.

First, I lifted my plate to give me access to that wonderful little hole in the needle plate that sits in front of the needle. I passed through a bit of crochet cotton, maybe a size three. Pull out a good length behind the presser foot and replace the plate. In this pic you can see how the cord enters a tiny space between the plate and the machine. 

Double needles are threaded and raring to go!


I ran some painter's tape from top CF to bottom CF and after did the same on the back. I lined my needles up and started with that cord in my left hand for the first few stitches to get it taut into the seam. Then the machine just automatically feeds the cord. I made sure it was pooled in my lap so it could feed smoothly. Since one straight line down the front and back wasn't going to quite make it I took my hip curve and frixion pen and marked lines on either side of CF and CB. 

 They were stitched from the front hemline, over the shoulder, to the back hemline.


My pintucking is complete and the blouse sits on my form. I need to do a bit of fit before proceeding but have serged all the edges inside and am so close to completion. Mo' lata'..........Bunny

The Ray Pinafore, 2025's Epic Fail

  Happy New Year and welcome to my epic fail of 2026. I guess you have to have one, right? This is the Ray Pinafore from Paper Theory Patter...