Sounds like a title from Dr. Suess! Alas, it is just what I did during my blogging hiatus. Sewing continued in that time and as it always has been, proved to be a great solace. Here is what you missed. There are two repeats and one new design so I won't get too deep into the weeds.
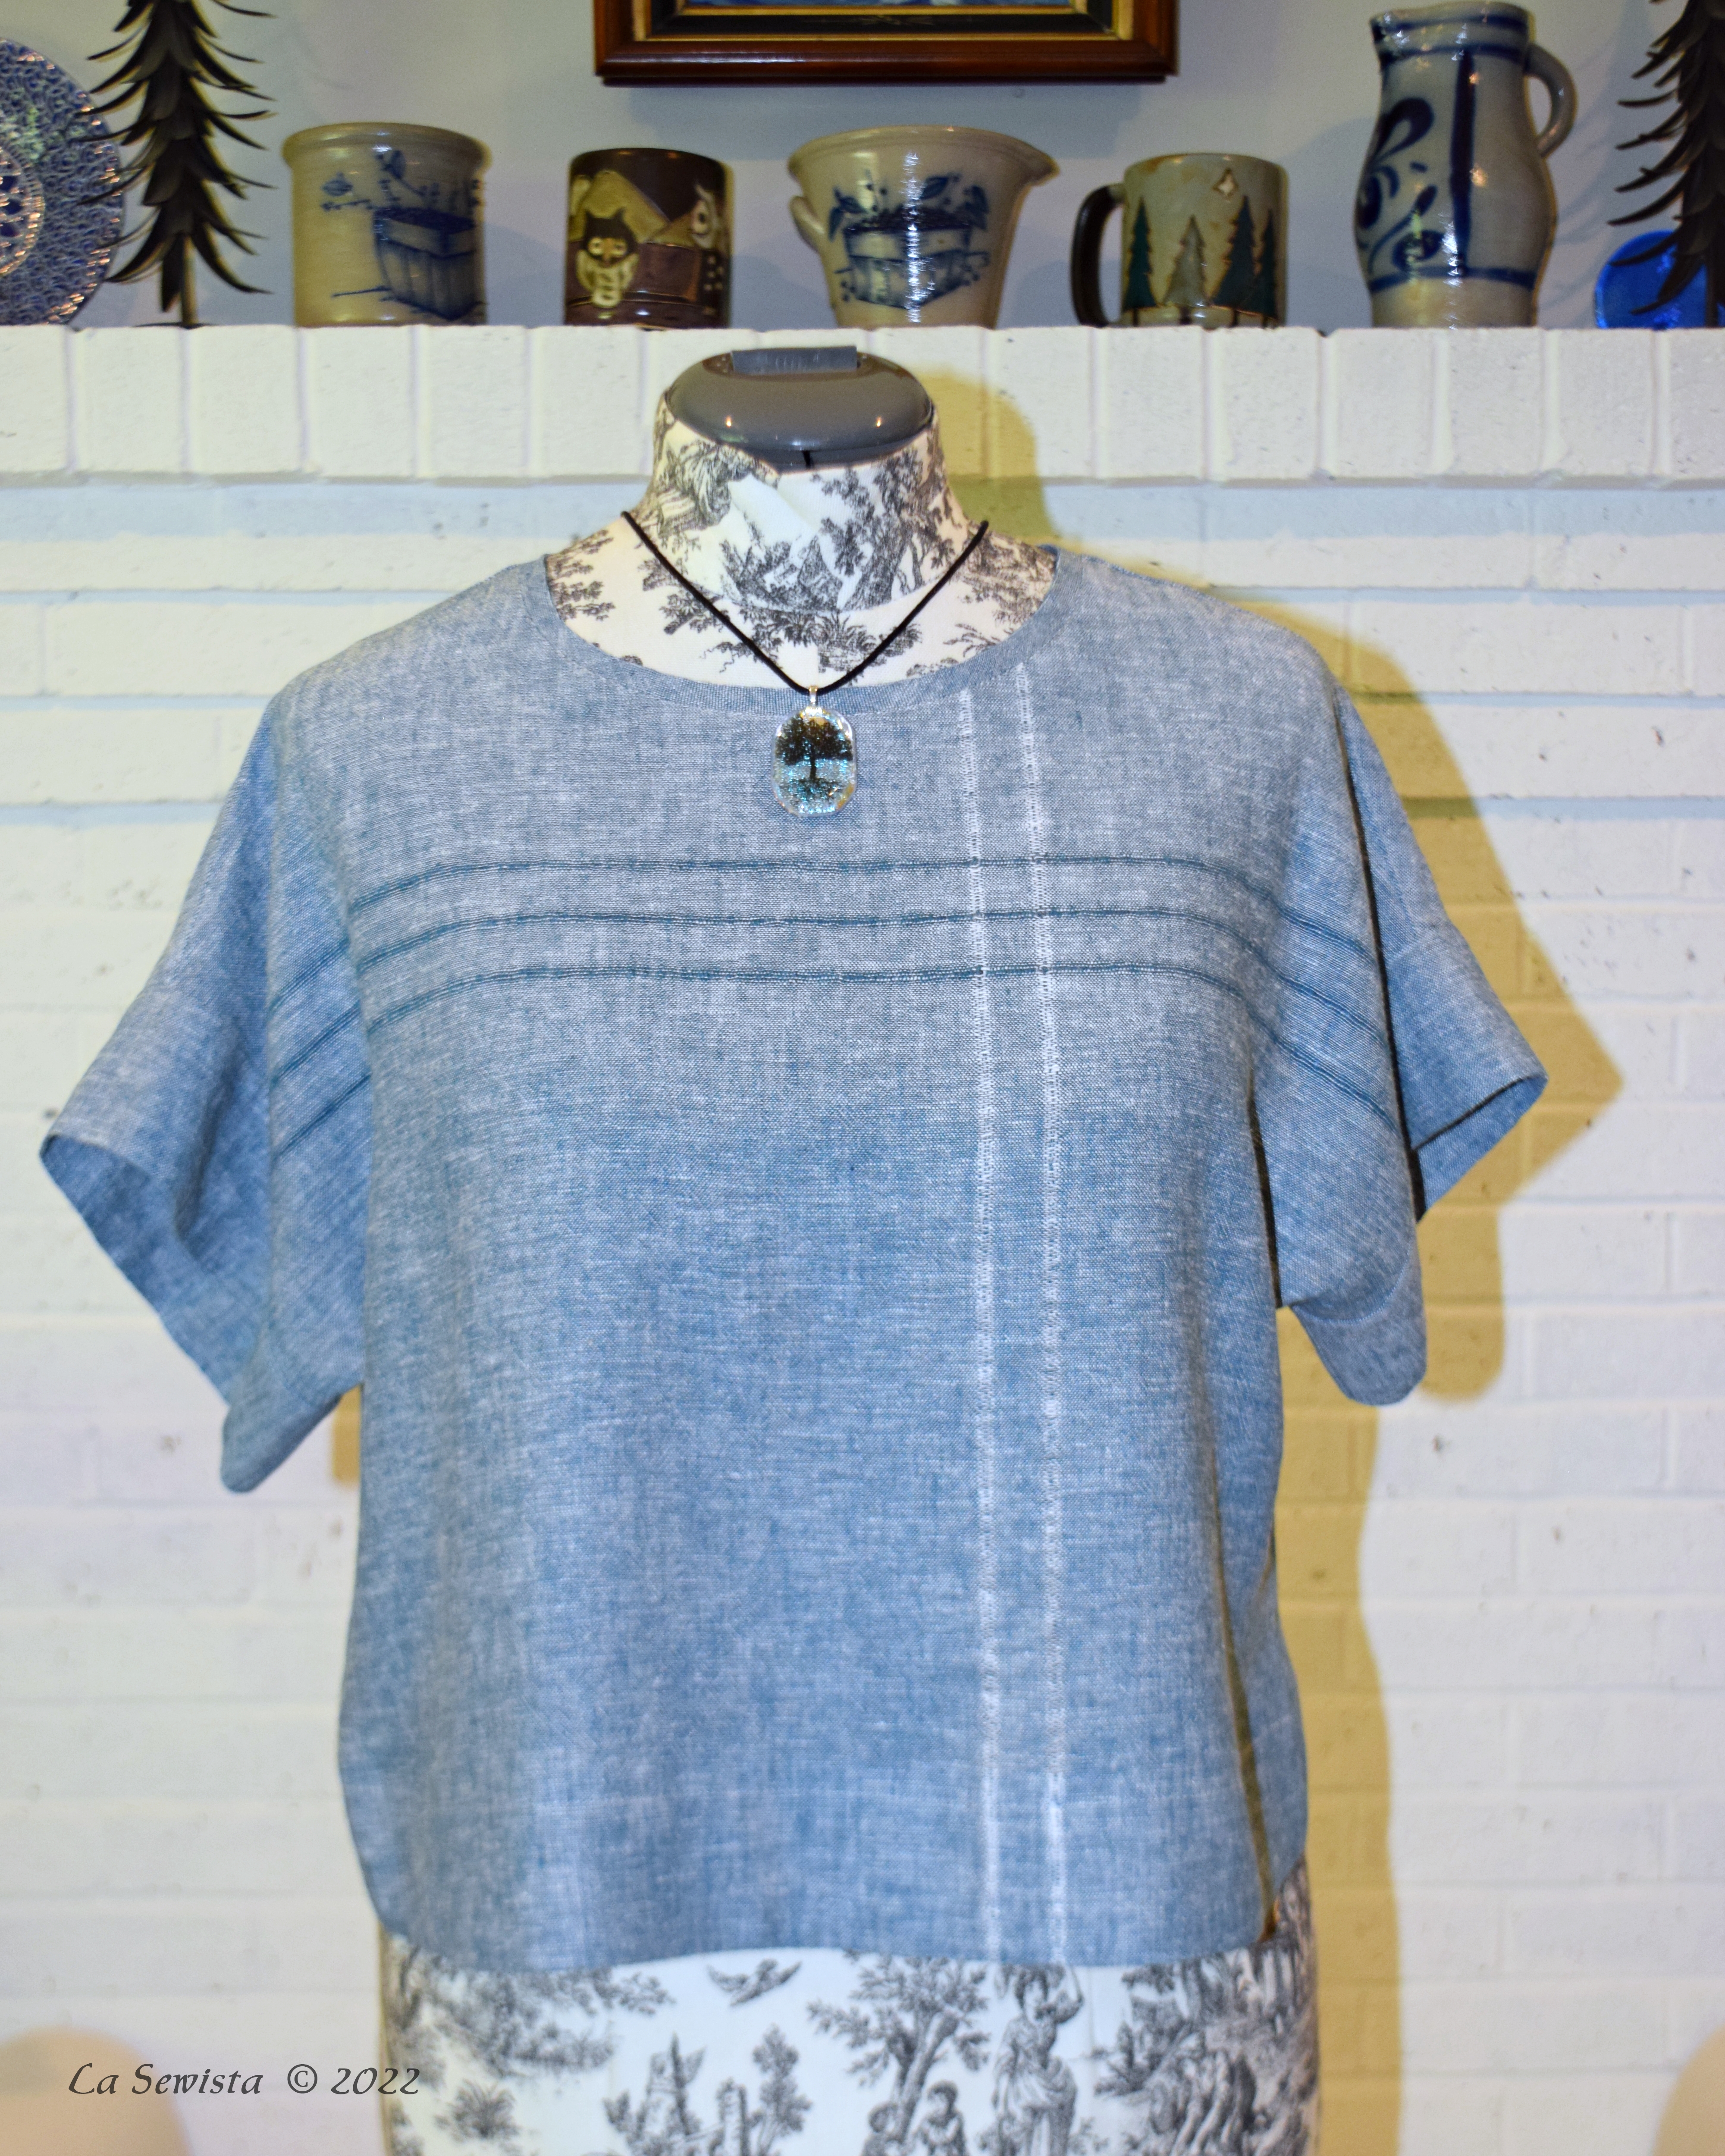
Here we go with another Eureka Tee from the Sewing Workshop. This one is made from yarn dyed Brussels Washer linen by Kaufman in the smallest size. It is, I believe, my fourth iteration. As far as fit, my sis says I need to make it narrower. I'm OK with the wider style of it all but will try a narrower fit next time around just to see what happens. I have a muslin and may just baste out some width. What you see above has been worn and washed a couple of time as I am finding it a great summer top.


I decided to embellish this simple top by pulling the threads. I knew that the warp and weft were different colors and this could be interesting. The thread pulling was easy and I pulled five threads to get the effect of one row as you see directly above. If you look at the rows in the pic above this one, the smaller pic, you will see the thread pulling looks quite different. The washing had an effect on the look of the pulled threads and actually all the fabric. It didn't appear to shrink but it got "crepe-y". I'm ok with it but just be aware that if you want to keep the crisp look of the pulled threads you can either further hem stitch them or hand wash this fabric. Either way, I think it is a nice feature on a simple top that begs for detail.

Construction on this was as suggested in the pattern: machine stitched, pressed to the side and serged for a finish. Further details on my original Eureka tee can found here: The Eureka Top
*****************

Next is my attempt to jump on the ditsy print bandwagon with second make of a sixties sort of tunic. This busy print makes it very difficult to see the details of the design. This is Butterick 5861, OOP, a classic tunic. The fabric is 100% rayon in a crepe type finish, what was called "crepon" back in the day. It is well starched in these pictures as it was extremely slippery to work with and I had to give it a couple of coats to make it a pleasant sewing experience. It has not been washed out yet so it all looks a bit "puffy."

You can see there is detail on the shoulder yokes and on the bib type inset at center front. I decided to do my own thing there which in hindsight was great looking but a total waste of time. You just can't see it among the tiny, busy print. It was fun and challenging getting it done, however.
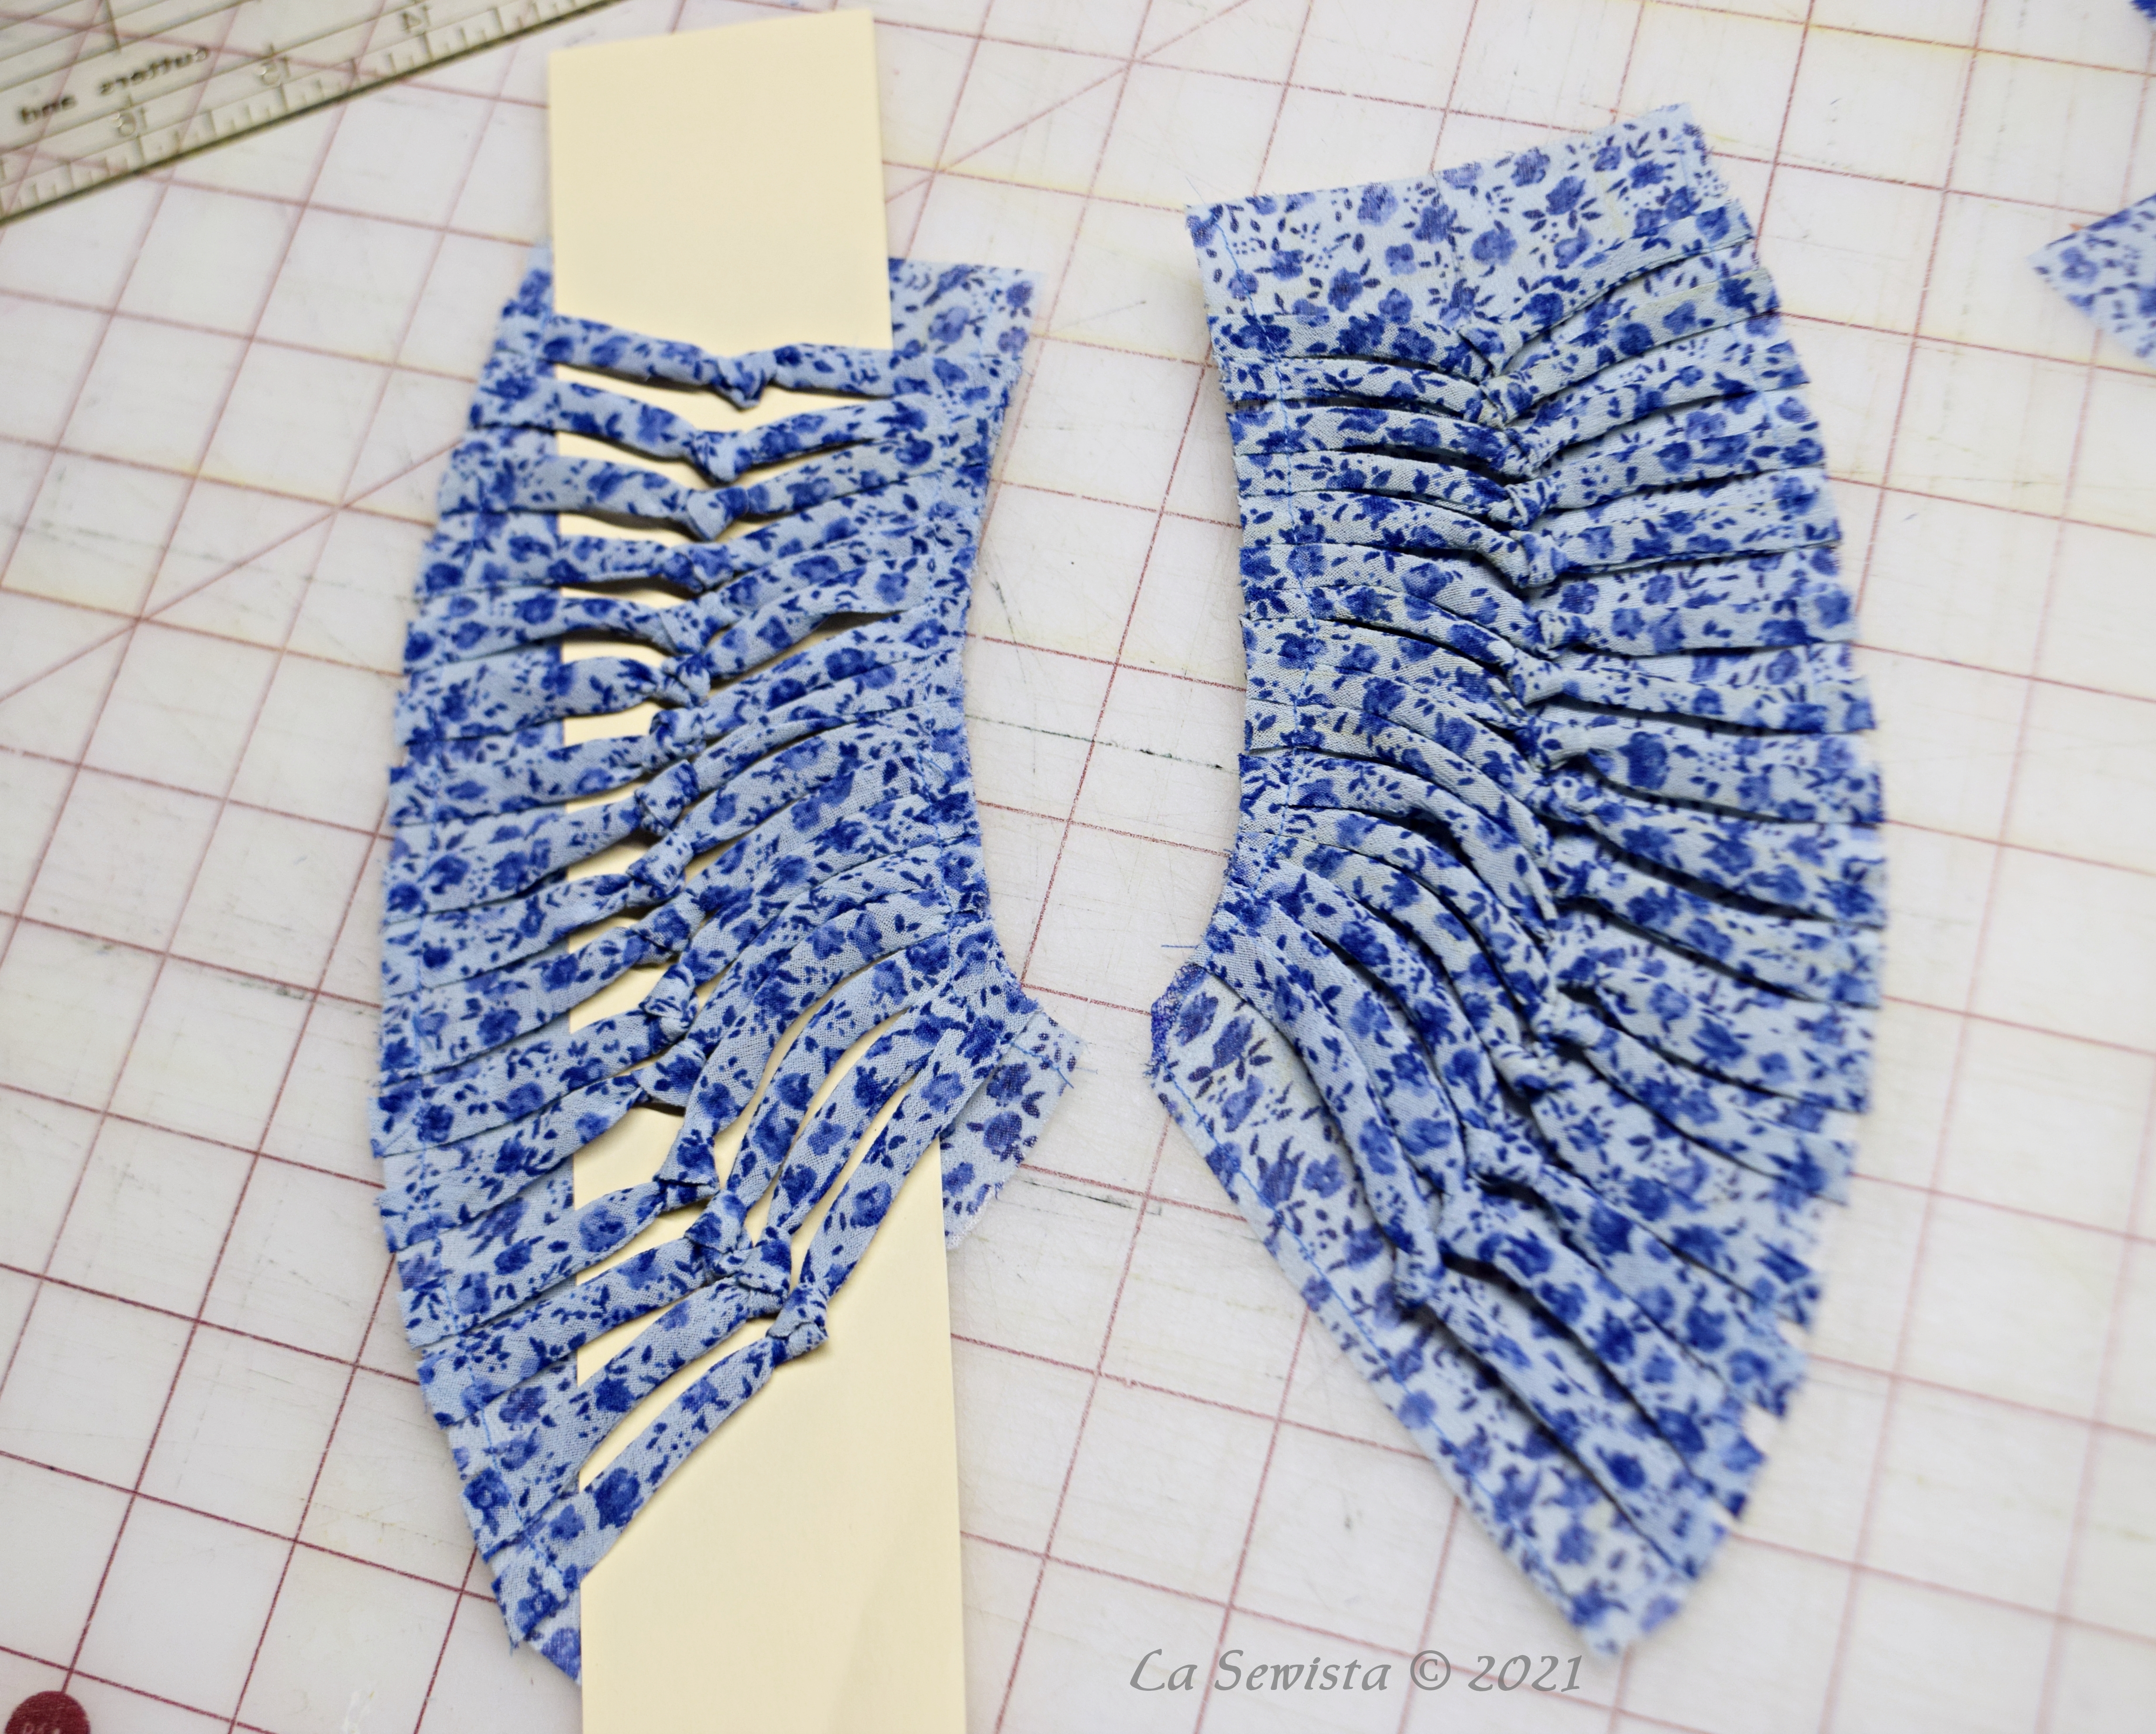
Instead of plain bias strips the pattern recommended, I chose to make little knots in the center of each strip. I made bias tubes, knotted them, and cut so the centers matched up when places on the garment section, which here are the shoulder yokes. Here is the bib inset:
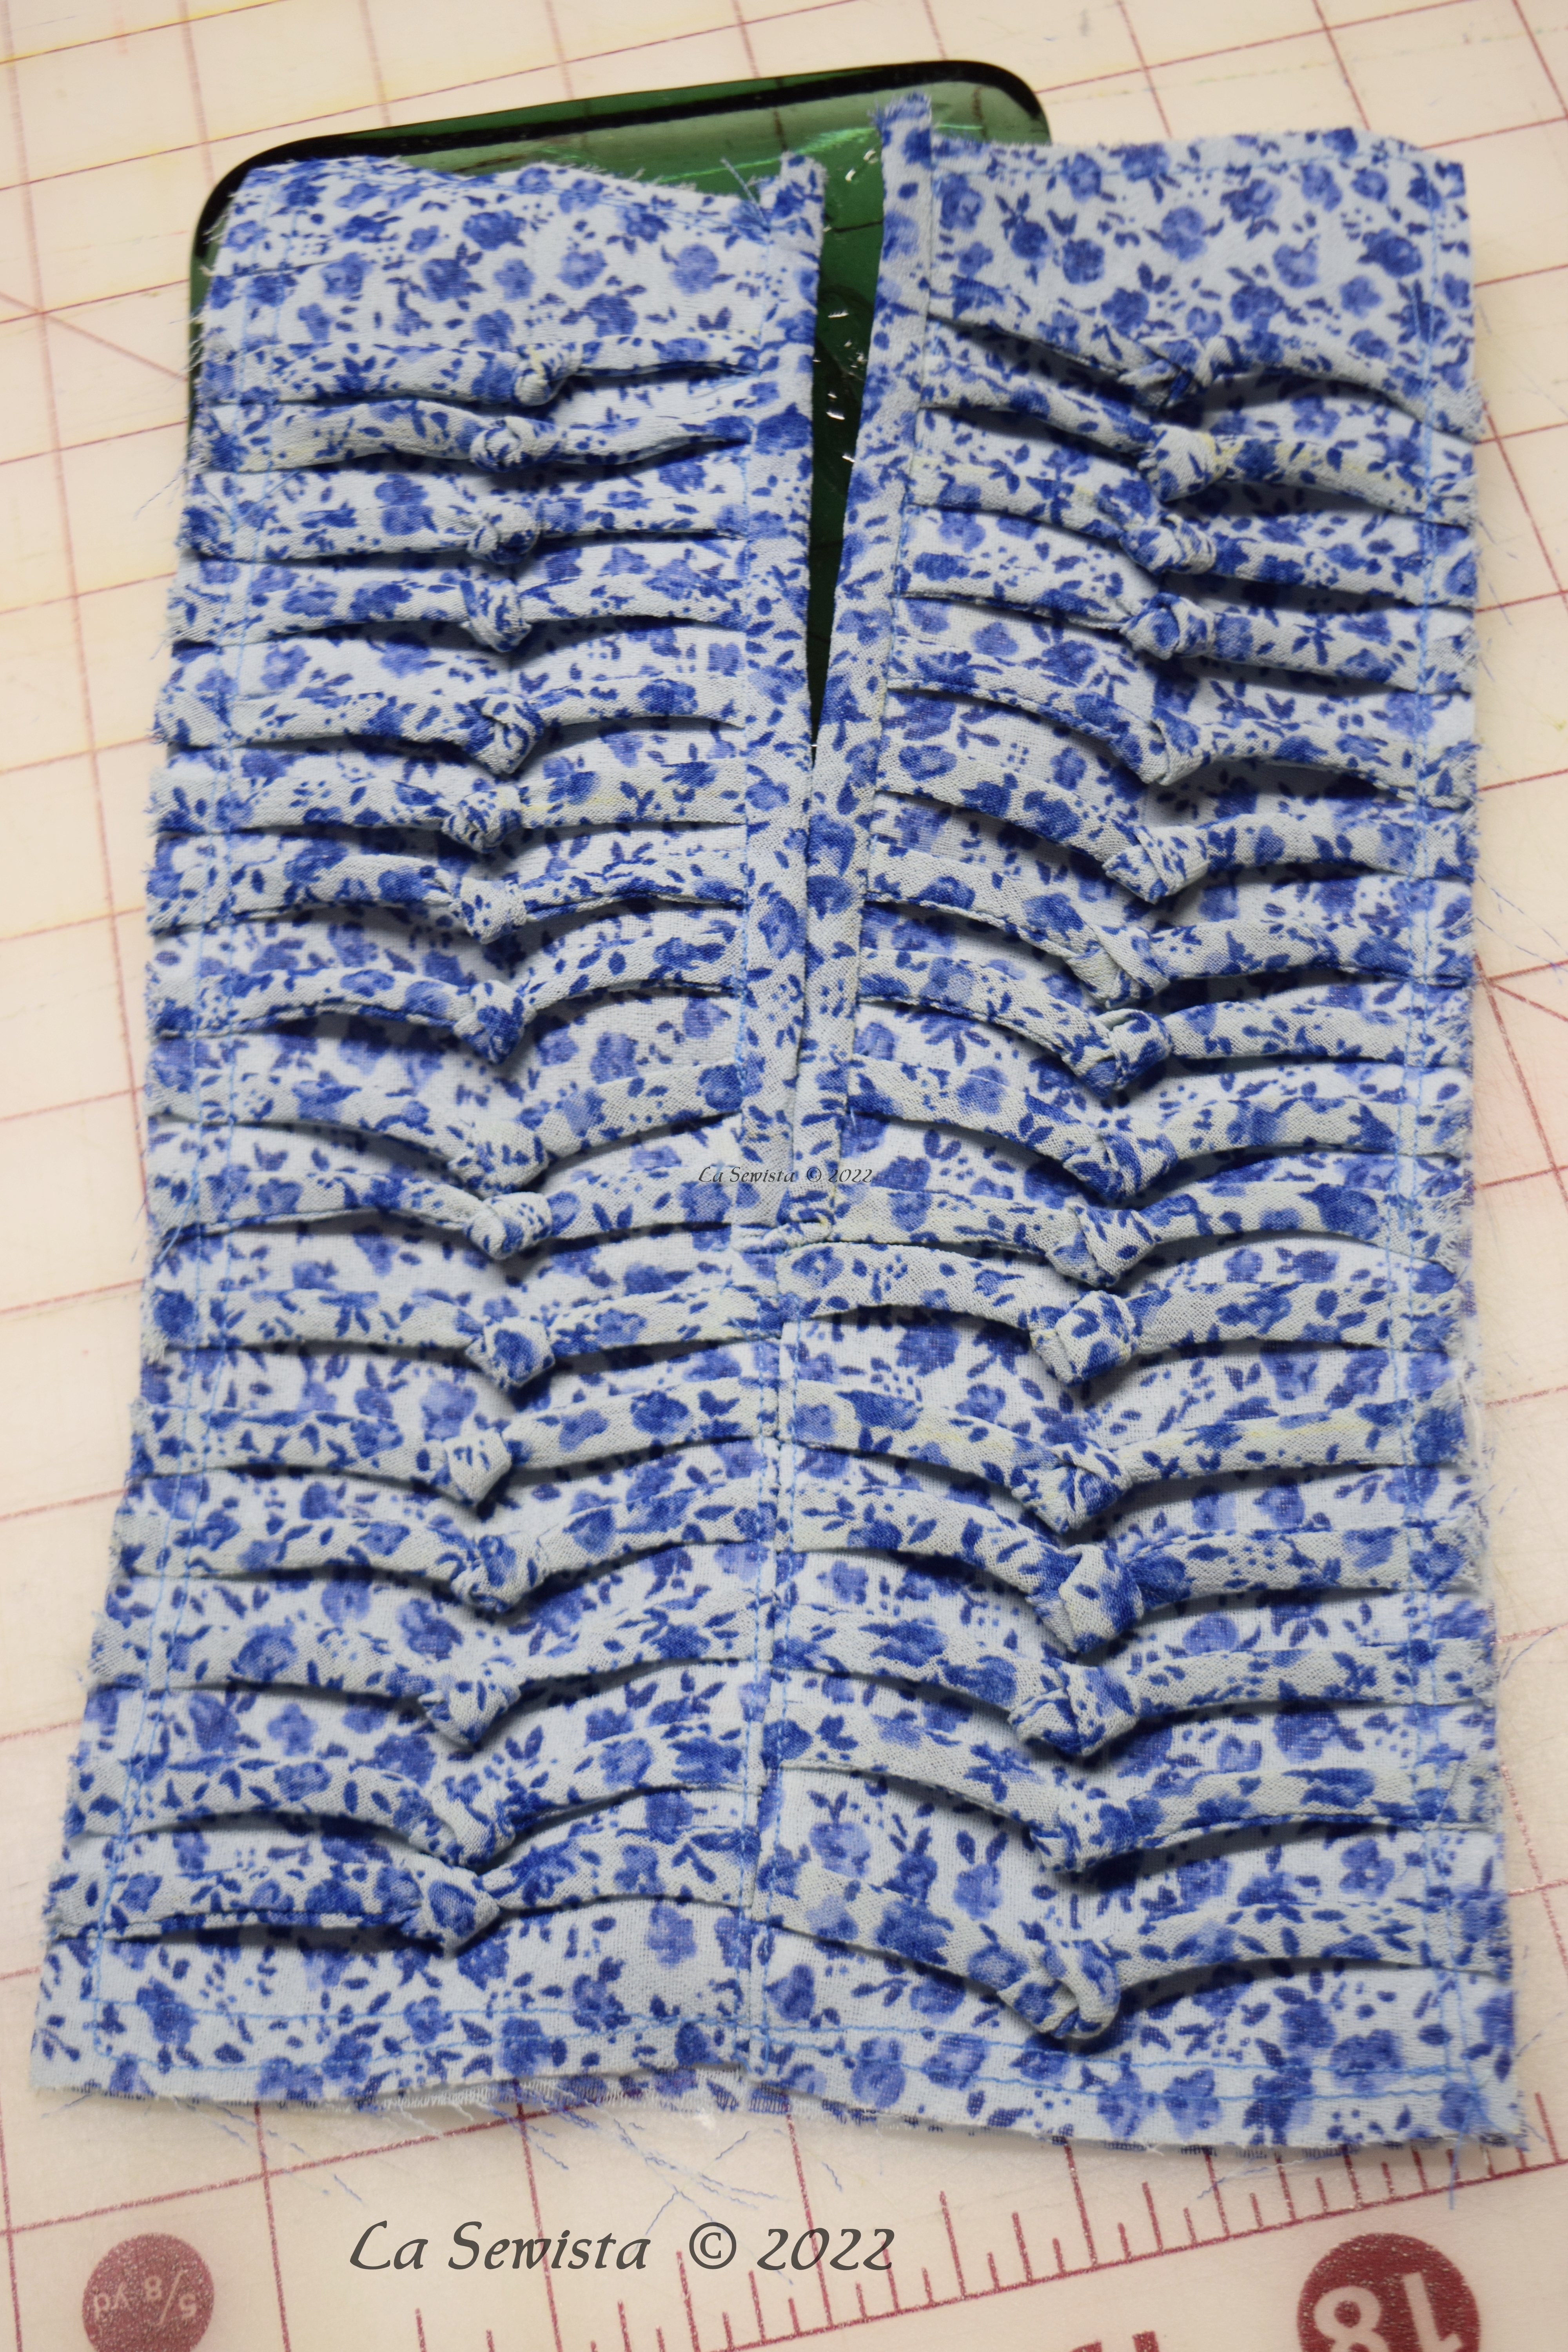
It was very tricky binding the opening of this. I veered off the reservation to figure it out but it came out ok.


It is bias cut, wraps around obi style and has a couple beads on the end to weight it down.

The cuffs easily fit over my hands but don't look big so I did not elasticate them.
To see my original effort on this tunic click here. It is quite different. I feel on this one I put too much work into to it for the fabric that it is. It will look ok with some jeans. In the end, I did enjoy the study in embellishment.
************************

Last but not least, the one item made specifically for our vacation. In its short life it has already flown the friendly skies, covered my head as I avoided poisonous jelly fish in the North Atlantic, been mushed into a crowded knapsack and protected the once cancerous skin on my skull. It has been a real work horse once home as well and I am wearing it everywhere. I LOVE my bucket hat.

No pattern here! Everything I looked at just wasn't quite right, whether a pattern or retail. Brim too wide, too narrow, etc etc etc. Just when I gave up, a few days before leaving on vakay, I was in a local retailer and I saw this gaudy little number above. It has the shape I was looking for, one that fit my petite head. I tried it on, score! I bought. It might look cute with my periwinkle linen dress and I could use it to make my own bucket as well.

I proceeded with a stash of oaktag, my padded smocking board and some heavy yelllow headed pins to copy each section of the hat. Pattern ready !
 |
I inspected the guts of the original hat and after interfacing my khaki twill, tried to proceed in a logical order to duplicate its construction. I self lined the hat with more twill. The original used a cotton lining.

Row upon row of topstitching on the brim!

In the end, I think I got it. I plan to make more for winter, warmer fabrics instead, maybe with ear flaps! I will make a hat with a wider brim as well.
This has been a long post. Thanks, if you have managed to work thru to the end. It is what I worked on while not blogging. I thought of you all during that time and knew I would eventually get back to you all and let you know what I was up to. I have lots of plans for future projects and the queue is long. More to come!


