Welcome to Next Level Sewing #2. What is more basic to sewing than thread? Yet using it well can definitely add a bit of polish to your garment. These are simple skills that you won't find in a pattern and if lucky will stumble upon on the internet. I've tried to gather them together here for a more cohesive lesson for you. If you have any questions or would like to share your experience please feel free to do so in the comments. There is a definite dirth of info on the web about thread.
Thread from the spool. Whenever handstitching, always thread your needle the way it comes from the spool. Cutting a length of thread, letting it fall in a loopy situation on your work table, and then picking up any cut end is not a good habit. By feeding the leading cut end of the thread into your needle and knotting the end that is closest to the spool you eliminate aggravating knots and kinks. Thread is made with a twist. When you thread the needle with the end that is closest to the spool you are constantly fighting the natural twist and it is a battle between you and the thread's urge to get back in line with it's twist. Guess who's going to win?

Want to make your handsewing a bit couture? If your handstitching is for finishing, like a hemline or buttonhole, run your thread through a piece of beeswax. Beeswax is available from any of the chains. Then pass the thread under a warm iron to meld the wax into the thread. I would not use this technique for heirloom sewing of lightweight fabrics but it is wonderful for finishing hems on anything wool or more tailored like a jacket. When I iron the thread I do it over a few layers of scrap fabric. I don't want that wax to telegraph to the ironing board cover where it will later be released while ironing something else, not good. So do this over a towel or a few layers of cotton scraps.
Thanks to the late Anita Boucher who taught me this 25 years ago when she saw me thread my first needle for hand stitching a quilt! The end of twisting, knotting thread was glorious!
Knot those puppies! In the past few months I have seen two very well known sewing teachers topstitch a pocket and just snip the threads off at the corners when done. No, people, No! Once this garment is washed, and in both cases seen it was washable jeans and pants, I promise you those unknotted threads will pop out and fray. Then the pocket or whatever will come lose from it's stitching and in no time that garment you put all that effort into will look like Walmart's latest fast fashion after a run through the washing machine. Again, not good.

How to do this correctly? Simple. I always keep a pincushion next to the machine with a couple of crewel needles in it. Why crewel needles? They have big eyes and are quick and easy to thread. I don't want to futz with needle threading while at the machine so make it as easy as possible. When finished stitching a seam, one that is on that outside and will show, leave about 8 inches of thread before cutting. One thread, the bobbin thread, will already be on the back. The other is on the top and gets threaded with the crewel needle. Run that thread through to the back of the garment in a way that looks like another normal stitch . Once on the back do a square knot with the two threads. Square knot? Right over left, left over right. Clip the threads now. A more couture finish? Run the threads between the garment and come back up on the wrong side about an inch away. Clip them to keep the ends hidden. You now have your threads tied off and your beautiful topstitching will hold up to cleaning and look good for a long time. To make my point here I sewed up a simple pocket, a la quick, and on the right side I tied the topstitching threads to the back. On the left side I clipped them as I saw the two well known Craftsy Profs do, down to the quick. Then I put the pocket in the wash for one wash and one dry. Look how this came out after one washing. The stitches on the right that were tied to the back are solid and holding. The stitches on the left are a mess. This pocket is doomed to separate from the garment with a few more washes. This is what happened after one wash. You work too hard and put too much into your sewing to have it fall apart and look shabby like this.
Don't Backstitch. I know. This is against what you have been doing for maybe years. But backstitching, particularly at crossed seams, can add bulk and make for a not smooth seam intersection as well as uneven seams. Remember Couture Sewing Maven Roberta Carr's number one rule of sewing, "Reduce bulk whenever possible". Not backstitching reduces bulk. But my seams will fall apart!!! NO! See the next paragraph.

Dial down your stitch. OK, this takes a little getting used to but the results are worth it. I promise you, in no time you will be doing this without even thinking. When you get between a half inch and a 1/4 inch away from the end of a seam STOP. Same goes for starting seams. Dial down your stitch length to 1.5 or even 1 and continue stitching till you meet the edge. This will give you strong seams and will eliminate the bulk of backstitching. Cut your threads right at the edge. Once pressed, intersections will have a smoother appearance than those that are backstitched and seams will lie flatter. Have you ever seen backstitching in a retail garment? While I really don't think they do anything to strengthen stitches in manufacturing other than hand the piece off to the next stitcher in the process, we continue to bulk up our seams with all this unnecessary thread. So dial down that stitch length for a more professional look to your seams.
In the pic above you can see the difference this makes. This is a cotton chambray.Do you see how the backstitching has added bulk to the right seam and is not letting it lay flat? This has been pressed open just like the seam on the left. By dialing down, the stitch length the entire length of the seam is exactly the same width and presses beautifully. By backstitching, three rows of thread are making the width of the seam unequal and pressing flat not doable without bubbling. Yes, you could press the life out of this and probably bring it back to look a little better but it will return with each washing. You don't want to do that every time you iron, do you?
Thread fades, particularly cotton thread. All those lovely thread holders that hang on the wall next to your big window over the sewing machine? Not the best thing for your thread. It is best stored in a dark space, free from dust. You can get thread organizers that stack and fit into cabinets nicely. Mine are stored with each color in its own box and inside of a cabinet. Sewing in the basement? I did for years. Fluorescent lighting will fade your threads, particularly the silk ones. BTDT. It does a wicked number on silk and silk thread.
***************************
There is a surprising lack of information on threads on the web. There are many different kinds of threads, too.
The poly or poly blend threads most of us use to do our sewing are quite strong and have elasticity built in. They are great for knits because of that factor. But because of that elasticity, extra care has to be given to winding your bobbins. Wind your bobbins at a slightly slower speed. We are always in a rush to fill a bobbin, an aggravating interruption to our sewing. Slow down with the poly threads. At high speed the thread is stretched before being wound on the bobbin. Then when you go to sew you see the puckered pulled tight seams. That is because the thread is too taut on the bobbin. So wind the bobbin at a touch slower speed. Careful, too slow and your bobbin won't be tight enough and the next thing you know there is looping in the bobbin case.
Our newer computerized machines can be temperamental. They don't like thread lint so you need to clean your machine after each garment. Some machines definitely have a preference for their thread brand. At one time my machine would only be happy with Gutterman thread. Now it will use both Gutterman and Coats and Clark. Turns out C&C implemented some change that made my machine like it again. So experiment to see what works with your machine best. DON'T use cheap thread. It is made with very short staple fibers that will lint up your machine and can cause an expensive week or two at the machine spa. It's not worth it. Good newer thread only!!!
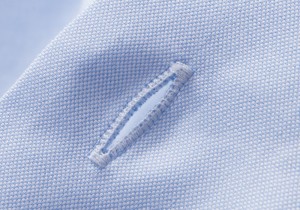
Cotton threads have a matte finish and offer a rich look for button holes and topstitching. Their bit of fuzziness helps fill in the spaces on machine buttonholes and can make a lovely finish. I've heard more than one expert suggest cotton thread for sewing silk blouses. I've done this and really like the way it works and looks. Cotton thread is not for the construction of much used children's clothing.
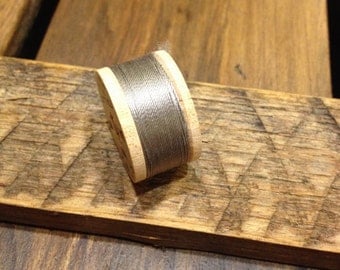
Silk threads are lustrous and extremely strong. They are what you use when doing basting that will then be pressed in as in a hem or other tailored applications Why? Because they do not leave indentations in the fabric when steamed. Heavy steaming is required in many steps of the tailoring process and regular sewing thread will leave indentations in the garment that are hard to remove. Regular silk sewing thread avoids this. You can get Gutterman silk threads for this at the chains. Silk buttonhole twist is what you want to use when going to the effort of hand buttonholes on couture garments like a Chanel style jacket.The next sentence is a bit controversial but I agree with it. Because it is so strong, the silk can actually cut threads in your garment fabric and is often recommended to NOT be used for actual construction. I would use a high quality cotton like Mettler silk finish thread on silk fabric, not silk thread.
Threads come in different sizes. The higher the number the finer the thread. For heirloom sewing size 80 and even a 100 threads are used. They disappear into the fabric when doing pinstitching and other heirloom treatments, so lovely. This allows the "holes" to be seen and not clumped up with thread. These are sometimes called "fine embroidery thread" but are not machine embroidery threads. That is a whole different animal that I know nothing about as I don't do machine embroidery.
Most regular threads are size 50, Machine embroidery threads tend to be size 30. Remember, the lower the number the thicker the thread. Remember though, other than for heirloom sewing, I haven't found the number to be particularly important to know. What you do need to know is that threads are marketed not by size but by use as in multi purpose, buttonhole twist, topstitching thread, quilting machine thread, etc, etc, etc. There is a thread for each type of sewing being done out there and it's not hard to find the correct thread without knowing a size. Just shop for thread by it's eventual use and fiber content. Heirloom sewing is the exception. Specific thread sizes are often recommended and are available from heirloom purveyors like Farmhouse Fabrics.
Basting threads are a wonderful thing to have on hand and not available in most stores. I thank Claire Shaeffer for introducing me to the wonders of skeined basting threads. They have a loose twist and a very soft finish. They won't leave indentations when pressing. They are also easy to remove and break easily so you don't have to bother picking up and putting down your scissors when all you want is a quick baste or are thread tracing. The soft thread is great for tailor tacks as they don't pop out like regular thread tacks can. This stuff is hard to find and is Japanese in origin. I bought mine through Claire's class. Susan Khalje sells it in her web store here. Spoil yourself and get some great basting thread.
I hope this post about thread has helped you improve your skills and knowledge. Join in the convo and let us know your tricks, experiences or questions. Till next Monday...............Bunny


