Sewing Vloggers

Showing posts with label zipper. Show all posts

Saturday, May 25, 2013

Simp 1783 and Those Scratchy Innards!

Plans have changed! Before I start any new project I read the pattern  thoroughly.  When I did this, after I wrote the last post, I realized that the lovely placket I was thinking of doing was already there in the pattern and that the zipper spec'd was in the side seam, opening from waist to a couple of inches below the armpit, basically installed upside down.  I decided to go with the construction per the pattern. I have done these underarm invisible zips before. I like the look. I do not like  the scratchy itchies that happen  in the area at the top of zip under the arm. The semi rigid zip seems to love to dig into that area.  So I decided to do something about it. And that crooked seam? It will disappear as you will soon see. 


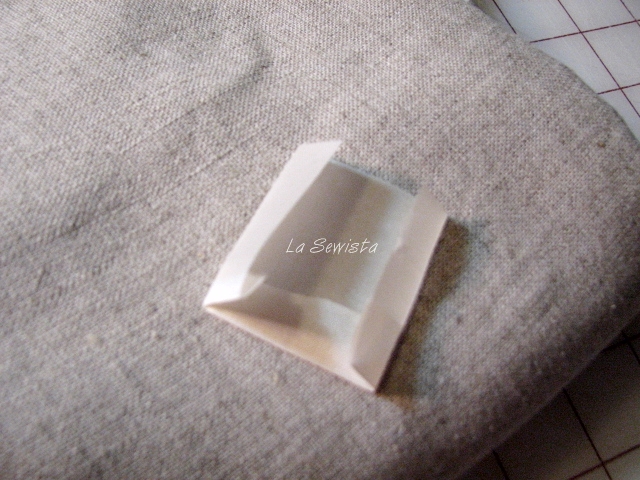
First I found a little piece of poly taffeta in the stash and cut it into a rectangle. I fold back the bottom and two sides and pressed. The top is left raw.

This rectangle is lined up on the bottom of the zip which in this case at the top. The zip was installed upside down and  longer than the opening and cut back and stitched to stop the zip from pulling out. It's a lot easier to install an invisible zip this way.  You wrap the side folds around the seam allowances and then  hand stitch the bottom fold to the zip. Next I stitched it to the seam allowance to keep it safe until the sleeves were installed.
Now I don't have to worry about the itchey scratchies.

I have to say, I think I have another TNT. I am loving this pattern, particularly in this fiber blend of rayon and linen. It wrinkles just enough to look good, if that makes sense. All I have left now is the handwork which is basically bias bindings to be hand finished on the neck and sleeves and a hand worked button loop. I can't wait to wear it!...Bunny

Saturday, February 9, 2013

Koos Zipper 2.0

I LOVE the Koos Zipper as shown in the View B instructions of Vogue 1311.  It is such a crisp application that would be great on any bag or jacket. It is not difficult either and there is also a tutorial in the sidebar from my first Koos bag construction.


A couple of differences here from the original construction:

* In the original zip I did not fold under the long facing pieces at their ends after turning. In this one I did. It did telegraph through upon ironing so I would not do that. To solve the issue I just moved them out of the way when I did the final press.

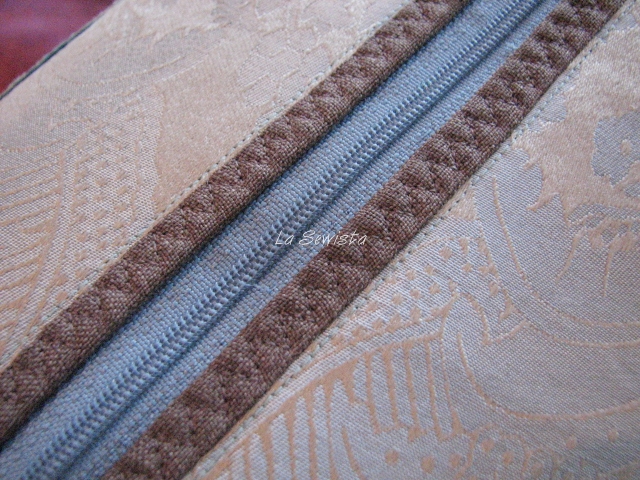
* In Zip 2.0 I decided, after a bit of experimentation, to triple zigzag the long edges of the facing. This helped secure the zip more than normal which I think is important for a bag and it's heavy use. I like the decorative effect it provides.

* I was able to center the zip beautifully with the help of Wonder Tape. It just looks uneven due to the camera angle.Ever notice those raised lines on zips? They are perfect for following the stitching and getting it even and centered.

* The zip was topstitched using my edge stitching foot and one click to the right. 

* Last but not least and totally unimportant I loved this zip which is a recycle from a long gone jacket. It opened at both ends. I just removed one of the pulls and sewed it shut on both ends to make it work for the bag. Zipper reused! It had a great pull on it so was definitely worth it.

Now on to the straps and sides and then lining. Maybe, just maybe, tomorrow....Bunny

Tuesday, October 2, 2012

The Koos Zipper, I Love It!


I am doing View B of the Koos Bag, Vogue 1311. View A has your basic slot zipper installation that you see in most bags, but View B has a very intriguing zipper technique that I have not seen before. A large facing is stitched, right sides together, in much the same way a bound buttonhole "hole" is done. The facing is outlined with the whited dotted line. I stitched the facing using a 1.5 stitch length around the ends/corners. Once stitched the "buttonhole" is cut down the center within a half inch of the ends. From there it divides and is cut into the corners, like any welt pocket or bound buttonhole.  Now, the neat part, cut the long seam allowance back to about a healthy 1/4 of an inch on the long sides ONLY. This will leave you with a 1/4 inch space between the two seam allowances. Step 2, Cut the facing at an angle, the green arrows, from the outer edge to the corners of the "buttonhole".

Take that end piece, the parallelogram, and push it only to the wrong side of the hole. Pin in place

 Here you can see the facing turned in on the ends only and pinned in place. Now comes the fun part!

 The long facing piece is wrapped around the remaining long seam allowances. In other applications as well as View A the entire SA is turned in with the facing. Here the SA stays where it is and is wrapped with the facing. Pin in place. This is going to leave a nice edge to butt against your zipper.


This is what the wrapped SAs look like from the wrong side. You have two options now. One is to topstitch the facing in place and the other choice is to ditch stitch from the right side in the well of the seam between the wrapped SAs and the bag. This leaves you with a clean slot to just place your zipper behind and topstitch into place. I think it is pretty cool and hope you do too! I love it when I learn something new in sewing. Thanks, Koos! I think this one belongs in the tute column, don't you?.....Bunny

ETA, 02/12/13: I did another Koos bag and the post contains additional hints for  installing this zip. You might want to check it out. Here's a link: Koos Zipper 2.0


Fall sets in on the Deer River.......

Monday, October 1, 2012

The Koos Bag, Part Three


I started the actual sewing of the Koos bag today. I have to admit, I've only referenced the pattern once and that was in regards to the zipper installation. Here's why. This is a great pattern with great directions. But on my bag I wanted to use some fabric that would not take the heat very well. So piecing together the top, bottom, and side and fusing them all after that to fusible fleece was out of the question. So I chose to do a sort of "foundation piecing." Here you see a scrap of cotton with the fleece all fused on. I always remove the seam allowances on fleece and interfacing when I make bags. There is just too much bulk otherwise.
Just as in paper pieceing, the first piece is sewn down to the foundation. The next piece is layed on top as you see above and stitched to the base and first piece. After stitching, the seams are cut back and graded and the second piece is flipped over. Now I have a big circle. You can see the green fabric came up short but another piece will be overlayed on top of it and it won't show.


I also stitched and flipped the bias edge, turning it under on the leftover side and topstitching it. It came out ripply but so evenly ripply that it looks intentional as you will see later. I actually like it as it really makes the fabric shine.


And if that wasn't enough bling, I decided on adding some brushed gold sequins, a trim I have had for years and now it's time had come. I did several samples of stitching on the sequins, some with contrast thread, some matching thread, and some monofilament. The smoke colored monofilament won
. First I got a plate out of the cupboard to use to mark a nice curve. This wasn't as easy as it sounds. This trim had to bypass the zipper installation and the four buttonholes for the straps but eventually I found the sweet spot. I drew that on with the plate and then ran a line of Wonder Tape along the line. Wonder Tape is a double sided tape that is great to position trims, zips, and all sorts of things, a must for any sewing room. All I had to do now was line up the sequins over the Wonder Tape. You can't see it in this pic but it is really important to leave about an inch of Wonder tape hanging off the edge. Stick the last few sequins to it and this extra will help hold the tape without unraveling until you are ready to stitch the seams.

Here's a closeup and you can see the monofilament is virtually unnoticeable. The sequins will be picked out of the seam allowance when it is sewn to the sides. In the meantime the extra tape and sequins will help hold it all together. To stitch the sequins I used a 6.0 wide zigzag, a 2.5 length, and the monofilament thread. I think they came out pretty good and it's not a brazen scream of bling so I'm happy. Next in line is to install the zipper and the strap buttonholes. They are really cool. The zipper has an interesting method where the seams of the zipper facing are "wrapped" with the facing fabric. More to come. I WILL follow directions for that step! So far this has been a lot of fun. It feels really good to get back to my sewing. All painting was completed yesterday and now we just wait for our floor to arrive.

***************************************************

You may remember last spring our four footed friends decimated the hostas. They are back lately every day around lunchtime. Caught the little stinker getting a few last bites in before winter! At this point she is welcome to them..........Bunny

The Ray Pinafore, 2025's Epic Fail

  Happy New Year and welcome to my epic fail of 2026. I guess you have to have one, right? This is the Ray Pinafore from Paper Theory Patter...