Sewing Vloggers

Showing posts with label Marcy Tilton. Show all posts

Monday, December 26, 2016

Vogue 9108, the Marcy Tilton Apron Dress


I thought I would be finished this sooner. It's not a hard project and there is little fit involved. But my husband had some sudden health issues to deal with. We are back on track now and all is good. I finished the dress that is really a jumper before Christmas and can't wait to share with you all. I'm going to try a little different format for this review.

My concerns about this pattern:


There were many. My first concern was the actual design.  I've made Marcy Tilton designs before and had a few muslin wadders  as well. Would this unique design be another? Luckily, Pattern Review had some great reviews with photos that really helped with my decision to make this.

Another concern was the dress's volume, massive at the hemline. Most makers reduced this. But how much should I take out? Star's Threads took a whopping 54 inches from the bottom hemline. Yes, it's that full! Star's  skirt is positively A line and lovely on her. But I wanted a bit more volume in mine, but just not all that Tilton intended. My version had 24 inches of volume removed from the hemline and I am happy with it. I'll talk more about this in Fit.


I also had concerns about the weight of the garment, even with all that volume removed. I used the two way stretch knits as recommended but dang, these were heavy fabrics and all that volume in the skirt hung from a really rather flimsy  little bodice. I think I managed to overcome that issue fairly well and will get into that in a bit.

And what about those funky "epaulet" style straps that most rejected?  And that really disproportionate hemline?

Then there was the challenge of fabric choice. Four fabrics were recommended for View C, the non-strappy version that I chose. Would they all go together and would I look like a circus clown when it was said and done? I used my personal tried and true method for working with various fabrics in a garment. I will do an upcoming blogpost on that. Fingers were crossed and spirits invoked hoping that this time the formula would work as it has in the past. I think it did. One of my favorite things about sewing is putting various prints together in a garment. No boring solid color blocking for this woman! If it looks clown like, please let me know, but I have hopes you will find the choices appropriate.

While there was much to be pondered before starting to actually sew the dress. I can honestly say the actual construction was quite easy. The  most challenging part was the upper front bodice piece and that was not that bad at all, just the most challenging,relatively speaking.


The pattern:

This is Vogue 9108, a Marcy Tilton design. It's described as a "pullover dress, close fitting through the bust."  That sounds right but it really wasn't that close fitting and I don't think it really is on others I've seen. I was not sure what size to use. Did I want to futz with an FBA and do the small size, my usual MO? There was huge volume in the small size so other than needing the larger bust it didn't need any further alteration. I flat pattern measured the bodice area of the garment and found if I used the medium size it would accommodate my C cup and I could deal with all the volume however I wanted. I cut the Medium. It worked out perfectly.

Changes I made to the pattern:
* I DID NOT like the look of the hem in the  back of the dress being substantially shorter than the sides it matched up to. It makes the garment "feature" the back of your knees.  Who's got good back knees? Other than Heidi Klum, I don't think this would flatter anyone in any way. I extended the hem in back a good 4 inches. Since I still liked the detail of the uneven hems where they meet I kept it one half inch shorter than the side pieces.


     Below you can see how this half inch difference at the side seams makes a huge difference with its drape and the curved cut of the side pieces. But, it hides the back of my knees and that's good.


*  I did not pleat the lower front as described in the pattern, step #5. The slinky fabric was unexpectedly bulky and it wouldn't work. So I moved the pleats closer to the center and eased in the difference across the front. It worked fine.


* I did not use the suggested facings, choosing a simple binding instead for the neck and armholes. I chose to bind the armholes with black ponte. I didn't want anything disturbing the simple black on the sides or busying up the design any further.  The neckline was bound with the dots.  You can see how the straps, front and back, are sewn into the epaulet. They are wider than the epaulet and I just did a little tuck to make them fit.

* I did not use the specified order of construction. I wanted to check the fit and strap length before binding anything. Many who've made this did without the "epaulets" connecting the front and back straps. When I tried the straps without the epaulets it pulled up the bodice/waist seam to an odd area of the bust. Think "recent Rue debacle" and you'll know what I mean. So for myself, the epaulets put the strap length right where I thought it most flattering,  a little above my natural waist. It was not the "close fitting" bodice that the pattern described but it also wasn't made in the size I usually use. I like the fit and that's all that really  matters.

I found the directions very clear. At the very beginning of the dress directions there is a "note" suggesting interfacing for knit fabrics in the pocket, pocket edges at side front and "upper edges on front" areas with tricot interfacing. Given that knits are the recommended fabrics why is there no interfacing shown in the yardage requirements on the pattern envelope?  There are no yardage requirements inside on the directions either, just that "note" suggesting you use some. Grrrr.... luckily I had some fusible tricot on hand. All in all, the pattern was clear. I love that there are no buttons, plackets, cuffs, zippers, etc., just simple sewing.

Fabrics:

So many fabrics! This was fun to play with and figure out. I decided on four fabrics, sort of. The back bodice and lower front are a really nice jacquard type slinky knit made from acetate and a bit of spandex., the usual slinky ingredients.  I am in love with the ruby red color! It came from a thrift find, a Cold Water Creek large size tank dress that I picked up for a dollar. Gorgeous fabric!
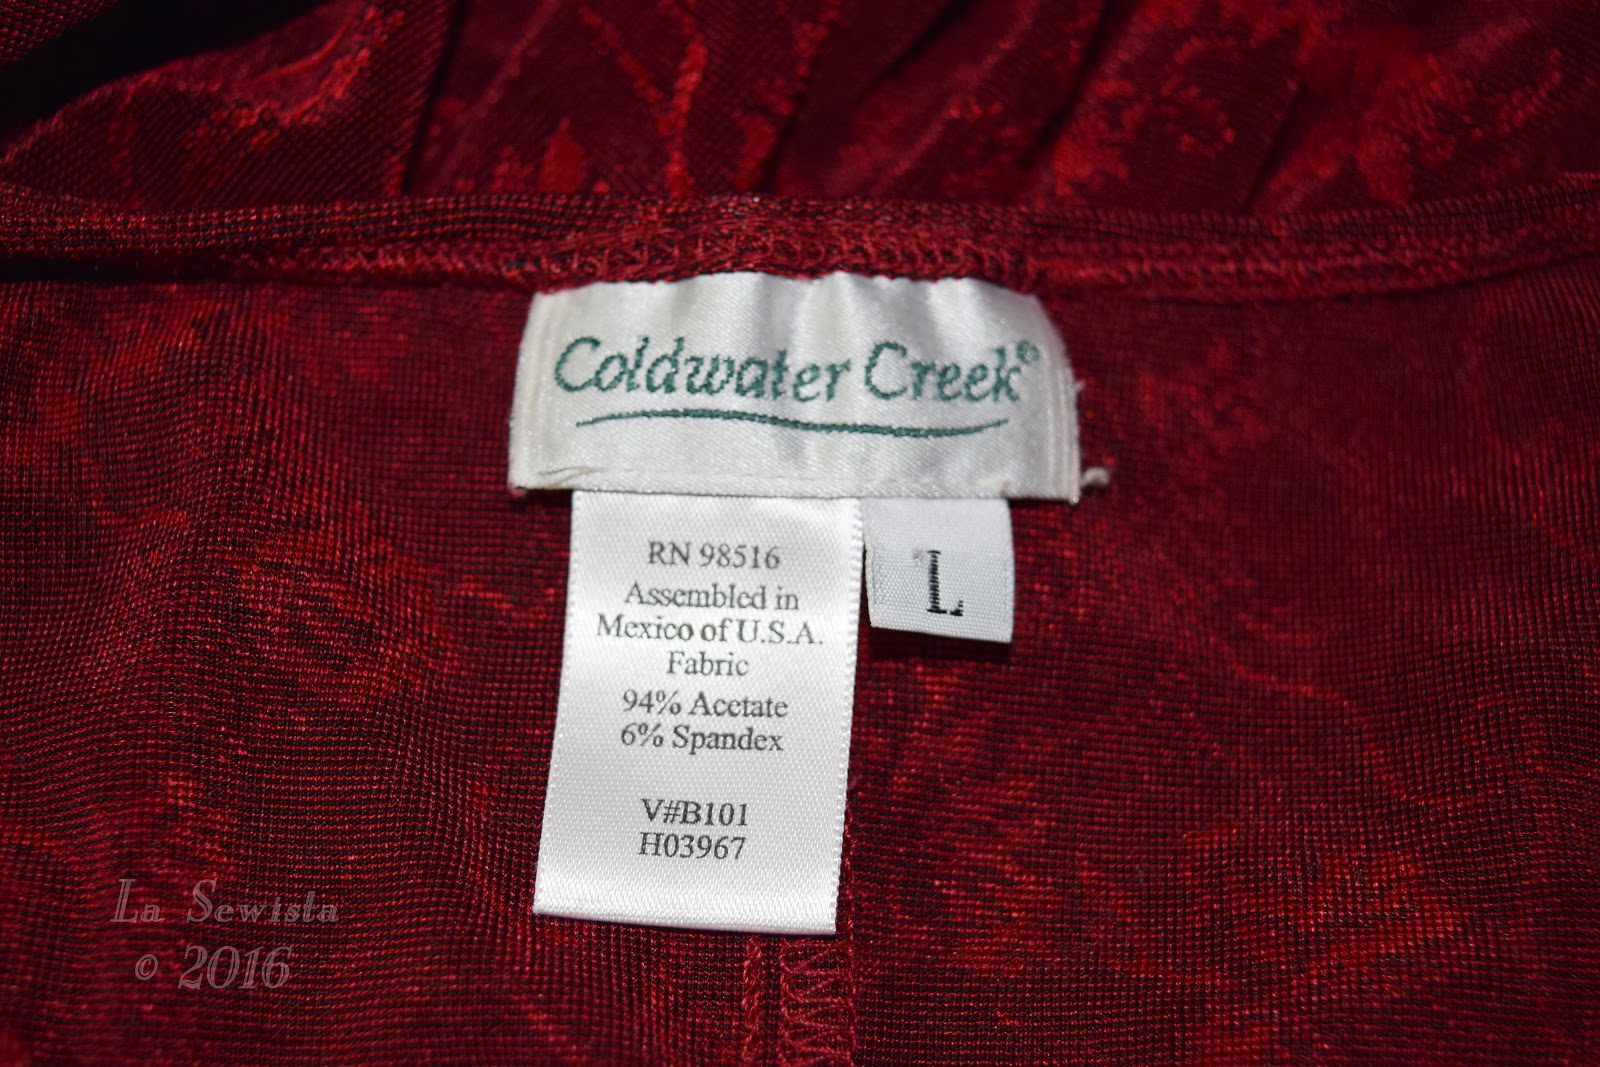
 Next,  I took a hint from many body con dresses I've seen and used black ponte for the side panels, the better to give a slimming, taller silhouette. It's a rayon ponte, matte finish and with a very nice drape . The back panel, front hem bands and some binding were in a pebbly polka dot knit, also rayon and quite textured.

 For the fourth fabric I took the black mesh point d'esprit knit and laid it over the polka dot rayon for the front hem band and for the front upper bodice.

 These were the survivors of many combinations I tried. I really think picking fabrics for this dress s the most challenging aspect but a lot of fun.

The front and back upper bodices were fused to a woven cotton interfacing. This was not specified at all but is really needed to have the strength to carry the weight of the skirt, IMO. The upper areas of the ponte side pieces were fused with more black fusible tricot. I tried the woven but it showed through. Backing these upper areas was important to the their ability to carry all that weight from the skirt and I would highly recommend doing this. It will also help stay your binding areas and prevent sagging. I ran the interfacing from under the arm across to the bodice front. I also interfaced the "epaulets"  as I didn't want the weight to pull on them making wrinkles. I've had that happen before.

There is no lining in this garment and one really isn't necessary.

Construction:

This is all straight sewing and really quite simple. Here are a few things I did differently than the pattern, Some I've already mentioned and won't repeat.

*I stayed every vertical seam with seam tape or selvedge. I didn't want these heavy knits drooping off the seamlines. I think this is really important. It didn't make for the most lovely interior but it is serving its function.You can also see in this pic how I used the tricot on the upper side pieces and the woven interfacing on the slinky bodice.A lot of thought was put into  this because of the weight the small bodice needed to carry.  Seams were stitched twice and trimmed.

* The hems were interfaced with tricot, edge stitched and then stitched again 3/4 of an inch away. I really like hemming knits this way as it gives a sharp edge and a flat hem that drapes nicely.

* Armholes were bound with matching black ponte so as not to add another element to the design. I wanted to keep those sides all black. No facings, please! The pattern specifies a facing for the armscyes.

*  Back panel, Piece 19, the dots, reduced by 2 inches in width.
    Side panels, the ponte black, were reduced by 5 inches in width on each side = 10 inches.
    Side fronts, black ponte,  were reduced 6 inches each side = 12 inches.
    Total reduction taken from hem = 24 inches.
    The reduction was made with a ruler going from the hemline to the waistline and not altering from     the waist up at all.
    The skirt length was reduced by one inch all around.

*  I highly recommend interfacing the top edge of the pockets. I used a 1 1/2 inch strip of fusible tricot on the slinky.


In conclusion:

This jumper is a darling design that really needs to have volume reduced in the skirt to look it's best, IMO. It also  needs that hem length in the back skirt lengthened. Making the back of a women's knees a focal point just is not a good idea on any level. This dress has no zipper, buttons, snaps, closures, welts or much of anything else for design detail. I LOVE that. What the pattern does offer is a great opportunity for creatively using various fabrics in one garment. I love mixing fabrics and have plenty of experience doing so but I found this garment particularly challenging. Hopefully staying with a tried and true color scheme helped.

I really enjoyed making this and it will be my go to dress for casual Christmas gatherings. I enjoyed the challenge and yet the simplicity. I am even tempted to make it again in maybe a long, sleeveless version for summer. I highly recommend this pattern with the modifications suggested. As it comes out of the envelope,,,,, not so much.....Bunny
***************************
I hope you all had a wonderful holiday. We had a great Christmas weekend with our daughters in NH, lots of family, great food, snow, sledding snow ball fights, more food, and just great memory making. Whatever your celebration, I pray you were surrounded by loved ones and blessed with warmth and joy..........Bunny

New profile photo: I've gone natural with the hair. Yay, liberation!

Sunday, December 18, 2016

Last minute gifts!

It's a busy week for sewing bloggers, at least the ones like me that don't plan ahead too well. I stumbled on this tutorial through Pinterest for making "burrito" style pillowcases. I highly recommend it as it very clearly explains the process  and is well photographed. The "burrito" technique is also the name of a method often used on yokes on tailored shirts, same principle and one you can find in the tutorials on this blog. Just click on the tab above. I needed five pillowcases for my grandchildren. Here you can see them all rolled up like burritos and ready for their first line of stitching. All components are in that tube!


Each child's pillowcases relates to them somehow. One loves Harry Potter, another butterflies, etc. A word to the wise if you try this. Any design that is directional will give you a migraine as you try to figure out which way to lay it out so the writing is going the correct way. In the link I've given you there are comments as to how to do this but I found them confusing. I really thought I had it the right way but clearly I didn't. Truthfully, my Zack will be thrilled with his Harry Potter pillowcase and won't mind at all which way the letters are going, so I'm not going to stress about it.


There are three pieces of fabric to each pillowcase. It was a lot of fun coordinating everything. My new steam press was really invaluable on this project which is nothing but flat rectangles. Basically. the pieces are pinned together. The hemband is wrapped around. Then it all is turned right side out through the tube. Next comes making the pillowcase with French seams and then done. Everything is enclosed. No raw seams or threads anywhere!


I put these together "production" style with every process happening to all the pieces before I moved to the next task. I think that really helped me save time. They were all cut out, then pinned and the burrito stitched. Then the French Seams to all of them, easy peasy, done! All five took me an afternoon. These will make great stocking stuffers.

************************************************
The Marcy Tilton dress is done and I love it, I really do. I did a lot to that pattern to make it work  for me and my fabric and can't wait to tell you all about it. I wore it to our Christmas brunch at work and received many compliments. While I wanted to take pics then, it just wasn't the right, as in proper, moment to do that. I have the entire blogpost written and will hopefully have pics of me in it soon. I could put it on the dress form but I know that's not what you really want to see. Here's a little tease, the interesting hemline:

The MT post would have gotten up sooner but my husband had some unexpected health issues. He is doing much better now and things are back on track. It did require lots of Dr. appointments and visits to Syracuse for care, hours away. We are good now and all is full bore for Christmas, visiting our children and families. All will be fine and he has great doctors. In the meantime I definitely have my garment sewing mojo back and have lots of things on the burner. Can't wait to share it all with you. ....Bunny

Sunday, November 27, 2016

Yay! Back to sewing!

And it's a dress! Well, sort of. Or is it a jumper?

This pattern has been seducing me since I first laid eyes on it.  First, I thought the proportions could work well for a petite, shorter person. And you know how I love to mix patterns. BTW, Kenneth King has an interesting article on Pattern Mixing in the latest Threads. 

I will be doing View C which has a solid back, not the strappy back. The strappy back is just too too, at least for me.  I want this to be something I can wear to work with a black tee or such and some black boots. 
A few words about this pattern: Two weeks ago my husband and I drove for seven hours to the Cape to attend a wedding and see our big family. For two of those hours I read and reread this pattern. It looks complicated but if it is broken down and planned out it is quite easy. There are no zippers, buttons, topstitching , etc. It is all pretty straight sewing. But it IS challenging. The challenges are getting the right mix of fabrics in the right combination and fitting. Once that is settled is is all straight sewing.


Whew, those dots are making me dizzy! I have four fabrics, a solid black rayon ponte with a nice drape, a deep cherry red piece of patterned slinky whose color I adore, a knit rayon polka dot and a sheer black point d'esprit mesh knit.  


They are all very drapey but similar in weight and stretch so it should work. The black mesh will be underlined with a layer of the polka dot. Next came planning out what pieces got which fabric. I've always been good at holding color and design in my head so I didn't bother with sketching but I would recommend it if you are thinking of this pattern. Many of the sewists on PR that reviewed this pattern found the sketching very helpful to keep track of what went where. There are 14 pattern pieces! I have a notebook that I used to keep track of my choices.  Next came the fitting.

Again, Pattern Review was very helpful with fitting advice and I highly recommend you visit the reviews if you plan to make this garment. Cocosloft and Star G  have great versions and there are several others as well. Just search Vogue 9108. You will see many people have taken out some of the incredible fullness in this design. First, all that knit will be quite heavy and will pull on the simple bodice, not nice. Next, the amount of volume is HUGE. One sewist took out 58 inches from the hem width ! I wanted a compromise between the two options so took out a total of 24 inches from the skirt width. Keep in mind these are odd fitting pieces so this fit part is pretty challenging. I decided to go with a size Medium with the theory that I could take out any more if needed. It is hard to tell what is needed when it is just in cut form. I tissue fitted the muslin on my form but that wasn't much help. I am so not a tissue fitter!  I can easily adjust the seams if needed so I will stay with the larger than usual size.

If you look at the models on the pattern cover, the bodice appears snug and I am guessing  is pinned in the back for the photo. But if you look at the completed garments on PR, the bodices seam much fuller with a deeper armhole and wide bodice. Some made alterations to use this as a sleeveless dress by raising the whole dress through the straps. By using the larger size I can decide if I want to have a loose or snug bodice. Not sure yet!


One thing to be aware of, which the photo above shows, is that the pockets are rather "kangaroo" and do not fit the garment flatly.  They "hang". They are deliberately wider then the piece they are attached to. This made altering a little tough. In the end I got it done. I took one inch out of the skirt all around  near the bodice and may shorten the the other bands as well. Not sure yet. So 24 inches removed from the width from various pieces and so far one inch from the length. I am not taking out more due to the shoulder strap issue which will become more obvious as to why later on.

The pattern calls for no interfacing but  Step 1 tells you to interface the " pockets, Pocket edges on side front and upper edge with fusible tricot interfacing." Luckily I had some in black on hand So be aware you may need interfacing which is not spec'd on the back of the envelope.  I would at the least interface all the pocket edges no matter the fabric.

So much about the fit will be dealt with as the pieces go together. Hopefully that will work out.


Before I started cutting out I made a pile of each fabric and then put the pieces to be cut out in that fabric on top. I would have gone crazy otherwise.


Next was time to mark. But first I hand basted the black mesh to the polka dot bodice front. For the rest of the marking I thread marked with different colors for circles, squares, etc. I wrote the legend down on the pattern in case I forget.


Once everything was altered, cut out and marked, I made new piles. Once you are ready to sew this pattern is it quite simple. You put the front together, then the back, then add the sides and done. So I made piles for front, back and sides of all the pieces needed. Whew, I think I am finally ready to put this under the needle! That probably won't happen till next weekend but I really feel the worst is behind me. Fingers crossed.

*******************************************

I hope all who celebrate had a wonderful Thanksgiving Day filled with bounty and surrounded by friends and family. We were blessed to share in the spirit of the day with our oldest daughter and her family over a long weekend. The kids made igloos out of the twenty inches of snow that fell earlier and had a great time. Friday evening we went to the new micro brewery that has opened in our little village. One of our blessings is incredible water and made this the perfect spot for a brewery. It is a gorgeous property and lots of fun to visit and share a beer. Here are DD and I sharing a sampler. 


Sunday, October 4, 2015

Vogue 9035, the foiled top from Marcy Tilton


Lame smile, hubby making me laugh! While I think this looks like a maternity top out of Mad Men, I like it. It's comfy and out of my "style zone". I definitely favor more hour glass emphasizing designs , but for a casual work top, this is perfect. I wore it to work Friday and to a party after work with slim black pants. There were many compliments but more than that, this top just felt good. I wish you could see how the foiling sparkles. I did make my buttonholes a tad too big and they shift, therefore the wonkiness. I am going to tighten them up and then all should fall evenly as it does when I pay more attention to such things.
As with most Marcy Tilton designs, the collar sort of does its own thing, flopping this way or that and that's OK. I like an interesting collar. The pockets add a LOT of volume to the garment. I was able to bring them under control with some pressing. This is ideal for someone choosing to hide a tummy or waistline. My fingers are pointing to the actual seam line for the dropped shoulders. I am pleased with how that turned out. Here are more details.


I foiled an irregular rectangle on the back. I think it adds to the Japanese vibe this top sort of has. The collar is cut on. The back has some interesting details at the lower level.

There is sort of a pocket effect going on but actually its a tuck with zigzagged topstitching separating the sections, Marcy's idea, not mine. I like it.

Here you can see the pocket. The pattern piece has a very unusual shape to pull this off. I found the pocket really billowed out front but with some pressing came under control. The one thing I don't like about the design/pattern is the sleeve cuff. I love that there is an option for a fold back cuff with a slit as I really detest long sleeves. BUT, that slit is on the underseam of the sleeve and barely visible. You can see it here, almost. I would have preferred more effort put into the sleeve design so the slit would be on the outside of the sleeve, the norm. But I will live with it. By having the slit of the cuff tied into the underarm seam, it is easier to pull off. A split cuff would definitely take more thought and pattern pieces, probably a facing, to pull off. But I would have liked that better.


There is a definite "swing" shape to this garment which you can see above. Heck, that's what makes it so comfy. I've always liked me a good swing top or jacket so I am comfortable with this.

Pattern: 
This pattern is Vogue 9035, a Marcy Tilton design. It has a dropped shoulder, a cut on collar, interesting back detail and a very unusual bodice front that incorporates the bodice into the pocket, if that makes sense. It has a definite "swing" silhouette to it. I found it comfortable, stylish enough to get many compliments and a very interesting design. Tilton's patterns have not often worked for me fit-wise but this one was perfect. I have narrow shoulders and full biceps and a C cup. I made this in a size 6 with absolutely no alterations. FWIW, length alterations could be difficult on this pattern due to the unusual shape of the front bodice.


Fabric:
Fabric was a linen/cotton blend made by Kaufman that I purchased from Fabric.com.  It is 55% linen and 45% cotton. I have used this blend before and really like it. It has been washed and does that non wrinkling linen thing that comes from washing. I love that it had the linen look but not the wrinkles.

I did Hong Kong seams as you can see. They are made with bias strips of poly charmeuse. I love how this looks on the inside. It makes me feel good. When I wore it to work I wore a black negative ease tee underneath, mostly because it was cold out. I didn't hesitate to take the top off and show my friends the inside. As my twenty something workmate said "I would wear that inside out". I bound the sleeves exactly the way it is shown in the latest issue of Threads, where the bias binding is attached using the same seamline as the sleeve, folding it over and ditch stitching in the well of the seam. Then the fabric was cut back to the seam line underneath.


Construction:

This is a pattern where you MUST follow the directions on the instruction sheet very closely. Marking all notches, circles and squares is critical here. The bodice/pocket construction is very unusual. I think I paid more attention to the directions on this pattern than I have on any other in a long time. One of the challenges were the Hong Kong seams. I decided I want to do this from the get go, but when it came to the pocket area I was stumped. I ended up doing them "after the fact" only finishing the pockets around the top three edges after they were installed. It was hard to figure out what I could HK seam before it was all constructed but you can do the most of it before seaming if you pay  close attention, particularly in the pocket area.

I did "foiling" on the pocket facings and the collar facings and the rectangle in the back bodice before any construction started. This pattern, like most Marcy patterns, is ripe for embellishment. Have fun with that!

In conclusion:

I really like this top. It's a bit "jacket-y" but that's OK in my cold climate. I love the linen blend fabric, the foiling and the uniqueness of the design. Being comfortable adds to my enjoyment as well. It was a fun challenge to sew and I really enjoyed that aspect. Will I make it again? Probably not as it is rather unique, but I really like the way the shoulders and upper bodice fit. That makes it a winner in my book.
********************************

Last night we were able to get some fresh dug Maine clams up here in the boonies and I made us a dish of Clams and Linguine Rosa from Mario Batalli. What a feast!..............Bunny

Saturday, September 12, 2015

Vogue 9035, a Marcy Tilton top


My affair with designs by the Tilton sisters continues. It's one of those love hate relationships. I love the designs but they can sometimes hate me.  To make them work for me takes just that, work. I am now up to the challenge and hope this one's a winner. I need tops for the upcoming season and this looks comfy and perfect for work. I can see it with some slim black pants, which currently don't exist in my wardrobe. I have to do something about that!

I will do view A. The difference is simply button placement and the cuffs. I plan to wear these at 3/4 length folded up. The fabric is identical on both side so that should work nicely. Now for the fun part!


The fabric is this yarn dyed black linen blend from Kaufmann/Fabric.com. It's identical on both sides which is suggested for this pattern. It is casual and has a nice hand, a bit heavier than chambray but not as heavy as denims.  I do fear it could look a bit prison matron though. It needs some interest added. For now that will be heavy black topstitching and a bit of sparkle. I am thinking of doing some "foiling" on the collar facing, pocket edges and button areas. I will post more on the actual foiling process later but here are a few samples"


I have two rolls of silver foil. One is matte and the other VERY shiny, like chrome. My accents on this top will be VERY light handed. I live in mortal fear of anything on my body having that decorated sweatshirt look and this is no different. I am favoring something on the idea of the thin squiggly lines that the red arrow is pointing to. It is shinier IRL and really a light touch. But these things evolve with me as you know. 

In the meantime, the pattern  is cut, measured and ready to go. I may be the ultimate  "don't follow the pattern" chick, but here it is absolutely necessary. This pattern has such odd shapes and twists that I am now on my third reading and think I'm ready. Marcy Tilton and Issey Miyake went to the same design class for this one. Lots of attention will be necessary. But there are no big techniques involved otherwise so it should go pretty fast. And I do have to give myself over to the more casual "non fit" of her garments.  Not sure about the buttons yet, though. I always save that decision to the end as I never know how much of an accent, or not, I want them to be. I rarely buy buttons when I buy everything else for a project. 


And I am breaking my iron clad rule of making only one thing at a time. I am also working on DD#2's cushions for her window seat. Her patience with me is immeasurable! While I wait for zips, it will be The Foiled Top.
*******************************************

Thanks, everyone, for the lovely, encouraging comments on my jean jacket. I do love to recycle! There will be more to come along those lines as I have found a wonderful new source for projects locally. For 25 cents, yesterday, I bought a very new looking real silk charmeuse top with the most amazing trim and a good amount of fabric. It definitely has potential and if not, what they hey. I had a half hour of awesome entertainment for twenty five cents. Doesn't get much better than that.....................Bunny


Sunday, March 29, 2015

Vogue 8499 #2, the beige linen skirt


I am so stinkin' happy with this skirt! I think it looks quite upscale and does more so in person when you see the yummy linen up close. Since this is the same pattern I reviewed in the last post I am going to focus on what I did differently.

Fit: 
I followed Lorrie's advice and my gut instinct and took three inches of ease out of the area of the skirt above the zippers. It looks so much  better and more flattering now. All I did was take out 3/8ths of an inch on each seam = 3 inches. I tapered to nothing above the pocket zippers. I am really pleased with the fit now.

Construction:
First, my apologies to Mrs. Charisma/Smith. Yes, I whipped out the simple black version on an afternoon but this puppy took me all day, 9-5, and I loved every minute. What took so much longer?

The zippers! Why? I didn't do them as the pattern suggested. The pattern has you put the right side of the lower side of the zipper to the right side of the pocket top. Then you make a seam . Turn over and topstitch. What I didn't like about this is that both sides of the zip were being treated differently. I wanted both sides to have the same look, whatever that was. So I serged the top edge of the pocket and pressed in a small hem. I placed the zipper bottom edge ON TOP of the right side and top stitched with a triple zigzag stitch. That stitch gave the white garment a bit more casual interest.  When it was time to put the pocket on the skirt I simply laid it on top of the side front and stitched the top edge of the zipper in the same way.

Now the pocket was installed the same way all around. Hubby says I can rob a store in this skirt! Those are deep pockets.

Those were the pocket zippers. Now I had to do the back zipper. I figured it wouldn't hurt me to  look at a few videos and tutes so off to the Web I went. There are MANY "exposed zipper tutorials" out there. None had the look I wanted. There were some real good ones as far as installation but they all had the two bottom "legs" of the zipper folded under and topstitched. I wanted something with a bit of a cleaner finish.


I was able to slip the zipper legs behind the fashion fabri and still have the zipper fully exposed and stitched for the rest of it's length. It was a bit involved to do this and I will have coming up a separate post on how to do it. It took LOTS of pictures.

This back CB  zipper was also triple zigzagged to secure.


This zipper LOCKS and that rocks! It actually clicks in and is very secure, love it. I love the vertical line this adds to the design as well. You can't see it here but the bottom of the zipper, on the beige linen, it is also triple zigzagged. I am on some sort of triple zigzag binge. Don't know what that's about!

Another addition to the construction, which you can see above, is that I topstitched the top edge of the waistband. I think that is always a more professional finish to an elasticized waist. I did that after the top edge was serged and turned down and pressed. Then I put in the elastic under the fold and simply stitched in a casing.


At this point, the back casing area was looking pretty nasty. So before I closed up the casing I went digging and came up with some beige silk dupioni. That was wrapped around the end of the casing and stitched in place when the casing was stitched. The top edge you see is the actual selvage edge of the dupioni. It is so much prettier now.

Again, all seams were sewn, serged, pressed to one side and topstitched.

I think you can see why this one took a full day to finish but finished it is and ready for the warm weather.

Fabric:
This linen is much heavier than the black linen of the original effort. It is what I would call a Home Dec Linen or bottom weight. For some reason, this skirt is heavy. The pockets I thought were a little too "Marcy" for me, I now love. The pockets are big but big means lots of fabric and lots of weight. That  keeps the skirt from ballooning out and looking silly. I really like the way they affect the drape of the garment and the weight they add.

This pattern has now been given the sacred status of


I love that. Highly recommend......Bunny


***********************************


Do you think I may have worn out my IDT, aka, walking foot? I can get it to work just fine with this bull clip!..........Bunny

The Ray Pinafore, 2025's Epic Fail

  Happy New Year and welcome to my epic fail of 2026. I guess you have to have one, right? This is the Ray Pinafore from Paper Theory Patter...