First off, my iron died yesterday. As I was ironing the sleeves water literally poured out of the steam holes and soaked the sleeve and ironing board and my feet. It also stopped heating and I couldn't bring it back. I have had 3 Rowentas over the past 20 years and they alway end with a bang. I have felt they provided me with good service during that time. I liked that they were heavier and therefore did some of the work for me. This is the world of Pinterest, Pattern Review, Amazon and Epinions. Based on a few sewists I respect I have been gunning for the Reliable for some time. But then I read the reviews. The current top of the line Rowenta came out quite a bit ahead so that's what I chose. One click later and it will be here Tuesday morning by noon! Love that Amazon prime! In the meantime I am stopped in my tracks without an iron but did sew on the facings and the sleeves were completed. Here's the end result and how I got there.

I figured out I needed a facing of five inches to make this work and attached that to the sleeve lining with a seam. Stitching followed the lines I had drawn. you can see the front and back below.

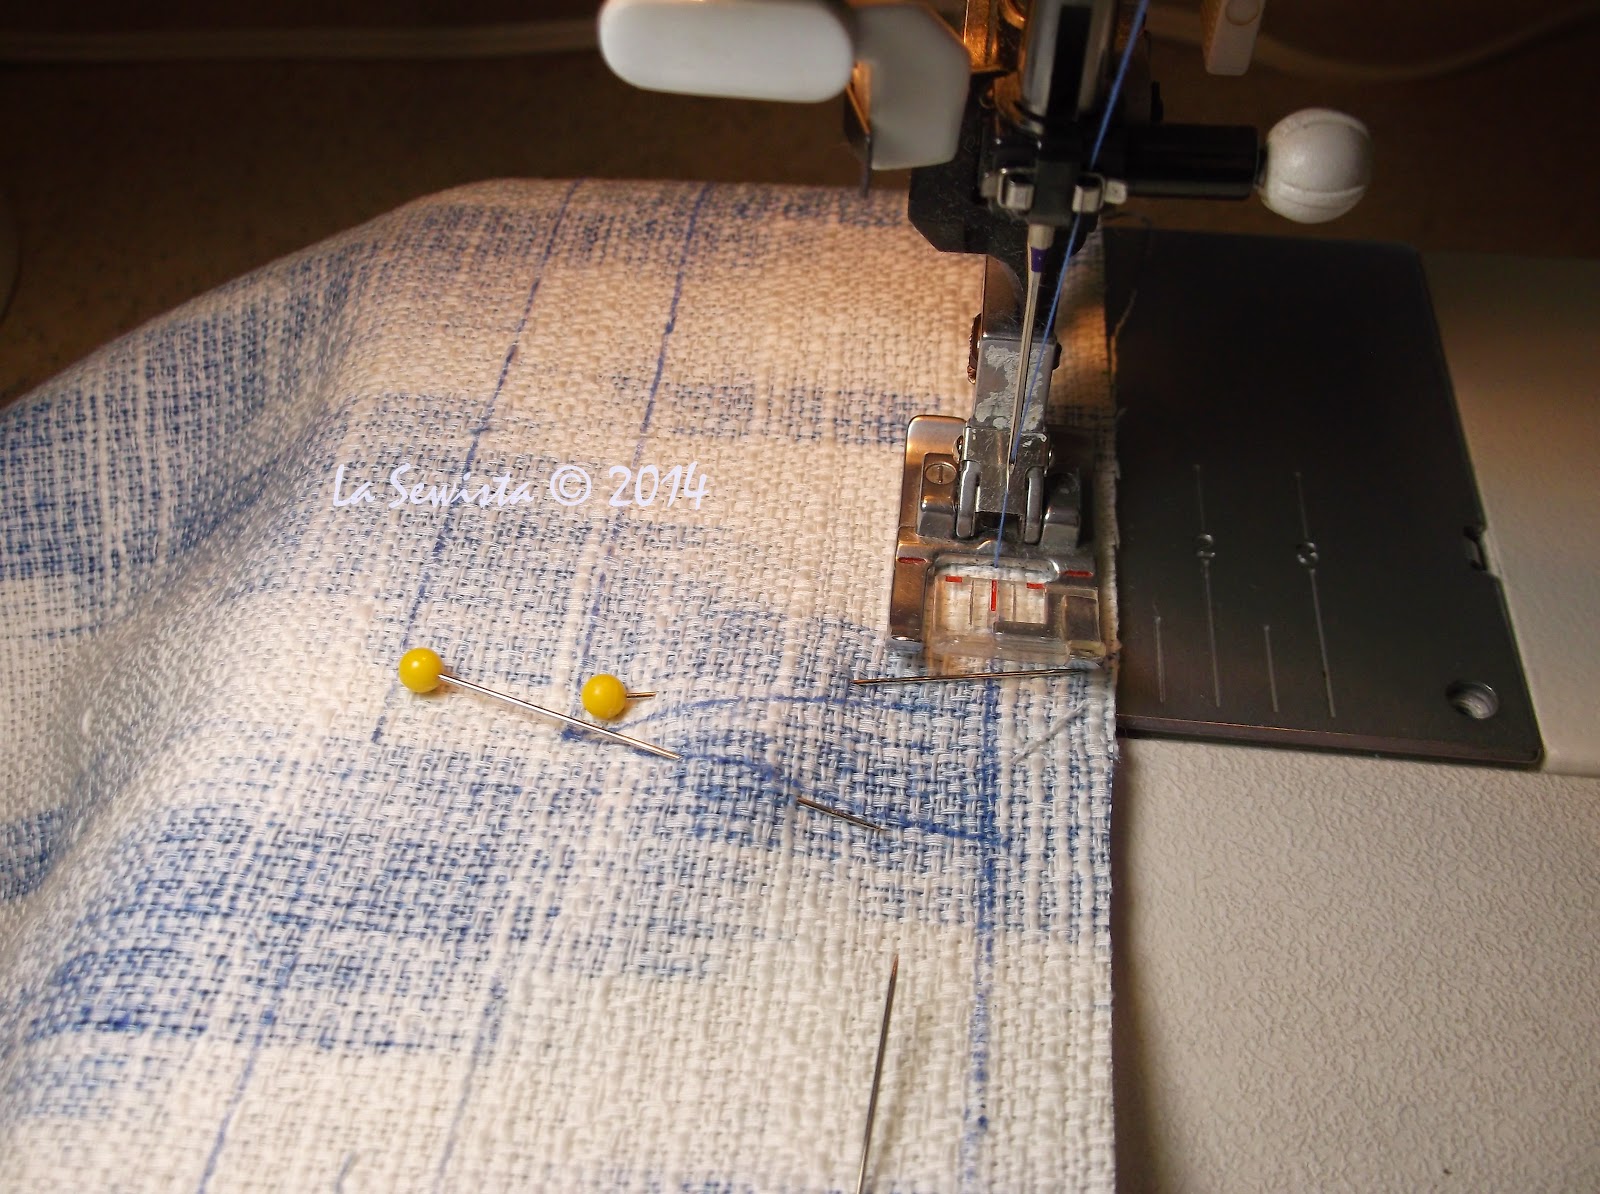
When the stitching approached the slit I dialed down the length to 1.5. This fabric is really ravelly. I Fray checked each point on both the facing and ironed dry before cutting. Loved those drops of Fray Check shining in the photo!


The edges were ironed favoring the sleeve side so that when the cuff is rolled up there is a smooth look.


On each side of the zip I folded back the zip at a 45º angle. With just twisting it to the side it was not easy to get each zipper top matching on each side of the bodice. With this sharp angle I could measure and bend them both back equally. This will now get sewn into the facing seam and here's the results. Hope this helps any who decide to make this jacket.

I figured out I needed a facing of five inches to make this work and attached that to the sleeve lining with a seam. Stitching followed the lines I had drawn. you can see the front and back below.
When the stitching approached the slit I dialed down the length to 1.5. This fabric is really ravelly. I Fray checked each point on both the facing and ironed dry before cutting. Loved those drops of Fray Check shining in the photo!
The edges were ironed favoring the sleeve side so that when the cuff is rolled up there is a smooth look.
Done!
To finish the sleeve construction I did the Nancy Zieman sleeve technique that you can find on the Tutorial Page. Easy Peasy! The sleeves will then be put in and bound with the Bemberg lining. At this point the iron croaked and I decided to have a beer and call it a day. This morning I dealt with what I consider an issue with the pattern that I would like you to know about.
I remember from the first jacket I made from this pattern that when I got to the point of attaching the collar and facing the result of the junction of the collar, facing, and zip was very messy once sewn and turned to the right side. I had to do some back peddling to make it presentable.
The pattern has you stitch the separating zipper to the center front seam at the 5/8ths line all the way up and down. Fine. Then it has you butt the collar right up to it. Fine. The facing is placed on top and stitched all around. Not fine. What this does is cause the zipper to twist over the collar and look totally bad. I have actually looked at some reviews of this pattern and you can see the issue if you see any closeups. Here's how I handled it this time. If you plan on making this pattern I would definitely keep this info somewhere.
There are some green arrows showing how the zip would twist over the collar and then back to the facing if done the way the pattern leads you. Hopefully I will have this all ironed nicely for you to see soon. The iron death sure took care of my finishing this today. One of the great things about bound linings is that when you are done, you are done. No making a second garment and putting it inside. Love that.
I think the gremlins are in my house. We are going this afternoon to buy a new stove, dishwasher and hood. Seems they and the iron all decided that living in this house for ten years was enough.......Happy sewing!........Bunny


Sorry to hear about your iron but three in 20 years is a pretty good score. I love this fabric. This will be beautiful when it is finished. x
ReplyDeleteThanks.
DeleteI would love to hear about your new iron when you receive it, I need a new one too, as well as a better, non-wobbly ironing board. It seems like they don't make things like this to last anymore.
ReplyDeleteI will definitely let you know how it works out. I am sure there are strong opinions in each camp. FWIW, I can't use a steam generator iron, as much as I would like to. While my total sewing space is large, the sewing room part is small and I do my ironing in the adjoining family room. So hanging a tank or cord or whatever from the ceiling is not an option.
DeleteSorry to hear about your appliance uprising, rebellion and subsequent deaths. I bought a Rowenta refurb about a year ago. I think it was a Groupon offer, or something. It's nice and heavy, has 200 steam holes, etc, etc. It has not been totally satisfactory, but if I stay within the guidelines the iron has imposed, mostly how much water it will allow in the reservoir before leaking, it works well. I may go with an Oliso next time.
ReplyDeleteMy iron died in May of this year. I tried the Reliable but it ended up leaking and spitting no matter what I did so I returned it. I then purchased a Black & Decker Digital Advantage (much, much cheaper than the Reliable) and I love it. I hope you love your new Rowenta!
ReplyDeleteI have a mid-range Reliable (about two years now)--no problems so far. I hope your new Rowenta works out. Love the jacket fabric.
ReplyDeleteI love the nice heavy Rowenta, I just make sure I empty it each time I finish ironing. No leaks that way! I feel your pain with the appliances. We remodeled the kitchen six years ago and have already replace both the stove top and the oven. Not fun at all. I would also love to get a steam generator iron, but like you I iron in the family room so it's not an option.
ReplyDeleteOh, and the jacket is awesome!
ReplyDeletethanks, Cynthia.
DeleteIrons are such a mystery. I had some baaaad luck with a couple of different expensive Rowentas. I've now had 2 Reliables and have loved them, though I feel like the first one should have lasted longer. But I really love my Reliables better than ANY Rowenta I have owned. And then others have the completely opposite experience, so who knows?
ReplyDeleteI've had a Laura Star Iron for 10 years and love it. It does seem that appliance are in cahoots with each other...when one goes..2 more go...a series of 3 seems to be the norm. The jacket sleeves are looking good and thank you for that zipper trick!!! Good luck with the new iron and the rest of the jacket!
ReplyDeletethanks, Jo.
DeleteI'm a Rowenta girl just keep replacing them when they die! Glad yours will be in soon!
ReplyDeleteHi Bunny, sorry to hear about the appliances have died on you.............what a pain; but the joy of the new iron will overtake the hiccup.
ReplyDeleteLoving the jacket.
I keep researching irons as I fancied one like Kenneth D King suggests...................but, you can't get them here in the U.K. but I have found some Italian irons. Checking out what tailors here use as I need something that has powerful steam!
I inherited my grandmother's GE iron that was a gift for opening a bank account. She used it daily for decades and I did for another 10 years. My new ones are a roll of the dice- costly Rowentas never made it to their 2nd birthdays. My Reliable is going on 3 years old and I love the control I get. Who knows what tomorrow will bring? Nice jacket and method- thanks.
ReplyDeleteYou are welcome, Wendy.
Delete