This was a really fun make. It had it's challenges but all were pretty much of my own making. I made creative decisions not recommended in the pattern which required a muslin and a bit of prayer but they worked out with less stress than I thought. It was a great project for a bitter cold couple of weeks in January and jump started my lagging sewjo. It's plan was to be part of a few garments for our vacation next June, far more enticing than winter clothing right now!
Here were my challenges:
*The patterns specifies 2 or 4 way stretch knits. I wanted to use wovens. What size do I begin with?
* I was inspired by seeing the pattern on a 5'10" beautiful young woman. I am five feet tall definitely not young. The designer is five foot six inches tall. It would need accommodating. How?
* I had limited yardage of two vintage linens. How to make them work and in what complimentary fashion? Would I have enough?
* Would I look like a clown when done?
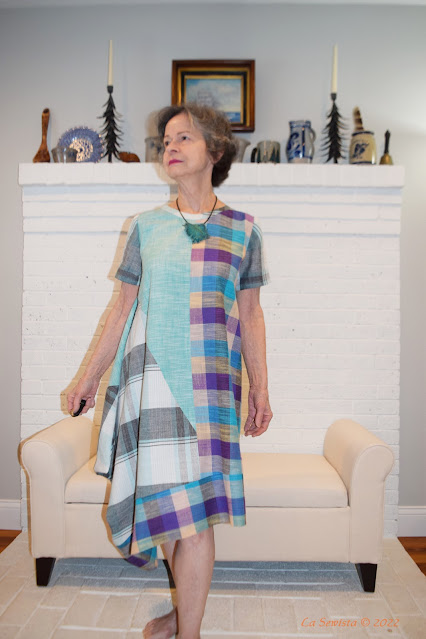
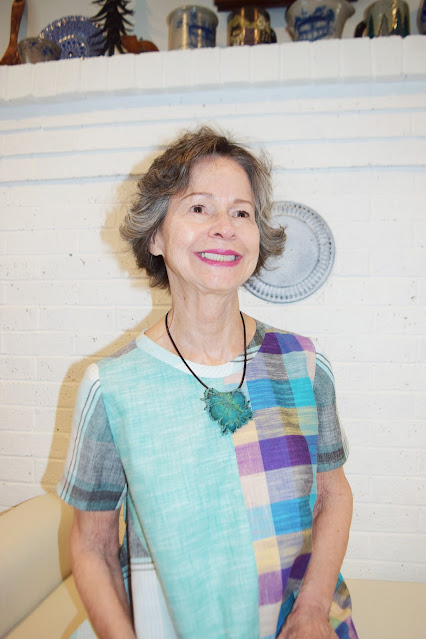
I think I met the first three pretty well. I will let you be the judge of the last challenge. I will say hubs loved it. His words, " ...very nice colors. That's really pretty on you. What's that big thing on the side? A pocket?"
Here is how I went about meeting those challenges.
Pattern:
This is the Memphis Dress from the Sewing Workshop. I was smitten from the first time I saw it on one of their employees on their weekly youtube video. I still long to make a version like her's, a variety of textured white knits, gorgeous! But this was a good start to work out the fit.
You can see my muslin here and read the blogpost about it as well. I did numerous adjustments I'll address in a moment some of which came post muslin. The muslin was to find my fitting issues and was made straight from the envelope. It was too long, too wide in the shoulders and just a LOT. It's easy for us petites to get overcome by style and this needed to be tamed down a bit. I do think the various fabrics broke up the volume in a good way and helped.
The pattern itself was quite easy to put together. Instructions are clear. It's pretty much all straight lines. Every notch and dot fit to perfection as they always seem to do on all Sewing Workshop patterns I have used. There is a lot of bias to watch out for but if being made in a knit fabric, as designed, you probably would have no issue.
I was concerned about size. The inspiring model said that when she used a woven she went two sizes larger. The finished measurements are on the pattern and website. The smallest size, XS, had a bust measurement of 40 3/4 inches finished, more than enough for me. I went directly for the XS. with fingers crossed. Below the apex there really was no other horizontal fitting, another plus for this pattern.

Fabric:
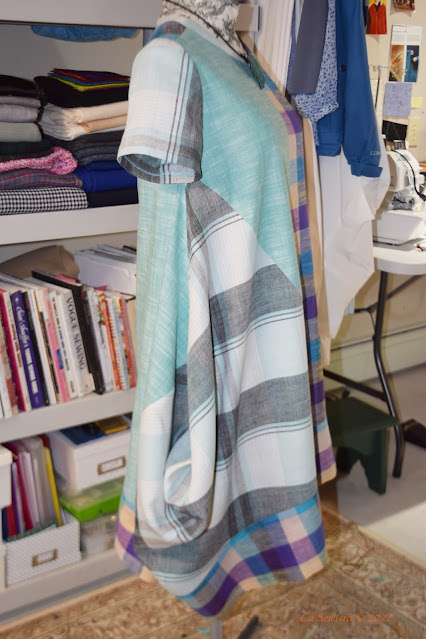
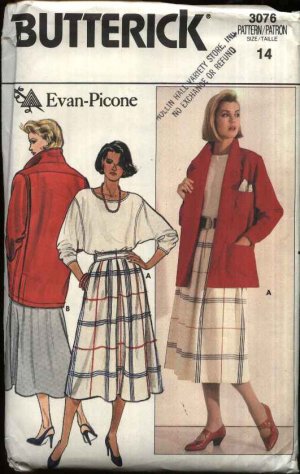
I like to keep all my fabrics out in the open on shelving, not that I have a huge amount. I keep like types together. I had two vintage plaid linens right next to each other and not long ago they told me they needed to be put into the same garment. The each were plaids and each had a bit of aqua connecting them. The picture above looks more blue but is is greenish IRL. Both plaid fabrics in the Memphis dress are linens, vintage, and gleaned from thrift shop visits. The one above is an Evan Picone garment and a really nice quality. Both are yarn dyed. This skirt had 3 plus yards of length. I took it apart for yardage. It was a size 18 and is clamped around my form in the picture. Here is an Evan Picone pattern, early 80s my guess, showing his penchant for plaid skirts. I have no recollection at all of the history of the purple check/plaid. I see linen, I buy it.
Design 101 - do things in odd numbers. It's far more interesting. I needed that third fabric. I brought my first two with me to my local quilt shop to see what they had in their ever increasing group of garment fabrics. I found a nice Kaufman linen/cotton blend in the right aqua color to be the third fabric. Now I just had to sit down with my pencil and sketch pad and figure out the color blocking.
Color blocking figured out. All three fabrics picked out and ready. Let's cut!
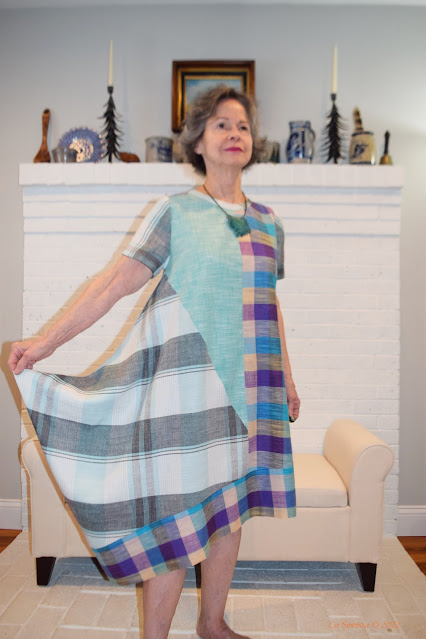
This presented a challenge or two. I had no idea if all the pattern pieces would fit on what I had to work with. I thought they would. They didn't. What is called the "drape", that large piece my husband called the "pocket", has bias edges and I wanted to specifically plan those big black bars. I was about two inches short of making the piece fit. Ackkkk.... Two options: piece in a little matching piece perfectly OR put a seam in where the drape would naturally fold and match that, hopefully perfectly. I went for option #2 and you would never ever know there was an issue. It falls beautifully and you just don't notice a thing. If anything, I think it enables the drape to fall better. Can't see it, can you? If you click on the pic below there are arrows pointing to the seam.
What looks like a mismatch in the hem band at left is simply a fold in the fabric.
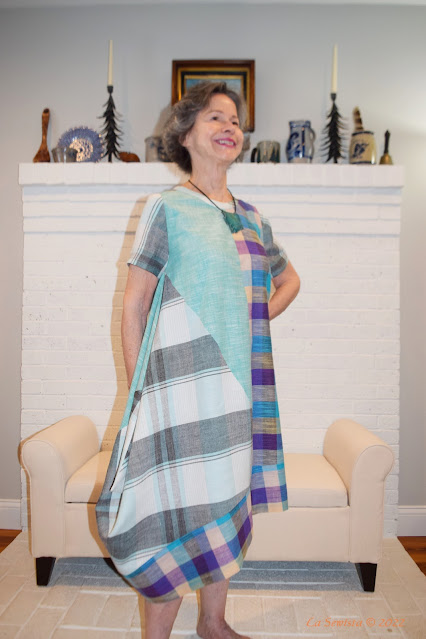
I love how once you move a bit in the dress it makes this wonderful curve at the side with the drape.
Other than that section I had plenty of fabric to lay out and cut as needed in all the colors.


Wow! I just love this dress, you did a wonderful job on it and the fabric choice is beautiful. The Azores are beautiful island (enjoy!) and this dress will be perfect.
ReplyDeleteThanks, Graca.
DeleteSo stinkin' cute! And a great dress for a warm place! You look cool...and kewl... ;-)
ReplyDeleteThanks, Lisa.
DeleteYour fun and stylish dress will be perfect for the Azores. We've been there twice and thoroughly enjoyed the people. Karen
ReplyDeleteAbsolutely stunning! Combining fabrics and colors can be tricky but this dress just shouts, "it works!" You make the most comforatble clothes so chic! The necklace looks like it was made for the dress. Thank you for sharing all the steps and tips and tricks with this pattern, Bunny!
ReplyDeleteI love what you have done here-creative thinking and pattern mixing at its best. Your version shows off the wonderful lines of this design so much better than the original pattern shows. Sophistication with a cutting edge to boot! Are you on Pattern Review? Take care, fellow sewist, Terri
ReplyDeleteWhat makes this dress work for me is your balanced layout of the patterns, your design, your contributions. Personally, I run the other way from styles like this, they look like feed sacks, to be honest. It is strictly your artistic handling that makes it a stunning garment.
ReplyDeleteWell, Ms. Bunny, there is no clowning around in this adorable dress. All of your changes seem to have worked out for the better. I love the colors and stripes in your linens. They go together very well. And the weighted hem is a great idea too. It does help with the drape of the dress. All around a great looking dress. I would take it on vacation too. ;-)
ReplyDeleteMs. Becky is a gem. That necklace is beautiful. What a great birthday gift from your daughter.
Great review on this dress.