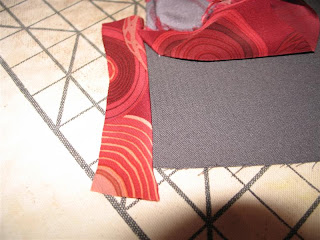
This can be a nasty little area to deal with. It is often forgotten about until the lining is all bagged. Then you are faced with a raw edge from the bottom hem edge to the jump in the lining hem. I've yet to see a pattern that refers to this either. Sometimes the lining can cover a lot of it. Sometimes it can be turned under with a tiny hem. If you deal with it before installing the lining you can finish it a couple of ways. One is to simply turn it under about a 1/4 inch and hand stitch. The other, and in my opinion a much nicer finish, is a simple little Hong Kong seam finish on this edge. Here's how I go about it.
 Sew the facing to the lining. Iron the seam toward the lining. One half inch above the end of the seam start trimming the seam back to a `1/4 inch. Before proceeding, pin the lining and its seam allowance way out of the way.
 Cut a bias strip of the lining fabric a rough inch and a quarter wide. Match the edges with the raw edge of the SA that you DID NOT trim. Sew a 1/4 inch seam. Trim it down to a healthy 1/8 of an inch. Be VERY careful that your lining is folded out of the way and that you don't cut it by accident.
 Press the bias away from the facing. Trim it evenly to about 3/4 of an inch.
 Wrap the bias around the seam allowance tightly and press. Be careful of your fingers. I used a press cloth which is a little awkward but can be done.
 Set your stitch length at 1.5 and stitch in the ditch to catch the seam allowance on the back. Press. Trim off the extra fabric at the ends of the Hong Kong finish. This is now ready to show its pretty face to the world when you whip open your new coat and casually expose that expensive silk lining! ;) See the top photo.........You know, I wish they had a name for this intersection. Maybe there is one. If you know it let me know. Its kind of like that funny space between your nose and your upper lip. What's that called???......Bunny


I'm bookmarking this for the next jacket or coat I make. Thanks!
ReplyDeleteGreat illustrated tutorial, Bunny! Thanks so much for sharing. I look forward to seeing the final product, I know you're getting close...
ReplyDeleteGlad to be of help. I will go put it in the tutes now.
ReplyDeleteThanks. I am bookmarking it too :))
ReplyDeleteNice finish. I do this sometimes - depends on how involved I want to be with the project. More often than not, I press the seam allowance of the facing/lining toward the facing and handstitch it down to the hem when finishing the hem.
ReplyDeleteKathleen Fasanella calls her tutorial on this very spot, "The Unnamed Tutorial", so I guess no one knows what to call it. Except maybe "that rotten little spot" or something more colorful. :)
ReplyDeleteThat space between youe nose and upper lip is called the philtrim.
ReplyDeletevery nice
ReplyDelete