
Covid, oh, Covid, what hast thou done to me?
My sewing for the past months has been totally influenced by the Covid monster. It has provided lots of time to sew and no where to wear many of the lovelies I have made. It's been an evolution. It started with me attacking my queue of garment dreams and I got a lot of those done. They are still waiting for their public moments. It has continued to evolve to searching out new designers and garments and putting those in the queue. However, my desire to make those garments is often fueled by a future event, a trip, a milestone. None of that is happening with this virus and my interest wanes. But Covid keeps opening it's opportunistic window. The latest is my return to utilitarian sewing. See my recent post here on mending a more technical garment. I have more mending accomplished and will share with you the more interesting achievements as they come along. There aren't many as you know most mending is pretty mundane. I am intrigued by visible mending, however, and have a cashmere sweater awaiting that.
I've always wanted to make my own undies, not bras, corsets or lingerie, just nice, comfie, well fitting underpants. It's a holdover comfort thing from my childhood. My grandmother made all my undies as a child until she passed away. They were always of fine all cotton batiste, mostly cut on the bias. They were lovely. She would send me back home with a stack at the end of every summer.
So Covid has rung the bell and called in the teacher and I am learning to make my own undies.
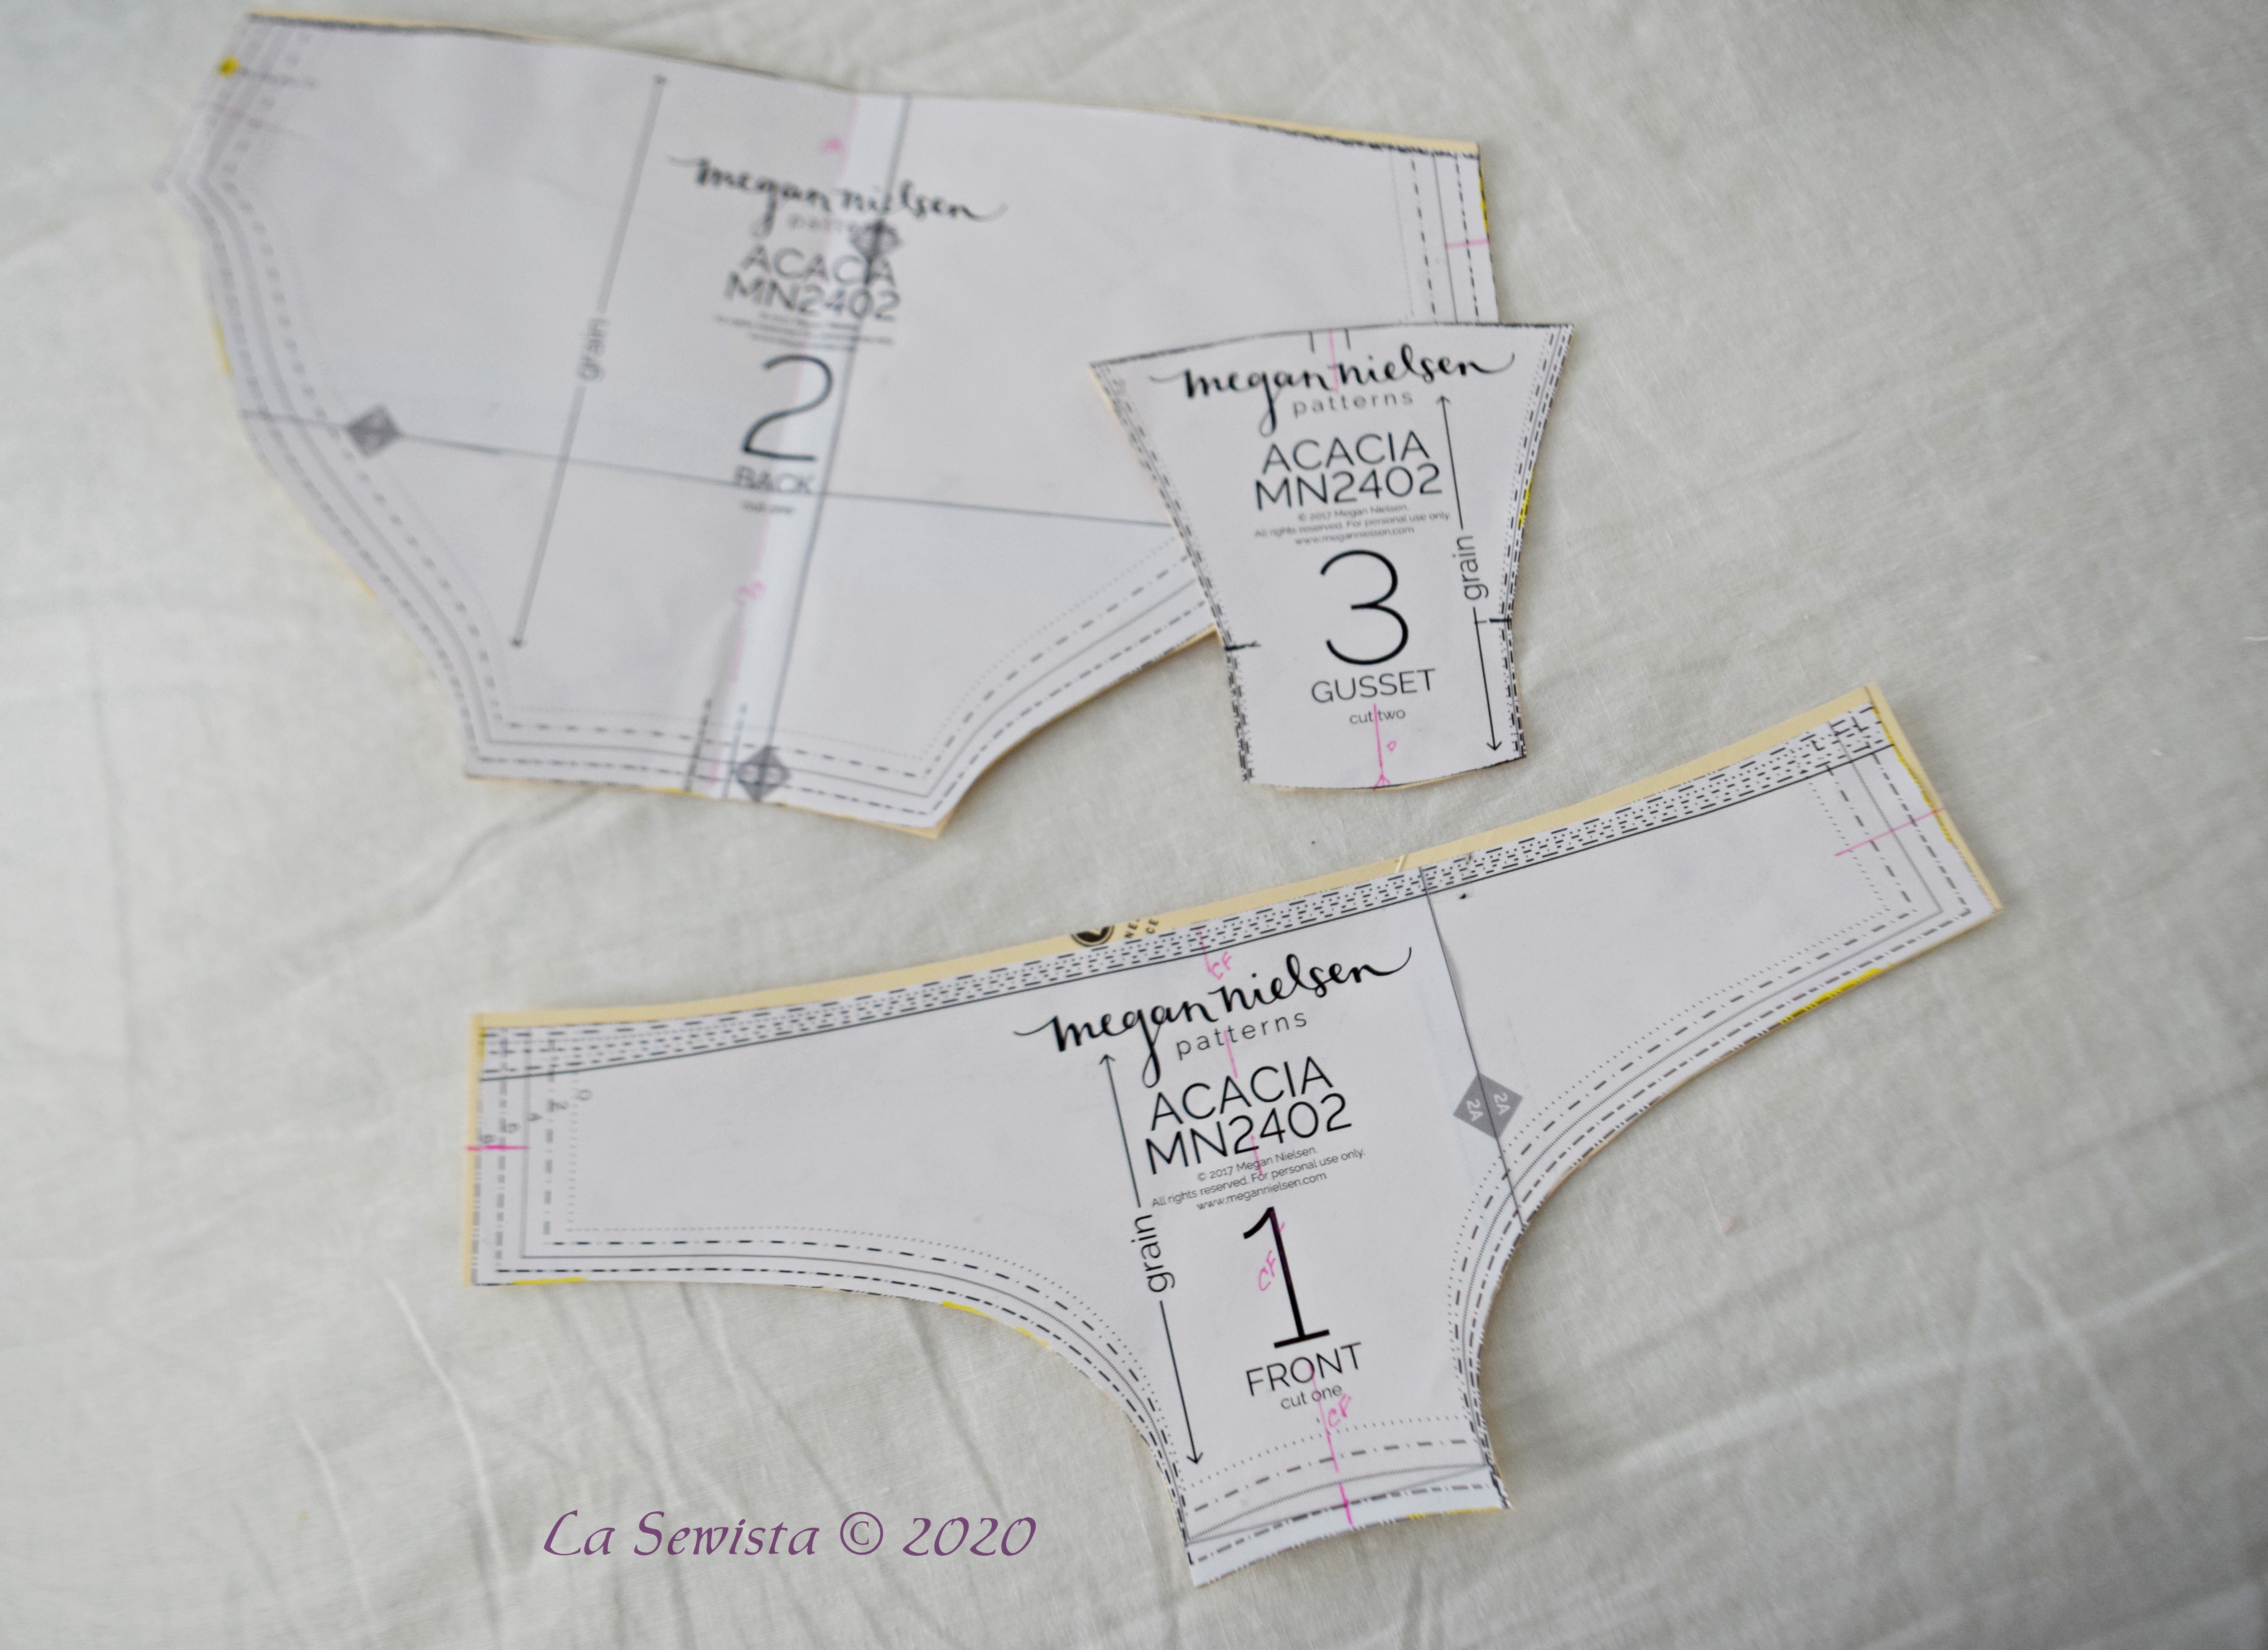
The pattern I used is the Acacia Underwear pattern from Megan Nielsen. It is a free download if you sign up for their newsletter. It will click over to zero dollars when you check out your cart. You can see on the pattern that I added a little bit to the top front and side front. I was actually between sizes and I also prefer my bikinis a little higher cut on the tummy but more on that in a bit. After making the first pair I made the adjustments and committed the pattern to oaktag. It is only the three pieces, front, back and crotch gusset. A suggestion: For me I found it easier to mark the center of each piece, the crotch gusset top and bottom, the back, top and bottom, and the front, top and bottom. I also marked the center of the sides. You can see this in the pink ink on the pattern. I just always do this on any pattern. It is a habit and the way I match pieces together even if they have other markings.
For fabric, this is a scrap keeper's dream. I have three pair to show you and one is an ITY knit, another is a Modal/spandex combo and the third is a cotton/poly knit. With this pattern you cut two crotch gussets, one for the outer side and one for the inner. I like 100% cotton for the inner gusset and use rejected tee shirts for that piece.

Don't we all have tee shirts with dreadful logos on them tucked away somewhere? My husband does and he gave me a bunch of never worn white ones. This piece is so small that a couple of tee shirts can make a lot of gussets.
When it came to construction, I went in all sorts of directions, with each of the three having differences.
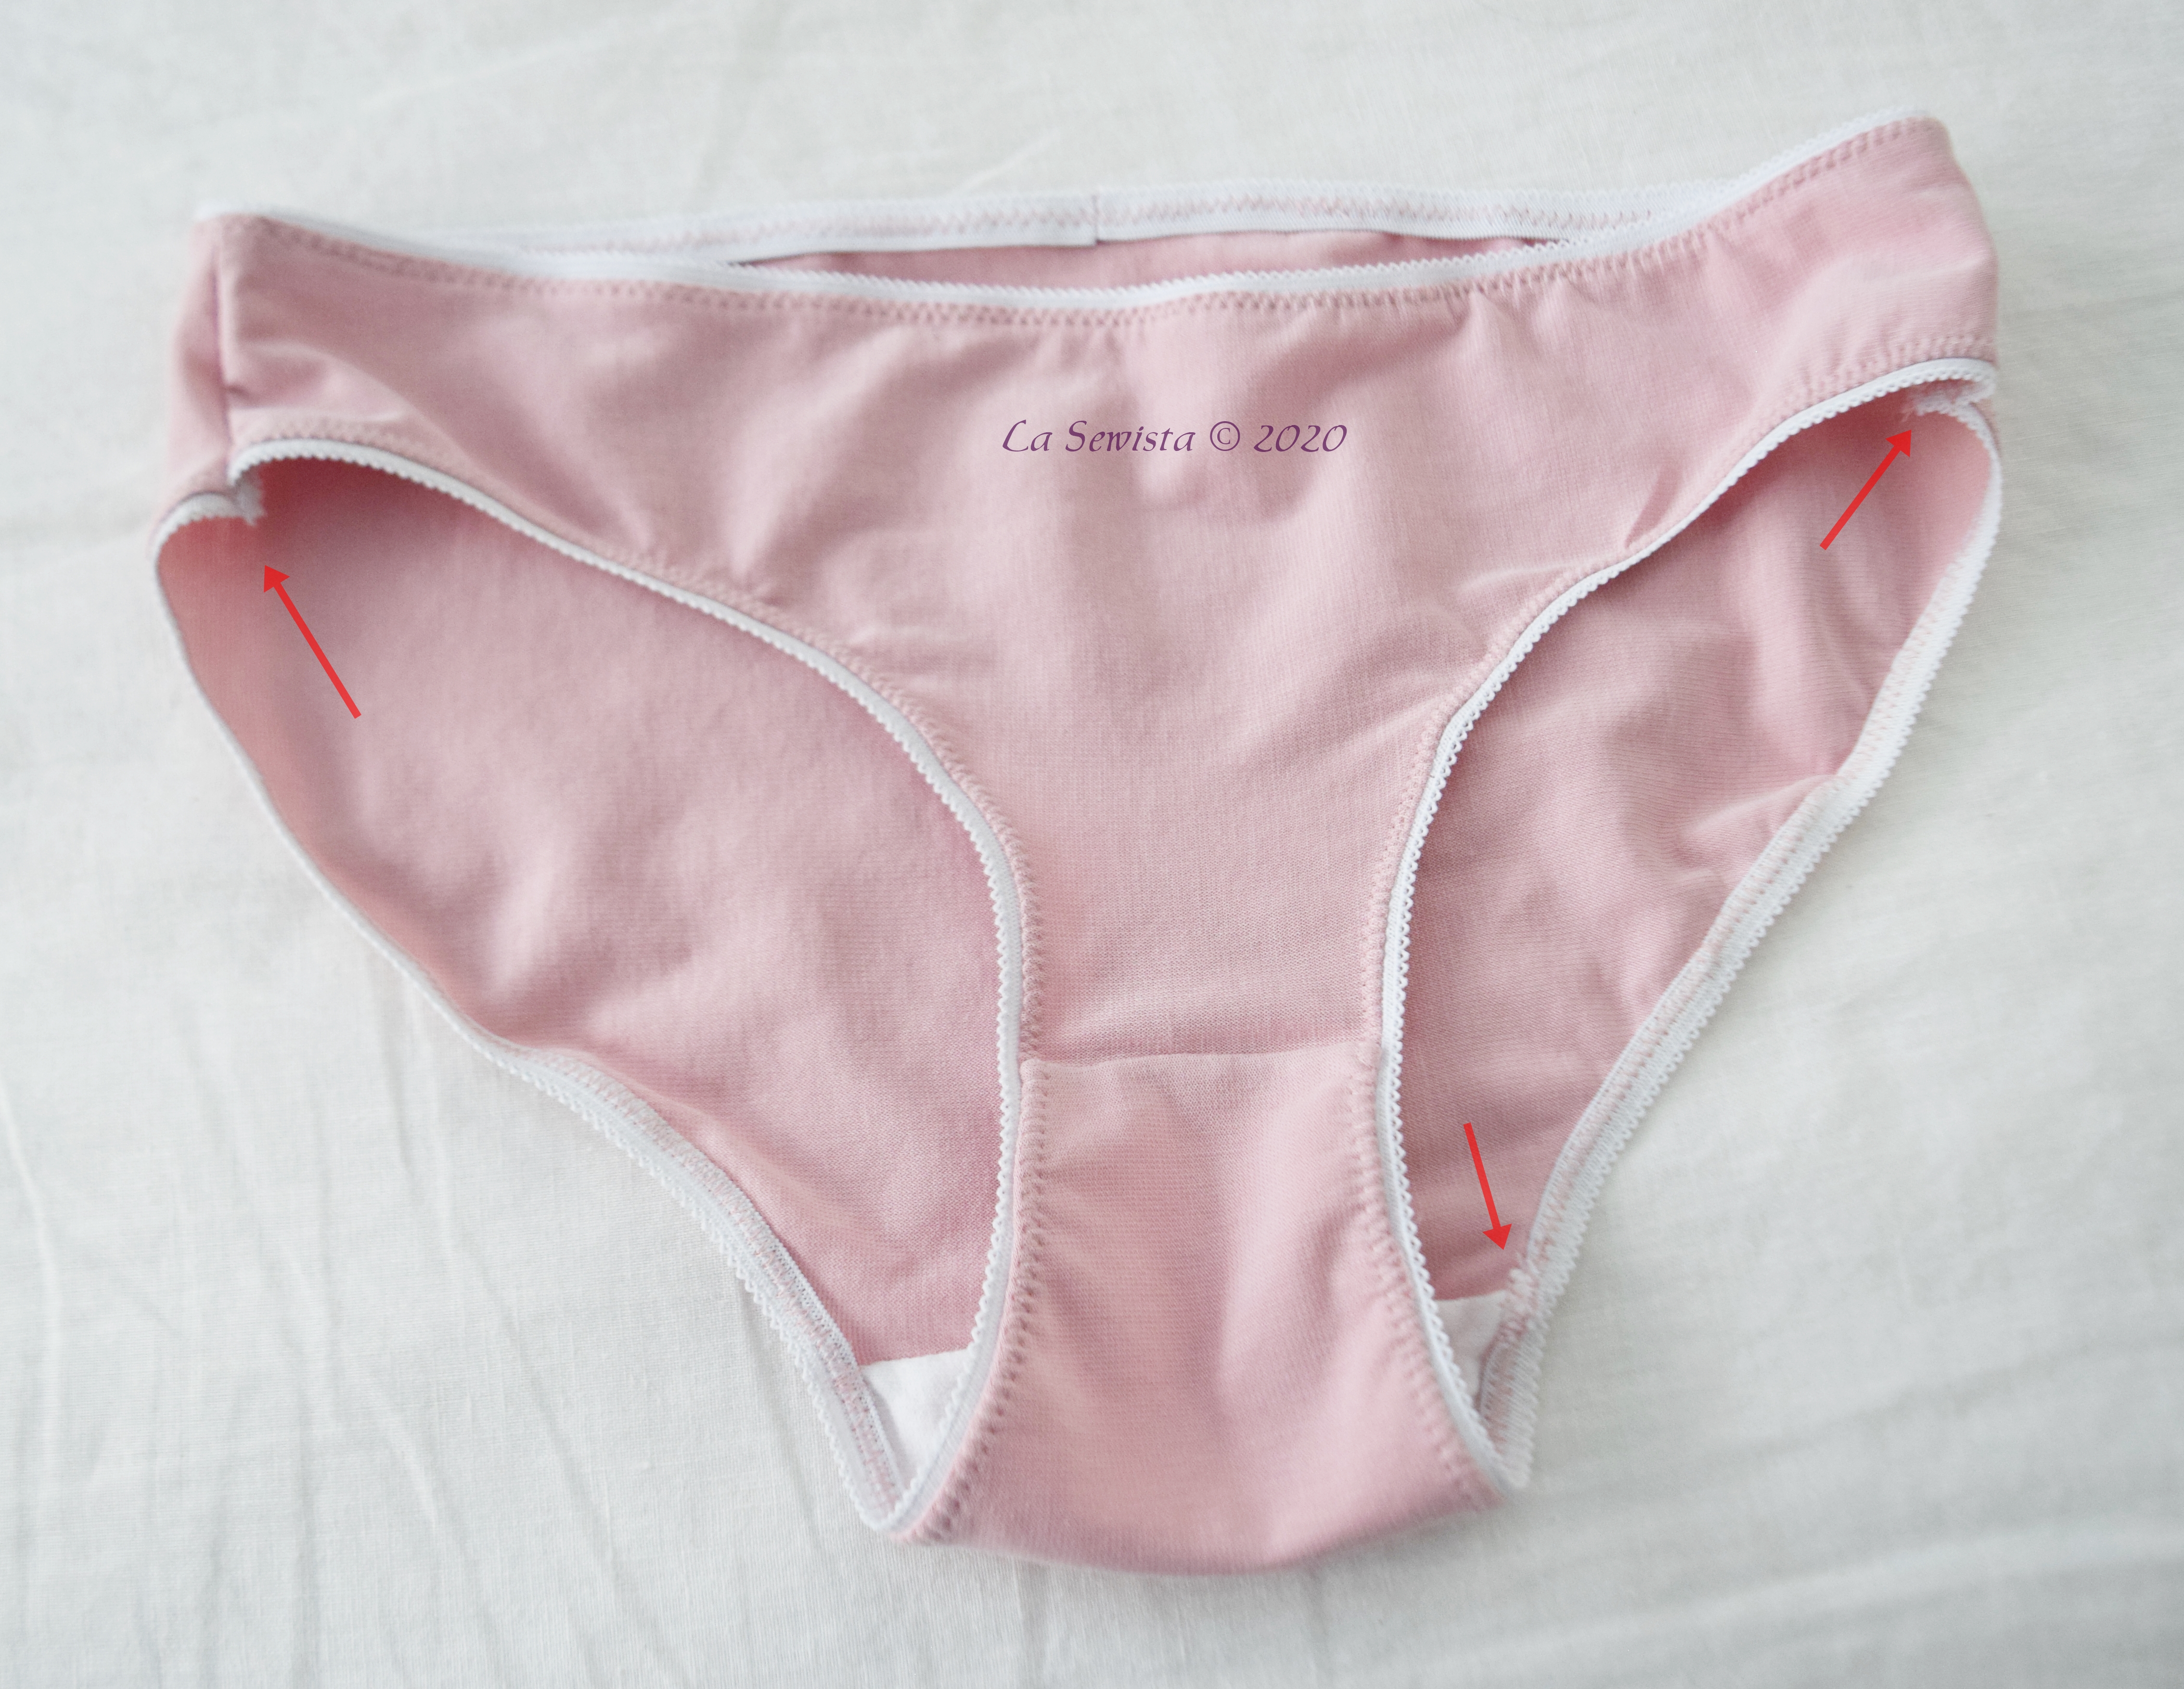
First, what inspired me to get going on undies was the Vlog by Tom Kat Stitchery. In it Whitney (last name?) shows 3 different ways to make this pattern from Nielsen. One uses picot edging. another uses foldover elastic and the third, her preference and now mine, uses fabric bands. I learned a lot from her and highly suggest watching this video. She knows her undies. I did watch other vlogs but hers was definitely the most knowledgeable and she's got a very good teaching style. All of her panties were made on the serger and the first had edges of picot trim. Hers were perfect. Mine were not. See the pink pair above. I questioned why she did not insert the leg elastic in the flat. I watched a video that did and decided that was the way to go. It really wasn't and I should have listened to Whitney. I ended up with lumps and bumps. I used the serger and it actually made for a bumpier seam than the triple zigzag on my sewing machine. My skin has become very sensitive lately to anything rubbing or irritating it inside my garments or shoes. I have even worn undies inside out it has bothered me so much. So the next two pair I made on the sewing machine. It just took a little longer, but not much. Another deviation from Whitney that I will stick with is using a triple zigzag to topstitch my bands rather than a plain zigzag which I am sure is also nice. Just my preference.
This first pair has a picot edge, easy to install, but you can see I needed a bit more practice with my undie sewing. Next..........
This pair came out much better. This is the cotton/poly blend, a lot like a nice tee shirt fabric. To trim the edges I used a 2 1/2 inch folded band for the waist and a 1 1/8 in folded bands for the legs. I folded them in half pressed them, and then attached with 1/4 inch seams, RST. I then turned the bands inside and topstitched with the triple zigzag and went slowly. One thing, priceless, that I learned from Linda Lee on her vlog, is to line up the edge of the fold on the leg band with whatever is a 1/4 inch away from your needle. This is on the LEFT of the presser foot. When we sew a seam, we always put the RST, line up the cut edges under the presser foot and line up with something on the right side to get a perfect seam, might be a mark on the machine, a piece of tape, whatever. As you stitch, watch the folded edge of your band on the left. Line it up with something on the left that will put your needle exactly 1/4 inch away from that fold. Duh!!!! The band is what shows, not the seam allowances and this allows it to be sewn perfectly. It really makes a difference as you see above.
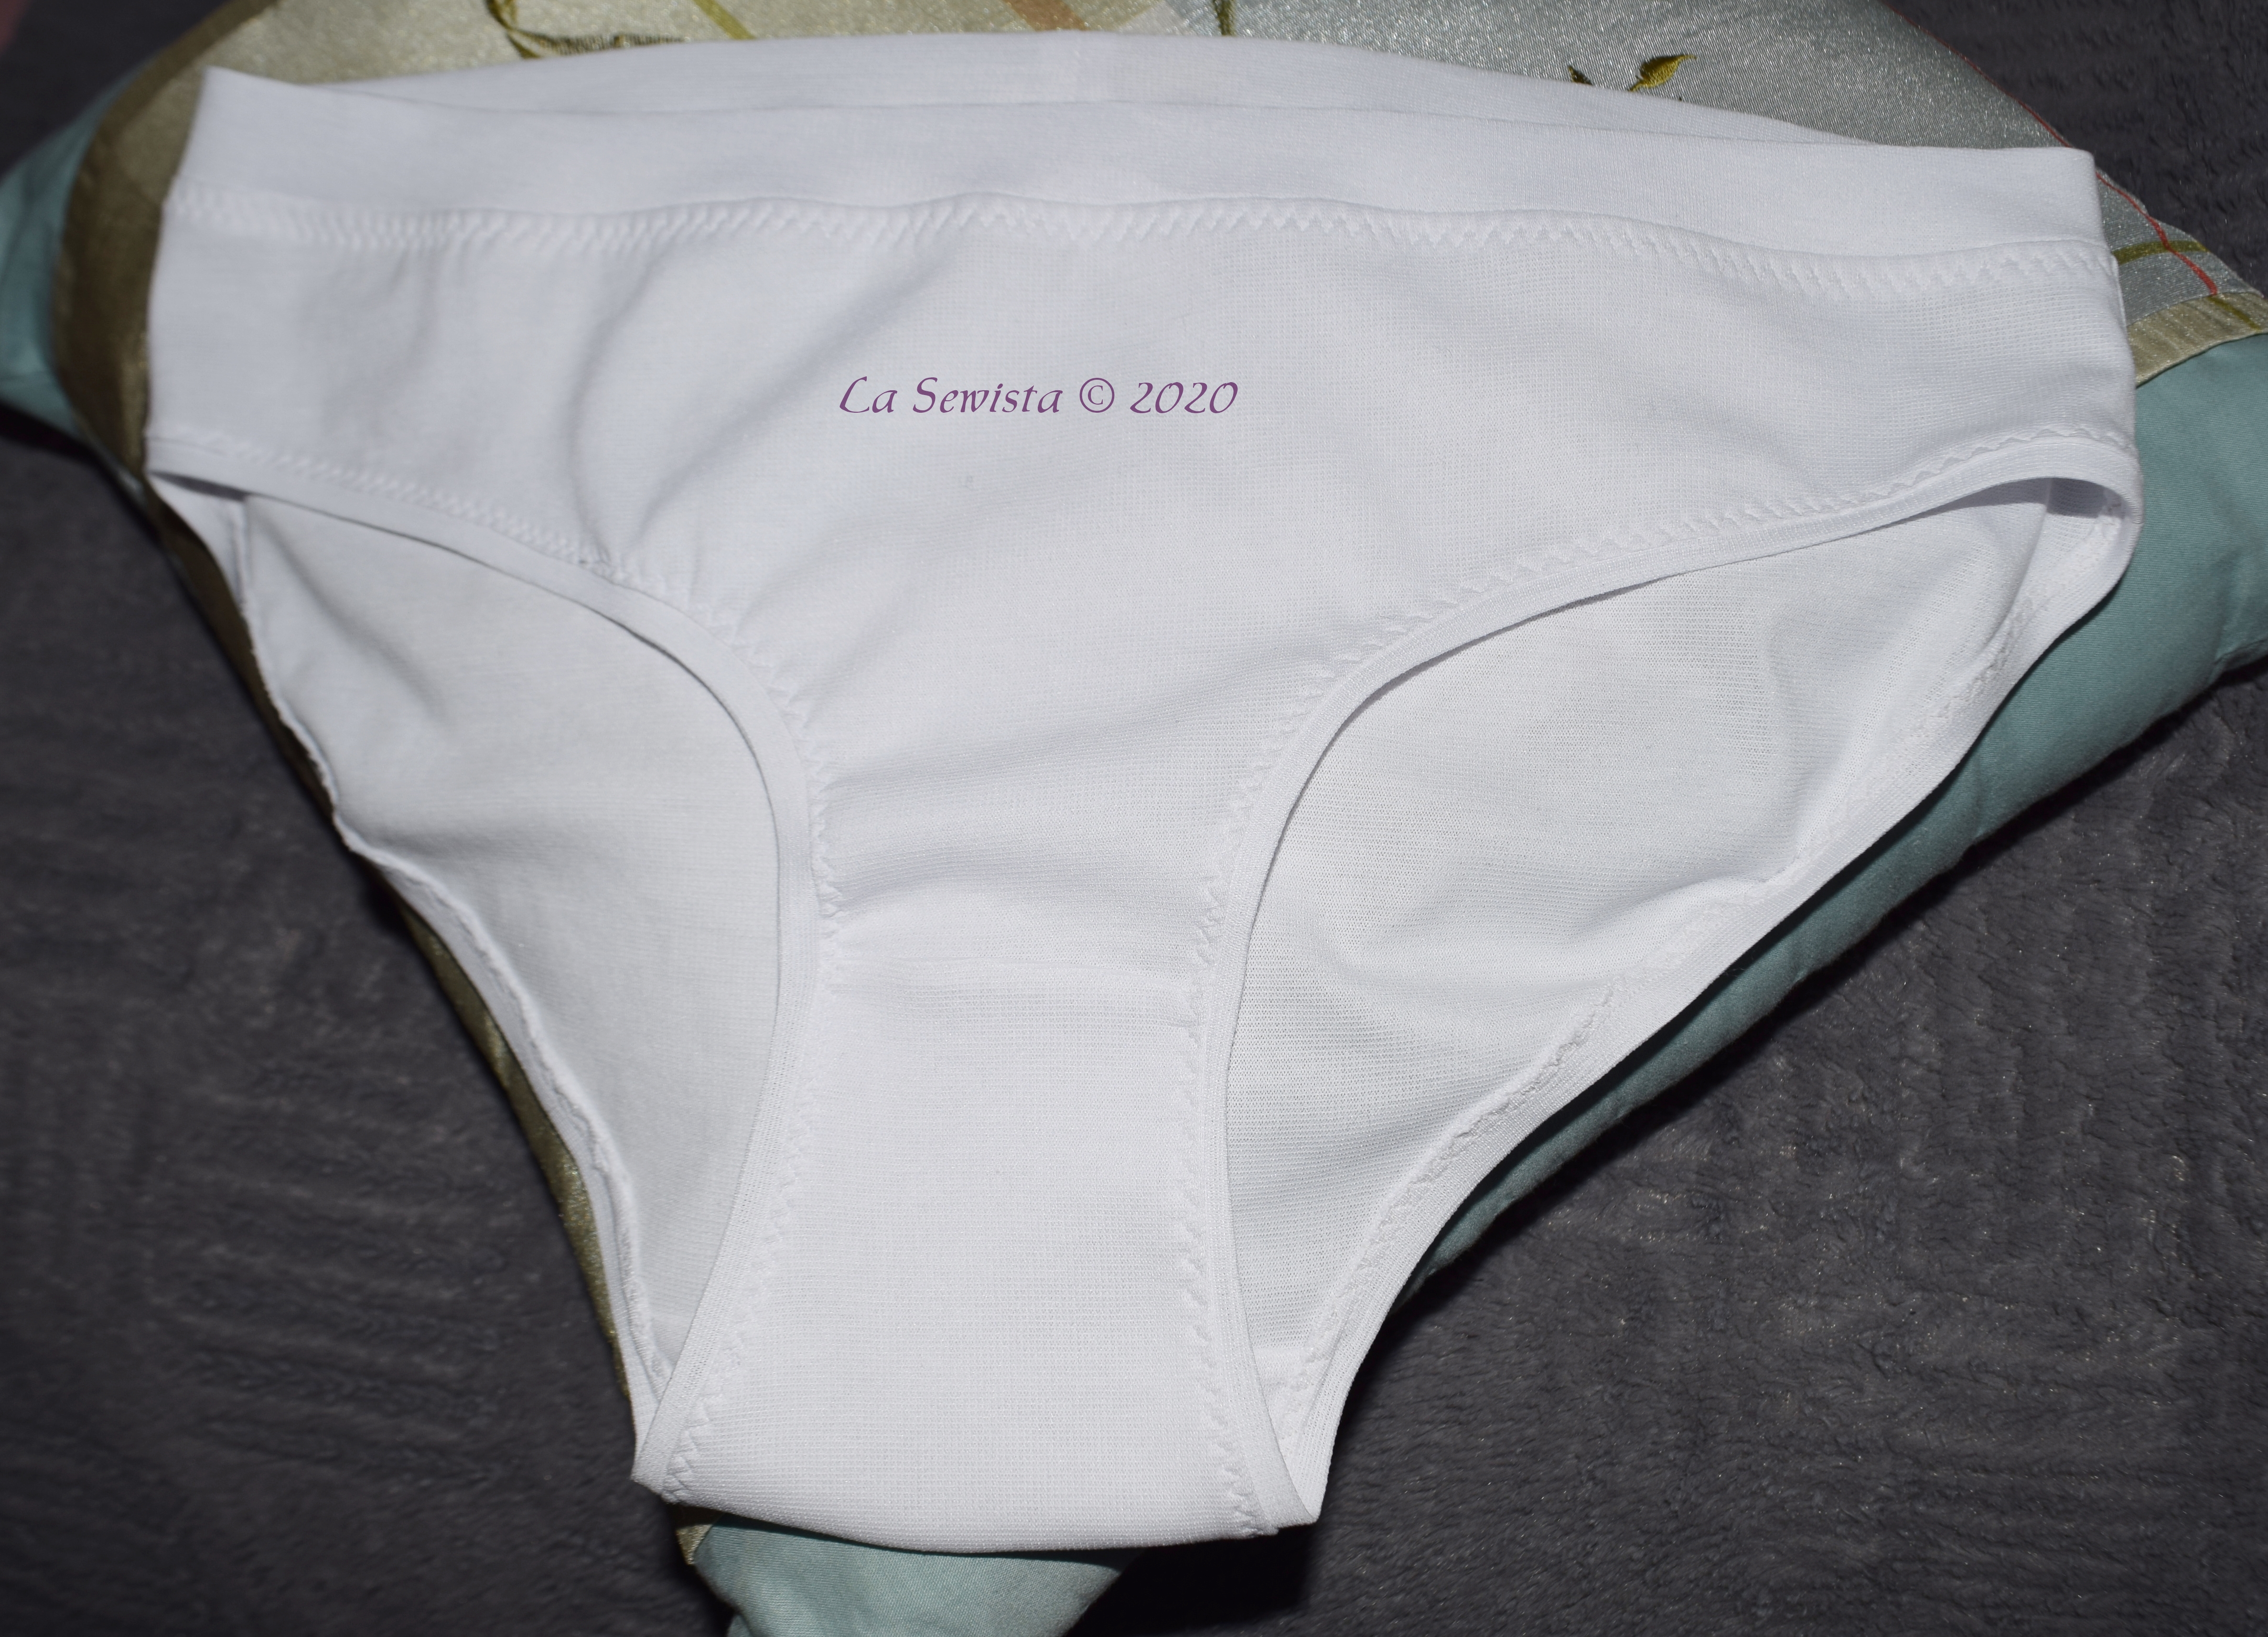
These white pants side seams and crotch were sewn on the machine with a line of straight stitch and then a line of triple zigzag next to it (side seams and crotch gusset). No bumps at all and the stitching laid down very smoothly. I was happy. My skin was happy. The seams had plenty of stretch. The fit with this higher waistband made me happy as well. No need to adjust the pattern at all. I may make my next pair with an even deeper waistband.

This was a really fun ride. I am definitely making more and soon. I now have a bucket under my cutting table just for "undie" scraps. You need so very little to make a pair. I know of some who automatically make a pair when they finish a garment and have enough fabric left over. Great habit to get into and it eats up those odd scraps. Just watch your grainlines.
The third method Whitney used in her video was foldover elastic. Evidently it is pretty popular for undies but I just don't care for the look so won't be making those. I did order a bunch of elastic lace from Sew Sassy Lingerie and it came in today. I will play with that too.
I also learned on this video to "sew in the bowl" something Whitney emphasizes often. I've learned how to eye my needle from the edge of the binding/band/hem fold instead of the seam edge. Most of all, I learned how to make myself some undies. Covid has turned me to more utilitarian sewing lately. Now I am studying up on Visible Mending.
****************************

LOVE my new Pendleton boots, quite practical for our New England weather! They have labels on the back heel and nice wool lining too! ...Bunny


These look great! I'm sure they don't take long once you figure out the technique. Thanks for the inspiration.
ReplyDeleteYour welcome. Once you figure out the technique you prefer and the fit and then have your pattern on a piece of oaktag so its really easy to cut around it takes no time at all. Now I want to know everyone's bum size so I can make them some as gifts!
DeleteIsn't Whitney great. Her last name is Luckenbill. You have tempted me to try to make a pair as I now have a very stooped body and have pants, but not undies that fit!
ReplyDeleteSo much info here, and so helpful. I, too, wear underpants inside out because of sensitivity to the seams; your tip to use the straight stitch, then triple zigzag, would take care of that. I suspect I am developing an allergy to the elastic so your tip to use fabric bands would solve that problem.
ReplyDeleteYour texts on this subject are correct, see how I wrote this site is really very good. star wars underwear for women
ReplyDeleteIt's great to see more discussion around comfort, design, and practical everyday wear. Seductive Men's Underwear
ReplyDeleteThis is a savvy blog I would not joke about this You have such a great amount of learning about this issue, thus much energy You additionally know how to make individuals rally behind it, clearly from the reactions body-positive apparel brand
ReplyDeleteI am upbeat to discover this post exceptionally helpful for me, as it contains part of data I generally want to peruse the quality substance and this thing I found in you post A debt of gratitude is in order for sharing designer swim briefs collection
ReplyDeleteNice embroidery inspiration, thanks.
ReplyDeleteIt's interesting to see how fashion is becoming more focused on comfort as well as style. best men's underwear brands
ReplyDeleteFascinating post I Have Been pondering about this issue, so a debt of gratitude is in order for posting Really cool postIt 's truly exceptionally pleasant and Useful postThanks DealByEthan journal
ReplyDelete