
This is the back of the fabric I am using to make a pair of pants. From the front it looks like a cross dyed linen. I knew it was cotton and not linen when I purchased it. I love cross dyes and this one had the look of indigo and seemed like a nice weight with a linen-y look. You are looking at the wrong side, which I never looked at in the store. I came home and looked the fabric up on line and Kaufmann calls it a canvas, OK. After washing I went to press it before cutting. As I lifted up this fabric that I thought would make wonderful pants, I noticed an area that I could see through. Then I noticed more. Then I realized the entire yardage was made of thick and thin areas as you see above. Well, I sure missed that in the fabric store and that just wouldn't do. Do I can my excitement and make something else like a top that I don't need right now? I slept on it. The next day I decided I would underline the fabric and all would be fine. Each pattern piece would have it's own lining stitched to it and would be treated as one layer but made up of two. Now, what to use?

Here you see the pattern I will be using, the Sewing Workshop Picasso Pants pattern. This would be my third pair. I had no idea I would love these pants as much as I do. They are very comfortable and I wear my first pair constantly. It is a heavy cross dyed linen. The other is a discharge dyed fine wale corduroy. I wanted more. The fabric for the third pair looks like an indigo dyed denim on its right side. You've only seen the back. I thought, "well, I could just use my pant liners." But, I was afraid they would get hung up on the seaming. These pants are a lantern shape and each leg has six sections with lots of seaming you can see above. I can definitely see my Bemberg pants liners getting hung up between the sections so that was out. I started this project in a 95 degree heatwave and the thought of any sort of full Bemberg type lining in these pants was just too hot of an idea to entertain. I had to give the pants some privacy, some weight and some comfort. What's a sewist to do?

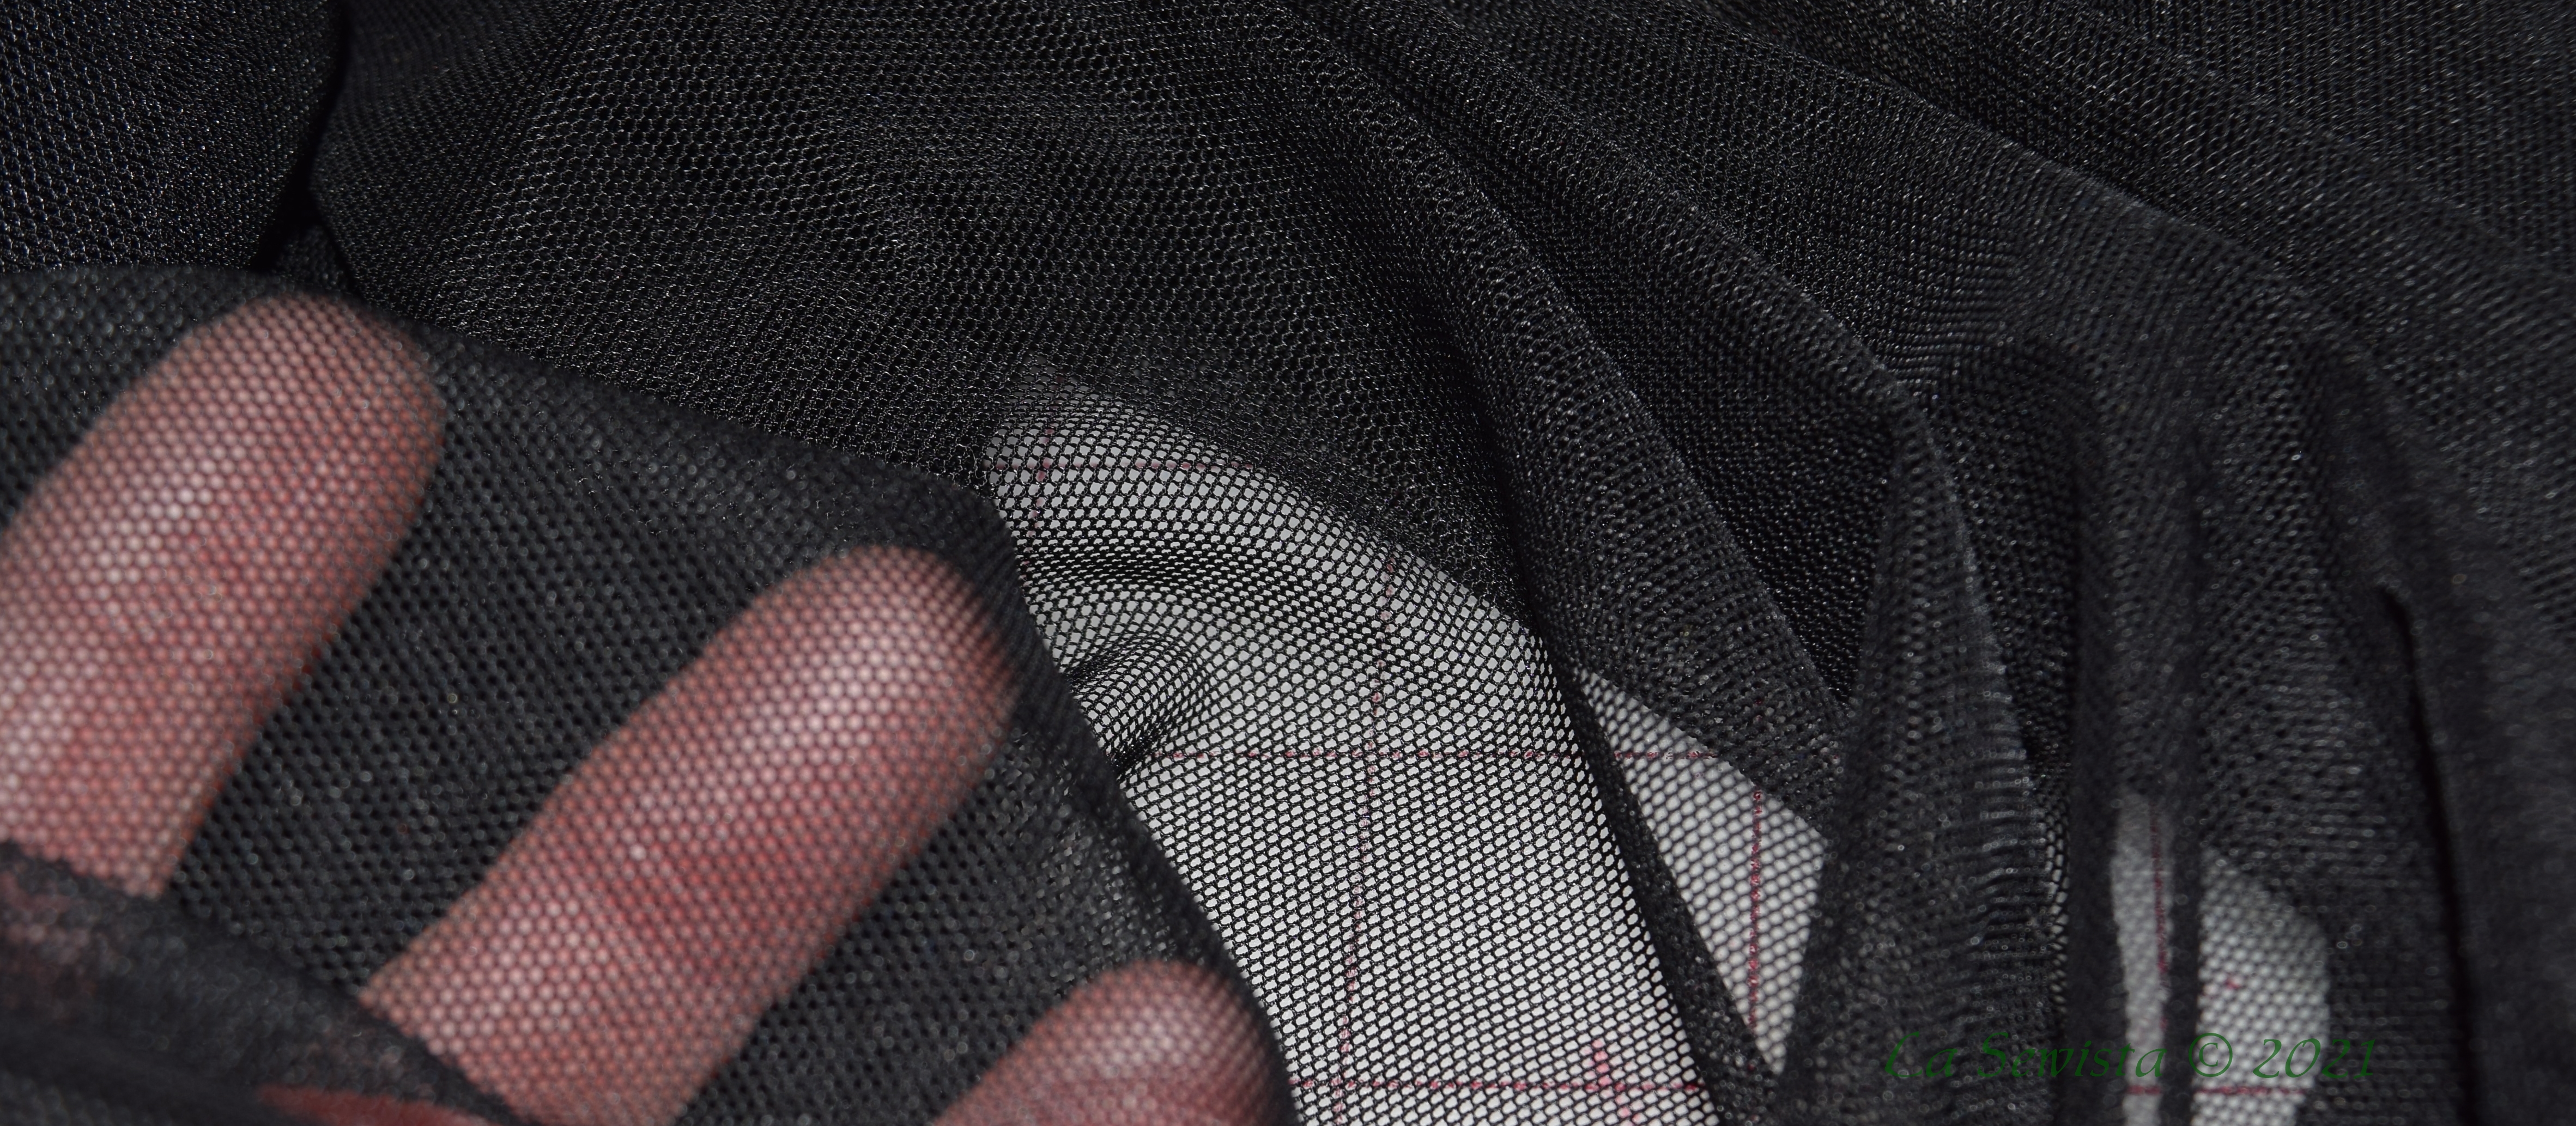
Why would you use this mesh? Well, first, let's discuss what this mesh is. It is a 100% polyester mesh. IT IS NOT the nylon tulle that is used to make little scrubbing things for the sink. IT IS NOT the nylon tulle that is used to make tutus and veiling and fluffy adornments for pews in the church at weddings. NOT THAT STUFF. IT IS MOST OF ALL NOT power mesh, that heavy duty mesh that is used for girdles, bras, swimwear and and anything else you can think of to hold in a mound of flesh.
"Stretch mesh" or "Stretch Illusion" is what is used to give the appearance of skin on wedding gowns, skating outfits, ball room dancing attire. It can match your skin color and have appliques applied which beautifully appear to be floating on your skin but are not. It is faux modesty. Let them think you are naked but you know there is fabric there so it is OK.
Stretch mesh is 100% polyester. It comes in the colors of skin but I understand it can be dyed and can be bought in every color imaginable as well. Vogue Fabrics carries a nice variety of skin tones. If you just need white, black or nude, you can find it at your local chain box for about 5.99 a yard which runs 60 wide.
Now, why would you use it?
* It's mesh design breathes and it is comfortable to wear in hot weather, far better than any solid lining. It is never sticky.
* It has weight. Using it as an underlining instead of a fusible to bulk up a thinner fabric, my issue, works wonderfully. Using a fusible for underlining, over time, runs the risk of delaminating, shrinkage of the fabric or fusible causing bubbling, and just not holding up to wash and wear like a non fusible. I will do a traditional underlining with my stretch mesh, cutting it out the same as my fashion fabric and treating the two layers as one. I love the weight it adds to the thinner fabric.
* It does not ravel and really needs no special treatment. My flowy separate lining in the culottes had a raw hem and was serged for seaming. That's it. For this garment the mesh was simply stitched to the fashion fabric with a simple straight stitch and while I tried to complicate it, in the end the simple way was the best.
* It has no grain. Cut it any way you want.
* It feels nice. I like the way it feels, the weight, the airiness in the summer weather, just so much nicer than a solid lining.
* It maintains that sheer effect of your fashion fabric without being sheer. See the post on my culottes for more on that here.
How do you sew it?
For this application here it is really quite simple. We are going to underline the fashion fabric and a few basic rules apply.

The underlining, IOW the mesh, will be cut the exact same size as the fashion fabric and that goes for each piece. You will find the selvedges of the underlining have a gathering/pulling effect on the yardage.

There is no way you can lay the fabric mesh out flat with the selvedges pulling like that and you can see the big ripples above.
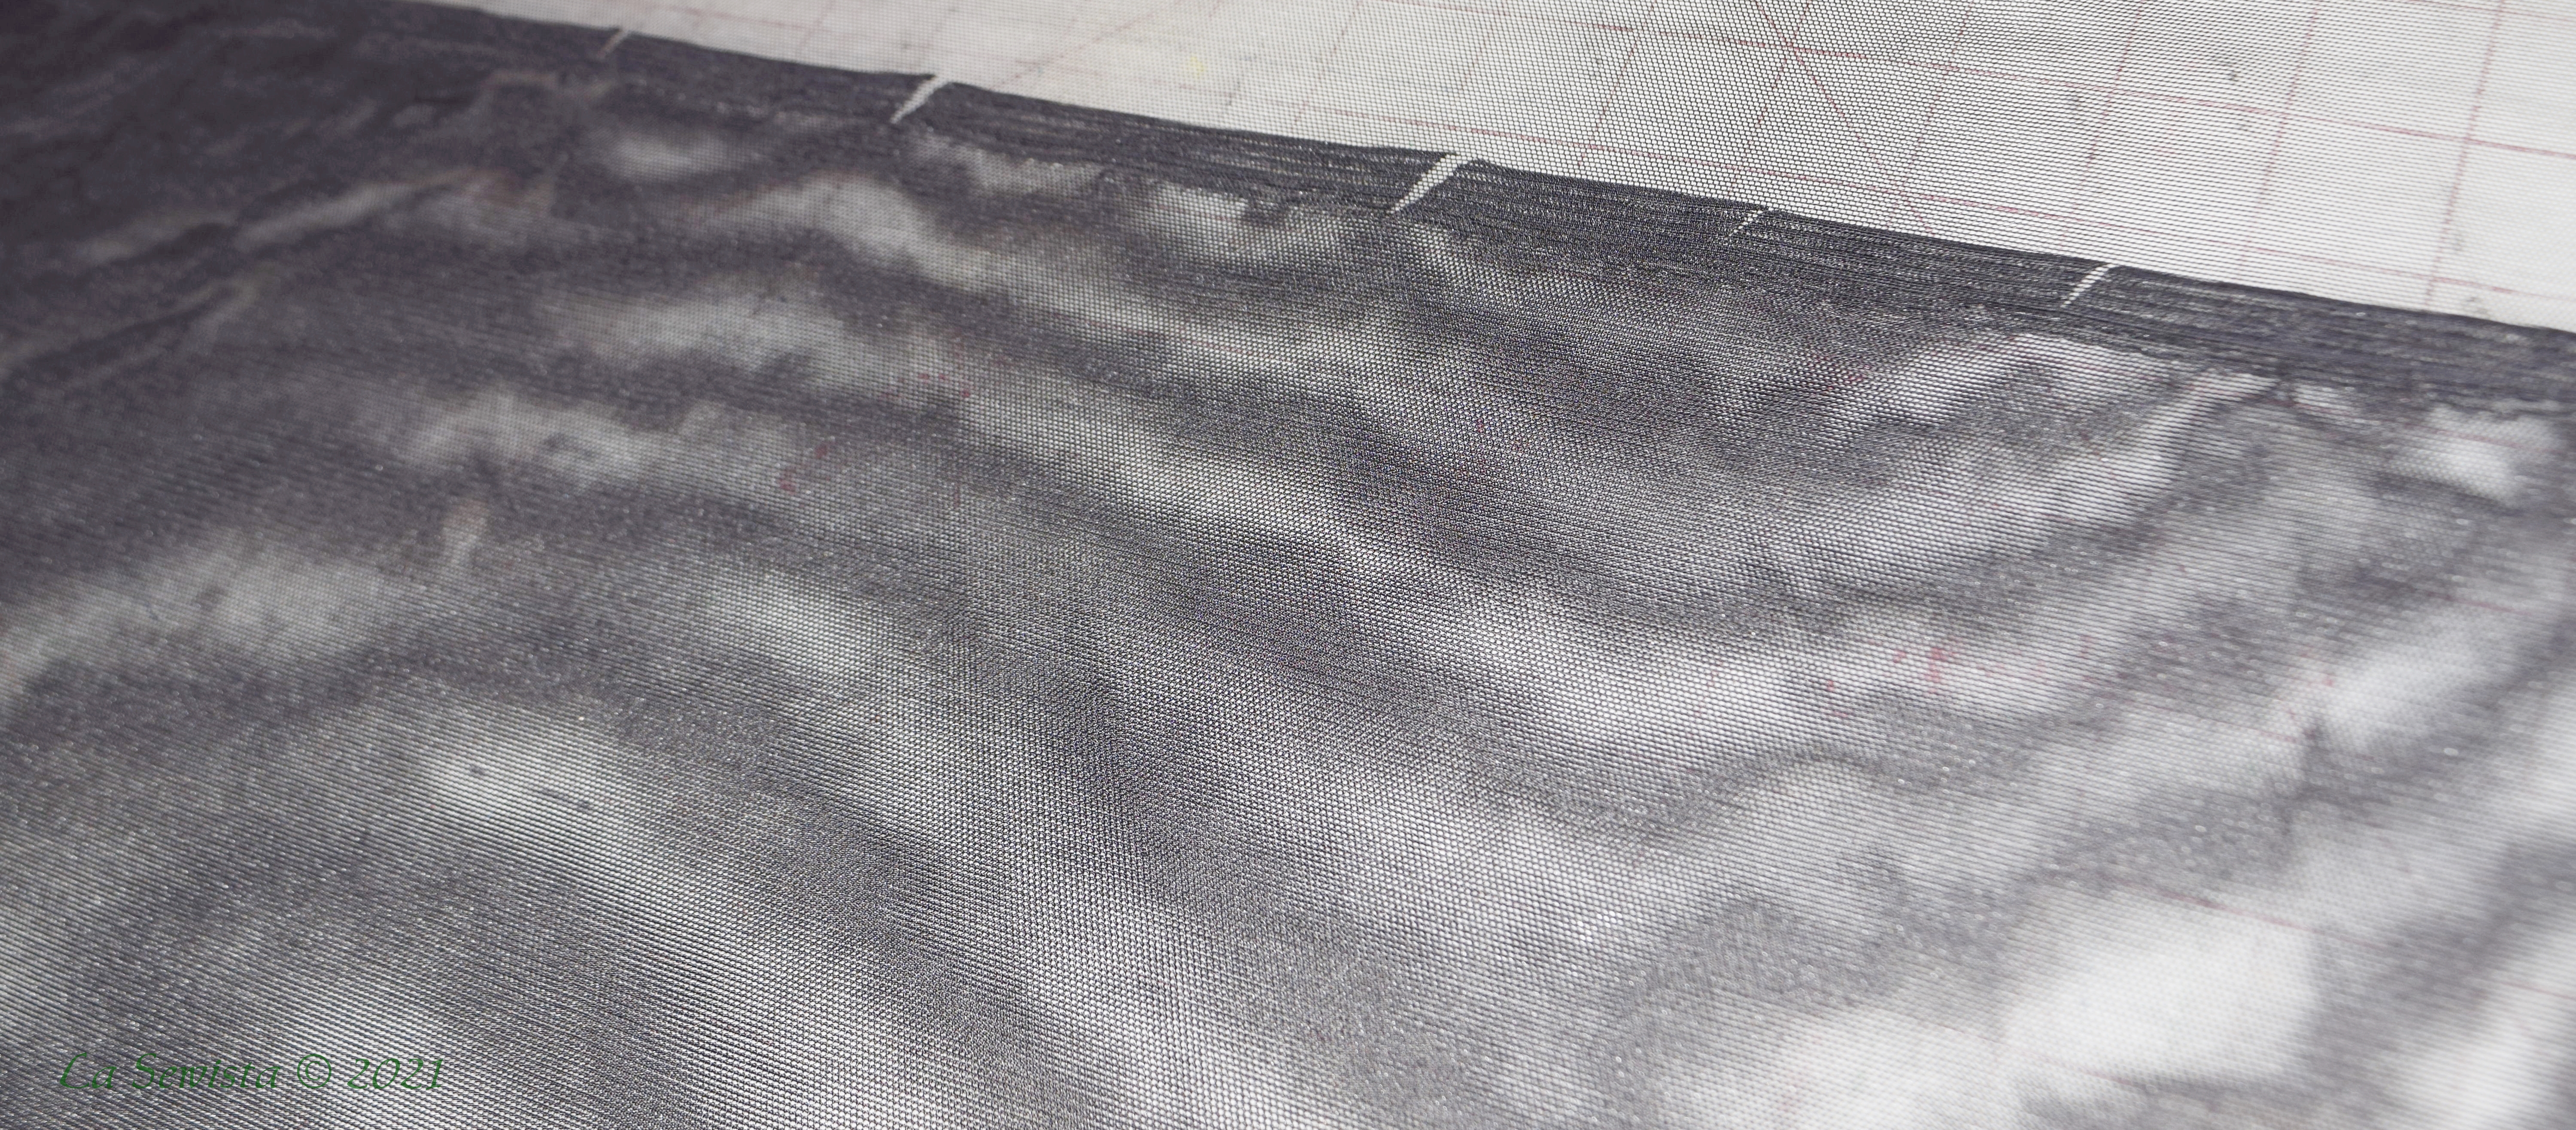
This pic shows how I clipped the selvedge and the fabric now lies flat. Now I can cut out my pattern pieces. Sorry for the moire effect, just happens.
Let's look at that first blue fabric pic again. Do you see how the threads on the bottom left corner run downward? Each side of your pieces will have a direction that the threads are flowing. We are going to sew DIRECIONALLY! Our stitching will be done in the same direction as those threads. We will not sew against them. Sewing against them can make your underlining bubble and shift. That means you will start and stop at each corner and sew in the correct direction. You may also have to put your fabric inside the machine harp, all to the right, to sew directionally.

Most importantly, you will sew with your fashion fabric on top and your mesh underneath. If you have a walking foot or integrated feed built into your machine, disengage it for this process. Pin, yes, pin, your two layers together and stitch, fashion fabric on top, underlining underneath. Stitch all around but one side at a time, always stitching WITH the direction of the threads.
You have to trust me on this. It will make your sewing much much easier to do it this way. I spent a great deal of time sewing the bottom sections of the pants legs with the mesh on top. Of course I believed I would have to maneuver and push and pull that stretchy, airy textile and therefore it had to be on top. Took me forever and I was constantly playing with the mesh's stretch. Then I switched, on the long pant leg sections, to sewing with the mesh on the bottom and no Integrated Feed or walking foot engaged and the stitching flew along, was perfectly matched to the fashion fabric with no bubbles or stretches and was just so easy and quick. Fashion fabric on top, mesh underneath, NO integrated feed or walking foot engaged. Okie, dokie? Let your feed dogs do the work.
Now I know some of you are also thinking why didn't she just shoot this thru the serger? Well, to keep bulk down and to use the plan I had in mind. My plan, which I used on my original pants, was to machine stitch the seams, serge them together, press to the side and then topstitch on the outside. The inside of the garment has little bulk and looks beautifully clean.

The other technique I used, which I frequently do on any underlining is to stitch down the center of any darts before stitching the dart legs together. This holds the underlining fabric and the fashion fabric together perfectly while the dart is being made.
Care
I have found the combination of poly mesh and 100% prewashed cotton easy to iron without melting or such. I used steam, a higher synthetic setting, a press cloth and a clapper for my seams. I put darts in the back of the pants and they took shape beautifully with steam, a cotton organdy press cloth and a ham. The pants aren't all together yet but so far I am really happy with my choice for the underlining and how that is going together. They look substantial with their underlining. I can't wait to see how they drape in the end. More to come! .............Bunny


Great post. You answered my immediate question about ironing and the tip for the darts is brilliant!
ReplyDeleteThank you, Pat.
DeleteI'm watching this with interest and can't wait for the finish. So appreciate all the detail in your posts because your projects are always so beautifully constructed and worn with flair!
ReplyDeleteThank you, Vivian. I hope to finish it today and maybe pics tomorrow!
DeleteThank you for the detailed explanations. I do enjoy your posts!
ReplyDeleteOoo-thanks for the advice! I have been planning a pair of slacks that need a lining, but am always hot, & have never done anything like that. I know exactly what fabric it is, too 💜
ReplyDelete