Sewing Vloggers

Showing posts with label dresses. Show all posts

Saturday, October 7, 2023

McCalls 8406, the Bias Sequin Dress


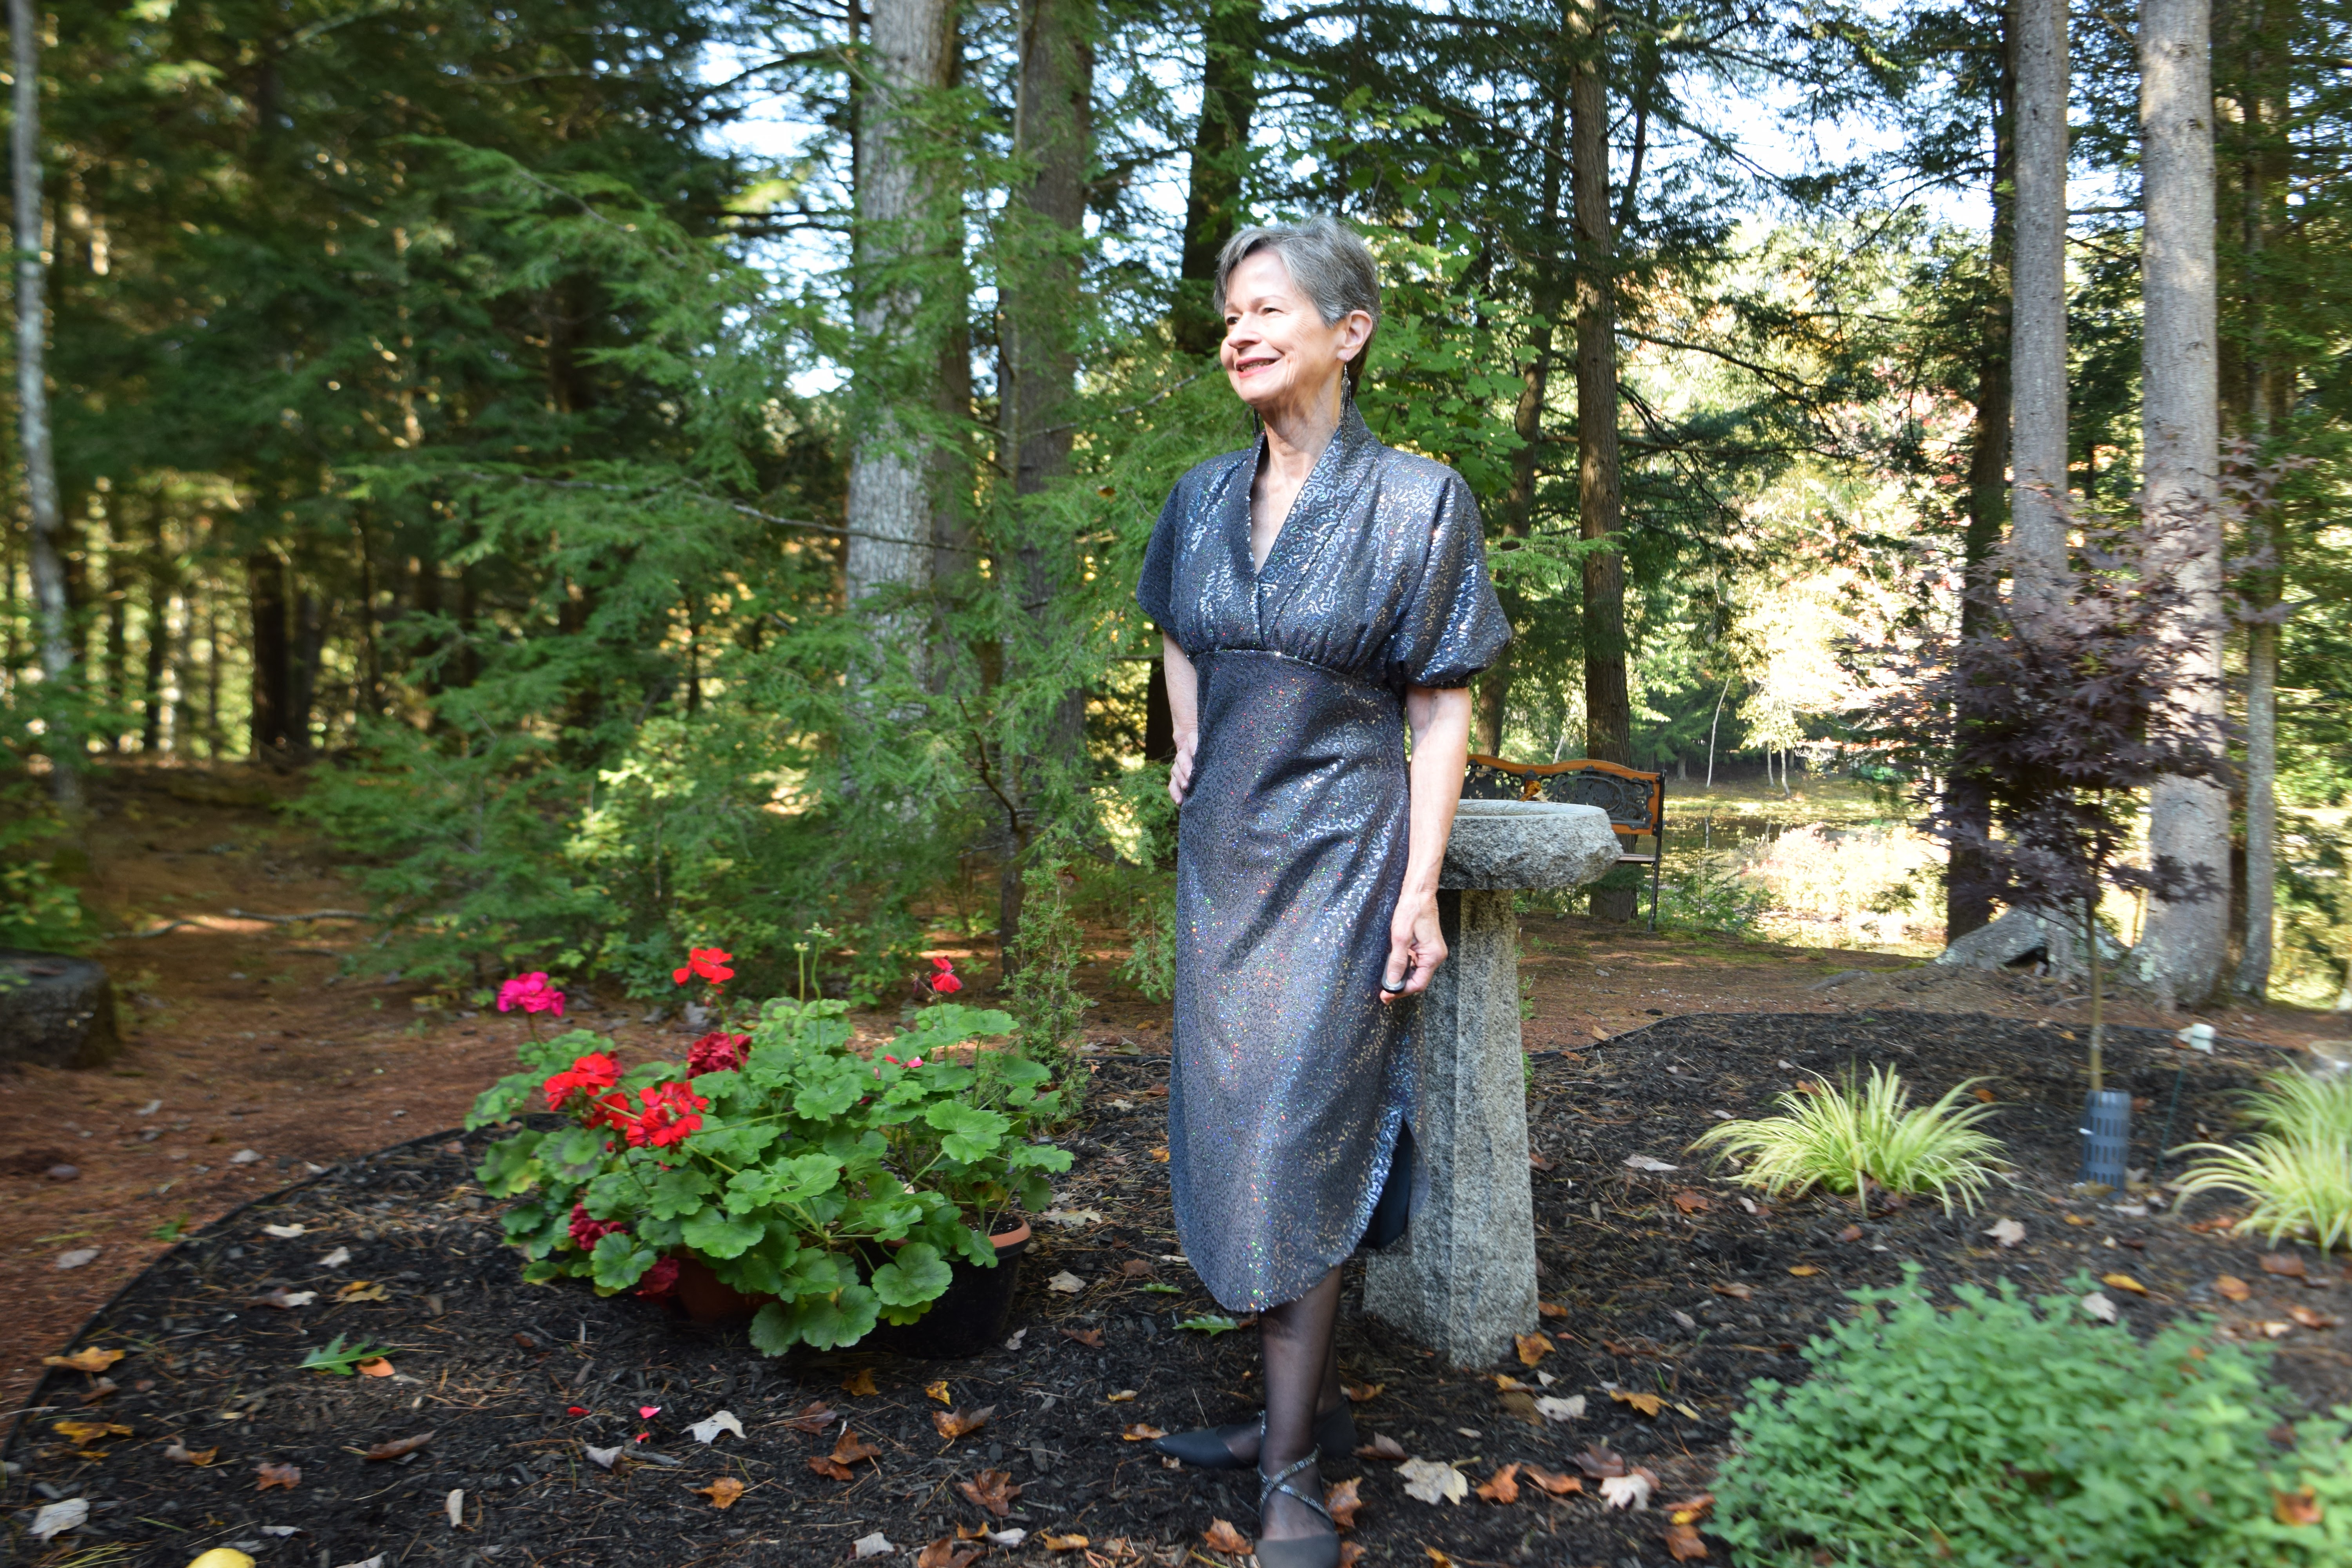
Chalk up another one! A bias cut dress out of sequined fabric.  I have a lot to say about this project. First, it was perfect for the wedding. I had anxiety over whether I would be over/under dressed for the event.  It was j u s t right!  Second, it is hard to photograph this fabric. I took tons of pics and these two were the best. It just caught the light so weirdly in the photos and every time I moved in the slightest, the bias fabric had other ideas and movements. But in the end, it was perfect for the venue. Speaking of venue, the day was pouring buckets, foggy, just awful weather so the pics I planned on taking there just did not materialize. So let's get going on the sewing here!

Pattern

This is McCalls 8406.  Here is their description, "
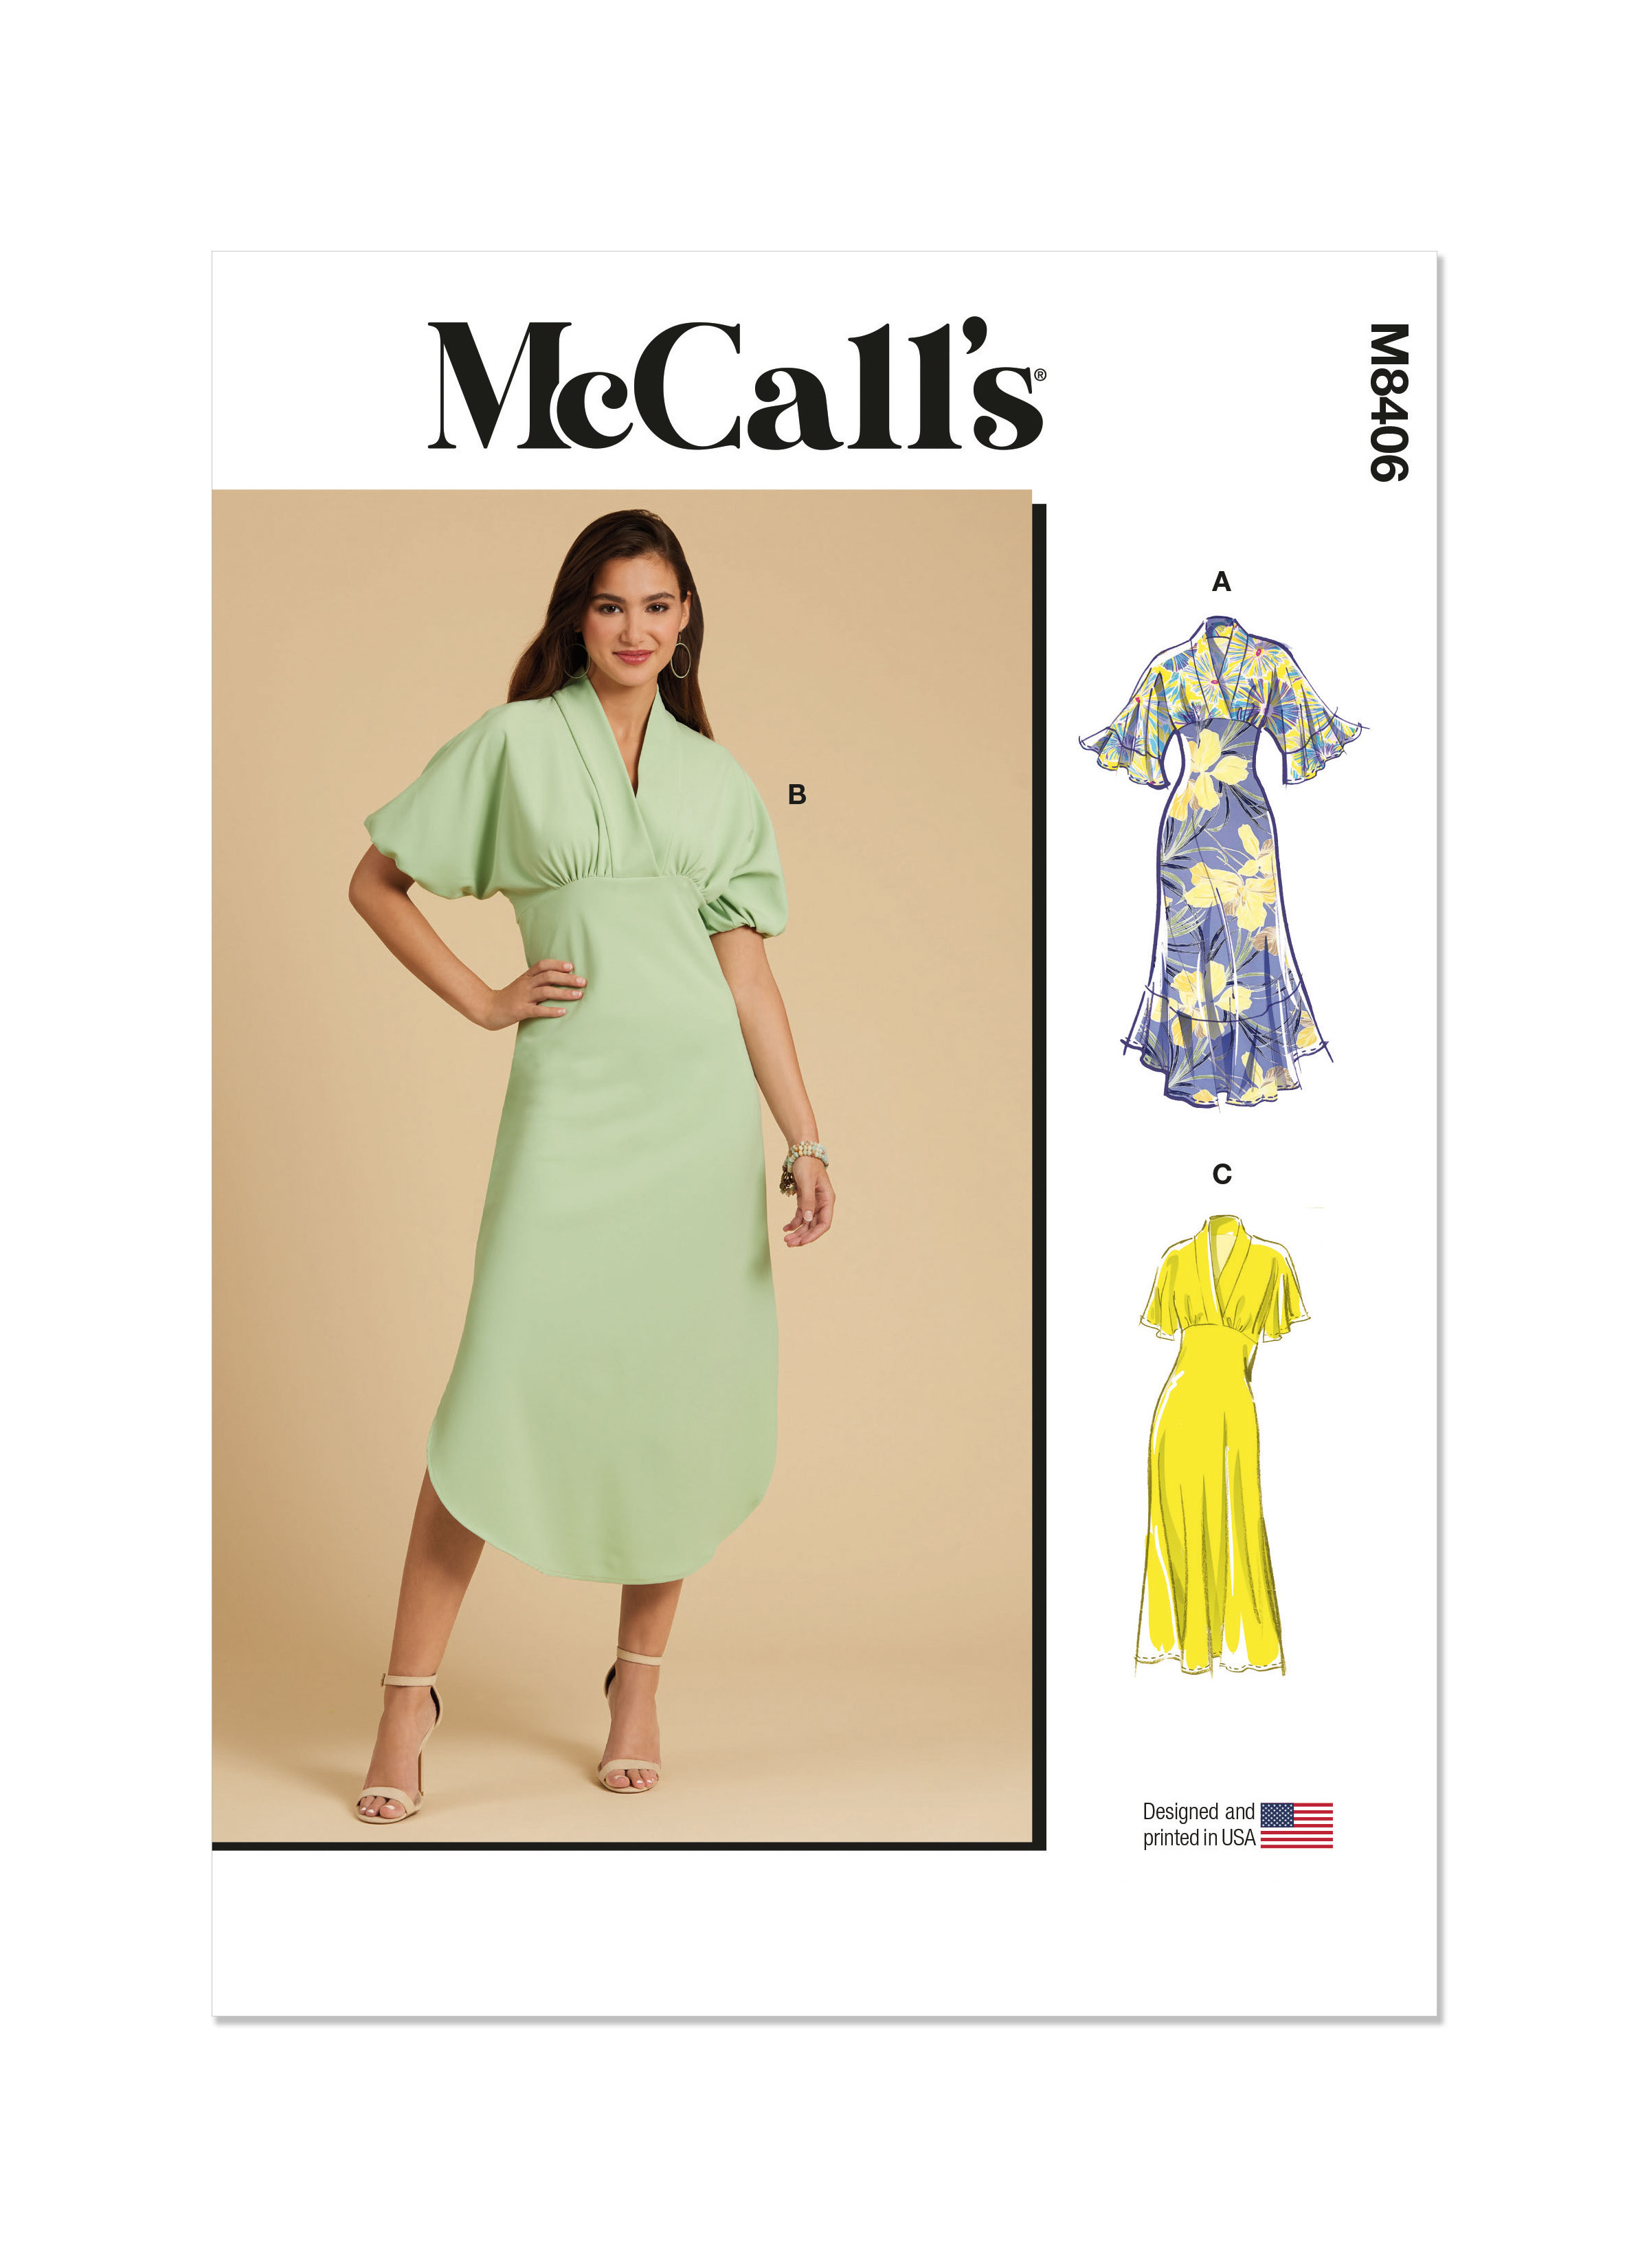
It is McCalls 8406. They describe it as "Empire waist dress with sleeve and hemline variations has shawl collar neckline, narrow hem, bias skirt and invisible side zipper." 

First, this dress needs a muslin created first.  There are fit challenges here despite looking quite simple. For me, I needed to discover if I could even pull off a bias skirt with my hips and I could. But previous experiences at a heavier weight were otherwise so I was not going into this with confidence. I found the bias cut flattering and my husband really liked the fit, too. Next, there is a lovely empire curved rise to the bodice that under the arm dips down on the back bodice, very pretty. However, I needed  a bit of Full Bust Adjustment and it is not easy on this pattern. The dolman sleeves are very deep but the bust fullness comes from those gathers below. I did a cheater FBA by adding a 3/8th inch ellipse curve in the gathered area below the bust.  You can see what I mean with the red lines below. 


This pattern is fairly simple and should be a breeze, but my fabric choices and vision definitely complicated things. I also wanted to do the fabric justice so used techniques to achieve a more couture finish. It took time and three muslins. More on the muslin  process is two posts back  here. 

Fabric


This was made with Ambiance lining and a sequin net fabric from Fabric Place Basement in Natick, Mass., the burbs of Boston. The sequins are tiny and trailing and on a net that is stronger than tulle and that does not stretch, unlike the mesh nets so prevalent right now. I learned a lot about sewing with sequins and you can read it in my last post here.

Construction

The dress consisted of two parts. The bodice was dolman sleeves and a bias folded collar band. Under the arm would be the start of an invisible zipper installation that would continue down from the waistline another 10 inches into the skirt The bodice was underlined with the Ambiance and all bodice seams were Hong Kong bound finished.  Each pattern section was block cut, thread traced, stay stitched next to the thread tracing and then finally cut out. This was to make sure there was no shifting while cutting  and no bubbles between the fabric layers. Lots of handwork and fussing! Using silk  thread for the basting made things easier.


I made a change in the collar construction. I have discovered, in more than one project, that a large BIAS band collar changes direction of grain in relation to the body as it wraps around. In the three muslins, I always had a large wrinkle on one side. I decided to split the neckline band in half at the back neckline and put a seam there and then reverse the grain of the band. This way the grains would mirror match as the came around the neck. Big wrinkle eliminated! The collar went in beautifully and all match points were spot on with this pattern.  I made no petite adjustments to this pattern other than length. 


On to part two, the skirt.  On the pattern you see an exaggerated shirt tail hem. I liked that. My lace had beautiful lace bordered selvedge edges. I carefully cut them off to attach to the hem of the skirt. But, first the lining. It was easy to sew but I made the skirt too large. The top was a size six and the skirt was a twelve and way too big. It had only two seams , each side. I went back and took it in to a size ten and it was just right. You can see the original stitching in the seam above. You can also see that with these seams being cut on true bias, there is absolutely no ravelling. I made the decision to do no further finish on them. It would only add bulk and time. I'd been at this for a while now and wanted to get it finished. I have seen numerous vintage cocktail dresses finished exactly this way, of similar fabric,  and was comfortable with my decision.  I was using a size ten microtex needle but it still left holes. I think a finer thread would have helped as well but none to be found in this color.

Back to the hem. When I originally made the muslin I knew I did not want a full length dress. Below knee was fine but the shirt tail was deep. I moved the hem up before cutting by five inches. I wanted to maintain the shape of the hem and slit look. You can see how I did that here in this post.   I then went on  to deal with the edge of the net hem. I spent an afternoon attaching the border lace, about an inch plus wide, by hand, in a very weak gather, just enough to make the curve of the hem. It was hand basted on then machine stitched.  Looked pretty enough, but, alas, I had to deal with it again later. 

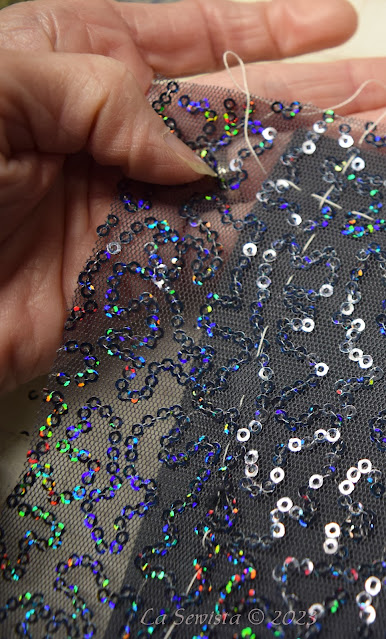
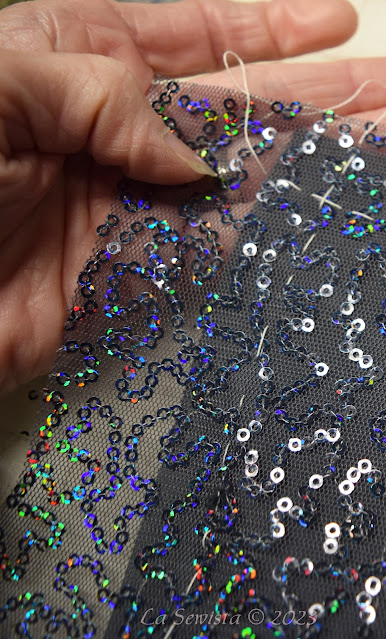
Next was dealing with the zipper, my most challenging situation. I had to transition at the waistline seam from a traditional installation in the bodice to one in the lining that was only in the lining and hidden by the netting so  it would still be invisible. Now, I have seen and worked on these often in formal gowns, but there has always been a heavy fluff of gathered tulle or organza to hide the zip in the lining below the waist, easy peasy. I had no fluffy gathers. I wanted to maintain a smooth line from the waist to hem, all the while having access and hiding the zipper in just the lining layer. What's a sewist to do? 

Very tiny snaps and Fabric Fusion adhesive to the rescue! I installed the invisible zip above the waist as per usual. I then folded the netting out of the way and continued to install the zip in the lining. I just placed my needle back in the zip area on the other side of the netting. Zip installed! Now to hide it.................I searched my notions and found some very tiny black snaps. I tested and found they totally hid in the netting. But they were so small I could not get them to cooperate with my fingers while sewing. Frustration! I used my forceps to hold them and a bit of fabric fusion to place them. I walked away for an hour. I came back and the snaps were stuck just enough for me to easily sew them on. 


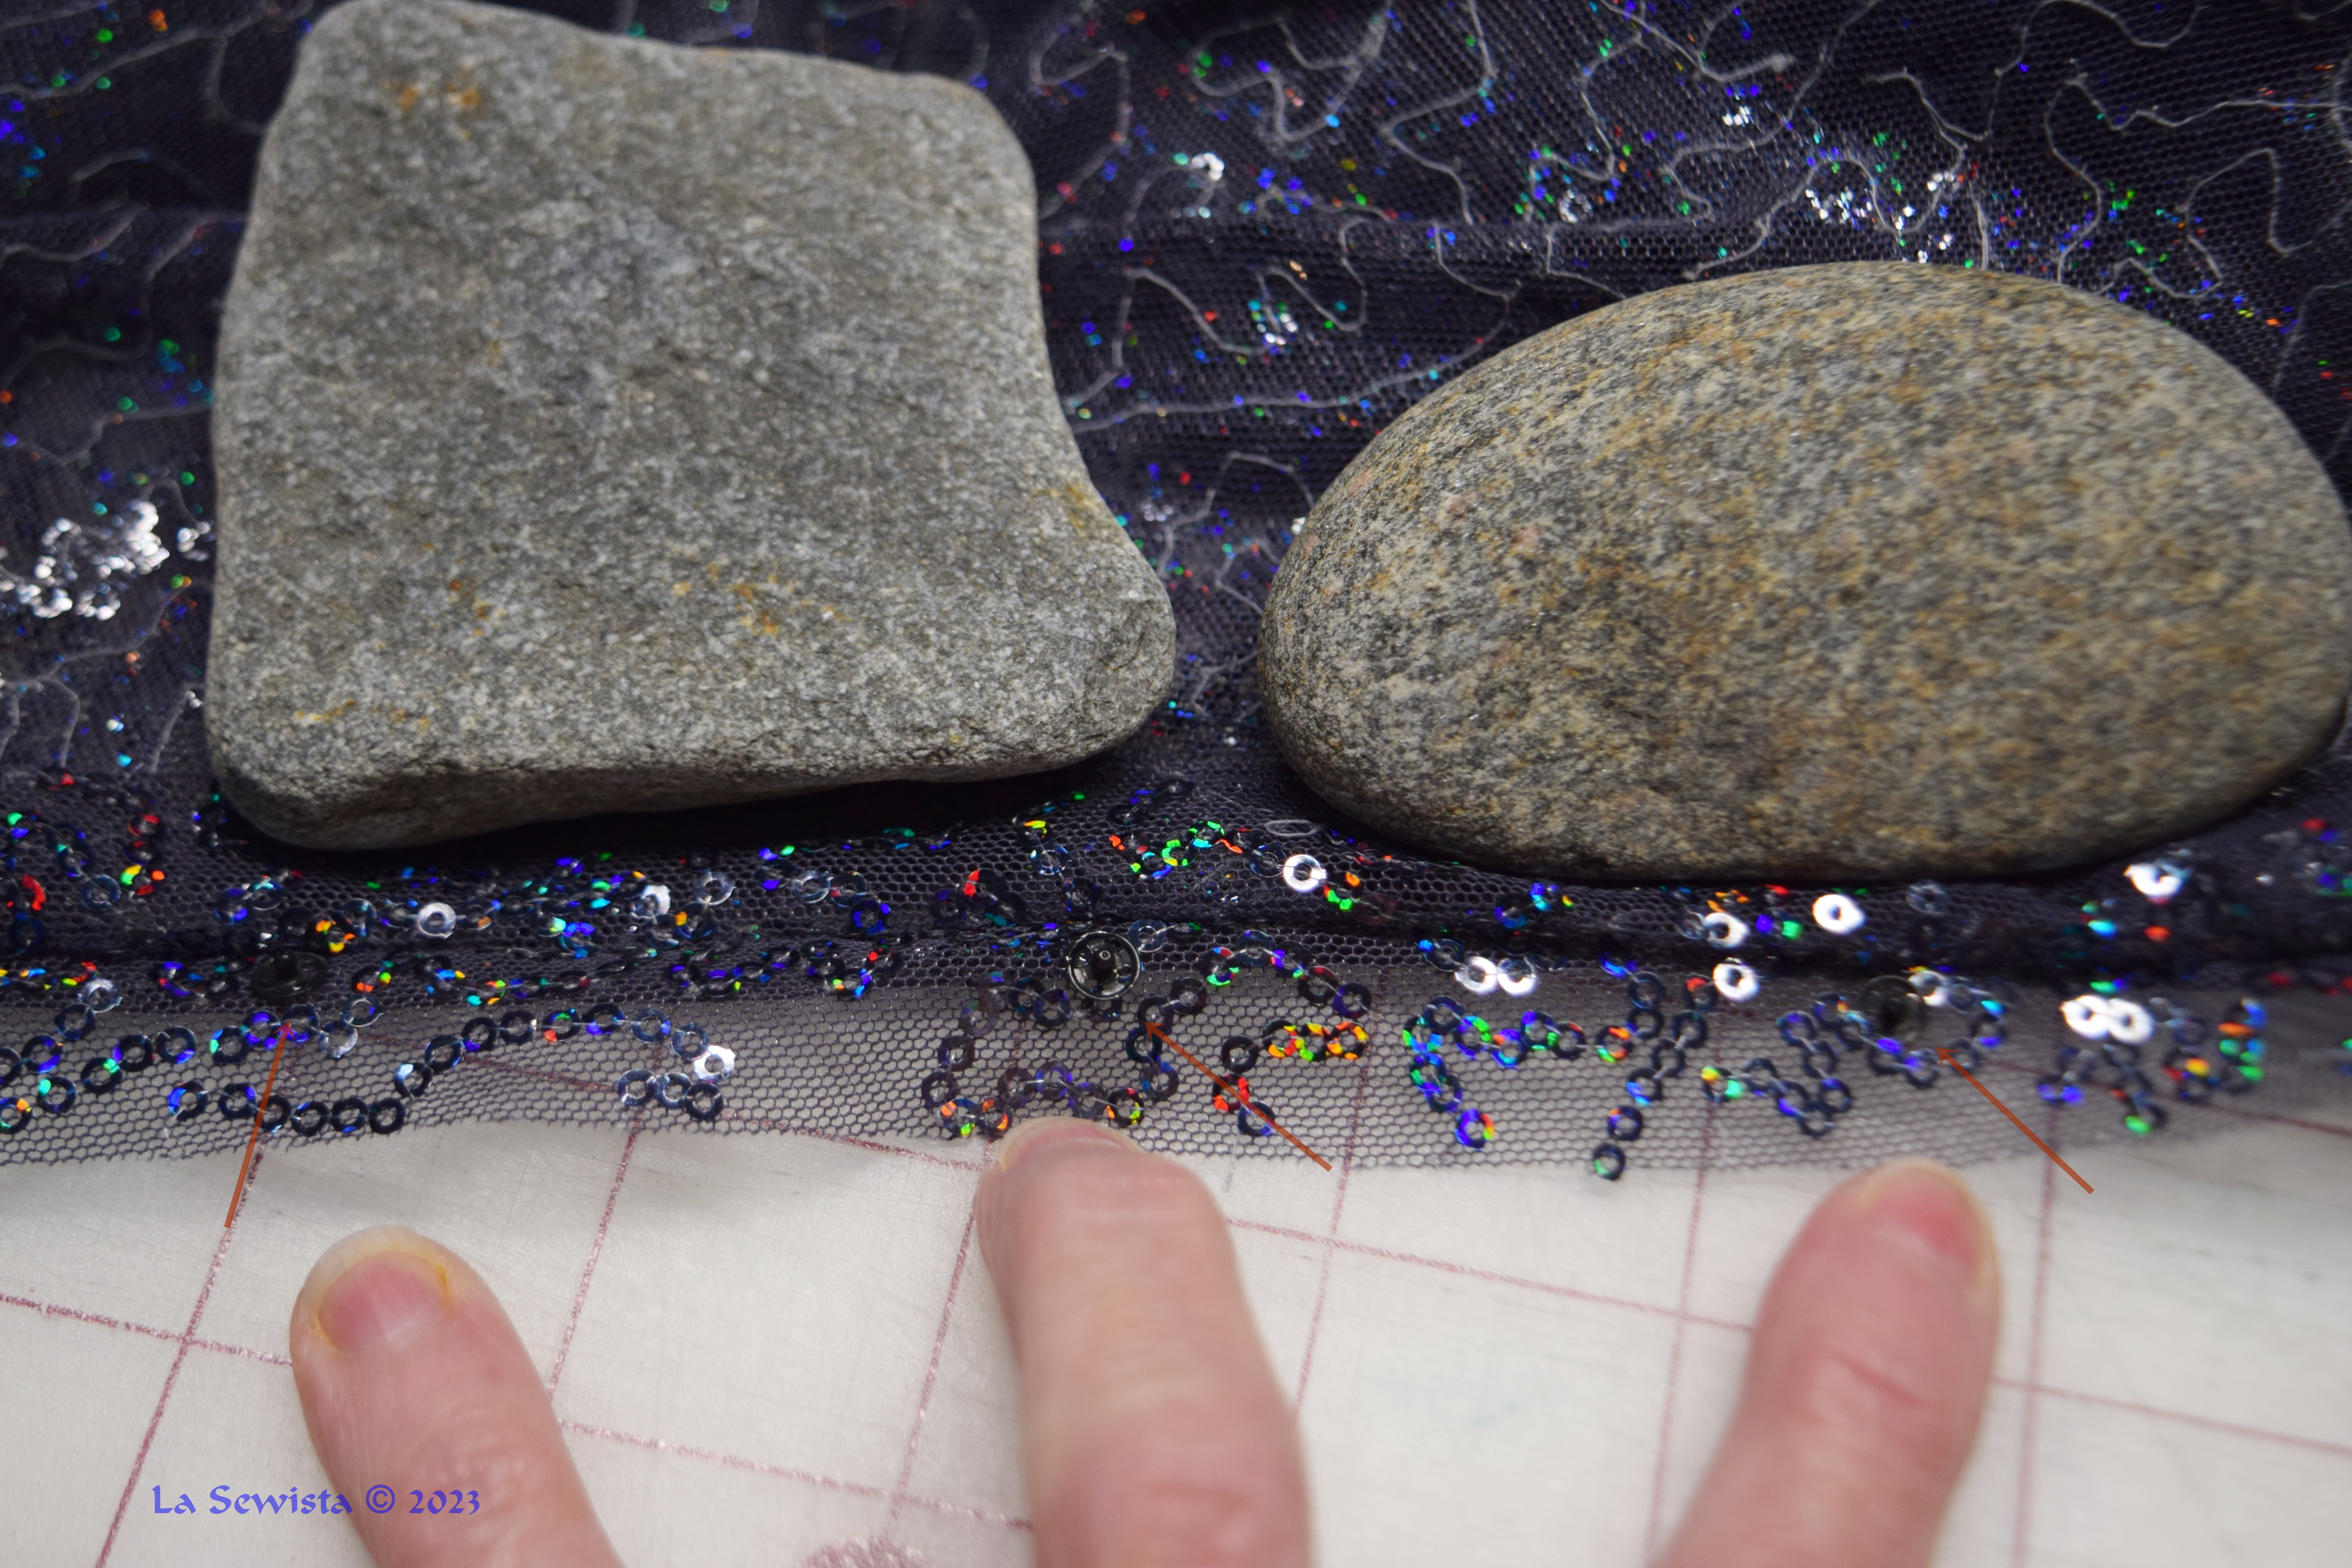
First, I had cut my seam allowance on the net skirt extra wide to accomodate the zip. I then sewed it shut traditionally with regular stitch length in the seam and long basting stitches in the zipper area. The seam part was pressed open. The zipper part was pressed to the side to make sort of a placket. That is on the right in the picture. I cut a slit between the two. This netting does not ravel.That folded to the side seam will now become the placket and home to 5 teensy snaps.  


You will need to blow the above pic up to see what's going on. Red arrows point to the glue drying snaps. The rocks hold fabric out of the way. Once dry they were easy to stitch on. I then did this again on the other side with their matching snaps and then we were good to go. You can see it all transitioned smoothly, although it requires some serious bending to reach the little buggers and get them shut. 

I tried the dress on now that the zip was in. It flowed smoothly in that seam and I was pleased. I was not pleased with my dress. The length of the hem I had put all the lace on looked frumpy and the slightly ruffled lace edge made it look like lingerie.  Hubs totally agreed.  I shortened the skirt another 4 inches,  no lace ruffle edge and it looked much better. He agreed on that as well. I trust his judgement after all these years. But talk about adding more work. I had to shorten the lining too. 


I also discovered, as well suspected, that I needed shoulder pads, just some little skinny ones.  My shoulders seem to be drooping with age, a new development in that onward journey. The dolman sleeves really accentuated it. So I got to work. 


While I had 1/4 inch pads in my resources, I did not like how they shown thru the dress. I made my own. 
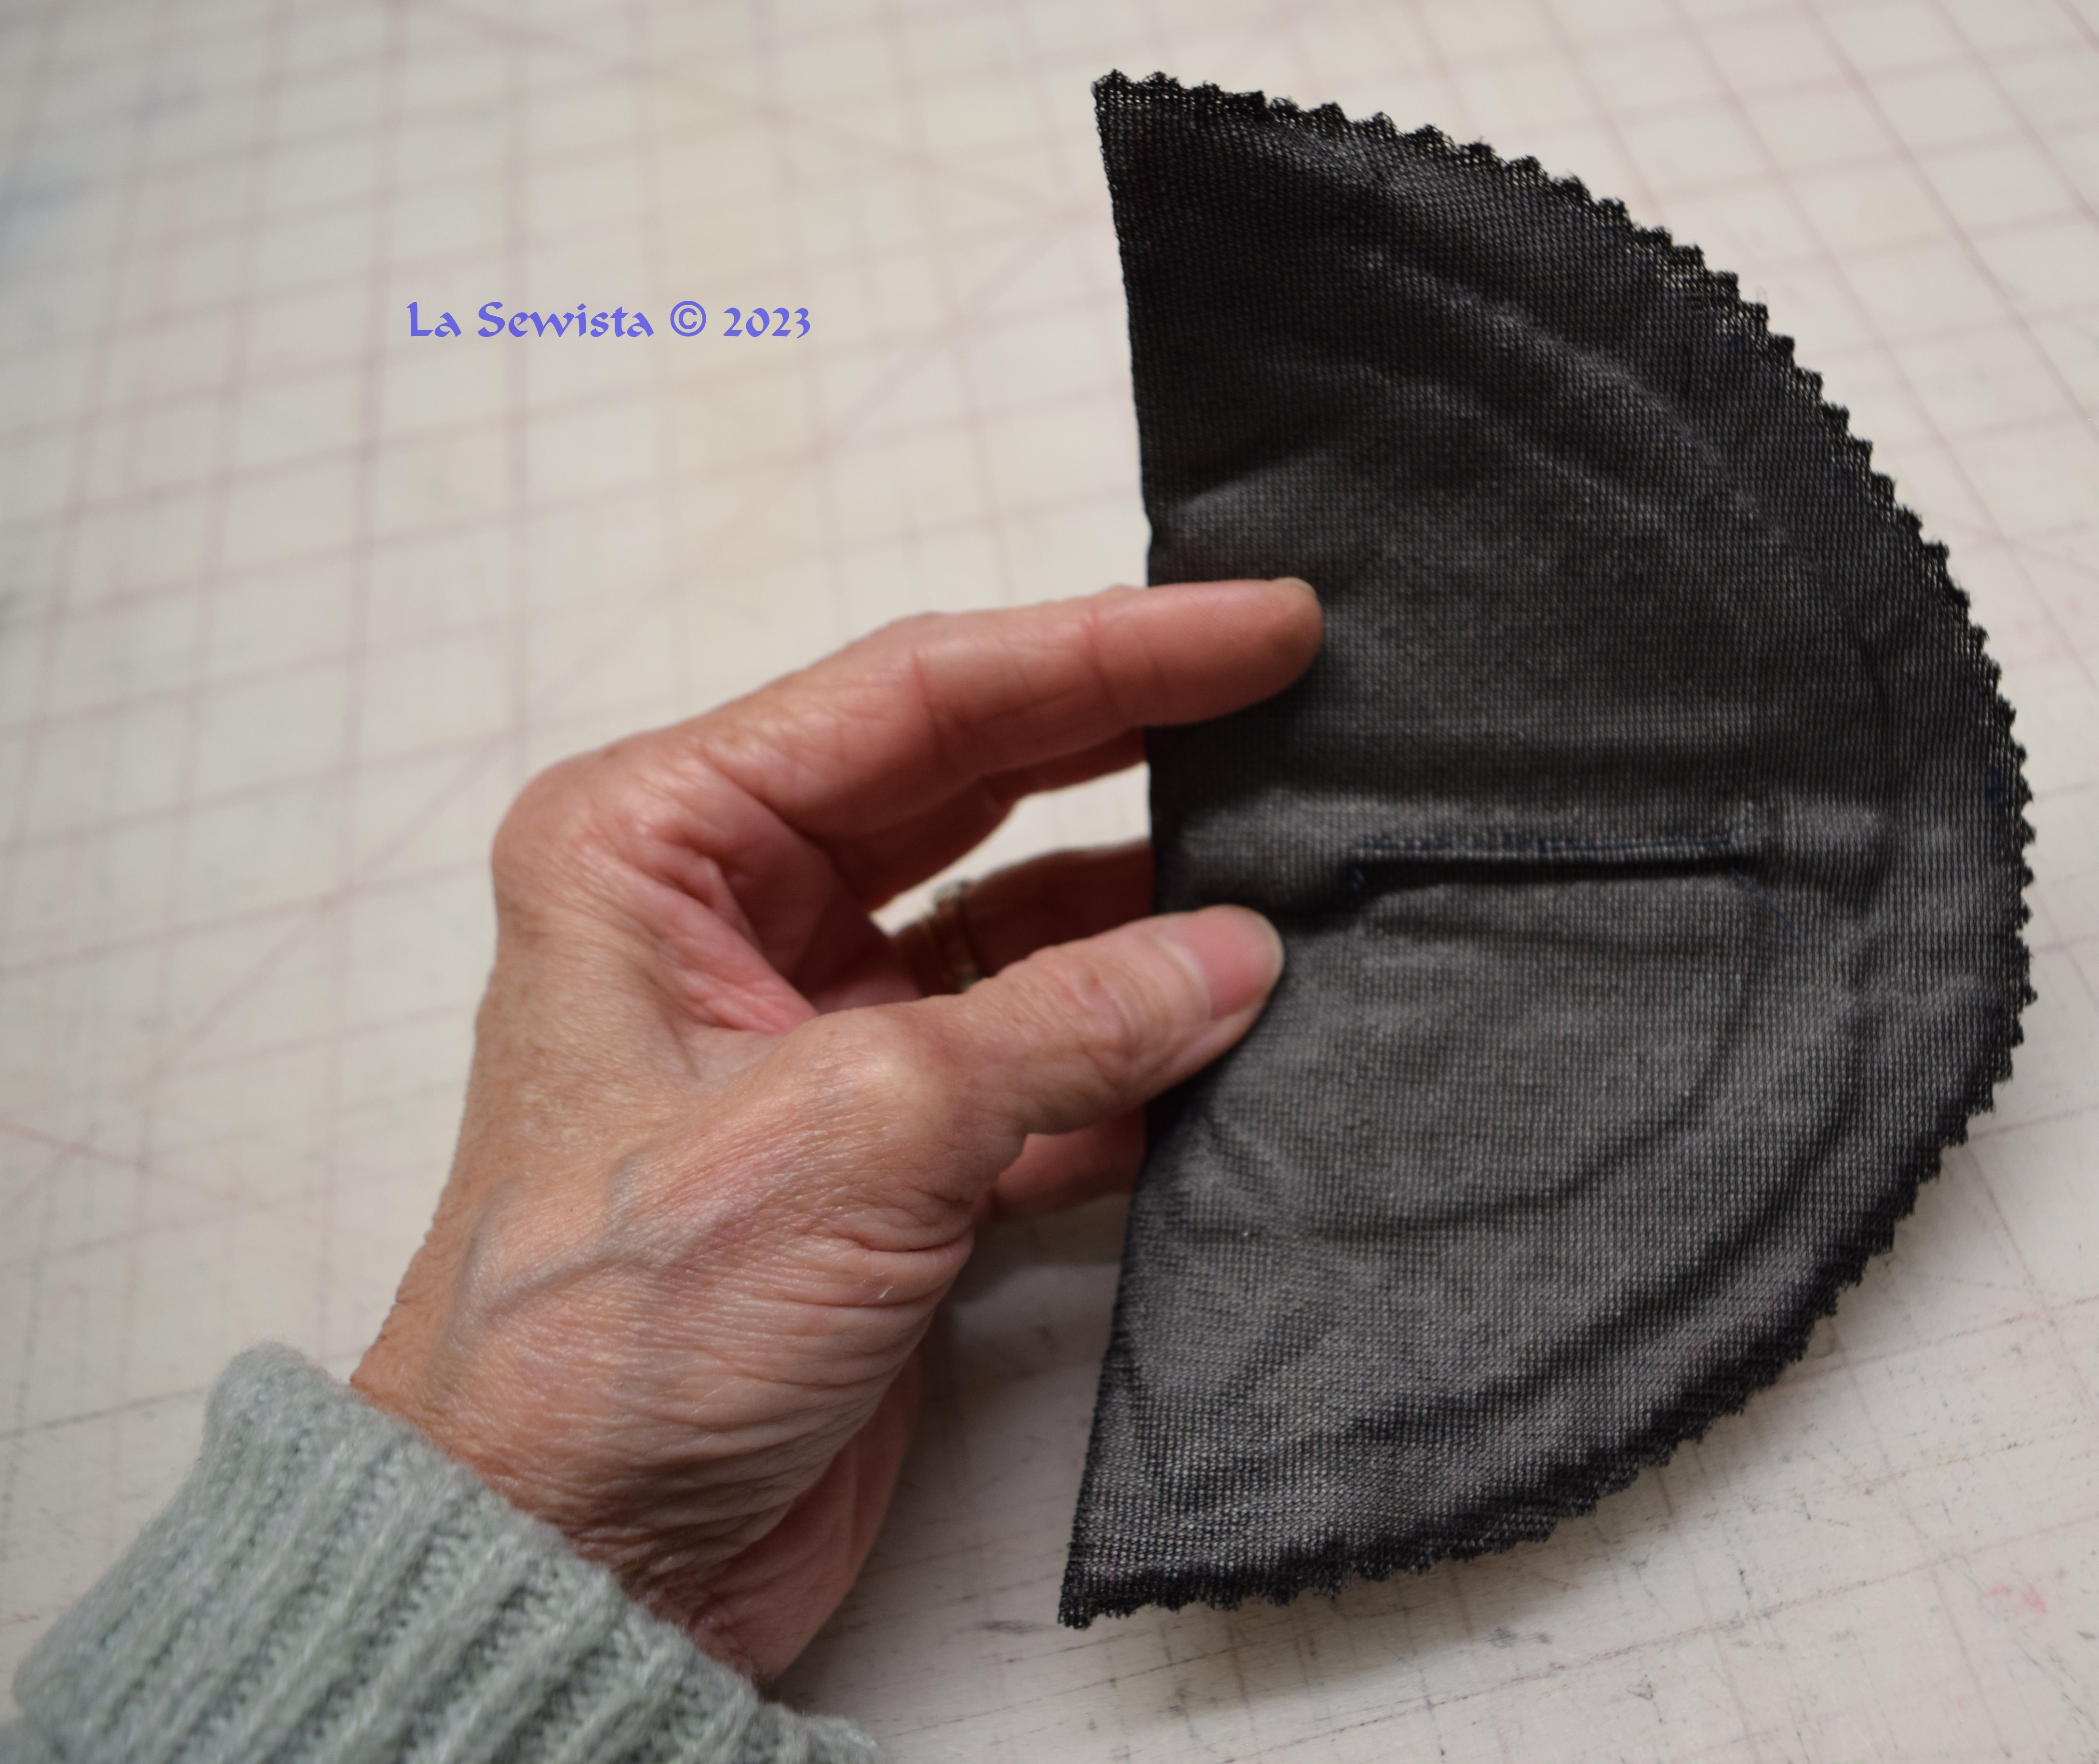


I measured the dress while wearing it to see how large to make these. I then laid out a layer of Fusi Knit tricot fusible interfacing. I cut a large shape and graduating smaller ones out of batting. I put a straight strip of batting, about an inch wide, across the pad. It did not extend all the way, just built up the middle. The Fusi Knit was then folded over and pressed to the batting sandwich. I then stitched very close to the pinked edge. I took a small tuck in the center of each pad to force the curve. I pinned them to my ham, gave them a good steaming and left them overnight. they made a definite positive difference on how this dress draped on my sloping shoulders. Don't be afraid of thin should pads!

In Conclusion:
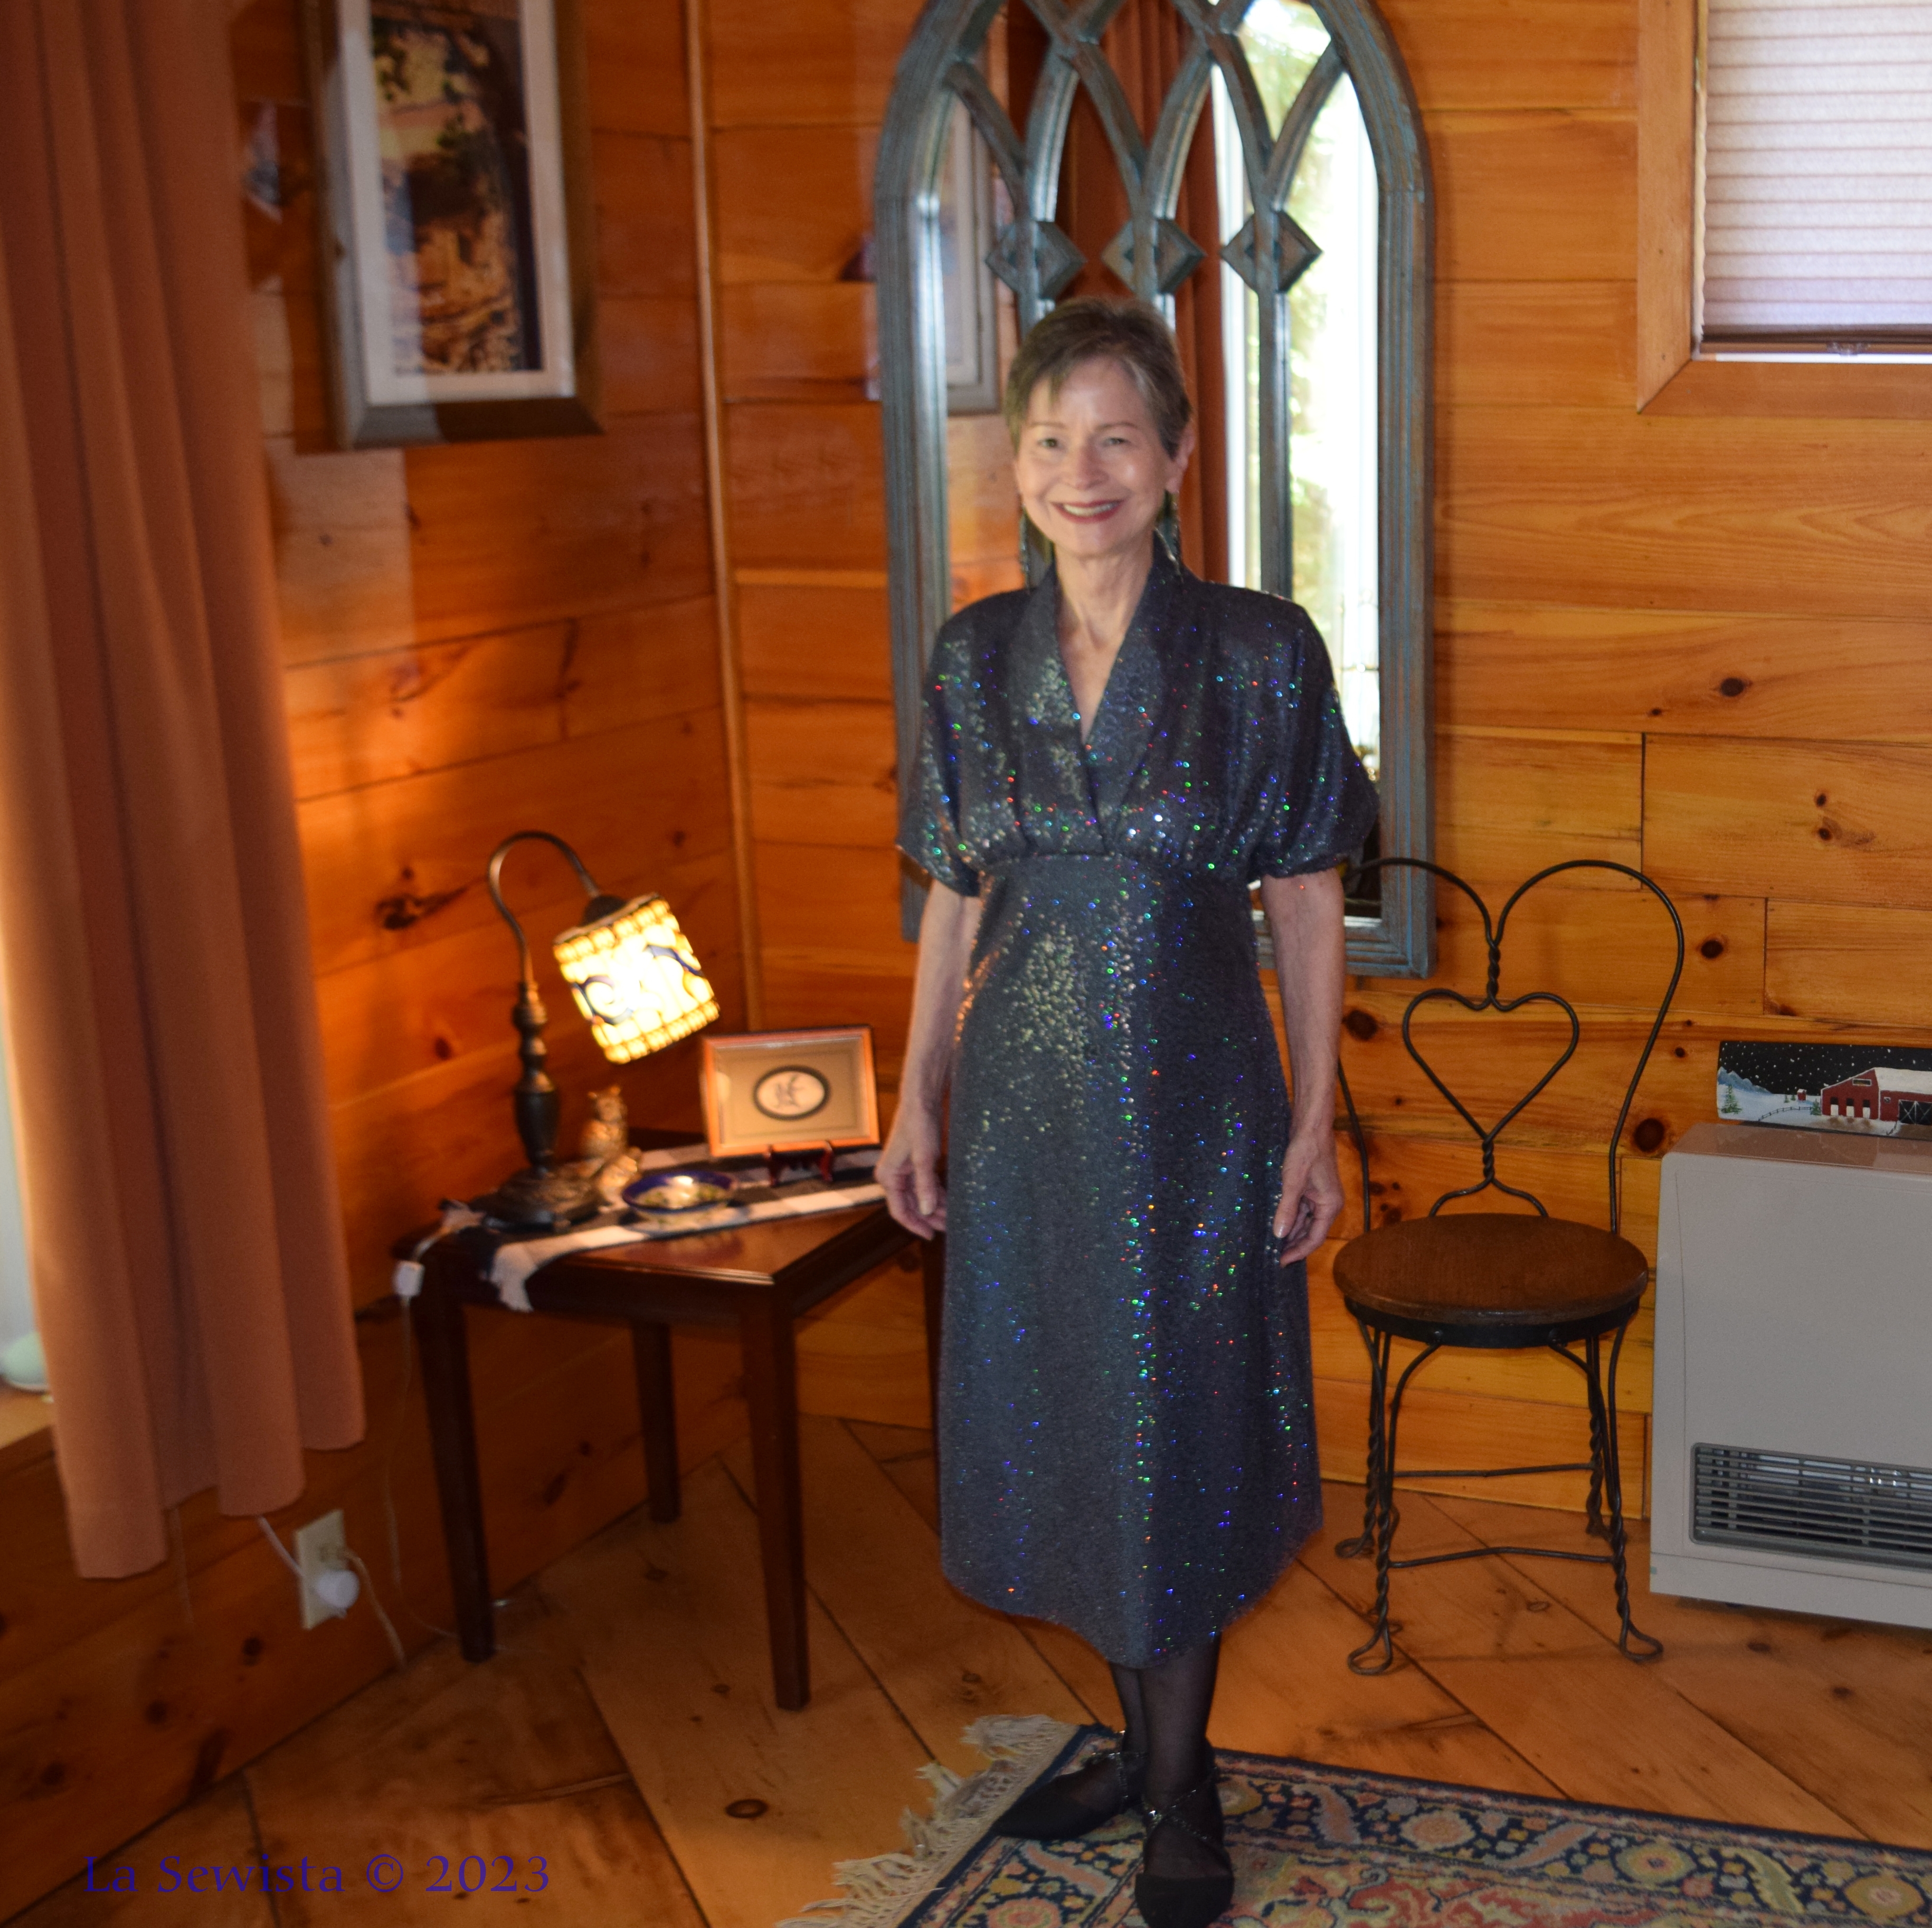


This dress was a lot of work. All of that is of my own making and choice. As far as the pattern, here I will share something that I have deliberately held until the end. I found this dress EXTREMELY difficult to get in and out of. I have very narrow shoulders. I used the size zipper recommended. I installed exactly where the dot was for that purpose. It barely got over my shoulders. I have a very narrow torso,  you all know that. I can't imagine how anyone else could get in and out of it. If I made another here are my suggestions: 
* Run that underarm zipper a good four inches into the lower sleeve seam.  I can't see any other way to make it work otherwise. 

* Consider making this dress out of a knit. Then you will get the stretch for getting it off and on. 

* Last of all,  add a center back seam to the neckline as I did, and run the invisible zip to the top as you do have a center back bodice seam to work with. I think this is the best option. 

I love the style of this dress and would consider making it again, possibly in a knit. I like the bias cut of the skirt. If I made it again I would had a triangular godet to the upper sleeve seam, begining at the outer shoulder edge, to make a fuller sleeve. I felt they could use more volume.  I definitely recommend the pattern but with these mentioned caveats. 

******************************************
 I am on to my next project, the Imby Flowy top.  I am starting with a muslin. While digging in my muslin fabric tote, I found this and decided to play with it for my Imby. More to come...........Happy Sewing..............Bunny


Thursday, July 15, 2021

The House Dress, ca 2021


Redemption! Not the most exciting garment but but this simple dress redeemed me from the sewing debacle I endured with my last sewing excursion. Coming out of Covid had me craving nicer clothing to wear at home. No more fleeces. No more letting comfort reign supreme without the slightest regard to style. No more wearing clothing I wouldn't be caught dead in beyond my front door. I want clothing that is comfortable, feminine, and would look like I gave &*$(#@ if I decided to run to the market or Post Office and bump into friends. I wanted to look pretty at home and pretty going out. I don't want to look like I just came from yoga class. I respect that others may feel differently  but enough  feel like I do that the NY Times did a big article on it in it's fashion section about a month or so ago. I want dresses. 


To honor all those who have gone before, the likes of Lucille Ball and even my own Mom, and all the women who wore cotton "house dresses" with snaps up the front to quickly get in and out of or to whip open on a moment's notice for a nursing babe, and for all the women, again like my Mom,  who surrounded me back in the day, I  wear my best bandana, a la Lucy. While my Mom would have used it to cover up criss crossed bobby pins that secured spirals of thick black Irish tresses, mine is merely hiding a bit of gel and wet, washed locks. But I like my bandanas too and wear them a lot and to honor the "house dress". 


In my opinion, the house dress should:

*  Not be tight around any part of the body, particularly the waist

* Should be easy to get in and out of

* Should be an easy  to maintain fabric

* Should never give off a slovenly vibe and be able to get you from home to public view nicely

* Should be out of natural fabrics and never sweaty or sticky

* Should be very comfortable to wear

* Can be accessorized and "upstyled" if need be. 


Simplicity 8856 fit the bill perfectly for me, but first the fabric!

Fabric:

For fabric I used my most favorite fabric after linen: Kauffman's Essex Linen yarn dyed linen blend. The weft is linen and the warp is cotton and I use this fabric repeatedly. It is linen if it could be perfect and the addition of the cotton makes it so. it reacts like denim in that it does not wrinkle up and if it does any wrinkles just seem to fall away. You can wear it all day and look great for the duration. It is comfortable, breathable, easily washable and easy to sew. I have made more garments out of this fabric and literally have two large stacks of it in my stash. It is my go to. It is perfect for house dresses, washes beautifully and would need very little if any ironing right out of the dryer. If you do iron, it responds beautifully with no fuss as you will see in my photos. 

Pattern:

Simplicity 8856 is one I grabbed off the stand at the store. What you don't get from the picture above is that it is available in this one envelope in sizes for children and women up to size 24 which they call XL. It has deep pockets and is not gathered all around as the front bodice has a flat center panel extending all the way to the hem. I liked how the volume was reduced by this. There is a lot of volume in this skirt. I took two inches from the  side front pieces  each and another two inches out of the back panel. 

I have found that when I do this type of skirt with the raised waist it can very poufy and billowey. I topstitch down my seam allowances toward the bodice which you might be able to pick up in this pic. I also, upon completion, go back and press down the top inch or so of the gathering, otherwise  all that gathering can swallow me right up, petite hint there, sewists.  


Another change I made to this pattern to accomadate fit was to add darts, small ones. In the past two years I've made two garments with raised waists like this one. I have found that they do something interesting that you need to watch for. If you wear a B cup or smaller, the garment  seems to hang from your shoulders, It will look loose and be comfy and that is generally the intended look. If you are larger than the B cup of the pattern, the garment will hang off  the tip off your boobs and is just not that flattering. when I put together the bodice of this dress, I pinched out a couple of small darts under the breasts. That pulled in the bodice enough to look much more flattering and like the dress was hanging from my shoulders more. I decided to put the short darts in and you can see them here before pressing. No regrets and I recommend with these loose bodice dresses which are all over right now. 

Construction:


This was a very easy construction and one beginners could succeed at. I had no issues with the directions and pattern either. All was clear. The closure is simple. All of my seams are stitched together,  serge finished  and pressed open. The directions have you turn them under in the area of the back slit. With serged edges there was no need for that so I just pressed them open. 

I loved the little loop for the button, vintage, which I made from a bias  tube and my fast turn tube set. 


There is so much conflict in the sewing world over bias binding versus facings. There is a lot of  HATE for facings. Personally, I make the judgement on each individual garment and have no quarrel with either. Here, I followed the pattern and did the facing.  Sorry, sewists, but it is hard to complain about a well installed facing. Done right, it stays put and you don't know it's there. Now I had my issues at one  time but with the wisdom of Nancy Zieman pushing me on I think I've mastered this one. If you would like to master your facings evermore, click here for Nancy's method; Here


I didn't want to overload this dress with topstitching. I didn't want it to look like jeans remade so I kept the TSing down to just the pockets and hem. I love my topstitching.  I only say it that way because I am not sure that every one is aware that the heinous "stretch stitch" that jumps over itself three times and should never ever be used on a knit (per experts Linda Lee and Nancy Zieman both) makes the most wonderful, thick topstitching that you can see here on the pockets. This is at a 3.0 length. Use if for TSing, NOT KNITS!


I also veered a bit from the patterns style wise with the sleeves. I sewed in the required hem but folded it up about an inch. I had machine stitched the hem in but then hand tacked the cuff in so it wouldn't turn down, turquoise arrow.  The red arrow points to the small dart which is not in the right spot as I am lifting up the skirt in this cropped pic. The original sleeve hem was not at the best length for me. The pattern also comes 3/4 length which is what I will do if I make another. 


In Conclusion: 

    Find your bandanas. Get out your patterns and make yourself some house dresses! I hope to make more, Let's make Lucy and Ethel proud!!!! ........................Bunny

Wednesday, July 3, 2019

My first evah Wearable Muslin, New Look 6866


And it's even a hand painted wearable muslin!


If you've followed me through the ages, you know I don't believe in wearable muslins. The reason I caved on this pattern is because I wanted to find out how deep the back neckline was, did it show a bra band, and could I play with the design and get some "bump outs" to work. The original pattern is great on it's own. It is New Look 6866. Make sure you don't read that upside down!

It's a summery classic with neckline choices  and deep-ish looking back neckline. My original inspiration was this beauty I found on Pinterest:


I love the look, the "bump outs", the painting and particularly that deep, shaped hem band. Thank my sister for naming them "bump outs". Sounds appropriate to me!  I had some beautiful periwinkle cross dyed linen but I needed to work out the design before cutting into it. I did and will tell you what I figured out from my first wearable muslin. It was a worthwhile experience but a new one for me. I just don't do wearable muslins! 

Fabric:

I wanted something with some body as my linen would be underlined. Dig and dig. Well, if I am going to wear it, and surely just in the garden digging, I might as well use some off white denim I've owned for years.  I  bought yards and yards years ago with intentions of slipcovering the moon, I think, and it has been the gift that keeps on giving. But, oh, my, is it blah. The more I worked with it, the more blah it got. Hmmm,,,,,,,As I was experimenting with the pattern, placing, tucking, etc, I kept looking up and around to see all my painting supplies for another project I was working on. Paint, that's it! If it looks awful, well, who cares? I had a cute stencil for a dandelion puff and I layed some paints down on the dress front pieces  with dry brush techniques to give some color and depth to the dandelions. Then I decided to stencil in the dandelions on top of the colors with royal blue paint. The stencil had no stems so I had to paint them in as well. I was pleased and this was headed in a good direction. 


The denim was prewashed three times and the paint got my usual "make it stick" technique and that worked great. I have washed this dress three times, once in hot water, and the painting hasn't budged. Yay!

Signed my artwork, too!

Construction:

I tried to keep this simple, muslin being and all, but it was denim, and I was going to wear it. I went jeans style, stitching, serging and topstitching all the seams. This dress is rugged. It actually comes out of the wash, like a pair of jeans, with a shake and it totally wearable! 


Above you can see the hem band and I will do a post on how I managed that deep, shaped hem and the bumpouts in a few days. 


The arms and neckline were simply bound with a muslin quilting print turned and topstitched. 


This dress has no zipper and easily slips over my head. I did not use the facings included and simply pressed open the serged seams and catchstitched them down. 

Edited to add that I just did a blogpost on how to alter an A line shape for bumpouts. Here:


In conclusion:

Lots of good take aways from my first ever wearable muslin making. 
   *It IS wearable, not perfectly fitting, but wearable. 

   *I need to raise the armscye to prevent bra show. 

   * I like the bumpouts but will make them a bit more shallow in the "good" version.

   *I LOVE the wide hem band. It is not from the pattern. I added that change. 

   * I will remove some volume from the back only. My SIL and I did some playing around and that    was much better.

   *I will make the next one shorter. I really thought this would be mid calf but it's not. Up it goes! 

   * I love the back neckline. I used to think my back was my best feature and still decent enough to bare on a hot day.  But not anymore..........My arms are my best feature. They have held more babies, comforted many fevers, hugged in wild passion, wrapped around the dying, and stitched probably a million stitches. You judge for yourself but I think they are my best feature. 


Monday, May 4, 2015

Vogue 8630


Right about this time last year I wrote about making a dress for a wedding with this fabric. I had the alligator shoes to match. What I didn't have was the time. At the last minute I caved and bought a little red knit number from TJ Maxx. That worked well but I have still been so wanting to make this same dress. Try again! I think I may make it this time. I am determined and will budget time each day to get it done.


The pattern chosen is really simple and I have seen some nice results on PR. The collar is really lovely, a design that flatters my narrow shoulders and long skinny neck. The dress is a simple sheath with a waistline. I prefer that to deal with my swayback. I will be doing the sleeveless version and like how the collar becomes a bit of a sleeve. The belt? More than likely self fabric. The fabric? Above you see a 100% rayon dress fabric. It's a bit heavier than usually seen but has a lovely drape, The collar will be an matching white linen, a heavy texture to match the rayon. Construction? It calls for a lining. I won't do that. Since rayon can "hang out" and potentially droop on a very humid hot day, I am going to underline it instead. The last wedding I went to, not far from this one, was extremely hot and humid and I think the underlining with Hong Kong seams will work better to support the rayon. I am going to interline with cheap nylon net. WTH.....I read about this some time back. A designer used this to keep dupioni silks from becoming totally wrinkled and the netting goes between the lining and fashion fabric. Again, to hold the shape and prevent wrinkles on a hot summer day. I am anxious to try this technique and feel I have nothing to lose here. Can't wait to report how that goes.


The zipper on this design starts two inches below the neckline and is hidden by the wide collar. Here you can see my beginning muslin. The form is tilting and no side seams are sewn. My sewing plan has me finishing the muslin tomorrow. Just looking at this I am thinking the neckline may be too wide and will show straps. Or do I go strapless? If I had more time I would build in a corset but not this time! The upper back is looking wide, which usually happens. I don't like the simple unsewn slit for a vent and think it looks a bit cheap. I think I will make a more tailored vent instead. We'll see. I also think I will hand pick the zipper, maybe with some beads.  This garment is definitely planned for dry cleaning only. I also think I will need to peg the skirt. Not sure on the length yet. Your vote may help me there.

I also have ordered a hat to go with my outfit and it will work great with this dress as well as with nothing else in my wardrobe. Once I put down my plastic on the hat I was committed to making the dress. So I am focusing on this bigtime. I still have a long queue of projects I want to do including bags and some more linen pieces. Spring has finally arrived here with it hitting the eighties today and yesterday. Yay!  So vacation and it's mandatory after vakay catchup is out of the way. The now dry green yard is calling but this dress has priority. Stay tuned.......Bunny

Saturday, August 23, 2014

Sew Chic Patterns

Today I am thrilled to introduce you to Laura Nash of Sew Chic Patterns. She is an Indie designer who brings a depth of knowledge and experience to her designs that is very impressive and it shows in her patterns.
I first discovered Laura's skills when I saw a review on Pattern Review for her Fifth Avenue dress design.  Do Laura's patterns have a vintage vibe? Yes, most definitely. But they are not the nod to simplistic fifties fashions that so many indies have over saturated the market with. Laura's vision is one of femininity with a big dose of elegance, the type of garment you could wear to a wedding or evening out and turn heads. Even with the backwards influence of fashion  her looks feel fresh and original. Just look at her pattern called "Phantom". This design can be a swing coat, a top, or something as elegant as what you see below.

This bit of sheer froth can be even more appreciated in the line drawings where you will see the shape and detail built in as well as how easily it could be interpreted into much different looking garments.


With that bit of tease I would like to share with you an interview with Laura that she was so gracious to accommodate. 

When you were sewing in your younger years did you have one particular project or garment  that you were particularly proud of?  Or that was particularly difficult to complete?

As a teenager, I think my sewing was fairly inventive. I also enjoyed coming up with costumes for school plays, performances, and Halloween. Of course I didn't know how to make a pattern from scratch like I do now, but I would use a fashion pattern as a base and create something completely different from it.  I don’t recall it as a challenge, but my best project from that era would be the wedding dress I made for my mother.  She had a dress in mind when shopping the pattern books, but couldn't find anything exact. She ended up buying a Vogue pattern as a base, which was really quite extravagant for her budget. I changed quite a few things adding in a yoke with mandarin collar and full sleeves with cuffs accented with rows of tucks, ribbons, lace, and buttons, and sleeve and skirt overlay of white striped chiffon.  My sister was married in the same dress.

What fabric has given you the most difficulty?

I really dislike brocade. It’s beautiful, but I just can abide the constant unraveling!   People complain about chiffon, but I don’t mind it at all.  I find that careful preparation of the fabric with attention to the grain when time to cut makes everything else go smoothly.

Your business is quite comprehensive and must be quite time consuming as well. Any hints for getting it all done? Do you find much time to sew now?

Oh Yes! I have found out for myself that running a company is more than full time work! And at least for a perfectionist, getting it all done just doesn’t happen, but at some point there is “acceptable.”  Being organized is critical to being efficient no matter what the job.  I wear a variety of hats, of course, and I can’t be without sewing completely but I don’t get to sew as much as I’d like. However there is a bright side to the situation; I see from my helpers what their difficulties are, which makes it easier to anticipate and look for solutions in assembly and techniques for best end results for people of all skill levels.

Your garments have a vintage vibe but in an elegant way. I love the tailored extras that you are unafraid to incorporate. Who or what inspires your designs?

What a nice compliment! For me, vintage means elegant, though you won’t find that in the dictionary! It’s kindness, poise, restraint, modesty, classic, gentle, beauty.  I hope my designs speak well to that definition. I try to create styles that are wearable in the marketplace as well as the workplace for the 20 and 60 year old alike.  Simple silhouettes definitely have their place, but I hope that adding special and even unusual details, it brings them to a new level of excitement. All of my designs are directly inspired by the first half of the 20th century.  Though I have bookshelves full inspiration by way of scrapbooks, notebooks and books about designers, old sewing manuals, and anything associated, I rarely need to look at any of it. It’s in my veins now!

Everyone loves a peek into the sewing space of other sewists. Care to tell us what your space is like? Do you work better with a bit of clutter around or must you have everything in its place to be creative?

In my main work area, I do have a certain amount of clutter because I like things to be near me and stored near first use. Some things never get put “away”, but I cannot operate in chaos, so I must stay with a certain level of of organization. All works in progress, along with the project materials, are kept in Rubbermaid plastic bins with lids, of which I have two sizes.  I keep all of my everyday sewing tools lumped together in a large plastic school box case, and have a tall portable stacking bin for things that may need to move with me, but things I need less often such as sewing feet, bendable rulers, electric shears, push pins and such. My cutting table is always layered with two cardboard cutting boards (Dritz Superboard) and elbow lamps and ironing board nearby.  To tidy up, I have a computer armoire that I have converted into sewing storage. I stow my sewing machine in the compartment where the computer tower would normally go, and notions and tools are contained on the pull out drawer where the keyboard would usually sit. Project bins stack below and the upper area is tall enough for narrow bolts of fabric I am working with.  I have three other rooms that get used for printing, packaging and storing supplies, materials, and equipment to vendor, teach, and produce product.

Can you give us any hints about upcoming patterns? What is your favorite to design?

I admit a weakness for dresses.  Pants and tee shirts are a necessary part of our modern life, but I don’t find them interesting to make or to wear.  I have several projects in the works, but the one I can tell you about is a redesign of the Pendleton pattern.  As one of the first to be published, it’s been on the market for quite a while, and rather than retire it, I decided to give it a refresh. I’ve finished the first sample and it will have a view B option as well. The dress has a much younger look to it and a whole new personality that I’m really excited about. The only thing left to decide is whether I should also give it a new name too!

Thank you so much, Laura, for taking the time for this interview. It is my pleasure to introduce you and your work to my readers. With that in mind, here are a few of Laura's designs, some for day, some more for evening, and others that can be interpreted either way. 


These are just a few designs from Sew Chic Patterns. Others include hats, luscious lingerie and more. Laura is truly a gifted designer. Her experience and skills are obvious. I look forward to making one of her designs in the near future. Get to know her work through these links and I trust you may feel the same. 


Sunday, March 30, 2014

The DK jumper, #2, V 1175


Isn't this a fun shape? I really like the hem at this length without the balloon effect., at least for now. If that continues I will just hem the dress and lining separately and leave it long. 

I decided on the pivot and slide which I think will work out the best for my shape. I added to the underarm and center seams this way for an additional 1 1/4 inch of width to the bust. I tried the slash and spread method, the remnants of which you can see on the muslin. It pulled things all awry and made big gapes as well. I think it just didn't work for my particular shape but I thought it would as it did for others. Pivot and slide it was! 

At this point I have the bodice pieces all on. Let me tell you, this pattern IS ALL about the marking! I used a legend and colored threads to mark things properly. 

It is really necessary. For the pleats I used a wax marker, the kind that disappears nicely when you iron. I drew in the direction of the pleats as well. That was VERY handy. I also made sure I laid the pattern out  for cutting exactly as shown in the directions. On my recent draped back tee, I ended up with a fine top but it was "backwards" from the directions in the pattern. With such odd looking pieces and such critical marking I just didn't want anything to vary from the pattern. So far it has all gone together really well.

I will say it has been bulky. I am using a light to midweight linen. And yes, it does look like denim. But it has that bit of linen glow which I love, and of course the wrinkles. This pattern has way too  many layers of fabric in places to make out of a denim and really needs a lightweight fabric.


At this point the fit looks pretty good and as I see this design unfold I think it will be flattering. The back hugs my narrowest part and that's always a good thing. 

Let's see if I can make it through the next steps, Wowsa!...Bunny


The Ray Pinafore, 2025's Epic Fail

  Happy New Year and welcome to my epic fail of 2026. I guess you have to have one, right? This is the Ray Pinafore from Paper Theory Patter...