I have started working on my linen dress. It will reflect some fit changes from the original Dandelion Dress shown here. It will have a tad less volume, particularly in the back. The armscyes will be raised about a half inch but otherwise, it is the same dress. I have a new pattern to play with as they were on sale and this way I could start fresh for all of you who wanted to know how to go about adding a bumpout to an A line dress or even a skirt. The pics aren't too exciting as they are of pattern tissue but the concept is a fun one so let's get going!


What do you need?
* New Look pattern 6866 if you want to really copy what I did which is fine or any other maxi A line pattern.
* A cutting board so you can see the measurements as that helps to establish grain and get your alterations correct.
* Dressmaking ruler, French curve or whatever shaped ruler you like to use for pattern drafting. Above are my rulers , decades old, purchased at a travelling sewing show. Great learning experience and lots of unusual notions. I don't think I have put these down since I got them in the eighties. I use them for everything despite their names.
* A red or blue fine point Sharpie or whatever you would like to use to make your changes as long as it is not black or navy. You want a line that stands out to avoid mistakes.
* Tissue paper in case you would like to trace from your original pattern, which I would recommend, or if you need to add extensions.
That's about it.
The first thing you need to do is iron your pattern tissue, BEFORE CUTTING, and I insist on it. It will just be easier to work with, never mind other good reasons why. If you are using 6866, be aware that the facings have different sizes on different facings and they are overlaid on each other and I don't know why.
A note about the pattern and really any pattern you are going to cut. Iron it (no steam), lay it out flat, and measure it. Only then will you know if it is close to fitting. In this pattern I used the smallest size. The bust area, I think, fits great on me. You judge. There are 40 inches in the bust for the size small. THIS IS DESIGN EASE, PEOPLE. I will write a post on this soon. This is not an ill fitting pattern. The shoulders were perfect on me. More to come on this subject as there is so much misunderstanding about the concept of fitting ease and design ease, two different things. Movin' on.......
Getting ready to cut:
Roughly cut out your pattern pieces. Do not get rid of any of the tissue in the side seams. Keep it all, including all sizes. Use your red marker to extend the View E hemline out to the end of the tissue from whatever size you are using. I am using small here. Don't cut off any of those other sizes.

If you are using the larger sizes you will have to add an extension of tissue or paper about 4 or more inches wide to draw the bumpout. I am using View E, the shorter version here. Don't cut anything yet! Lay out your front piece. We will concentrate on the hems for now. Measure across the tissue six inches down from the View E hemline and make marks all across. This will be your new hemline. Connect the marks to give you your new cutting line for your hem.

This is the new cutting line for your deep, shaped hem. Cut out the hem, ONLY , across the bottom.
Fitting. Do any vertical adjustments you need to do before cutting any further. I simply tucked up some length a couple inches below the waistline but whatever VERTICAL adjustments you need, go ahead and do them now.
After that you can cut out any other parts of the tissue EXCEPT the right and left side seams for front and back.
Let's look at the front first.

I always find it easier on these nested patterns to outline MY dart in a contrasting color. Makes things a lot easier to mark and match up. I like to put dashes down the center too, to fold on.
It is now OK to cut out your pattern everywhere EXCEPT the right and left side seams from the notch under the dart to the hem.

If you need to do any further alterations, FBAs or such, do them now. You can see I raised my armscye a bit here, plight of the short people!

For larger sizes, add an extension piece of paper, maybe 5/6 inches wide to the side seam. You will be working outward from your normal size seam, whatever that may be. Place the tissue pattern piece on your cutting board ON GRAIN. With your French Curve or any other curvy Dressmaking ruler and your red sharpie draw a new side seam on the pattern as shown in this diagram below. It will give you the shape of my original Dandelion dress. In my linen version, I will be only extending out two inches, not three, to reduce a bit of volume and play with the shape a bit. In a nutshell, here is what you will do as you can see in the diagram.

* Place your pattern piece on grain on your cutting board.
* One inch from YOUR SIZE side seam, at the new hemline, make a hashmark. This is where you will start your new curved bumpout side seam.
* Twelve inches up straight up from the hemline make a mark on the old side seam.
* At that 12 inch mark, turn Right 3 inches and make another mark. This is where your widest part of your bumpout will be. Feel free to do less if you would like a different look.
* About 4 inches below the notch, make another mark. This is where you will start curving in, instead of bumping out to give yourself some waistline shape.
Lay your new altered pattern down on the cutting table. Lay your back piece on top, matching the notch and side seam of the original dress. With your sharpie draw out the same shape you just made on the back of the dress side seam. Done.
We still have the hem band to deal with but I want to get the linen all cut out first and lined and you will see why later. You may want to wait for that instruction before starting to have a complete understanding as more shape is to come.
I am five feet tall. These are the dimensions I came up with based on nothing more than my inspiration picture. I am sure the model in the picture is far taller than me. You can move these curves up and down any way you like to work with your own height. I have no magic formula. A muslin is wise. Just remember to go in that one inch from the side seam line for YOUR personal size, not mine. This helps shape the wide hem band. Also remember to curve back in about 3 or 4 inches before you reach the notch to give your waist some shaping. A dress with this much volume needs that inward curve to look decent.
You will be doing more shaping when the wide hem band goes in.
Once all of your lines are drawn in with your red marker, cut out your tissue. If you've read this far, you can see that you are destroying the original tissue. I suggest that before starting you trace out your original tissue as this is a great classic pattern that I am sure you will use over and over. I know I will.
I did not cut out the wide hem band until the dress was all cut out for what will become obvious reasons. We will continue with that step in the next post as it is a bit involved. Stick with me! We are almost there!
**************************
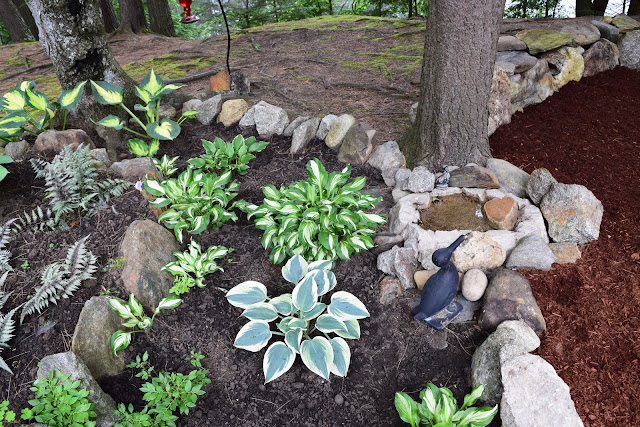
Because you have endured these rather "dry" pictures of pattern tissue, I will leave you with a bit more color. My husband and I have been working hard on our property we bought last year. The outside, like the inside was a nightmare but one with great potential. We took care of the inside with a total rehab and love it and it's like a brand new home but the outside now needs our attention. It is quite sorry. This property is on a bluff/cliff, whatever you want to call it on a small lake in New Hampshire. We have incredible wild life every day who drop by and visit. Looking forward to less energetic years at some point we are making this a no lawn, woodland shade garden for about 90 % and all of the back yard. It will be filled with mosses, pachysandra and other shade and acid loving goodies. We have done massive clean up here , I mean massive grunt work but it is looking so much better. We have a long way to go, long way, but gardening takes time and teaches patience. You can see our fairy moss growing happily and we can't wait till we have velvet everywhere. It is doing really well, coming from just a tiny bit. It will come as things grow and more hardscape goes down. Here's a few pics:


Happy Sewing!.......Bunny


Positioning all of those rocks! So much labor, but it looks fabulous already. A woodland wonderland in the making. Pachysandra is such a wonderful ground cover. In our part of the South we are largely stuck with ivy which is so invasive, right down there with Kudzoo.
ReplyDeleteIt was a test of marital endurance! Pachysandra does really well around here. I am going to my daughter's to harvest some more tomorrow!
Delete