Sewing Vloggers

Showing posts with label Pants. Show all posts

Sunday, July 26, 2020

Pants length and Petites and Talls


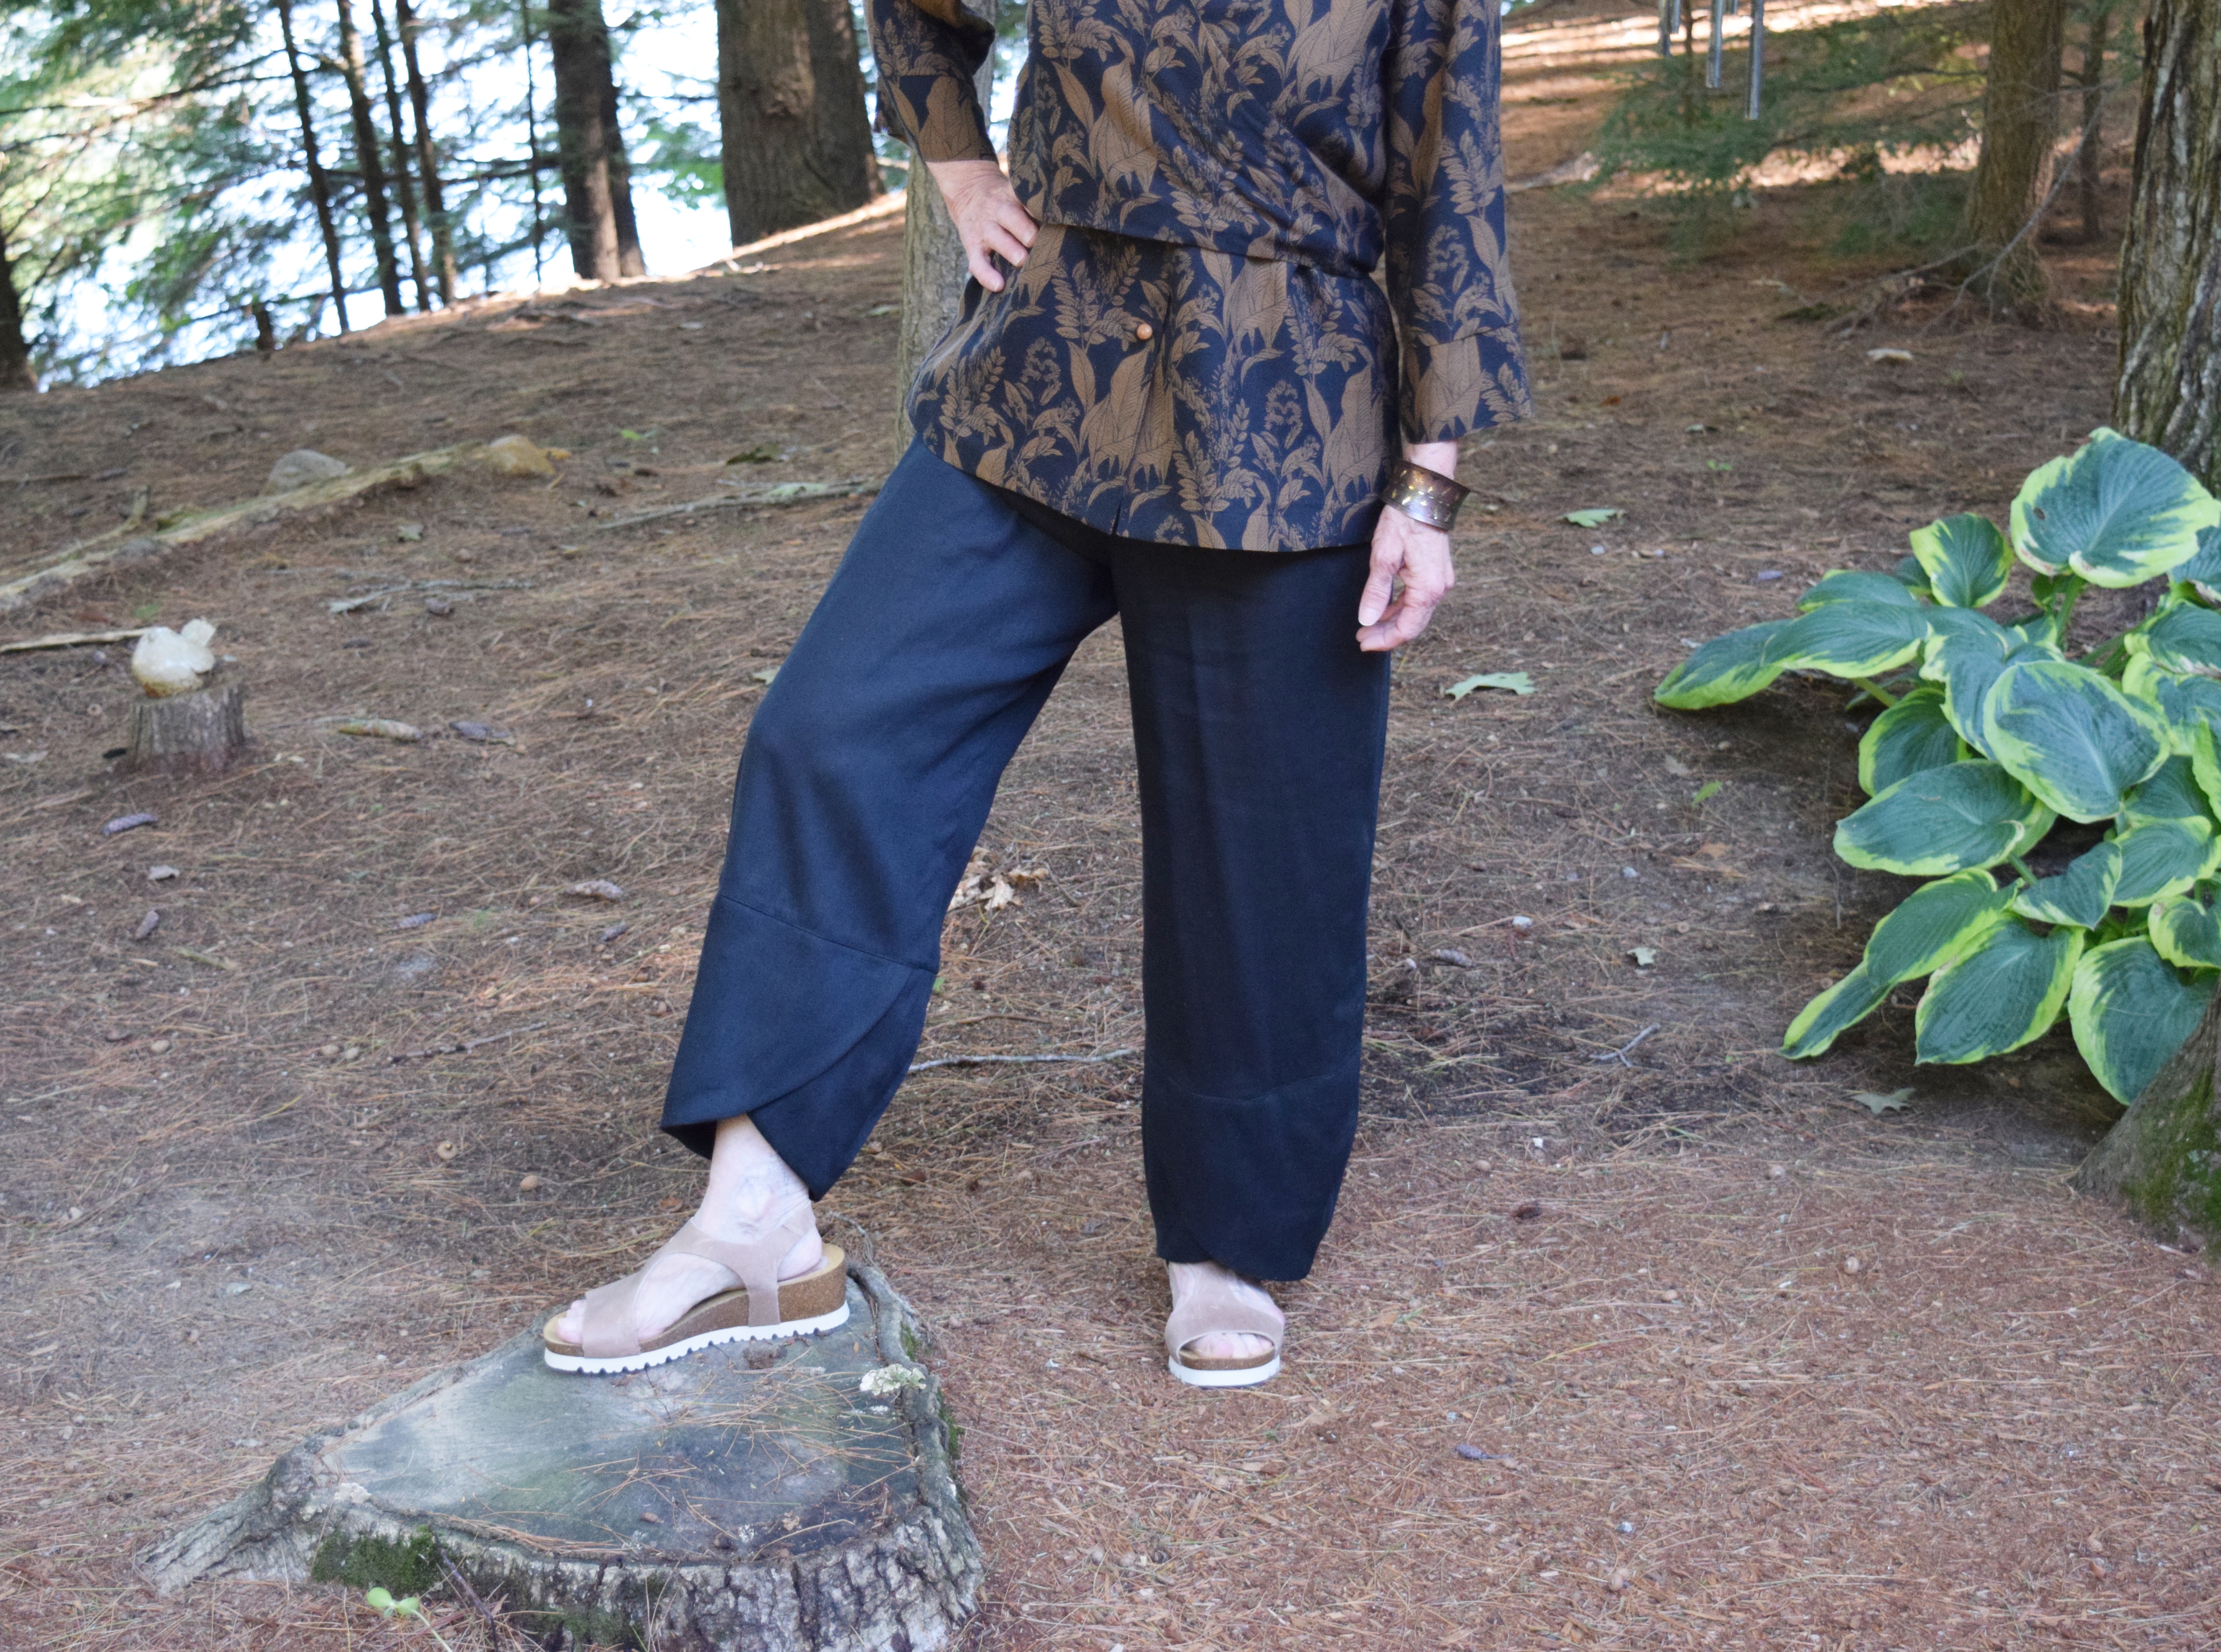
Simplicity 8922 is a great pattern. It is a straight legged pant with 4 cuff variations that are separate and sewn on to the pant leg. If you look like the model on the envelope, well, perfection in hem length ensues. If you are not that five foot six inch dream woman, this divided look could easily go awry. I just made the pants you see above and have already started a second pair. 

 I made it my business to come up with a formula for getting this proportion thing done right and done easy. I had spent way too much time on this part of the last construction and had to figure out a different way. This method is easy, didn't take me long and will work just as well for those who are taller than our dream woman on the pattern envelope. 

Before we start I would like to say this method could work on any pattern. You just have to establish where your knee is and where the knee is on the pattern. For other pants patterns you can fold the front pant leg in half connecting the edge of the finished hem on a full length pair of pants with the inseam crotch point. Keep your grain line arrows straight and in line with each other. Where the fold is is where the pattern has decided your knee is. This is your frame of reference for adjusting any pant length, whether you are short or tall. You then compare the pant leg with where your knee is and make the needed adjustments. With that all said, here is how I went about dealing with the proportions between the cuff and the pant leg on Simp 8922, particularly for petites. For Talls, just go in reveres. 


The first thing you need to do is to find a pair of pants that has the perfect length that you want to also have in your new pair of pants with the cuff. Look in your closet. Try them on. Are they the perfect length you are looking for? Get out the measuring tape.

Put the pants nice and flattened out on a table.  Hold the beginning of the measuring tape right at the seam where the waistband meets the pant. THE SIDE SEAM.  Press down and hold tight. Now measure the side seam to the fold of the hem edge. You are measuring the finished length of that side seam, no seam allowances or hem insides included. Write that down. 


For this pattern, hold the front leg pattern piece against your tummy making sure the SA matches you natural waist. Have someone mark a dot on the tissue where your knee is. Done that step! Make a dime sized circle with crosshairs in it to mark your "knee circle". You want it rather obvious as it will be your reference point. 


Lay this front pant leg pattern flat on the table. I was working on my back leg so that is what you see here but it is the same. You can see the red dot and that is my "knee circle".  Fold the seam allowance, or if using a sloper like I am, the hem allowance on the pant leg to the back of the pattern. Lay it out on the table nice and flat. 

Cut out the tissue for your cuff pattern. Fold the top seam allowance and the hem edge on that to the back of the tissue as well. This is all specific to S8922. 

Lay the cuff piece up to  the pant leg piece matching the top of the cuff band SA with the edge of the pant leg hem SA. The SAs have all been folded to the back. This will give you the view of the completed pant leg as per the pattern. Now we know you are a shorter person than our model on the envelope and this will be too long. Measure that side seam, not the cut edge. What is the difference to get you to where you need to be to match your perfect side seam length that you earlier wrote down?  Whatever you need to remove, take half of that and tuck it out of the cuff band. So if you need to reduce the pant leg 4 inches total, take  two out of the cuff band with a folded tuck. Match the seams again and look at your pant leg.  It is still too long and you have 2 more inches to remove so take that from the leg to get to your total of four.

 I found, at five feet tall, just taking two inches out of the cuff and sliding it up and down the pant leg until I got my exact side seam length I wanted worked out perfectly. So, next, slide your cuff band up until you have the exact length you need for your perfect side seam measurement and judge how it looks. Use your knee circle as a reference point. If it is good, and you have the right measurement for your side seam. mark your pant leg and fold out what your don't need.  So if you slid your cuff up 2 inches to make the four inches you needed to get to your perfect length AND it looks good to you and in relationship to where your knee is, tape things in place and proceed to cut your fabric. Double check your measurements again after you have folded out the unwanted length. We'll call this technique "Tuck and Slide". You tuck out  your cuff  based on your side seam measurement and slide up or down to get the perfect length. How's that? Once you've found your magic spot, just tape the tuck into place and cut or fold out your pant leg tissue as well. Make sure you've added back seam allowances to the pant leg.  Double check everything before you cut. Measure the side seam of the pieces, add up and see if you get your perfect side seam length from the original garment.  Also, remember to do the same to the back and any facings you may decide to mock up as I did. It really only took a few minutes compared to my first effort. The magic is the side seam measurement. Also, that knee circle is a priceless reference point and I implore all pattern companies to put it on their pants patterns. It is theoretically the halfway point between your inseam crotch point and the hem edge. We know we are all built differently and knowing where the knee circle is on the pattern allows us to adjust for our own unique shape. Short from knee to hip? Remove length there until your knee circle matches your own knee and vice versa. It is a great reference tool.  In short here is our petite or tall pant leg adjustment for styled cuffs:

* Find your ideal side seam measurement for the completed garment. 

* Find your knee circle on your pant leg. 

* Fold back the hem allowances on the cuff band and the top seam allowances on the cuff band. Fold out the seam allowance on the pant leg where it meets the cuff. 

* Match up the bottom of the pant leg and top of the cuff. 

* Fold out half of the measurement needed to reduce  length on the cuff. 

* Match the cuff top to the leg bottom . Slide up the cuff until you reach your ideal side seam length. 

*Mark your pant leg and fold and out a tuck there as well. 

* Fold all your tissue back out. Tape in your tucks and cut out your pieces. Measure twice, cut once! 

HAPPY SEWING!....................Bunny

Wednesday, July 22, 2020

A Tale of Two Simplicities!


Hello, sewing friends! I held off posting until both the pants and the top were complete for this outfit. While I fell in love with this rayon/lyocell blend for the top, little did I feel the Autumn vibe it would give off when I bought it. I had also planned and cut the long pants and later wished they were cropped but but hey, we can't avoid the change of the seasons and I am now one new outfit ahead of the seasonal game! 

Both patterns were fun to sew but provided challenges with my efforts to make them work for my petite frame, nothing related to the pattern itself. I liked the fresh look of the wrap scarf on the top and as for the pants, we are seeing those tulip hems all over Pinterest and I was brainwashed. I will review the top first and then move on to the pants. 

Top Pattern:

This is Simplicity 9143, a top that offers a simple, plain front bodice and mandarin collar.  View A is sleeveless with a breast pocket and View B, my choice, has elbow length sleeves with a one inch hem and a small slit. View B also sports a "wrap" that is inserted into the shoulder, armscye and side seam and has very long ties. The pattern shows it simply tied in front as you would a shawl, very pretty and quite unique. Here it is tied that way:


It is very pretty but on me it was an overwhelming bit of fabric volume, at least in my opinion.  We'll fix that later! But it is lovely this way too. 

Another issue with this pattern for petites are the sleeves. The shoulders are dropped on the model so I went with that and fell it contributes to the soft look. If you click on the link and look at the sleeves they are right at elbow length. I learned many years ago this is a very bad length for me--boobs and being short does not work well with sleeves that end at boob level. But, silly me, ever the hopeful one, thought, well, that model is tall and these patterns are made for much taller women so this will come past my short little elbows. Uh, no. We'll fix that later too. No way was that staying. But again, it is a lovely sleeve if you are not five feet tall with boobage and a volume type bodice. 

Other than those two issues I did my usual. I did an FBA for a C cup. I did my usual petiting of the pattern in the upper chest area and I looked at the details. I cut the mandarin collar down by a 1/4 of an inch. I love mandarin collars but again, many years ago I realized Big Four mandarin collars were really too high on my long neck and I cut out a quarter inch from the height of this collar. It is still the same length but not as deep and it worked out just right. 


These buttons are from my dear friends inheritance and vintage wooden balls. There have fine inscribed designs on them and were just perfect for the shirt. I am just concerned about washing. We shall see on that one. 

Top Fabric:

This is a rayon/lyocell blend. It is fairly lightweight and drapes beautifully. It was my first, out of covid visit to Joanns buy. They have really upped their game with their challis offerings. It's good to see something supplanting those shiny poly faux silks. I used SF 101 in the collar and that was about it for interfacing as the CF facing was folded in and the layers made for the needed stabilization. I washed this on gentle, warm wash and hung to dry. It did not shrink at all for me.  I have found the contribution of the lyocell to the rayon to have made it far less prone to wrinkling.

I did try something that Linda Lee of the Sewing Workshop swears by and that is sewing all wovens with cotton thread only. Not sure I am on that bandwagon but I am going to give it a try for a few garments and see what I think. It does make for a prettier topstitch,  and I often use cotton thread just that way.  I am learning lots of things from all these Vlogs I have been watching lately! My next garment will have a really interesting new technique as well. 

Fit Issues:

I will just bullet point these:

*Did an FBA for a Ccup

*I "petited" the area between bust and shoulder seam as you can see in this tutorial here.

*Removed a 1/4 inch from the height of the mandarin collar.

*Here's the biggy. I found the sleeves, as mentioned, at a visually bad length for my height. However, I had them completely made, slit, hem and all before I realized this. I added a 14x9 inch rectangle that I folded in half and seamed on the ends to get a finished "add-on"  to my sleeve. The short ends would provide the slit that would line up with the already hemmed and completed slit. Here's a pic that may make it more sense and it is very photoshopped for contrast so you can see it better. 


It put the sleeve hem in a much more flattering spot and I liked the look of the long double slit. I make almost all my sleeves 3/4 length when I can. 

Things I would do if I made this again:

* For petites only, I would cut the wrap height down a little bit. By this I mean the bottom edge from where it leaves the side seam to the point where it becomes a tie. It just has a lot of volume and this reduction in height/length I think would work better for a shorter frame. 

What I did that was not in the pattern:

I  SELF-FACED my "wrap" pieces. On this pattern you will see both sides of that wrap when you tie it so keep this in mind. By facing it with the same fabric, it worked out beautifully and I think gave the wrap a better weight and drape. This is a challis, so quite lightweight. I highly recommend this move. 

I also backed each side of the collar with interfacing. This fabric is just too slithery and ravel-ly to do otherwise. I used SF101 because in my covid stash it was all I pretty much had. I block fused the fabric BEFORE cutting and also double checked the pattern before sewing. Yes, it had stretched, interfacing fused and all, and I did have to remark and re-trim . 

All the seams are serged and the side seams were serged before sewing, important, due to hemming the corners. 

I recommend mitering your corners for a "better" look. It's easy enough and there is loads out there telling you how to do it. 


I love this design but I think there is a bit much volume in it for me as shown. I was playing with the ties in my mirror and discovered that I really like to wear it like you see above. The sashes crisscross in the front, so less volume, and then wrap to the back where I tie them at center back. It gives me a bit of my shape back and yet I still have the fun of this lovely  design. It's great that you can try and wear it either way. You also can get a good view of how the sleeves worked out in this pic as well. Now for the pants!


Pattern:

Simplicity 8922. This is an elastic waist pull  on pant with 4 different cuff(?) variations. I chose the "tulip" cuff which consisted of a section that had curves instead of corners and they overlapped each other at the bottom of the legs. The legs go straight down, making for a very comfortable pant.Again, my challenge was the petiting of this pattern and it was trial and trial again. How long should the cuff be? Where should the pant leg end and the cuff begin? 


Since I used my sloper for the upper pant shape as it matched the width of the pattern perfectly, it was a matter of figuring out the length of the cuff but before I got into that I got into my usual inspection of the pattern details and asking myself, "do these need to be made smaller for a smaller person?" and they did. 


First, I altered the shape of the "tulip". The pants I had seen online had very pronounced tulips and these, as you can tell from the pattern, are nearly straight down. I took my hip curve and shaped them to turn in more sharply. The front and back pieces were stacked so they would have matching seams when I cut. 


Then I lined up the pieces and took an inch off the top of the tulip. I planned to sew a 3/8th in seam there. 

I sew/basted the pants together and they were too long, not to long to wear, but too long to show off the tulip detail. These needed to be shorter but I  definitely did not want a real cropped pant either. I took the seam in another inch deeper and it worked. You can see how deep they are. I suggest you baste in your stitching before you decide how the length works for you. It took quite a bit of play to get it right. 


I have started another pair of pants from this pattern, View A. I have come up with a very specific and easy way to get the right length on the pant and cuff for any height person and will publish that on Sunday, in three days. I think it will be a big help to any making these pants and to get a good proportion on them. It will work for any one super tall or super short like me and even a lot of in between. So come back Sunday for the next post and there will lots more specifics on getting these cuff proportions to look their best without the hassle I had on the first go round. 

Fabric: 

These pants are made with a rayon/linen blend. They are rather lightweight and despite their dark demeanor really nice on a hot summer's day. They are not lined but I DID face the tulips with self fabric. I am glad I did as I think that gives the nicest finish. The pattern recommends a tiny hem for the edge of the cuff. With the right fabric I think that would be OK but in this one I think it would have cheapened things. Also, by facing the cuff, weight was added and that helps the pants to hang better and not wrinkle as much. 


Construction:

This was pretty straightforward pull on pants construction, no pockets, so it went together quite quickly. Getting the cuff to pant leg ratio worked out took the most time. After that it was quickly done. I also found one other issue with the tulip cuff. Those I have seen online have the overlap of the tulip happening so the high point of the overlap is at the center of the foot. In this pattern it actually turns toward the inseam. All notches and seams matched perfectly. I made sure it overlapped and those notches were correct as well.  So the tulip effect is not very obvious when you look at these dark pants. I am planning to make them out of a khaki twill and play with the cuff to get the overlap to land at center foot.  They still look great and I think the details will show better in a lighter fabric. I highly recommend this pattern. I have been working off my sloper and all the pants have been wide leg but I really think I need to do a new pants sloper. I did this one before I lost weight  and today I faced the fact that it is a bit large and I know where it is large. I am going to make one more pair of pants with some simple adjustments and see if that will do the deed before I start the whole pants sloper thing again. Fingers crossed that I may not need to do that. You know its all about that crotch situation. 

Sorry this project took so long but I did want these two items to go together for you. Again, little did I realize how Fall Forward they would look, but they are pretty, I think, and definitely comfortable. I do have a couple of summer projects still left in me and they won't take as long as this, I hope! Depends a lot on the weather. Hubs and I are in the throws of house repairs and painting the house exterior with the two of us doing 90% of the work. It's all good and looking so different and nice. We are calling it  the Retro Ranch with vibes of Chip and Joanna!  I am excited about my next project. I will be trying  a new and different technique, as suggested by one of the Vlog gurus. 

If I am looking a little piqued here, I am. A tummy sort of thing hit me today but I was determined to get the pictures taken and this post up for you all! Tomorrow will be a better day! 


This Japanese Painted Fern is on of my favorite ever plants. It is doing well here and quite hardy. Enjoy!.................................Bunny

Sunday, June 24, 2018

The Burnside Bibs


I am loving my Burnside Bibs. They are comfy and more comfy! There are lots of details in this pattern. I really like that they are a great alternative to jeans and such fun, oh my! Yes, this is a grandma wearing these "coveralls" but hey, I've earned my priveleges!


Pattern:

This is the  pattern Burnside Bibs from Sew House Seven Sewing Patterns. I have really been entranced by her designs and plan on trying more. This was a paper pattern  but PDF options are available. I really like her aesthetic, comfy, wearable and youthful. And her youthful seems to be wearable by all ages. The designer, Peggy, no last name that I can find, has been "designing and making patterns in the apparel industry for many years." Her experience shows. The paper pattern comes with a detailed booklet that really left nothing to chance. It was clear, well illustrated and easy to follow. I think a motivated beginner could work through it with Peggy's clear instructions. Options include making the bib in a curve or a squared shape, making cropped or full length pants, and making a more fitted design with darts and a zipper or one that pulls on and simply ties. I chose Version #1, sort of. I did the fitted pant, full length and the curved bib. If you are considering this pattern look at the different versions on the site to see what you might like. 


My one and only beef with the pattern was the serious nesting going on. You can  see above what I mean. I got around this by marking my pattern size markings with a colored sharpie, the better to see! I must admit here....I am working on a big four pattern now that the bibs are done and  that has the sizes split with 6 and 12 on one piece and 8, 10 and 14 on another pattern piece. It is all very clear. But other than the nesting issue this pattern is wonderful all around. 

Sizing is unique to Seven House Seven and runs from 00 (34 hips) to size 20 (50 hips). These are all on one paper pattern so you can see why all the nesting. For my version I used size 2, the 36 inch hips. I think you will agree it fit rather nicely. I did consider this a semi toile as I really did not care for the fabric initially. I did no fitting tweaks at all to Size 2. One thing to keep in mind is that the rise of the pant can be controlled by the straps. When I first put them on I was not happy with the length of the rear rise. It seemed too long. But, after fiddling with the straps and hiking it up, the crotch set into place much better. Version #1 has darts in the back and an invisible zip for a better, closer fit. Version #2 has a large unfitted waist and no zip.  That waist is required  to get the pants over the hips without a zip. #2 therefore has a fuller back and a more ruffled effect to the back waistline. I think I may go back and add the leather belt loops to the front so I can keep the straps in line with my natural waistline. They seem to stretch and drop, more a property of the fabric I think, certainly not the pattern. 


Fabric:

This was one of those end of summer linen bargains that I tried to take advantage of. The weight of the linen is "mid" to heavy and makes a nice pant. It has been washed several times which removes the need of future heavy ironing and makes the linen less "stiff" looking, more organic. This fabric comes out of the wash needing no ironing other than the hem edges. Linen is so comfortable to wear and such a delight to sew. There is lots of topstitching on this garment. It doesn't really show as the thread matches so closely and sinks right in, but the design needs it in many areas as in the pockets and waistband. Next time I might do a complimentary accent color for the topstitching. 

This is not a flattering color on me at all and that is why it has been in my stash a very long time. I just kept washing it and the more I washed it the more I liked it. I decided that if I were able to wear it with some white  and away from my face I might be able to get it to work. I think it wasn't to bad in the end for a color that does not work on me. 


For the rear belt loops I used a faux leather. Why? Well, by the time the loop strip was made of this heavy course linen, then folded  under, then attached to the back waist , its facing and interfacing, there were just too many layers to get through and still look good. I needed an alternative and the faux leather came to the rescue and it is washable, unlike real leather. In the end I really like the look. The pic above is a perfect rendition of the actual fabric colors, kind of an orangey brown. 

Construction:

I really followed the pattern booklet provided to the letter. I didn't make any fit changes either other than hem length. I wanted to see how it fit me with none and how it would look on my hips with all those pockets. I did cut down the front pocket about a half inch. Just my petite habit. I think the next time I make these I will cut the back pockets a bit smaller all around as well. I also think that loops on the sides of the front would make the straps work more in line with my natural waist.

For actual construction I did my usual linen routine: sew the seam, serge the seam, press to the side, topstitch . This makes a sturdy garment that will survive lots of washings.  There are lots of areas in the pattern directions that you are directed to topstitch so make some samples to get it the way you want before starting. I used regular thread. The next time I think I would use  heavier thread or triple stitch.

For the invisible zip, I used Kenneth King's method, new to me, and I liked it a lot. It involves using  a hemostat to pull the zipper pull through. It's rather quick, too, and I had no lumps at the bottom of the zip.

Making the belt loop of faux leather was easy. The pattern has you fold the fabric strip to the center and then fold in half, fold under the ends and then topstitch. That's a lot of  bulk with eight layers before even stitching to the pants. I cut a strip of faux leather the finished width of the belt loop. The length was double the finished size stated in the pattern. I used a rotary cutter for a nice clean edge. Then I got out a black fabric marker and ran it on all the cut edges. The strip was then folded in half with a tiny bit of double stick tape helping out. The short edges of the strip will not be folded under like denim belt loops. Your strip is the finished size with no folding under. Make sure when you place the loops that the folded edge of the strip is all matching, in other words all at the top or all at the bottom. Topstitch the long edges of the strips about an 1/8th of an inch in. Locate where you want to put your belt loops and sew the strips down, a bit over an eighth of an inch from the edge. I went back and forth three times being careful to get the needle in the same holes so I wouldn't cut the leather. Threads were drawn to the back and tied off. I did samples first with the same layers of fabric as the pants. I yanked and these loops held up fine. You can see from this ruffly picture that the stress really isn't on the belt loops. Pardon the lighting on this one. I wanted you to see the ruffle effect up close.


This is an easy to construct design. An edge stitching foot will help greatly as you do the topstitching. An enthusiastic beginner would enjoy this pattern. Can a grandma wear bibs? You be the judge for yourself. I am wearing this to a folk festival on the Cape in two weeks. This grandma's gone festival!

***************************

New house notes:

 The pics above with me in the bibs were taken in our challenging back yard. There are tons of trees which we cannot cut down. The gnarly one next to me is my favorite. It has so much character. I am standing in the new bed I planted. It seems to be surviving. Fingers crossed as this back yard needs help. I love this pic of the tree alone.


I LOVE our black stainless fridge. If you haven't seen black stainless, it is stainless with a mirror like finish, slightly darker than regular stainless and IT DOES NOT MAKE FINGERPRINTS. I can rub my butter and floured hands across it and it just wipes right off, easy peasy. The color and finish is such that you really can't pick it up on the internet. Check it out in the stores if you are in the need for new appliances. Happy Stitching!..........................Bunny


Saturday, July 12, 2014

Jeans (?) done!


The jeans (?) are done! First, a big thank you to my husband who took all sorts of hair done, made up face, look at me photos. Unfortunately the pants outside just seemed to disappear into the dark foliage, grey sky, I don't know. So I took more photos, bad hair, no makeup, down in the family room but you can see the pants a lot better. The reason there is a question mark is that these have all the jeans details but not quite the fit. More in a minute on that. 

Some deets:

Pattern:
I used  my Sure Fit Designs sloper along with their Jeans DVD that I purchased in addition to the pants  kit. Glenda's instructions were to take it down a size, which I did, and to cut back the leg width. I have some deep dark emotional issue when it comes to cutting into patterns the way my gut tells me too. I thought the legs looked to wide so I took an additional inch out of each one but I feel there is still too much volume for a pair of jeans. Nice pants, but not a jeans fit. That's OK I still really like these. I have since tried on numerous jeans of mine and have picked out the pair to copy on the next go round. I don't fault Sure Fit as Glenda says she likes her jeans more like trousers and did recommend cutting them back more in the leg if desired. I just was not quite sure what would work for me and I feel it shows. 

I did use Sandra Betzina's Power Sewing to aid in the fly zipper and construction sequence and that was a big help. I also used her method for a pants stay across the tummy and that was described in previous posts. 

Fabric:
This is 97% cotton, 3% lycra from Joanns. I really liked the print. I will not make the next pair with any lycra at all. I am all ready with my 100% cotton denim. I swear these pants stretched out just working on them. They do feel very comfortable. I do not like lycra! I'd rather be uncomfortable than baggy, vain woman that I am!

The stay and pocket lining are a "railroad engineer" looking cotton. Remember those striped Oshkosh Begosh coveralls on your kids? That fabric! 

I used rivets from Taylortailor and they worked great. I like that you can buy small amounts from them. None of them broke or gave me grief. There are several youtube videos for attaching the rivets that were very informative. I learned a lot from them and recommend checking them out. Just search "jeans rivets".  I did not do rivets on the back pockets as they are known to rip and scratch leather upholstery. 

Construction:


Construction was pretty straightforward with the addition of lots of topstitching and the rivet installations. Here you can see the fly. It is so easy to do using Betzina's method. I did not do a fly shield this time. I just wasnt' sure about the bulk but I think in my "real" jeans to come, I will have that shield. 

For the topstitching I used regular Gutermann thread and the "triple stitch" on my machine. This is the stitch that goes back and forth three times making the stitch and before it moves to the next stitch. I think it is more difficult to control than a regular straight stitch but I do like the heaviness of it all. I think I may use jean topstitching thread and a single stitch  for the upcoming denim pair. 


I did a lot of snoop shopping on jeans before I made these. There are many, many variations in the way the topstitching and riveting is done. Consistent in most jeans I checked out was to double topstitch the full inseam from ankle to ankle. On the side seam, the topstitching was done only to the end of the stay/pocket bag and then finished with a bar tack like you see above. Works for me! I wasn't about to try to topstitch a side seam on a closed up pant leg. 

The topstitching thread I used was a perfect match to the deep pink but  the flash makes it look a lot lighter. Not so!

I did my best to work with the pattern of the fabric and think it looks pretty good. It was unmatchable so I just tried to keep the positive and negative areas next to each other and I think it looks fine. 

Also in my snoop shopping was a lot of looking at pocket placement and shape. The Sure Fit sloper gives a patch pocket for jeans but I did not use it. I found the most flattering pocket on my ample hips was one that was a half inch less wide at the bottom than the top. It also needed to slant out slightly at the top. You can see that the top corner of the pocket is higher at CB than at the side toward the side seam. I found a lot of jeans like that and found they were the most flattering for me. Different hips will certainly work differently with their pocket alignment. . 

In the end, I think volume needs to come out of the area from the thigh to the ankle on my next pair. The rivets and topstitching details that were intimidating me now are old friends and I am ready to skate right through that on the next pair. I am ready for my first official pair of denims! Whoo hoo!........Bunny


Wednesday, July 2, 2014

Part Two - Sewing the Pants Stay

Welcome back to part two, the actual sewing of the stay. I want to say that if you have a pants pattern that has pockets in front with an under pocket lining and an upper pocket lining your pattern may be as simple as just extending it out to the edge of the fly. Hopefully that will save you a bit of time and effort. In my case, I drafted the sloper so had to make it all from scratch, which you certainly could do with a pattern as well.


First, cut the seam allowance edge of the pocket on the Upper Pocket Lining.


With the pants leg facing up. Place your Upper Pocket Lining on the pants, smoothing out and matching edges. pin the edge of the pocket opening down. That is the area with the quarter inch seam allowance. 


Stitch on the 1/4 inch seam allowance and then trim off the excess as shown.


From the right side press the Upper Pocket Lining away from the pant leg.


Turn the Upper Pocket Lining to the wrong side and leave about a sixteenth of an inch of the fashion fabric showing at the edge. Press well. Pin into place.

I put some Stitch and Ditch paper stabilizer underneath and then proceeded to topstitch the pocket edge with a double row of "triple stitch". That's the stitch that goes back and forth three times to give a heavy topstitch with regular thread. Make samples and play with the tension to get it right before doing the actual pocket edge.


Serge or pink the bottom curved edge of the fashion fabric Pocket Facing. Pin the Pocket Facings to the non fly edge of the Under Pocket Facing. Stitched this curved edge down to the Under Pocket Facing. 


With the pants now wrong side up, pin the Under Pocket Lining with it's corner Pocket Facing face down to the Upper Pocket Lining. I think the picture above makes it a little clearer than words. 


It should look like this with all layers in place. Make sure all is smooth and serge together the two bottom edges of the Under and Upper Pocket Linings. Once done, smooth and press it all flat and pin into place. 

Serged bottom edge and pinned as above.


Your pocket and tummy stay are complete and ready now for the fly zipper to be installed! My favorite method is that of Sandra Betzina which you can find on the Threads website here.    My zip is all installed which I did tonight and tomorrow I hope to face the back of the pants. I will do my own thing there which means doing a two part waistband that separates at the center back, the better to fit my backside! First, though, I have to watch that rivet tute on You Tube if I can find it

This is not the most glamorous tutorial out there but it is one that I think can give you a lot of service through your pants making journey. I will put it up on the tutorial page for future reference. Let me know if you have any questions or need help...... ...........Bunny

Monday, June 30, 2014

Jeans or Pants Stay, Part One

Got my camera issues figured out, finally. Thanks to those who shared their helpful ideas. Photos are under control now, able to be edited, and I am smiling again. The really good news is that the camera shop my friend brought my cameras to says one is fixable and won't cost too much. Hooray! I am getting the big guy back! Wahoo!

I am going to show how I did this pants stay in two parts  as it is rather involved. It's not hard, just involved, very doable. The first part will be on making your pattern. Years ago I had a Vogue pants pattern that I got to fit  really nicely and it had this stay in it. I loved how it made the pants fit and feel and used the "stay" trick on any pants I could from then on. Why use a stay? Well, it keeps your pockets from poking out. It holds the shape of the front of the pants really nicely. Many, myself included, feel it has sort of a girdle effect helping the tummy to appear flatter. If you have seen jeans out in the marketplace that claim to make you look slimmer it is because it has a stay in the pants.

Here are my pants fronts. They will get a fly zipper. I am showing these to you as I went round and round on the pattern matching here. THERE IS NONE! I layed the entire piece of fabric out flat on the floor and the only design I saw was one very wide diagonal unit repeating down the straight of grain. The repeat was so large that it took two yards to go from left to right across the fabric. It was an uneven design so there was no mirror matching either. It was hopeless. I decided the best I could do was balance the positive and negative spaces and leave it at that. I am happy. This is how the fronts worked out:

To make your stays for the pants fronts you will first need your pants front pattern. You just need the top of the pants above the inseam. The legs can hang off the table. You will be tracing this  with several layers. You will need tracing paper and a pencil and eraser to deal with the inevitable glitches. 

Tape the top of the pants, above the inseam, to your work surface. You are going to make 4 more pattern pieces. 


 Tape another piece of tracing paper on top of the upper pants pattern. You don't want anything to move and there will be all those layers so the taping is important. First you will trace what will be called the Upper Pocket Lining. You will eventually cut two of those out of lining fabric, one for each side. . Trace the upper pants in pencil and then darken with a sharpie when you know it is all correct. Here you see the center front clearly marked, the red line for the grainline, a 5/8 inch seam allowance at the waistline and a one inch seam allowance at the side seam. The one inch side seam, also on the inseam, is my fit insurance. The bottom edge has some slight curving. . You will often see directions for this edge to have a more pronounced curve. I think a nearly straight edge eliminates any bias stretching on the bottom edge which will increase the tummy flattening factor of the stay. So do just a slight curve on the bottom edge of this piece. You can see the stay stops about a half inch below the zip, right where the crotch curve begins. 


Next, I measure 3 different pair of jeans to see how the pockets worked. I found four inches across the waist and three inches down was my preferred "look". I marked that with a red dot. 

Connect those dots with a curved ruler or shape. This will be the edge of your pocket when done.


Add in a 1/4 inch seam allowance to the edge of the pocket nearest the waistline. Your Upper Pocket Lining pattern is complete. Tape another fresh sheet of tracing paper on top of this one. 

Trace the pants again, this time without the pocket markings. this is the Under Pocket Lining and/or Stay. It will be cut from lining fabric. Again, make sure the straight of grain is marked as well as center front. 

Fourth layer:  This will be the Pocket Facing. It will be cut from your fashion fabric/denim.  You only need to tape down a piece of tracing paper the size of the upper right hand corner of the pants as you see here:
You need a piece large enough to trace the upper right corner of the pants and a deep bottom edge. Mark the pocket edge and seam in red. 

Measure down from the red pocket edge an inch and a half. This insures that no lining will be peeking out of your pockets, just more denim. Add your grainline to this pocket piece. Mine's not in yet on this pic. Here's what your completed piece for the Pocket Facing, layer four, should look like, minus the needed grainline. 

If you are going to have a coin pocket, which I think is so cute and authentic, you need to make one more layer. Pin a small piece of tracing paper over the pocket you just traced. Mark the grainline on the little  pocket and play until you get the placement you want. Mine came out a bit high but there is always a next time to make it better. 


So now you have five layers taped to the table. They are all traced and marked. Straight of grain is on each piece. Each piece will tell you what fabric and how many you need to cut. 

Two Under Pocket Linings from lining fabric
Two Upper Pocket Linings from lining fabric. 
Two Pocket facings from fashion fabric
One Coin Pocket from fashion Fabric

Here are the pieces minus the original pants front pattern.
A word about the fabric. The Pocket Facing and Coin Pocket will match your pants fabric unless you are pursuing a more creative look. The Upper and Under Pocket linings need to be of a firm fabric, NO STRETCH! I kept picking fabric from the stash that stretched with lycra on the crossgrain. Not good. Only use a firmly woven fabric, a cotton a bit heavier than quilt cotton would be great. Make sure it is pre shrunk. 

Next post I will get into cutting and sewing. Please let me know if you have any questions. I am glad to help. This really looks more complicated than it really is. In the end, this gives really nice support to the pants and I urge you to try the technique. Questions?.....Bunny

The Hanbok Vest

  I love this little vest. I thought about it for a long time. I am excited to tell you it's story.  Pattern: This is the Hanbok Vest by...