Sewing Vloggers

Showing posts with label jeans. Show all posts

Sunday, November 21, 2021

Is It Invisible?


Jeans all mended. 

I have really enjoyed being home since  retired. I am getting back in the  groove of household planning and organization and it feels good. Plenty of time for creativity is built into my schedule. Each day of the week has a focus and each week that focus can change based on needs and season. This week I pulled out the last of the winter clothing and planned a day to get it all washed and ironed as needed. Done! I planned the next day for the inevitable mending I found and a bit of more purging. I mentioned that to Hubs and he showed up as I sat on the couch  reading my latest Threads and handed me an extremely worn pair of jeans. He said, "these are my jeans for working outside and they are so comfortable. They have holes everywhere and I can't wear them anymore. Can you fix them?" You bet I can and I added it to my mending pile for the next day. 

Jeans crotch before mending. Left hole is the size of a quarter. Right hole is the size of a dime. 

The crotch on these jeans had the typical "ball burn" . It went right into the heavy seams. 


Pocket hole was about dime size and extending into the pocket corner. 


The fabric around the back pocket was just disappearing. It also needed repair and reinforcement. I found other little issues here and there but figured I would get through his requests first, judge the reaction and go further from there. These jeans are probably twenty years old. 

My mending tools. 


The way I wanted to mend the hole would require comfortable space to work on the sewing machine. That meant opening up the seams in the surrounding crotch area and removing some of the pocket. These are the tools I used to make this task easier. I will go left to right.

First is my box cutter blade. I use these a lot,  and their very sharp corner makes ripping serger and flat felled seams much easier. I simply lay the garment down on a flat surface and push that point into the well of the fold on the right side of the garment. I pick a little bit with the point and open up a few stitches. I then go right down to the second seam of the this double topstitching and break a few stitches inside the fold for that row of stitching. If I place my box cutter blade just right and keep the garment flat to the table, I usually can just slide the blade right down, in that well of the fold, and open both seams and the serging all in one pass. If not, the cutter blade will still let me make short work of slicing out the threads from this type of jeans seam.  Just be careful. This is not your Dad's single edge razor!  It did not take long at all to open up the seams. No slipped rips happened. 


You will often find areas of topstitching, like the bar tack at the end of the above topstitching, that will defy the blade and make it work too hard.  Forcing the blade to do what it doesn't want to could be dangerous, soooooo, I have another tool for that. It would be my pink tool, second from the left. This little number has been a great help in the sewing room since I found it at Rite Aid. It is an eyebrow shaver. Really. I saw them on sale. They come four to a pack, small money and are brilliant for shaving out threads that are stubborn and don't want to be removed by cutting or blades. You simply shave those little bar tacks a few times and boom!--the threads fall apart and you pick them out with  your tweezers or awl, third and fourth from the right.  Next in line are my Kai tiny curved scissors. They are so pointy they are dangerous. They are great to sneak into the fold and clip something that might be holding up the unsewing here. Wonderful tool and probably the most dangerous thing on the table. 

The next and last item I used to mend the pants that won't die are my flat nose little jewelry pliers. I got to the hard, thick lump of the zipper bottom area and the machine would go no further. I was able to backstitch by hand with my big needle but could not push or pull it through the rock solid denim. Saved by the pliers! I grabbed the shaft of the threaded hand needle and put its point where I wanted it to sink in to make a back stitch. I held it with the flat head pliers and pushed the fabric down the shaft to get it through the denim. I then let go, turned the  fabric over and used the pliers to pull the needle through and was able to finish off the line of topstitching over that really nasty bump of fabric under the zipper, right exactly where the former topstitching had been. 

Completed pocket mend.

More notion comments and my process:

After opening all the seams I went to the ironing board. I had a very light blue tightly woven cotton that I cut into an approximate shape larger than the hole. It would show thru the hole and I wanted it to match the area of the jeans.  It would also serve as reinforcement. I pressed it on to a piece of  Steam A Seam Lite the same size, right side to glue SAS. I then trimmed this to the size of the hole but larger by about a half inch and pinked the edges. The paper was peeled off and the sticky side and right side/blue was placed on the wrong side of the jeans over the hole. I then took a piece of woven fusible, slightly larger than the patch and pinked and pressed that into place over the patch. These two layers of patch on the inside of the pants got fused down well with the iron. 

Turn the pants over and back to the top. Now for the thread. I use regular thread for the darning part. It hides better into the fabric.  For the hole near the pocket corner,  stitches were removed so I could peel that side of the pocket back and have plenty of space to work under the machine needle. Thread color is tricky. Denim always has white warp or weft. I forget which. I start with a white thread, even on darker jeans. I go back and forth with small stitches, like 1.5, in the white thread. I sew in the direction of the twill.  I then change to something that is similar to the majority color of the jeans. In this case the palest blue I had worked. If you have any denim anywhere to practice your thread colors, do it. You will be surprised at the colors that work here. It is almost never ever what is sold for jeans colored blue thread. I tried 3 or 4 colors before I bravely tried the baby blue and it worked. Remember, best results come with sewing WITH the twill, not against it. Sometimes, however, it is unavoidable to sew against the twill. 


Now for needles and topstitching thread! This was all against common sense.  I had the exact same jeans topstitching thread in my machine as on the jeans. It was H E A V Y. I put in my size 18 topstitching denim needle. Sharp and big. You would think that was what would work, right? I sewed. I would stop my machine as it would not sew through the thick stuff.  Frustrations. I decided to try something that worked for me when I fixed a friend's  super heavy ski jacket with it's waterproof thick zipper. Same issues. I went opposite and it worked beautifully. I changed to regular thread, put in a much smaller size 14 Microtex needle, and changed my stitch to the triple stitch. The one that goes over itself 3 times.  Or is it 2? No matter. It worked like a dream. The needle went through like butter and the stitches looked fine. I find when I do this I have to make the stitch length much longer than I plan. It just always seems to short. I used a 4.5 stitch length and it looked like a 3.5. So use a shorter needle, regular thread and the triple stitch.  It would have been easy to blame my machine and say it could not handle the heavy denim layers. Wrong! Think for a minute. If you were a couple of mice squeezing thru a hole to get into a space, who would get thru the hole? The big fat mouse or the little skinny mouse?  That is my new theory for sewing heavy fabrics and it is working great. Use a smaller, sharper needle and a finer thread. Done. With the heavy triple stitch my topstitching looked pretty close to the original and if anyone is close enough to notice any difference, they deserve more than a swat from the wearer's wife!


I've always enjoyed mending, having that basket next to me while I laze away stitching in front of the tube, a rare treat. Usually it takes at the most an afternoon. It's a great feeling to see that basket empty out. I celebrated with a glass of  Pinot and felt very accomplished when I looked at that empty basket. I will  now  let it take a few months to fill up again before I have another go at it. .......................Happy Mending! Bunny


Wednesday, July 22, 2015

Denim Inspiration

I come from the generation of embroidered, slung low on the hips, bell bottomed jeans. I hated them as  they looked awful on me so I never owned a pair, que lástima! While I don't remember what I did wear for pants in my teens, it wasn't those. But I do remember being intrigued by the embellishment and maybe that's why I am enjoying making this jean jacket today. I have a definite plan: Phase One-piecing, Phase Two - painting and Phase Three - thread embellishment. Phase One is close to complete and I hope I can get some painting in this weekend. I will start with some experimentation before I  commit to the garment. I am really seeing just subtle blotches of color but evolution may kick in and turn it into something else. In the meantime, even though I have a pretty solid idea of what I want to do, I thought some research might be fun and started digging through Pinterest and Google. I saw some really interesting inspiration that fell into just a few categories and thought I would share.

Bleaching:

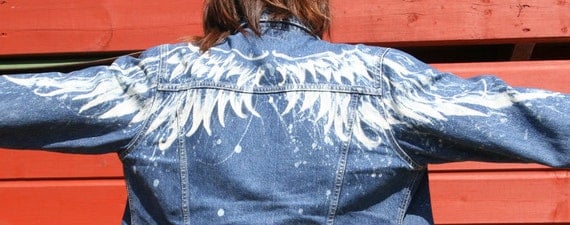
People seemed to have discovered the Tide Bleach Pen or using stencils and bleach in a spray bottle or even employing tie dye techniques. I really like some of these  effects. I will put a clickable link below each pic. This one uses tie dyeing technique and I like its simplicity.
Simple technique, good tutorial


I would love to see the effect with the arms down. Would it be so "birdlike"?

And for the real artist out there, what could be more awesome than this, painted on jean pockets?
closed Etsy shop, boohoo.....all gone.

\
This is a fairly easy project, good tutorial. 

Denim, once the possession of the hardest working among us, is worn by everyone today. Denim fabric and  garments are so amenable to making your own artistic statement whether you are capable of pockets with classic Greek portraits or simply want to tie dye with rubber bands in a bucket. So many opportunities and much very doable. 

Painting:

I think painting denim is what really appeals to me. It just offers so many possibilities and I've always loved painting.  While I am planning a subtle use of paint, like my inspiration jacket, anything goes as you will see in these jackets. Such fun!

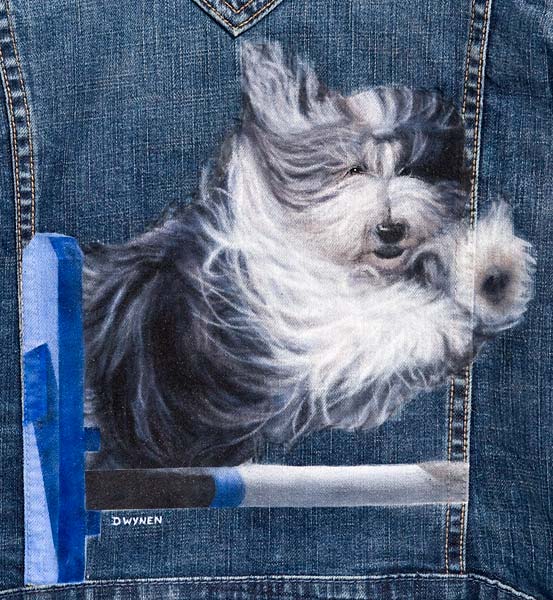
You can commemorate  a favorite pet.


Express your faith.

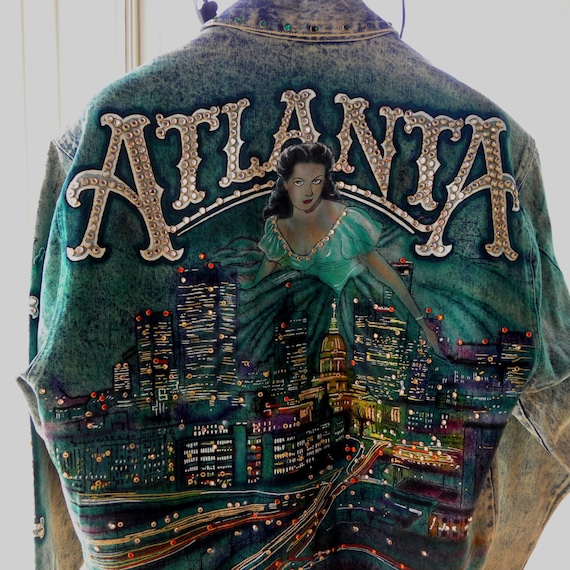
Remember a place.


Or honor a rock star like Pharrell. 


Painting a jean jacket just knows no bounds and they are just so much fun. 

Embroidering:

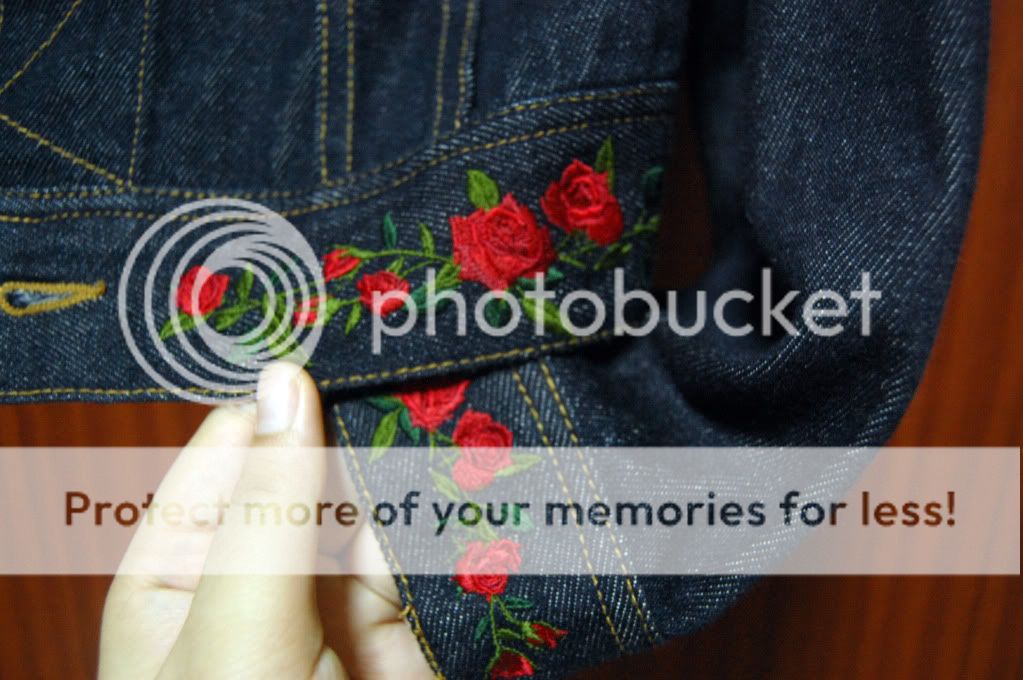
Embellishing the surface of your denim with embroidery has been around  for a long time. And, like painting, embroidery has limitless potential.  Many may feel more comfortable with a needle, be it machine or hand, when embellishing denim garments. An odd thing in my search though, embroidered jackets didn't have quite the artistic cache of the painted ones. Many were retail garments with a much smaller percentage being embroidered by the loving hands at home. Here are some  examples:


This little puppy is Dolce Y Gabbana and I know many of you could do this sort of work quite easily. I love how it works with the distressing of the denim. 


I couldn't understand a word on this page so hope this is nothing objectionable. It looks like a combination of paint and embroidery.


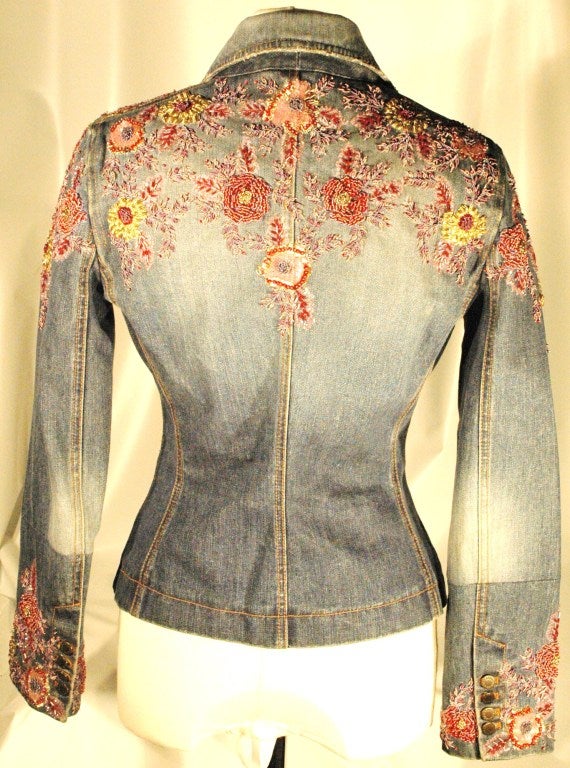
This one, above, is just darling and indicative of the the classic embroidered look I found over and over. I like how they used the peak of the yoke. Many self embroidered jackets utilize the back and yokes as the canvas. Embroidery elsewhere is not seen quite so much.

Applique and more:

Fabric appliqued to the jean jacket base is also popular and really a quite easy way to get a bang of a look and I like the effect. They seem to be a bit more contemporary. 

courtesy crux and crow on Etsy, no longer available

This one claims to be vintage seventies. While I think the fabric and trims are, those studded areas on the sleeves don't ring true to me. They are a much more recent trim development, IMO. Either way, pretty creative. 

This one sports machine appliqued flowers and I think its pretty cute and very doable.

Sometimes just a tiny bit of detail is the perfect amount.


Messy sequins and tears , anyone? Awww, come on, it's only 1650.00. Oops, its also sold out.

Hopefully you've enjoyed this tour of the denim jacket universe and the exciting opportunities for creative expression it offers. Each is so individual and such a personal creative expression. I'll be back with more of mine soon...........in between carpenters and gardening, dump and delivery trucks, hammers, nails and trips to the nursery......Bunny

Sunday, July 19, 2015

No grain, bit of pain, upcycled Jean Jacket

The jean jacket continues. With all the construction and work happening around our home I am only getting to sew on the weekends and that's if it rains! That's OK. The Decks are  near done, then there are new doors, a bit of hardscaping and some tree work and hopefully we will be done soon. The goal is August 1st and it looks like we will make it. In the meantime, today being rainy and uncomfortably warm upstairs, I retreated to the cave for Phase one of the jean jacket. My focus today was to get every pattern piece cut out and I almost made it. Here's where I am now. Keep in mind that I basically have three phases going on with this. First there is the cutting of the original jacket and piecing it to work for my particular pattern sections  and that's what you are seeing today.
This front bodice is waiting for the arrival of the zipper for center front. I have left the collar and hem edges on one side undone. This is the side where I am using the waistband for the CF band. I know, its wacky. It will have a silver zip up the CF. I hung the pieces on my dress form and they look better there as you can see where all the oddities end up and if they work or not.

On the back bodice I did that crazy curvy thing like I did on the rust dyed top back bodice. It is part of the original CF band. When this is done there will be closeups as I have done some  cross hatching here and there on the pieces that you can't pick up at this point. But this is no where near the finished product. You can also see here, this was not cut symmetrically and that was intentional. In 3D it works.

The sleeves were fun. I hope that pocket on my upper arm doesn't look to crazy. If it does I can always take off the flap or entire pocket. On the right sleeve you can see a bit of the old CF band. The sleeves look different colors. They are not, a camera thing.

This is phase one, the piecing and fitting phase. Obviously I added details from the old jacket for interest.

Phase two will be painting and there should be a lot.

Phase three will be more stitching in various bright colors. So this is nowhere near done or looking like the final product. Let's just hope it's not an epic fail.

This is all that is left of the XXL men's acid washed jean jacket. Out of this I have to make a LARGE collar. Fingers crossed!
*******************************************

A few years back I worked for a company that went under. The night before the liquidqators were scheduled to come in management gave permission to the sales staff to help themselves to any non sku'ed merchandize and there was plenty. One of the things I took home was this old rusted sewing machine that was used for display in the store. I  use it now to hang my more costume-y jewelry on, much of which I've made. I think it's a fun use of the old Singer................Bunny

Saturday, July 12, 2014

Jeans (?) done!


The jeans (?) are done! First, a big thank you to my husband who took all sorts of hair done, made up face, look at me photos. Unfortunately the pants outside just seemed to disappear into the dark foliage, grey sky, I don't know. So I took more photos, bad hair, no makeup, down in the family room but you can see the pants a lot better. The reason there is a question mark is that these have all the jeans details but not quite the fit. More in a minute on that. 

Some deets:

Pattern:
I used  my Sure Fit Designs sloper along with their Jeans DVD that I purchased in addition to the pants  kit. Glenda's instructions were to take it down a size, which I did, and to cut back the leg width. I have some deep dark emotional issue when it comes to cutting into patterns the way my gut tells me too. I thought the legs looked to wide so I took an additional inch out of each one but I feel there is still too much volume for a pair of jeans. Nice pants, but not a jeans fit. That's OK I still really like these. I have since tried on numerous jeans of mine and have picked out the pair to copy on the next go round. I don't fault Sure Fit as Glenda says she likes her jeans more like trousers and did recommend cutting them back more in the leg if desired. I just was not quite sure what would work for me and I feel it shows. 

I did use Sandra Betzina's Power Sewing to aid in the fly zipper and construction sequence and that was a big help. I also used her method for a pants stay across the tummy and that was described in previous posts. 

Fabric:
This is 97% cotton, 3% lycra from Joanns. I really liked the print. I will not make the next pair with any lycra at all. I am all ready with my 100% cotton denim. I swear these pants stretched out just working on them. They do feel very comfortable. I do not like lycra! I'd rather be uncomfortable than baggy, vain woman that I am!

The stay and pocket lining are a "railroad engineer" looking cotton. Remember those striped Oshkosh Begosh coveralls on your kids? That fabric! 

I used rivets from Taylortailor and they worked great. I like that you can buy small amounts from them. None of them broke or gave me grief. There are several youtube videos for attaching the rivets that were very informative. I learned a lot from them and recommend checking them out. Just search "jeans rivets".  I did not do rivets on the back pockets as they are known to rip and scratch leather upholstery. 

Construction:


Construction was pretty straightforward with the addition of lots of topstitching and the rivet installations. Here you can see the fly. It is so easy to do using Betzina's method. I did not do a fly shield this time. I just wasnt' sure about the bulk but I think in my "real" jeans to come, I will have that shield. 

For the topstitching I used regular Gutermann thread and the "triple stitch" on my machine. This is the stitch that goes back and forth three times making the stitch and before it moves to the next stitch. I think it is more difficult to control than a regular straight stitch but I do like the heaviness of it all. I think I may use jean topstitching thread and a single stitch  for the upcoming denim pair. 


I did a lot of snoop shopping on jeans before I made these. There are many, many variations in the way the topstitching and riveting is done. Consistent in most jeans I checked out was to double topstitch the full inseam from ankle to ankle. On the side seam, the topstitching was done only to the end of the stay/pocket bag and then finished with a bar tack like you see above. Works for me! I wasn't about to try to topstitch a side seam on a closed up pant leg. 

The topstitching thread I used was a perfect match to the deep pink but  the flash makes it look a lot lighter. Not so!

I did my best to work with the pattern of the fabric and think it looks pretty good. It was unmatchable so I just tried to keep the positive and negative areas next to each other and I think it looks fine. 

Also in my snoop shopping was a lot of looking at pocket placement and shape. The Sure Fit sloper gives a patch pocket for jeans but I did not use it. I found the most flattering pocket on my ample hips was one that was a half inch less wide at the bottom than the top. It also needed to slant out slightly at the top. You can see that the top corner of the pocket is higher at CB than at the side toward the side seam. I found a lot of jeans like that and found they were the most flattering for me. Different hips will certainly work differently with their pocket alignment. . 

In the end, I think volume needs to come out of the area from the thigh to the ankle on my next pair. The rivets and topstitching details that were intimidating me now are old friends and I am ready to skate right through that on the next pair. I am ready for my first official pair of denims! Whoo hoo!........Bunny


Saturday, July 5, 2014

Jeans, nearly done!

Keep in mind this is the very first time I have ever attempted jeans with all the bells and whistles so all is new to me. As I usually do, a lot of time has been spent in research. My "muslin" jeans are looking pretty good but we will see what the final finish brings. I'll share a few things I've learned.


I used some Frog Tape to make a template for topstitching the zip. I just stuck it to my cutting mat and cut it to the right size with the rotary cutter. Then I just pulled it up and stuck it on the pants. It made the topstitching more precise and also made sure that I cleared the plastic on the zipper end. You could use any painter's tape. As I always do, the zip is longer than needed. Why go around that lumpy bumpy zipper pull when you can just have it out of the way with a longer zipper?


Then came the rivets! There are a bunch of Youtube videos on how to put the rivets in your jeans and I learned a lot from these. What would we do without youtube videos?  Just search jeans rivets and they will come up. I did learn why the rivets fell out of a project I did a few years ago! I needed fabric "washers" !
Jeans rivets consist of a disc with a post and a decorative disc with a nipple. You will put the post part through the fabric on the wrong side and then hammer it into the nipple rivet on the right side. These pics should make it a little more clear.


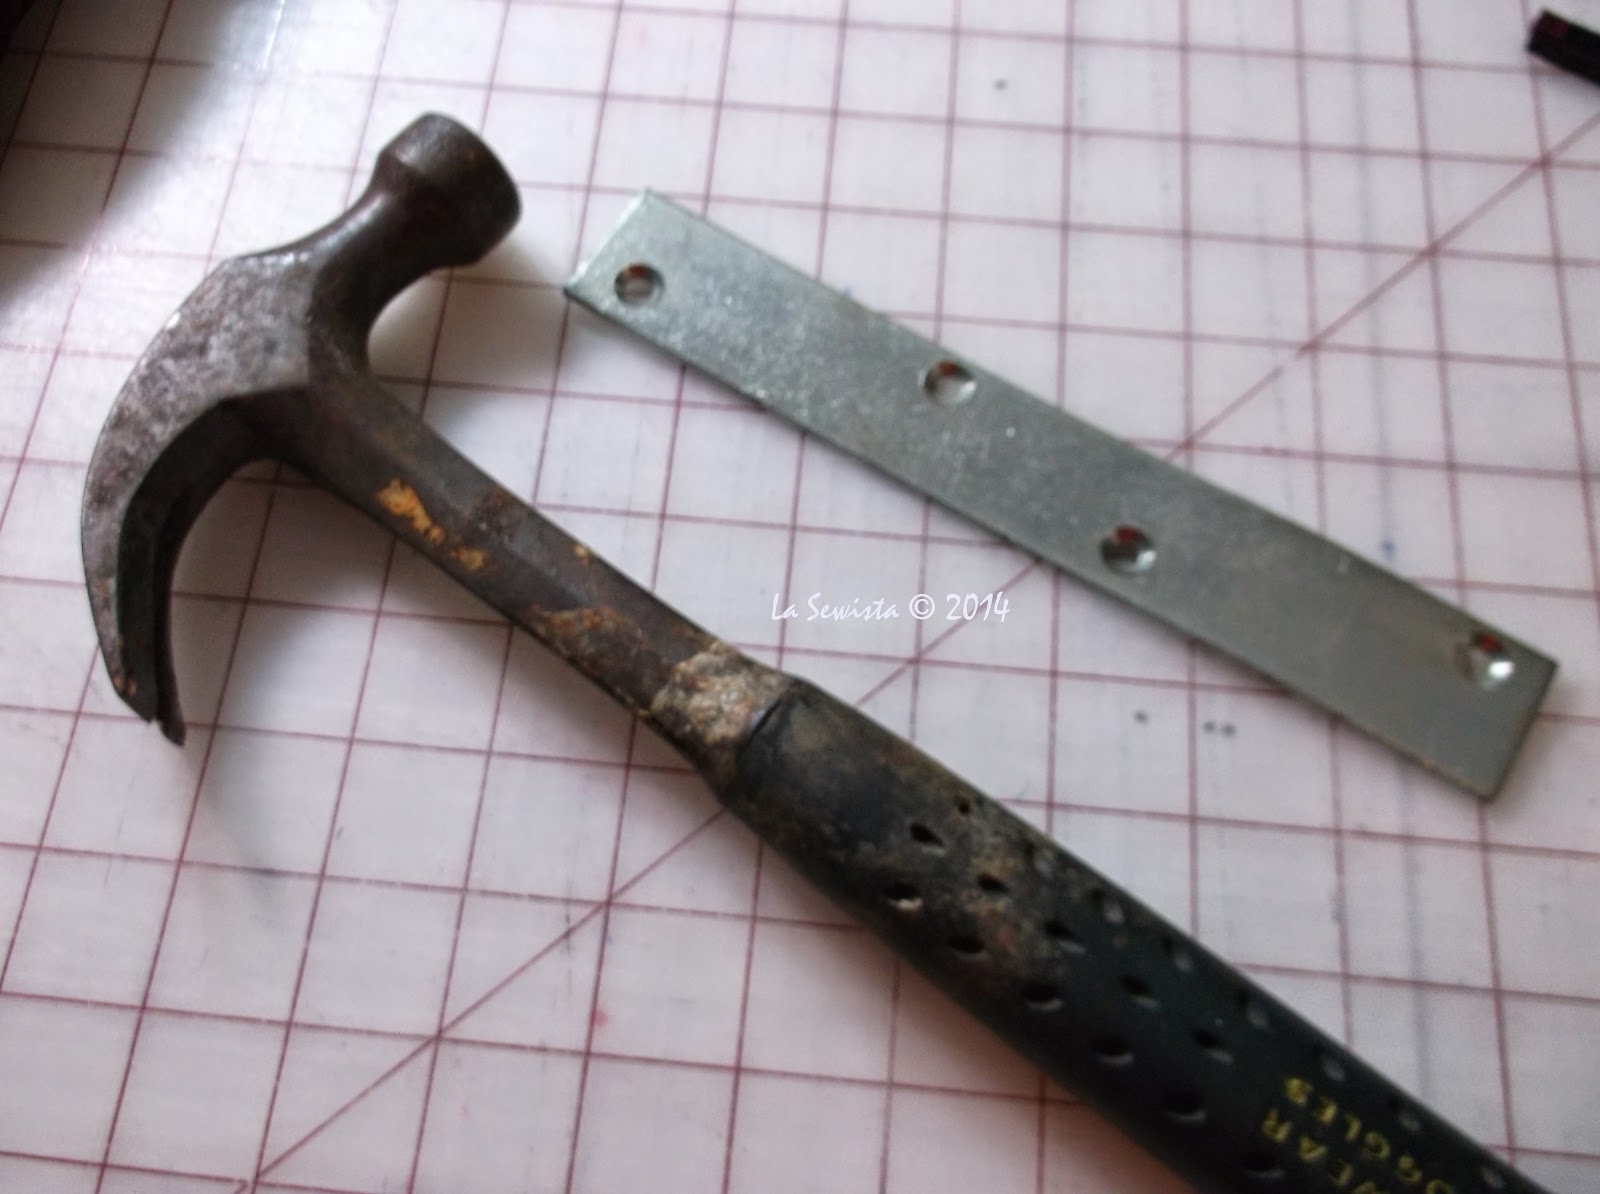
For supplies you need a hammer with a very smooth head otherwise it will mar the surface of your post disc. A smooth metal plate of some sort helps. I tried using a 3/4 inch thick piece of maple but it was not hard enough, so find some sort of hard metal surface for your banging. Also needed is some sort of pointed poking type of object. On my old failed project I used an eyelet cutter to make a hole for the post. Bad! You don't want to use anything to make your post hole that will cut the fibers. You want to poke something through that will push the fibers to the side and not cut them. I started with a seam ripper and then switched to my trust dental tool, perfect! A hole will need to be punched in the actual jeans spot where the rivet will go as well as in the fabric "washers".  Say "Ahhhh".


If the fabric is not thick enough as in maybe four layers of denim (per one video) you need to build it up with layers of fabric and make a fabric "washer"  to go between the lining and the post. Failure to do this is what makes the post too long and causes it to break. So I cut these little squares of layers of fabric and used them between the lining and the rivet post. The rivet post goes through everything and on the right side of the jeans you place the nipple disc in the point of the rivet post, you know, that male/female thing. While holding on to the whole thing turn it over so the nipple is face down on that metal plate. Give a few not too crazy hard bangs with the hammer. Trim the edges back to the circle shape and it should be done. Again, this is my first attempt at jeans rivets and just what I learned from you tube. Hopefully it will help others out there. I could not find  non youtube resources on this technique and appreciate any input my dear readers have to offer. This is a new journey I am on.


I got my rivets from a place called Taylortailor.com . They have great instructions on installation and sell in small amounts. 

Then it was on to the pockets, again, this is all a first time for me. I do hope the next pair, real denim, will be a smoother, quicker make. Back to the pockets: It took three sets before I got it right or at least as right as anything can be the first time you do it. My first pair of back pockets, well, I forgot the seam allowances. My second pair I used a satin stitch for the design and because I did not use a stabilizer and the fact that the fabric had lycra, the design was a wavy nasty thing that just ruined the pockets. I mean, we sew real here but three times the charm! I copied the size and shape and placement of pockets on an existing pair of jeans that I own. Since the satin stitch did not work the design would be made using the same triple topstitch that I have used all along with some tear away paper stabilizer,  no regrets. 


Here you see the pocket on top of a piece of typing paper for stabilization. That helped immensely. It all ripped off pretty easily.  After the design was stitched the angles were mitered and SAs pressed to the back. Finally, after three attempts I was able to install the pockets on the jeans. I used the same triple stitch for topstitching them and did a bar tack at the corner. I had planned on a rivet at each corner but one video I saw made the point that rivets on back pockets are really good at ruining leather uppholstery, whether in your car or at home. Since we have both, that was the end of that idea! 

The waist band needs installing and then hopefully a bit of modeling and pics. This always requires a bit of  "let's make a deal" with my personal version of Richard Avedon. Maybe a good meal? ...Bunny


Wednesday, July 2, 2014

Part Two - Sewing the Pants Stay

Welcome back to part two, the actual sewing of the stay. I want to say that if you have a pants pattern that has pockets in front with an under pocket lining and an upper pocket lining your pattern may be as simple as just extending it out to the edge of the fly. Hopefully that will save you a bit of time and effort. In my case, I drafted the sloper so had to make it all from scratch, which you certainly could do with a pattern as well.


First, cut the seam allowance edge of the pocket on the Upper Pocket Lining.


With the pants leg facing up. Place your Upper Pocket Lining on the pants, smoothing out and matching edges. pin the edge of the pocket opening down. That is the area with the quarter inch seam allowance. 


Stitch on the 1/4 inch seam allowance and then trim off the excess as shown.


From the right side press the Upper Pocket Lining away from the pant leg.


Turn the Upper Pocket Lining to the wrong side and leave about a sixteenth of an inch of the fashion fabric showing at the edge. Press well. Pin into place.

I put some Stitch and Ditch paper stabilizer underneath and then proceeded to topstitch the pocket edge with a double row of "triple stitch". That's the stitch that goes back and forth three times to give a heavy topstitch with regular thread. Make samples and play with the tension to get it right before doing the actual pocket edge.


Serge or pink the bottom curved edge of the fashion fabric Pocket Facing. Pin the Pocket Facings to the non fly edge of the Under Pocket Facing. Stitched this curved edge down to the Under Pocket Facing. 


With the pants now wrong side up, pin the Under Pocket Lining with it's corner Pocket Facing face down to the Upper Pocket Lining. I think the picture above makes it a little clearer than words. 


It should look like this with all layers in place. Make sure all is smooth and serge together the two bottom edges of the Under and Upper Pocket Linings. Once done, smooth and press it all flat and pin into place. 

Serged bottom edge and pinned as above.


Your pocket and tummy stay are complete and ready now for the fly zipper to be installed! My favorite method is that of Sandra Betzina which you can find on the Threads website here.    My zip is all installed which I did tonight and tomorrow I hope to face the back of the pants. I will do my own thing there which means doing a two part waistband that separates at the center back, the better to fit my backside! First, though, I have to watch that rivet tute on You Tube if I can find it

This is not the most glamorous tutorial out there but it is one that I think can give you a lot of service through your pants making journey. I will put it up on the tutorial page for future reference. Let me know if you have any questions or need help...... ...........Bunny

The Ray Pinafore, 2025's Epic Fail

  Happy New Year and welcome to my epic fail of 2026. I guess you have to have one, right? This is the Ray Pinafore from Paper Theory Patter...