Sewing Vloggers

Showing posts with label embroidery. Show all posts

Tuesday, May 21, 2024

A Vintage Top


It was a windy day! Hair fail!

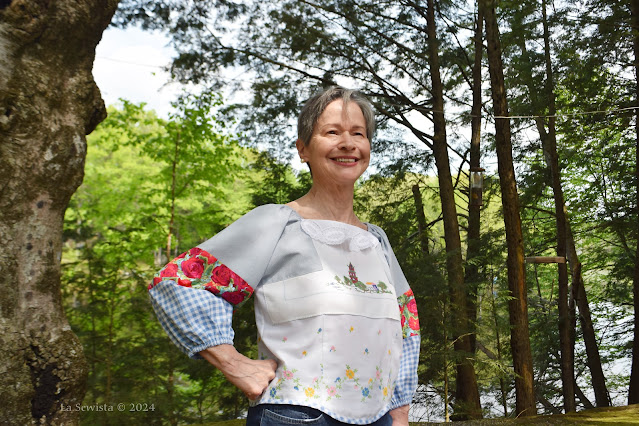
If you are a fan of Threads Magazine , and any passionate sewist should be, you will recognize this top. It was featured in their most recent issue, Spring 2025, Issue 225. As soon as she got her's,  my sister called me to let me know about this top and what did I think? Before we knew it we were collaborating on the pattern, it's fit, vintage linens and were sharing. She sent me the pattern, one you had to go online and down load, but quite simple. I sent her trims and hankies from my generous resources of vintage textiles, most inherited from friends and family. We were on. She finished first and it was lovely. Now I had to get hustling! 


Pattern:

This pattern was in Issue 225 of Threads Magazine, a design by Joan McGowan-Michael. McCowan-Michael's philosophy is that it is better to bring these heirlooms out of the back of the closet for the rest of the family and world to enjoy rather than have them "deteriorate under the beach towels". She does stress making use of those with stains and tears, thereby extending their lives and the possibility of appreciation by others. 

I knew I had tons of these, having been blessed with inheritance of a hoarder spinster great aunt and also the legacy of an elderly sewing friend who was dear to me. These items, and there are many, are preciously cared for and appreciated. Their line of accession is planned. 

The author/designer gives great guidance in choosing your textiles, prepping them, and working with the variations of print and designs. She makes it easy. There is a tie in the back of the top which I chose not to add. My Sis loves the tie. 


There is a schematic of the pattern in the magazine but no measurements other than for elastic for shoulders and cuffs.  You can scan the QR code offered in the magazine to access the pattern in more detail. This will bring you to the magazine site and a "Size Medium (38-40 inch bust) with half inch wide seam allowances." I could not find a size Small or anything Larger anywhere on the Threads site. I was frustrated.  My sis, who uses a 12 or 14 Big Four pattern, used the design with no changes at all. Being a size 4 in tops, 6 in patterns, I took out four inches from the bodice. I did this by bringing in the side seams and placed the shoulder seams in much closer. I figured that out with a try on. I was happy with my fit in the end and so was Sis. I think the fit here can easily be played with by utilizing a center fold and a base fabric to work on. You could place your linens on top of that as desired. The forgiving sleeves can be made longer and placed in or out as needed. Then again, maybe there are other sizes somewhere that I don't know about. 

Fabric:


 Everything in the top is cotton or linen. It was really fun going through my goodies to pull the sleeves together and then the hankies  and embroidery to work with that. Or did I do that the other way around???  It was fun. The top sleeve fabric is a micro-check, then a classic quilting cotton bought in the 90s by moi and finally some gingham.  When I had the top all done, it seemed like something was missing, like the cherry on a sundae fell off and rolled away.  I went thru more trims and laces trying to find something to finish off the bottom hem. Nothing seemed right. Then it ocurred to me that I could bind the bottom edge with more gingham. Bingo! It pulled the design all together. 


Here on the back of the shirt is one delicate hankie of the finest cotton(?) blue roses, so very ladylike. I cut it on the diagonal not quite in half and lined it up so the cut was the top edge of the back bodice. I had a ton of the vintage lace you see and used that to trim off the top edge. I think it is tatted lace. 


On the front of the top you can see a former "table scarf." It is made up of the teensiest cross stitch, with  an Asian theme, stunning hand work. Edging the neckline is the only half I owned of a beautiful lace collar. It still had its half of the snap left on it.  Never found the other half.  The bodice pieces are backed with white voile. 


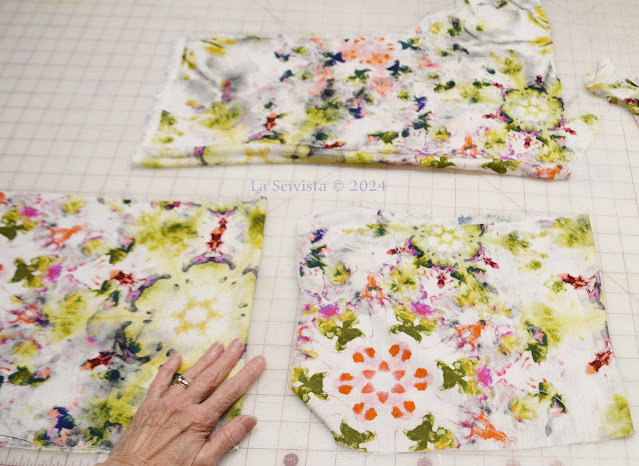
Below is running yardage of a crosstitched border that I had about 7 yards of. It's about 18 inches wide.  I split it and mailed the other half to Sis for her top. 


Construction:

Making this top was really quite simple. The designer thought out of the box with the sleeve installation which added greatly to the charm of the top. It also facilitated the ease of construction. While it did that, I felt that the area where the sleeve corners connected to the bodice had vague directions and felt a bit clunky. It was one of those situations where you move things around till they worked and then sewed them together. In the end, it all looked good. I did go back and do a narrow satin stitch where the elastic ended on each of the sleeves and  met the bodice. It just seemed more secure and looked fine. I liked the bound hem on my version and think this is an idea that could be added to the directions. The repetition of the fabric enhances the overall design, IMO. Will I make it again? Not sure. I have many more vintage linens, including some lovely tablecloths calling me. I may leave this one as a unique expression of upcycling and look for another type of expression for the next go round. In the end, it was a really fun make, particularly collaborating with my Sis. 

Would I recommend this pattern and design? Somewhat. I like the design. It is creative and out of the box. It really utilizes the vintage linens well. I feel the directions, at least where you are directed to the Threads website, could be a bit more logical and clear. But, that's me and how I like things presented to me. Others may feel otherwise. For a true newbie, well, I think they might need a little coaching. I am also disappointed in the lack of sizing other than the offered Size 8. Not everyone has the chops to move out from this.  But, in the end, I felt this was worth it and recommend it for those with patience who appreciate creativity and upcycling. You won't be disappointed. 


When I originally went out this morning to set up my camera, this is how I was dressed. It is how all my neighbors currently dress outside. We wear net suits to save us from the scourge of black fly bites. They are heinous, truly heinous. Net suits get very hot, even on cool days. Once the camera was all set up, I went back inside and changed into my little vintage top. You don't want to visit NH in May, you really don't........Happy Sewing!.............Bunny 
Friday, February 16, 2024

Three tops and more to come!


I have three tops to share with you, made between Thanksgiving and New Year's , I think. With the old year behind us, much is blur. These are part of last year and I am now working on this year's projects in earnest. You have seen me make these patterns before. They are tried and trues. I like to think the fabrications are unique and make them worthy of a second look here. I've tried different techniques each time. The first that you will see are two new Eureka tops. I believe they are number 6 and 7.   A search will bring up the others. The Eureka top is a very basic cut on sleeve tee shirt from the Sewing Workshop. It is the simplest of designs, therefore lending itself to all sorts of interpretations and play. It is large, boxy and so forgiving of fit. I highly recommend it. I did a bit of research and found that McCall's 7721, view B,  is nearly exact to my ruffled sleeve version presented here. I think it may just be a bit less boxy. 


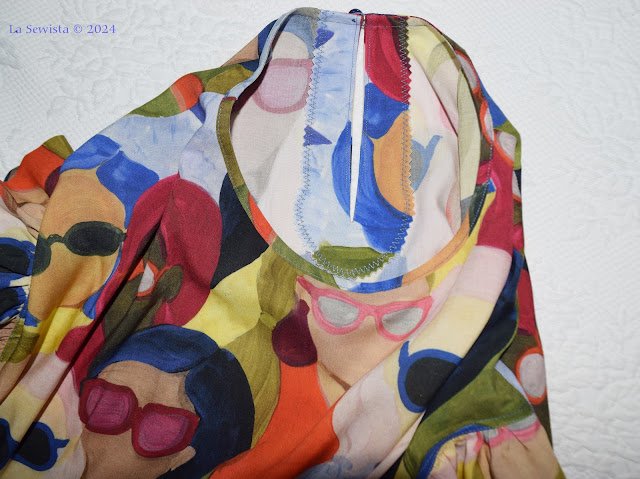
I could wear it now with a turtleneck underneath but will save this for warmer weather. The fabric is Lady McElroy and it is called "EPIC Spectacles". Make sure if you order it you ask for Epic as you may get the tiny faces as I did on the first purchase! Stone Mountain and Daughter carry it and were the ones to eventually provide me with the Epic version and were great to do business with. For the ruffles I simply cut a six inch wide strip the length of the sleeve opening and made that double the length of that opening. Next I sewed the short ends together. It was then folded in half, pressed and then gathered and applied to the opening, very simple basic ruffle technique. Seams on here were French seams except for the ruffle attachment which were machine stitched then serged. 


The Eureka pattern has no closure. I wanted one and I also made the neckline opening a bit  wider. 


I made a simple facing for the slit area and backed it with woven interfacing. Because I did not want any bulk to show through, I zigzagged and pinked the edges of the facing. No bulk! I did a simple thread loop by hand for the tiny vintage button and applied a bias binding as I always do.   I think this shirt is great fun and can't wait to wear it in the warmer weather. 


With the second Eureka, the party is all in the back. 


Pardon the photo. For some reason the fabric is really shiny. IRL, it is not. 

On this Eureka I did the sleeves as directed in the pattern, with a simple fold-up cuff. I always cut the extra small size.  This is a big garment and I like it.  


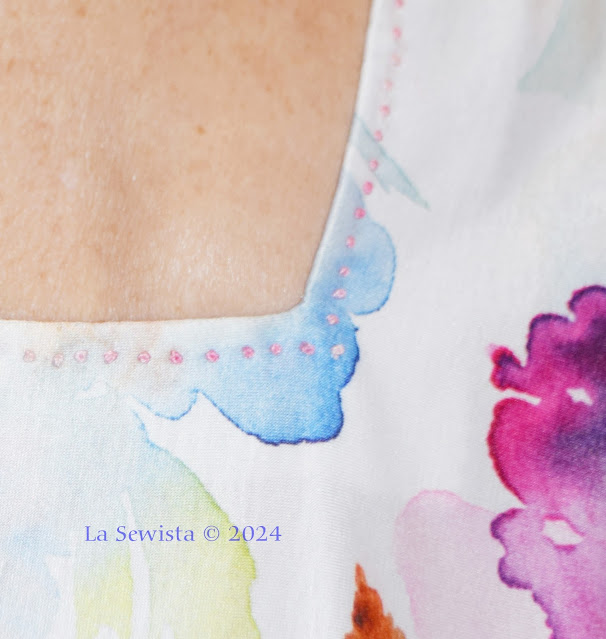
The back got a square cut out and I tied it across at the top  to prevent gaping. I also didn't want it hanging open for viewing to the public as I moved  around. The facing was understitched but also held down with French knots all around. I also ran a strip of boning in a channel across the bottom edge of the square cutout. It fits in very snugly and you don't even know it's there. Its snug fit keeps it in place and I can easily take it out for laundering. The cutout square stays nicely placed on my back with the weight of the bone and no facing rolls out. I gave it a trial wear to make sure.  What type of boning did I use? A white electrical tie, cut on the ends in a curved shape so not to irritate. 


The fabric was the fun part here. It came from a floor length tee shirt dress that also had white ribknit neckline and cuffs, Think golf shirt. I got it at Good Will and  was size XXL. On my first trip there in a long time, I saw it and fell in love with its hand painted water color style. I left it on the rack. I went back a couple weeks later and it was still there so I grabbed it. It was a very cold day and this type of garment would not be moving easily out of the door into the winter's cold right now. I brought it home. The fabric is all poly, I know, yuk, but I felt the lovely print would make up for any issues I might encounter with heat. The design of the top and its  loose demeanor make me think it won't be too hot. I really like it. 

On to top #3!


Oh, how I love the Imby top by Karmme Apparel! I didn't use a shower curtain to make this one! I did use a lovely fabric. It is a rayon slub, near sheer,  leftover from a prior project. You can see more on the original project here. 


The bodice lining/collar were made of a really nice rib knit. 


 The bodice was topstitched pretty much everywhere and the lining was understitched with a triple zigzag up to the shoulder seams. I hand stitched the collar down with a hemstitch underneath. It just kept wanting to turn back. If I did it again I would interface the turnback area. There is no interfacing in here now. The Imby top is a lot of fabric and should be heavy but it looks best with a light fabric making up the skirt and bodice so is very comfortable to wear. I think it will be delightful this summer and great with white jeans. I need to get some of those! (that fit)


The Velvet Bomber Jacket is c'est finis! I am just hemming the lining area by hand. This was not difficult, just extremely bulky to work with. The ribbing was like working with a rubber tire. Add in the heavy lining and fashion fabric and it tried my patience at times but I got it done. It could be better and I think it was one of those patterns you had to work thru the first time and then get it right the second. I'll review as soon as done, hopefully in the next few days. Then it will be on to sewing for summer and my vacation at the end of June. Happy Sewing..............Bunny

Wednesday, December 29, 2021

One of My Favorites


Doesn't everyone have a favorite sweater, one that is so very soft and ever so cuddly warm?  This is mine. It is 100% cashmere and made by Herman Geist. I love anything Herman Geist. I don't think I own anything that is as soft and lovely feeling as this very mundane gray sweater. I have had it for quite a few years and don't want to give it up. Unfortunately it was starting to fall apart. The hip and sleeve seams were coming unsewn  and that was a very easy fix. 


The neckline, however, was in tatters in some spots and needed to be fixed somehow. I am not a knitter. I do embroider. I do have scads of woolen embroidery yarns in every color imaginable. What to do , what to do?  

I took some pieces of wool that I had hand dyed back when and made little circles to hide the tatters. I then just pretty much threaded my needle and started stitching away. It has been a long time since I have done this type of work so what you see is pretty sorry but I think it will work for now and give me some more time with my beloved sweater. 


Being big on balance but not wanting to bring too too much attention to my wide hips, I did a more subtle version of the design down on the opposite hip.  I think it works. 


While I don't expect it to bring me any prizes at the county fair,  I think Ole' Herman would approve of my changes to his rather blah but wonderful gray sweater. Even if I just wear it around the house and it makes me smile and feel warm and softness all around me, that's a good thing. Nothing better on a cold, snowy day like today..............Bunny

The Hanbok Vest

  I love this little vest. I thought about it for a long time. I am excited to tell you it's story.  Pattern: This is the Hanbok Vest by...