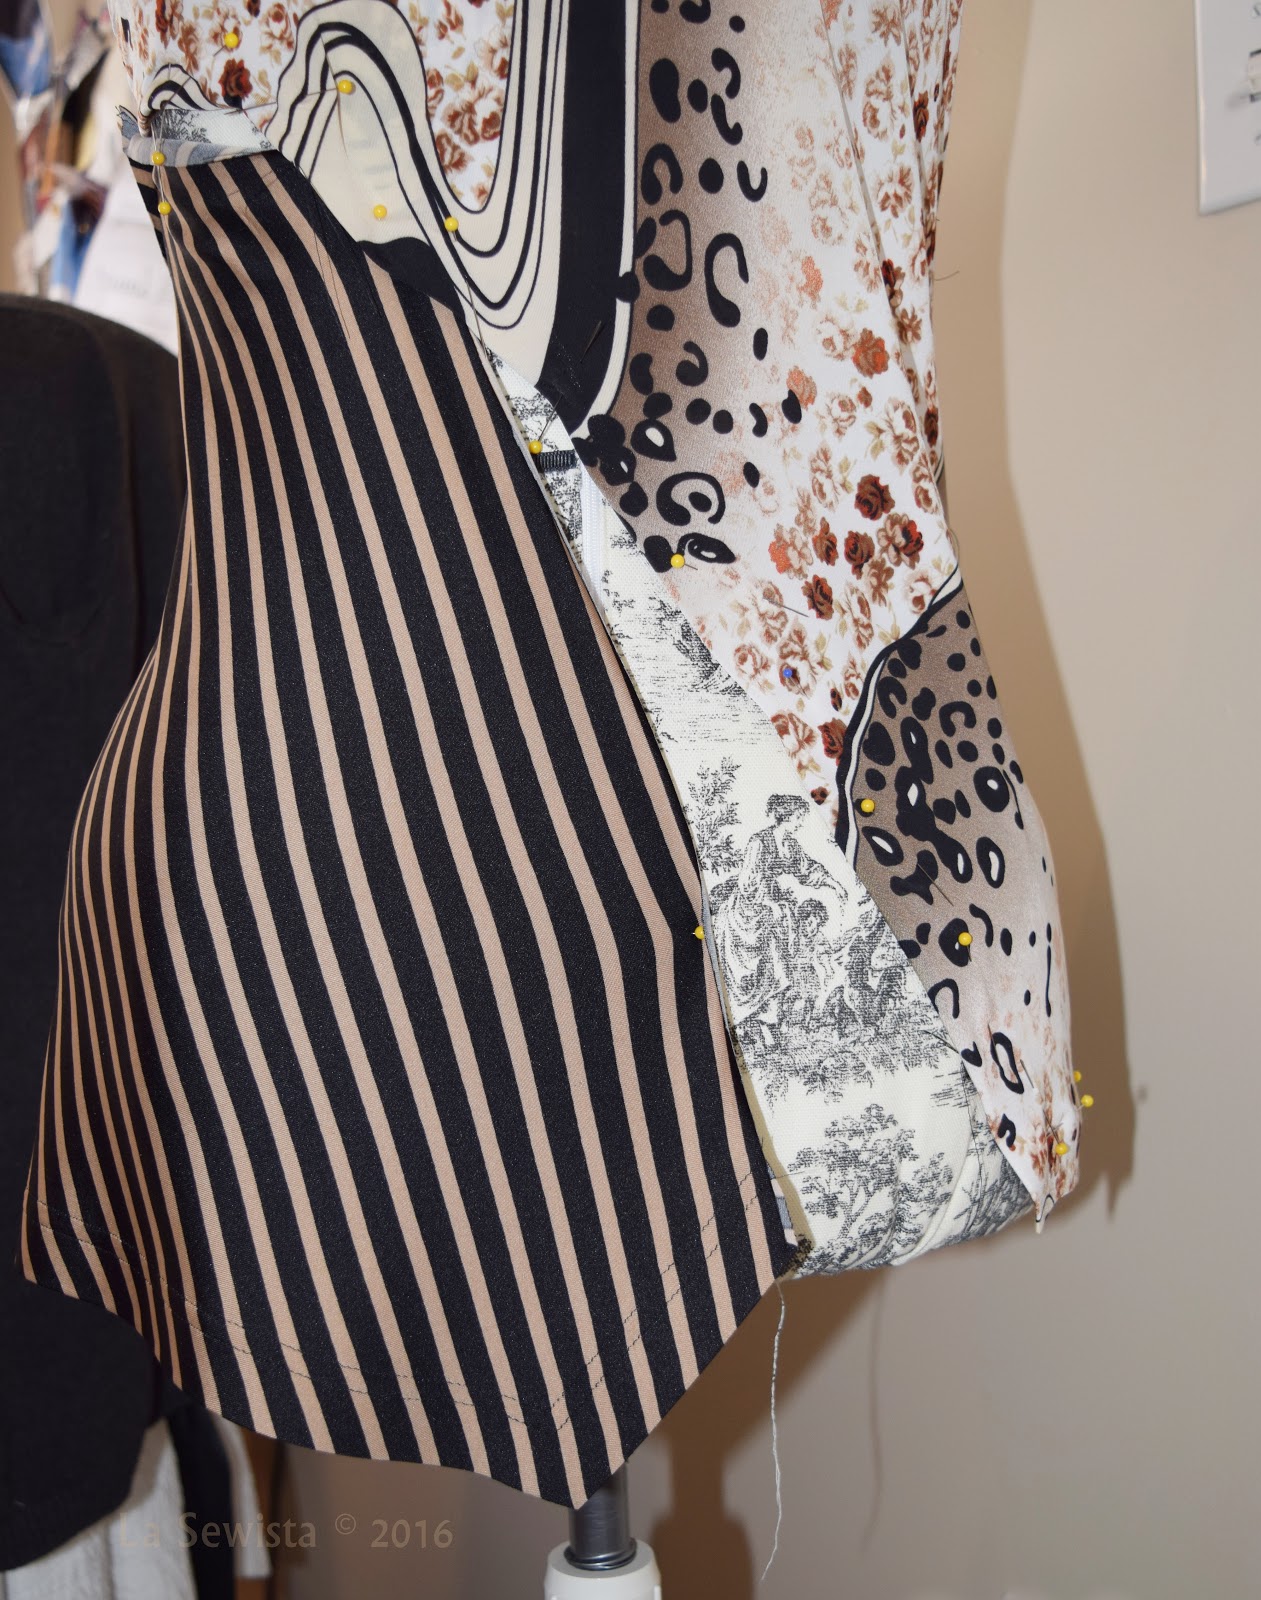
After a bit of thought, I figured adding a godet would be the solution. However, the underlay was complete with side seam sewn and the hems in and double topstitched. I was not taking that hem out of a thin knit, either. Here is what I did to add the godet to the the underlay.

I cut a section, an arbitrary 10 inches wide, on grain. The sides of the underlay are curved at the hip. I took my hip curve ruler and curved the bottom of the godet. This makes it lay, more or less, at the same level as the finished hem. I don't know any math equation to do this. I just curved it up about an inch higher at the sides than the center. The hem was lined with fusible tricot, slashed to accommodate the curve and pressed up the same width as the hem on the underlay.

Next, the godet was folded in half, all edges matching. I used the hip ruler to cut a curve mimicking the side seam of the underlay. The top of the godet would be at my natural waist.

Right sides together, the godet is pinned to the side seam of the underlay. I simply cut off the original side seam of the underlay to eliminate the stitching. The hem is folded out and the folds of the two hems match. I then sewn from the fold of the hem, not the edge, and up to 5/8ths inch away from the top of the godet. You want the point of the godet to be free so stop 5/8ths inch short, like you see below.

Once that is pressed (It will be trimmed after), it is time to match up the other side of the godet. Simply pin the whole length of the underlay. You will sew from the bottom hem fold, again open, to that same point where you ended on the first side, 5/8th inch short of the end of the godet.

Then stop,cut your threads, flip that end point of the godet out of the way. Go back under the presser foot and start sewing again from that point to the end of the underlay. This will leave the point free. Check the front and see if any correction needs to be made to have a smooth transition at the point and a tightly sewn point. You can maybe see that my seams are a "wobble" seam, two rows, stitched a quarter of an inch apart. This was then trimmed back to the second stitch. The "wobble" stitch, an Nancy Zieman term, is a very very narrow zigzag which provides the needed stretch. It works great. Why not used the serger? For one, it's not necessary as this fabric will never ravel. Plus it can show bulk when pressed. Just my choice but many sew all their knits with the serger. That's fine, not critique there. Plus, maneuvering that point could get a little tricky with the knife!
The hem is now folded into place and the top stitching sewn, match that on the original underlay. Now I can connect it to the overlay section, whew! Now it fits!

**************************************
Winter just won't let its grip on us go. This icicles, curving into the house remind me of it's icy tentacles and the way we all feel after the nasty month of February. Please Spring, come!....bunny


