Sewing Vloggers

Saturday, April 25, 2015

Interesting Pinteresting

Have you ever really looked at what's going on with your Pinterest board? Some rather interesting observations can be made with a little digging. You have X number of boards and you may be tracking your followers or not, but odd reflections on sewing and fashion can be found in those silly numbers.

Today I have 4340 followers. Many of my boards, of which there are 70 (Mon Dieu!) seem to hover around the 660-700 mark for followers. But here are some interesting facts regarding the sewing boards:

The "Sewing Tutorials" board has 2284 followers. That board is always growing too. I take this as a really positive sign that sewists want to increase their skill level and are seeking solid information and inspiration.  Here are the  other sewing related boards and their breakdown of followers:

Sewing zippers:  663 followers

Sewing pockets:  656 followers

Fitting:  700 followers   Interesting increase. Does it reflect the concerns sewists have about fit                                                    as opposed to technique? 

Drafting patterns:   687 followers   Also interesting in that it is an almost equal amount to the                                                     other sewing boards. I always thought many sewists could care less                                                        about drafting their own patterns. I am clearly wrong on that. Your                                                       thoughts? Is this evidence of the upswing in PDF patterns, some of                                                         which are drafted by those without design school experience and                                                           finding this online information helpful?  Thoughts?                                            

Sewing linings:  654 followers

Garment finishing:   654 followers

Heirloom sewing techniques;    774 followers  Hooray for that! 

courtesy Annwilliamson.com

 Sewing techniques & details:    1662 followers     This is my favorite sewing board and it's                                                        because it shows details, many from the runway, that could be                                                                implemented in our own clothing. It's where I keep my inspiration                                                          pics. Do you have a similar board for sewing details? It's fun to go to                                                    when I need  inspiration. The above pic is from designer Ann                                                                 Williamson  who thrills with her surface embellishment skills.

photo courtesy of ideamarketers.com


         Sew me some bras:       675 followers    I find this really interesting. We have seen bra patterns                                                 proliferating all over the blogosphere and the original instructors in this                                                 area of sewing are in big demand. Craftsy has a bra class. I think this is                                                 reflective of the variance in all human bodies and how motivated we                                                     are to make our own be the most comfortable and best looking, at least                                                 underneath it all. Beautiful bras in ALL sizes are way overdue and                                                         sewing your own is one way to get them.  Have you made  your own                                                     bra? My grandmother used to make all of my mom's and you couldn't                                                   tell the difference from a Vanity Fair. My mom loved them as they fit                                                   so well. I haven't taken the dip yet but it is good to know there is lots of                                                 information out there.

Another fun thing to do with your Pinterest board is to keep an eye on who is following you. You would be amazed! I have two well known followers and was really surprised to see their names as I scrolled through the list. Great pastime for a rainy dreary day! It's also very interesting to see where your followers are coming from. I have a great deal of Hispanic followers which doesn't surprise me given my background. There is a wonderful culture of heirloom sewing in the Hispanic community and some very beautiful work being done. I am glad we have made this connection. 

         
I have several other boards that are sewing related but not in a way that is reflective of the current sewing landscape so I did not put them here. Are there any particular sorts of sewing boards you look for on pinterest?  Do you follow any/many commercial boards in regards to sewing, like the McCall Fan Gallery, which I love, BTW?  Do you think businesses should be on Pinterest and is there a downside? I have heard of numerous instances of copyright infringement but isn't the whole Pinterest concept one big infringement? Not so sure about that one. Would love to know your thoughts.....Bunny

ETA: Once again, Blogger is giving me grief. I apologize if you are seeing blocks of text that are totally out of sorts and look a bit disharmonious to the eye. Mine in edit/write mode look perfect. Once published they go haywire. At work they looked awful as well so it's not my comp. Sorry for this aggravation.

ETA: Because you asked here is my Pinterest collection of boards: https://www.pinterest.com/bunnypep/  Thanks for asking. 
************************************


Hats, anyone?

We are back from a wonderful family vacation that had my oldest daughter, her hubby, three kids and Bunbun and Poppa all enjoying the wonders of Walt Disney World in Orlando. It was a visual delight with so much to absorb and be thrilled with and shared. It was way up on my bucket list, and my daughter's, and we just decided it was time.

I could regale you with scads of family pictures and perhaps many of you have been there as well so know its wonder. I'll share just a few highlights with you before we get back to sewing topics!


I was totally entranced with the textures and colors of the Moroccan village in Epcot. It was a sensory delight with its smells, colors and coolness. The buildings and alleys felt cool despite the high eighties heat and humidity. I think I could have stayed there all afternoon. There were items for sale that tantalized the senses from shimmering sparkly bags to really interesting clothing.


My daughter had backpack duty and was laden with the required water bottles and snacks.


Everything about this area made me want to visit Morocco. Added that to the bucket list!

We went to "Downtown Disney" three times and really enjoyed that. There are no rides, just lots of good food options and shops and it was a more relaxed way to spend the evening. We were able to take a calming boat ride to get there each evening. We had a particularly fabulous meal at Portobello's outside on the water with a chamber ensemble playing fifty feet away. It was delightful. After that meal we strolled through Downtown and stopped at a really fun shop that sold only hats. Carly and I had a feast of hats to try on. She is my hat girl having enjoyed them since very little and would wear a hat all day long in the house because she just liked to. The apple doesn't fall far from the tree! I started clicking pics as she was just too stinkin' cute in her fascinators

. You can see Grandma and assorted family members in the mirror as we take pics.


Carly definitely has the fashionista gene!


And of course grandma had her favorite hat, too! Goofy big brother had to make his presence known as well!


And my favorite on Carly:


Be thankful we didn't start trying on all the steampunk paraphernalia. We would have been there all night.

These are not the usual pictures you see from Disney but I figured you've all seen the Magic Kingdom and the Epcot ball and other memorable Disney pics from your own family members. The Moroccan village really appealed to my artistic side with its visual delights and the evening spent trying on hats with my grandaughter was priceless. I hope you have sensed a bit of the fun, delight and wonder that was our Disney vacation. I will never forget it......................Bunny

Friday, April 10, 2015


I have a few things in the queue that I wanted to share before we leave on vacation. This combo above will go into a bag. The print is not photographing well as it is much more the color of the eggplant patent leather. They really are wonderful together but the camera is just not cooperating. The print is a greyed out purple, very soft in color and what looks like white it all metallic silver, no white. It's a great combination and I can't wait to work it up. I've already stitched out some samples to see how the patent leather would take to the needle and it does beautifully. I was actually pretty surprised that I was able to stitch it using only a HS stretch needle and no other accomodations. It stitched beautifully so I decided to go ahead with a project, actually two. I am planning another loom bag as well as a clutch out of the PL. The clutch might have my latest bit of weaving as part of the design. All of this is percolating and you know the percolation stage is where change can happen at any moment and is part of the evolution. So we will see what design we will have in the end. 


This print really screamed out at me. It's a cotton but I think I can make it work either as a bag or perhaps even a summer skirt. It's a lot more blue than gray and a really intriguing print. I think it is a stylized version of branches in the snow. As much as I love this print and as much as I want to make it up, it will not be first in the queue. I've had enough with snow for now and won't touch this until all that white stuff outside is gone. Yes. We still have lots of white stuff but it is going down. 

I also need to add a waistband to the blue linen pants I remade. They are far from perfect but look perfectly great with an outside top over the waistband. I had to add fabric to get the length I needed for the crotch and while the color is a perfect match, the textures vary just a wee bit, practically unnoticeable.  But it is in an area that will never show so I am not worried about it. These will make great summer pants once done and you know how I love linen. They have been totally cut apart, recut to my sloper and made to work. I rarely throw out good fabric/clothing if I can make it work but you all know that. 

I am showing you these three projects as they are what I will attack as soon as I get back from vakay.  I will also be starting a "weave along" sponsored by Mirrix looms. We will be making a split bead woven necklace and it looks pretty awesome. I am excited about this technique as it is quite unique. 

We are headed for Disney and fly out Tuesday and to say I am excited is an understatement. See you all on the flip side. Stay healthy,  keep calm and keep sewing!.............Bunny

Monday, April 6, 2015

My first real weaving project, a Tapestry Cuff


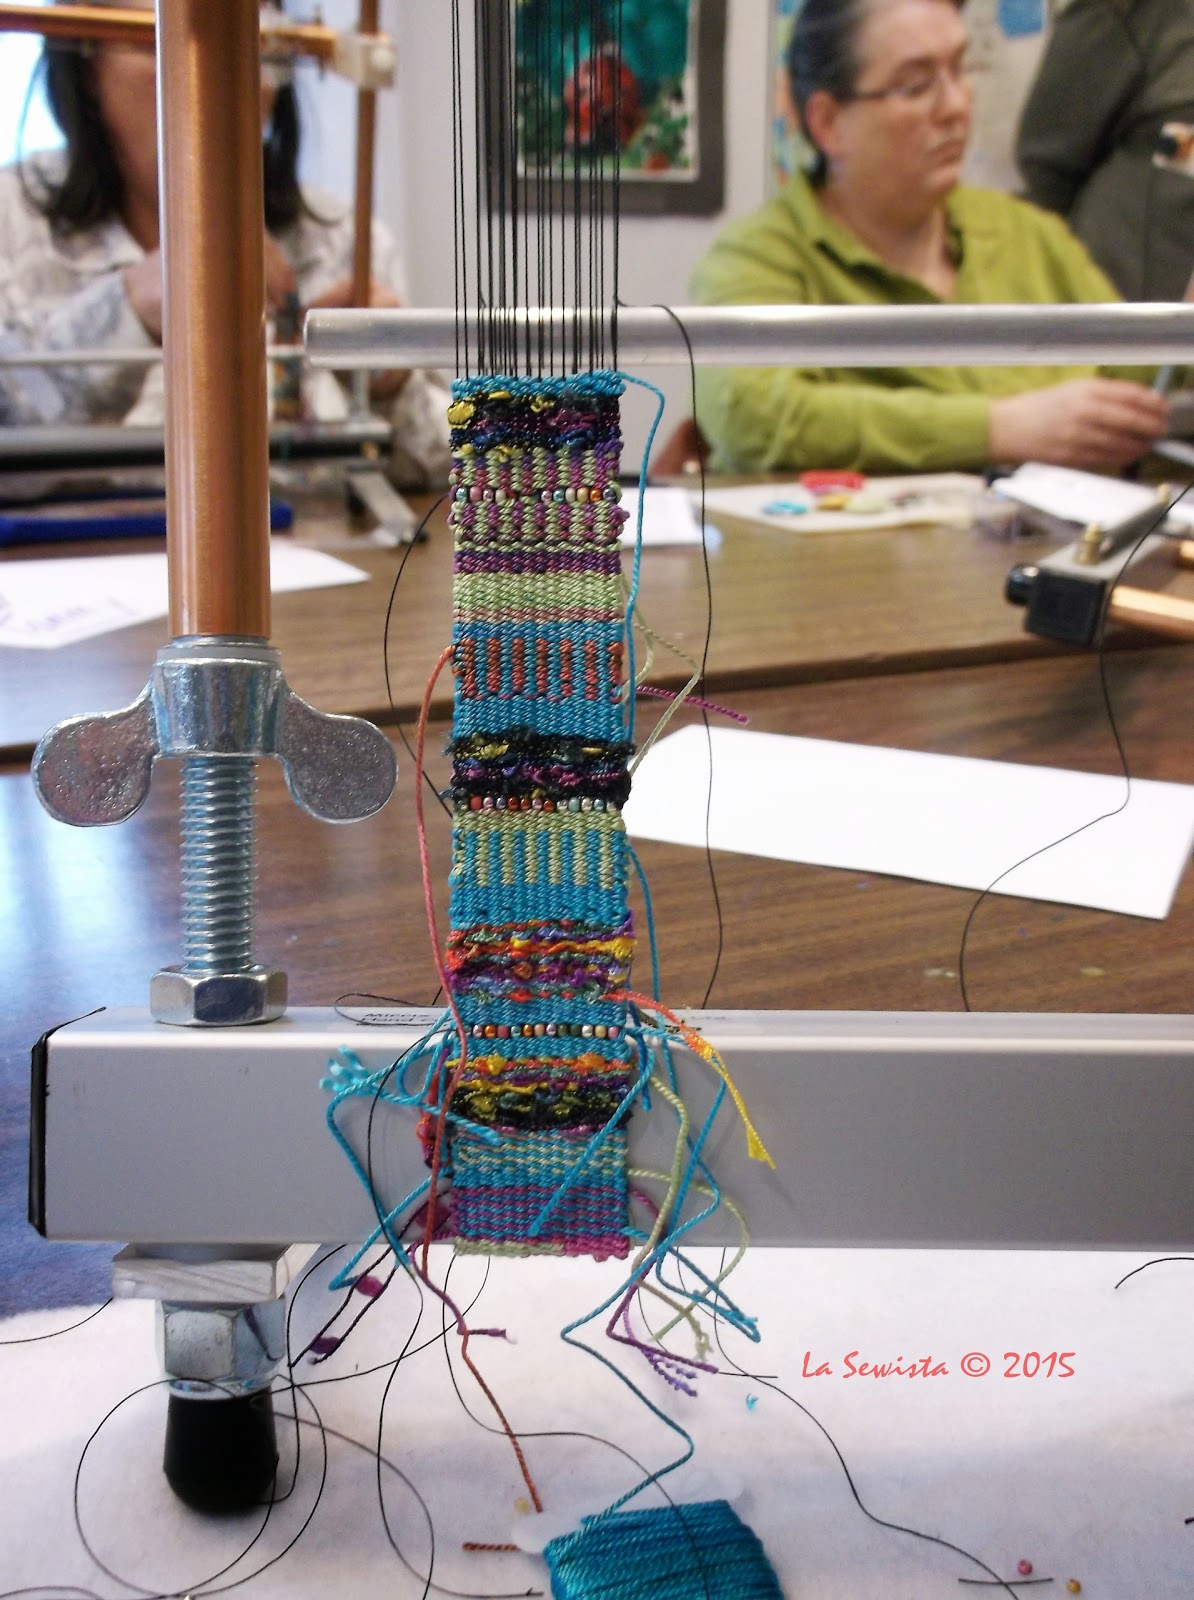
I am finally finished my cuff. This was the first project we worked on in the weaving class I recently attended in Groton, MA. The weaving was all actually completed that day. We learned how to warp our looms for beading tapestry and beads and this cuff has numerous techniques in it, a veritable sampler of techniques.


This is actually a brass cuff. The fibers and beads have been woven on the loom and attached to the cuff. Ultrasuede is on the back. Not necessary, but I beaded the edges as our teachers samples were made that way. This took way longer to finish than it should have because I chose (blissful ignorance) the wrong size beads and these are size 15 and very very tiny. F O R E V E R it took!  But now I am glad I used them.

I would be the first to tell you it's far from perfect but if you can't see it from a galloping horse..............you know the rest! I will wear it proudly to work tomorrow and can't wait to hear the reaction from my good friends.

I am looking forward to my next project. The weaving is completed, just a tiny sampler, no beads. I am toying with inserting it in a clutch bag. We'll see. My mind is spinning with all sorts of creative ideas.

We will be leaving for Disney next Tuesday and are so excited to be leaving this cold gray climate. I have some major sewing and weaving plans to roll out as soon as I get back. I did manage to remake a pair of linen pants this weekend, not hemmed yet. The pants were really nice and part of a three piece ensemble. I wore the jacket and tank to pieces but the pants were always too voluminous. I took them all apart and recut them with my Sure Fit Sloper. They now fit really nicely, no big blobs of fabric behind my thighs.

Till I return from my trip...............Bunny


Sunday, March 29, 2015

Vogue 8499 #2, the beige linen skirt


I am so stinkin' happy with this skirt! I think it looks quite upscale and does more so in person when you see the yummy linen up close. Since this is the same pattern I reviewed in the last post I am going to focus on what I did differently.

Fit: 
I followed Lorrie's advice and my gut instinct and took three inches of ease out of the area of the skirt above the zippers. It looks so much  better and more flattering now. All I did was take out 3/8ths of an inch on each seam = 3 inches. I tapered to nothing above the pocket zippers. I am really pleased with the fit now.

Construction:
First, my apologies to Mrs. Charisma/Smith. Yes, I whipped out the simple black version on an afternoon but this puppy took me all day, 9-5, and I loved every minute. What took so much longer?

The zippers! Why? I didn't do them as the pattern suggested. The pattern has you put the right side of the lower side of the zipper to the right side of the pocket top. Then you make a seam . Turn over and topstitch. What I didn't like about this is that both sides of the zip were being treated differently. I wanted both sides to have the same look, whatever that was. So I serged the top edge of the pocket and pressed in a small hem. I placed the zipper bottom edge ON TOP of the right side and top stitched with a triple zigzag stitch. That stitch gave the white garment a bit more casual interest.  When it was time to put the pocket on the skirt I simply laid it on top of the side front and stitched the top edge of the zipper in the same way.

Now the pocket was installed the same way all around. Hubby says I can rob a store in this skirt! Those are deep pockets.

Those were the pocket zippers. Now I had to do the back zipper. I figured it wouldn't hurt me to  look at a few videos and tutes so off to the Web I went. There are MANY "exposed zipper tutorials" out there. None had the look I wanted. There were some real good ones as far as installation but they all had the two bottom "legs" of the zipper folded under and topstitched. I wanted something with a bit of a cleaner finish.


I was able to slip the zipper legs behind the fashion fabri and still have the zipper fully exposed and stitched for the rest of it's length. It was a bit involved to do this and I will have coming up a separate post on how to do it. It took LOTS of pictures.

This back CB  zipper was also triple zigzagged to secure.


This zipper LOCKS and that rocks! It actually clicks in and is very secure, love it. I love the vertical line this adds to the design as well. You can't see it here but the bottom of the zipper, on the beige linen, it is also triple zigzagged. I am on some sort of triple zigzag binge. Don't know what that's about!

Another addition to the construction, which you can see above, is that I topstitched the top edge of the waistband. I think that is always a more professional finish to an elasticized waist. I did that after the top edge was serged and turned down and pressed. Then I put in the elastic under the fold and simply stitched in a casing.


At this point, the back casing area was looking pretty nasty. So before I closed up the casing I went digging and came up with some beige silk dupioni. That was wrapped around the end of the casing and stitched in place when the casing was stitched. The top edge you see is the actual selvage edge of the dupioni. It is so much prettier now.

Again, all seams were sewn, serged, pressed to one side and topstitched.

I think you can see why this one took a full day to finish but finished it is and ready for the warm weather.

Fabric:
This linen is much heavier than the black linen of the original effort. It is what I would call a Home Dec Linen or bottom weight. For some reason, this skirt is heavy. The pockets I thought were a little too "Marcy" for me, I now love. The pockets are big but big means lots of fabric and lots of weight. That  keeps the skirt from ballooning out and looking silly. I really like the way they affect the drape of the garment and the weight they add.

This pattern has now been given the sacred status of


I love that. Highly recommend......Bunny


***********************************


Do you think I may have worn out my IDT, aka, walking foot? I can get it to work just fine with this bull clip!..........Bunny

Saturday, March 28, 2015

Sewing is Planning!

I got my off-white linen and my three brown zips to make my next iteration of Vogue skirt 8499. Of course, my unbridled enthusiasm had me jumping in full bore without the aid of the thought process. Eeeeek, step on the breaks!!!!  So much of sewing is "foreseeing". Is that even a word? For me  it means seeing ahead in the sewing process to make all the tasks fit together into a final success. But things pop up that can put that train off it's tracks, particularly if you are forging ahead with great creative abandon.

Just as I was ready to put rotary cutter to cloth, I realized that the big long kangaroo pockets on this pattern would not match the skirt properly. I almost cut everything out without even thinking about that. On my first skirt I had taken a total of three inches in length from the pattern. OK, my pattern fit has been tweaked. Aren't I ready to cut and sew? Uh, no. The big long pockets needed to have their length adjusted to be in the proportion to the skirt the way the designer had planned. Whew, I almost blew that one and would have had big billow pockets that were not part of the original look. Here's what I had to do:

Here you see the pocket. I laid it on the skirt piece and it fell within the area where I removed one inch from the skirt length.Those bottom large dots on the pocket needed to match the skirt and that meant that the same one inch needed to come out of the pocket piece. To do this I first found the straight of grain and lined up my triangle edge to that line. I traced the right angle perpendicular to the grain line with my pencil.

That only went part way so I ran the line across by lining up the shorter line with my long ruler. I drew that across the pattern piece.


Here you can see the line across. This will be the line that is folded into a tuck. To make a tuck that will remove one inch of length a fold is made only a half inch wide. Remember, there are two sides to the fold and two halves make a whole inch. So the line was folded, the half inch tuck made and then interfacing was ironed on the back to make it secure.


These large circles (where the green lines point)  needed to match and still have four inches or so below to make the curved hem. Once the tuck was made I double checked by pinning the dots together and here you can see the results. There is a soft fold to this pocket at the bottom but if this alteration wasn't made it would have been much deeper and probably would not have draped as nicely or ended in the right location.


The large circles match, The tuck lines match and the fold is just right, in that it ends where it should in relation to the hem and skirt proportions.

You may never make this skirt and need this information but that really isn't the point of my post. If you are proceeding with wild abandonment on a project you think you have nailed down, stop and take a deep breath. Really look at the process. Read the the pattern instructions again a couple more times. Ask yourself is this all right and do that before you put scissors or rotary cutter to cloth.
T H I N K   S L O W L Y.  Then proceed. If you ever find yourself in a predicament like the above and don't quite know what your next move should be, just sleep on it. It will almost always come to you by the next morning and be clear as a bell. Funny thing about creativity, sleep and our brains!

This afternoon in quick time I had my well washed and dried on hot linen cut out and altered. Tomorrow morning I will sew full bore. Oops, maybe I'll slow down a bit before I start. Do you ever get caught up in sewing excitement to the point where you do a royal screw up? We all have.  But now we can maybe be a little more aware and prevent those wadders. ......................Bunny

Friday, March 27, 2015

Vogue 8499 finis!

Those of you who have followed this blog for a while know I love Marcy Tilton's designs but they rarely work for me, something about the neckline fit. This time I scored! I know you are looking at a basic black linen skirt but it does have it's details and I love it. I can't wait for the weather to warm and to wear it with a sleeveless off white tunic I have, a lot less structured look than what I show here and a more summery vibe. There is a lot to like about this pattern: quick, easy, and a bit of sewing and fashion detail. Sorry for the over corrected photos. You know how black is. 
Pattern:

This is Vogue 8499, a Marcy Tilton design. The pattern consists of three funky designs, two pants and the skirt. The skirt has large kangaroo pockets that I left off but the next version will have them. From pictures I've seen they add a nice weight to the skirt and "pull down" the fabric. This design is easy-peasy and can easily be made in an afternoon.

Fabric:
This is 100% black linen from who knows where. It is a nice bottom weight. I LOVE LINEN. It truly is my favorite fabric to sew and wear, so comfortable! It is a fabric that just gets better with time, the more you wash it the better it feels. There is no lining here. 


Construction:

The hem is stitched by machine. It's about an inch deep and I used my "lightening" stitch to sew it down. I plan to wash and wear my linens a lot and over compensate on the stitching, no regrets. Above you can see how the lower 4 inches of the  hem curves in at the four side seams, kind of cool. It's not an overblown bubble look, just a hint of curve. All the seams got stitched, then serged, pressed to the side and topstitched. Rugged! I did draw in a slight upward curve on the hem of the center front panel but truthfully, it barely shows. Next time I will do the hem as suggested. 

This skirt has a zipper in the back yet still has an elascticized waistband. It's OK but next time I will put in a couple of darts and cut back the fullness in the top third of the skirt. There's a zipper in there so why not? I think it will give a slimmer line, but given that I will most likely wear an overblouse with this skirt, the elastic waist is not a biggy deal. I did not follow the direction for the wiastband, choosing instead just to serge the edge and fold over and stitch. 

In conclusion:

I will definitely make this again and will try the pockets and darting the waist. I highly recommend this for a summer skirt. Now that it is done, seams pressed, etc. I will throw it in the wash to give it the beloved blistery look of much loved linen clothing. This pattern is simple, quick, has a bit of style and was fun to make. 

ETA: I decided to add the information on the blouse for those who asked. I did put it in the comments section but can make it linkable here. Here are the posts on the blouse as I made a big change to the design. 


Leave it to a white shirt to upstage a black skirt!

**************************************

This "Mag Eyes",  which I won in a contest by Sigrid way back when blogging was newer,  has been a Godsend in my beading/ weaving upstart. Those beading needles are a bitch to thread, thick thread and the world's tiniest eyes! This has saved my life. At loom class, two of the "professional" beaders showed up with high tech versions like the dentist uses, very expensive but that is how they make their living. I will have to check and see if my daughter has any castaways!...........Bunny


Tuesday, March 24, 2015

The Marcy Tilton Skirt, V8499


I have nearly completed the skirt you see above, Vogue 8499 from Marcy Tilton. I LOVE IT. This design has worked for me with minimal alterations and that makes me happy.  I only shortened the skirt three inches, two above the knee and one below. All that is left is to finish the waistband and pics will come after. I used a black linen which is another whole story. 

A few years ago I bought a three piece casual linen suit, tank top, casual jacket and lined pants. The pants have always been too big, you know, that voluminous amount in the back of the legs. I have since worn out and chucked the tank and jacket and the pants, in all their linen glory, sat like  new in my mending pile. A couple of weeks ago I got the brilliant idea to take them completely apart and recut them with my Sure Fit sloper. One night of TV and a razor blade later, they were done! I kept the lining totally in tact but cut out from the pants at the waistband. I am going to make a "pants slip" with them to wear with lots of pants. Thanks, Claire Shaeffer for that idea. She told us in class she never lines pants when she makes them for herself, choosing instead to make "pants slips" to wear underneath or not. Given the high temps of Palm Springs, where she lives, I totally get that. So now I am one black pants slip ahead of the game! 

Once the linen pants were all cut apart and pressed I realized I needed a bit more length in the rise than the pants had. I could add a yoke.  I had a perfect match of black linen. I grabbed that out of the stash and measured it up.  Did I want to cut into this good sized piece for the small yoke I was going to add or just give up my pants project completely? Neither! I chose instead to continue with the pants project but would stitch up something out of the black linen yardage first. Then with what was leftover I could alter the pants. Now what to make?!?

I went digging and decided on a skirt, this Marcy Tilton skirt. I love wearing skirts in the summer and really have none at this point.  I generally don't have luck with Marcy's designs but this one has worked like a charm. I have a complaint about her patterns I think you will all agree with. The garments and the photography are always too dark to appreciate the wonderful details she employs. Here is the line drawing of the skirt. 


In the front are two big kangaroo pockets that cover the side panels and have a soft horizontal pleat at the bottom. They have zips at the top, really cool but  I didn't do them. I wasn't sure how the skirt would hang on my wide hips and nixed the pockets. But now that I am near done and have tried it on, I will use the pocket detail  on the next skirt. This skirt has a folded over waistband and a zipper. But the waistband is also full of elastic. The gathers arent too heavy as the ease is only slightly larger than my measurements. There will be another one of thes skirts made soon. On that one I will go full bore, zips, pockets and all. Why? This went soooo fast, will be a versatile addition to my closet and I think pretty cute, too!

I love sewing linen. Sewing washed linen is even more of a joy, a joy to sew and a joy to wear. This piece has been washed three times and has that soft bubbly texture that says bring on summer.  Once you get over the idea of making a tailored garment with perfectly starched and pressed linen, you can have a really fun project. It's a type of project requiring minimal sewing finesse but if done a certain way can take a lot of washing and wearing abuse. When I sew washed linen I like to stitch then serge the seams. They are then pressed to the sides and topstitched. Sturdy, sturdy , sturdy! You can wash the heck out of them, Throw them in a hot dryer. If you grab them out of the dryer before done they require NO ironing! Now that's my idea of a nice summery linen garment! This was a great palate cleanser after the loom bag and weaving focus. I will also be able to wear it at Disney when we go in a few weeks.

We are going to Disney World in Orlando with our children and grandchildren and I am so excited.  So it has been a bit crazy around here. We are trying to prep the house for moving as much as we can in this brutal cold weather. Throw in a trip to Disney and all that planning and packing. Then continue with the excitement of my new craft, weaving and sewing as always. Add in the winter that refuses to go and the associated Cabin Fever and you can see why I feel like I am sitting and spinning on a giant snowball. A quick project that fits and is in my favorite fabric is just what the Dr. ordered. Also,  my husband is dealing with some serious health issues. We are waiting for biopsies and will know more shortly. Ah, the solace I find in my studio gets me through all this!  Lately I have read in blogs  and on PR about people that think sewing is just awful, "a lie", "too  hard" etcetera. If you are one of those I hope you can find a different hobby that will give you peace of mind. We all need hobbies that do that and it doesn't matter what they are. I would never spend time on a hobby that didn't make me happy. I just don't get that.  I do know when I am in my studio, life is good. I am relaxed and all is right with the world.........Bunny

Sunday, March 22, 2015

The Loom Class was WONDERFUL!


I am still on cloud nine from our loom class and have been wanting to share with you all. 

The Class:
This class was a two day introduction to weaving with beads and fibers and more specifically, weaving on a Mirrix Loom. The Mirrix Loom is a table loom that you use upright which is a really really nice feature. They come  very small sized (perfect for bead weaving jewelry) to quite large (great for larger tapestry works of art) and I think they are just beautiful to look at in a tech sort of way. We all brought our own looms to work on. The original class was structured to learn various tapestry/bead techniques while weaving two different bracelets, one on each day of our class. Because we were the world's best students with a great teacher, Our first day was declared a teaching success and our teacher suggested we get right into tapestry weaving if we were interested. We were and  the second day of our class was strictly tapestry weaving and trying all sorts of techniques in a small sampler.  The class was scheduled for 10-4 but our group of enthusiastic students decided 9:00am to 4 would be even better. We were all drinking the Kool Aid. 

For our class, Claudia supplied us with gorgeous hand dyed silk fibers  and gold thread to use. A nice "kit" was provided with way more than enough fibers beads and more to finish our two projects. The hand dyed silks are TDF. 

Our Teacher:
Claudia Chase was our wonderful teacher. She designed the Mirrix Loom and owns the company. She has been weaving all of her life, is a member of the League of New Hampshire Craftsmen (prestigious juried group) and is a natural born teacher. Her excitement was contagious and her patience limitless. Throw in a great sense of humor and you can see why the class was such a success. Claudia has classes on Craftsy as well as Craftartedu, a great site I just learned about. She dyes, spins, weaves and all that wonderful fiber-y type of "stuff".  

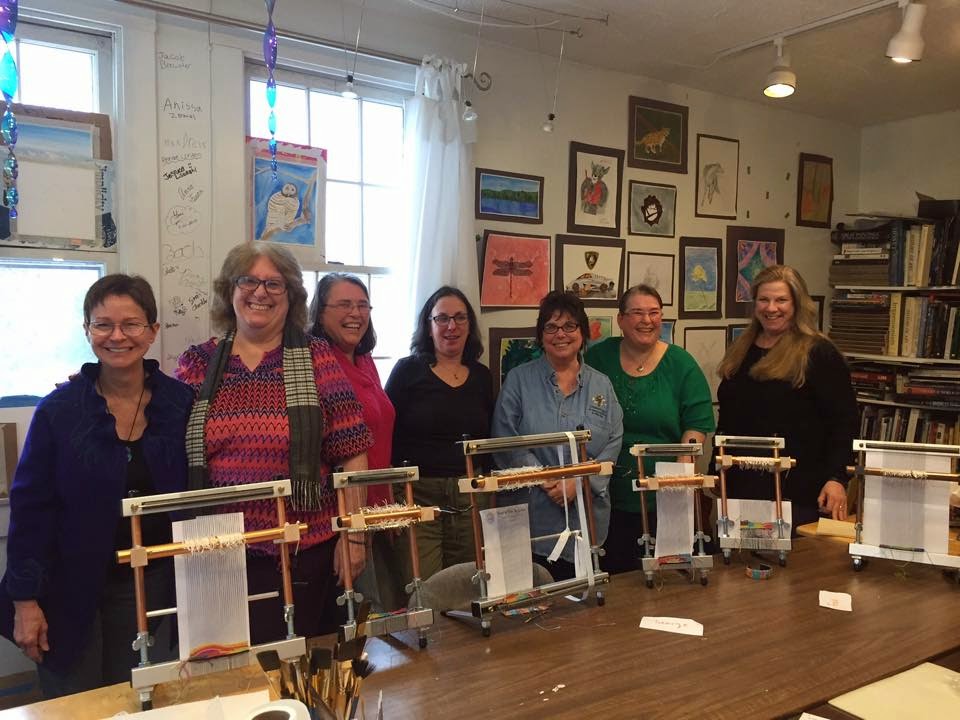
Claudia (black top in the center) was supported by our gracious hostess and artist, Joni Parker-Roach ( far right). The class was held at her gallery, The NOA Gallery in Groton, Mass. Joni teaches classes in an area behind the gallery that was bright and full of her student's work. She made sure we were comfortable  in every way and commandeered a great evening out of wine and good food for all. 


My favorite words from Claudia over the weekend "if you sew you know you want the back of your work to look as good as the front and you've been trained to do that. Throw that notion right out the window." In weaving there is all sorts of party happening on the back of your work and you just don't worry about it. Nobody does and it would be odd if you did. These were the first words Claudia shared when the class began. 

The Students:

I was surrounded by very accomplished bead weavers. Hopefully I absorbed some of their brilliance. Talk about small world! Two of the ladies, twins Tammy and Terry, live twenty minutes from where I live in upstate NY. I have searched high and low for garment sewing buddies since I moved here ten years ago to no avail. I go to this class in Massachusetts and find kindred creative souls that I can now commiserate with. That alone is worth the price of the class to me! The twins are very accomplished, bead professionally and enjoy sewing as well. Dona was from New Hampshire, another professional beader and so is Princess. Princess, forgive me for not remembering your given name but Princess fit so perfectly you needed no other! Princess kept us laughing  for the two entire days and stands to my right. All in all, a great group of creative women that I truly enjoyed being with. 

What I learned:

I was a blank slate when it came to this loom weaving business. Truthfully, I have always wanted to learn how to weave and now have the opportunity. I will continue to sew as that is in the  fiber of my being but I welcome this opportunity to continue to stretch my creative muscles. Frankly, one of the reasons I wanted to try this new to me craft is to see if I can help my synapses to continue to make new connections as I age. I am on a quest to try things that will stretch me mentally and force me to think in a new way about a new subject. Weaving will be a great way to do that. 

We learned all sorts of techniques, "pick and pick", "wavy lines", "bumps", "dancing fibers" and so much more. We also learned how to properly set up our looms for both bead weaving and tapestry weaving. 


This is my loom warped for tapestry and the heddles attached. That took some concentration and my synapses were connecting left and right! We learned techniques for finishing woven bracelets. For me the finishing is where the pros stand out and us newbies strive. It was so nice to have someone show me techniques for clasps and such. 

In Conclusion:

Myself and all the students all felt we got way more than our money's worth in this class. Claudia was so generous with her knowledge and kindness, Joni, too. We were thrilled to get all the extra emphasis on tapestry on day two. The atmosphere was loose, fun, and we were sucking up the the teaching like sponges in the deep. I had great fun, learned so much I never knew, and established some nice relationships with like minded spirits. I would take this class again in a heartbeat and highly recommend it if you lean in this direction. Gotta keep making new connections for the brain synapses!...Bunny


Sunday, March 8, 2015

Simplicity 1519, the Bark Cloth Bag


This was really such a fun, simple and quick project. Anyone can make this bag. Here's the deets:

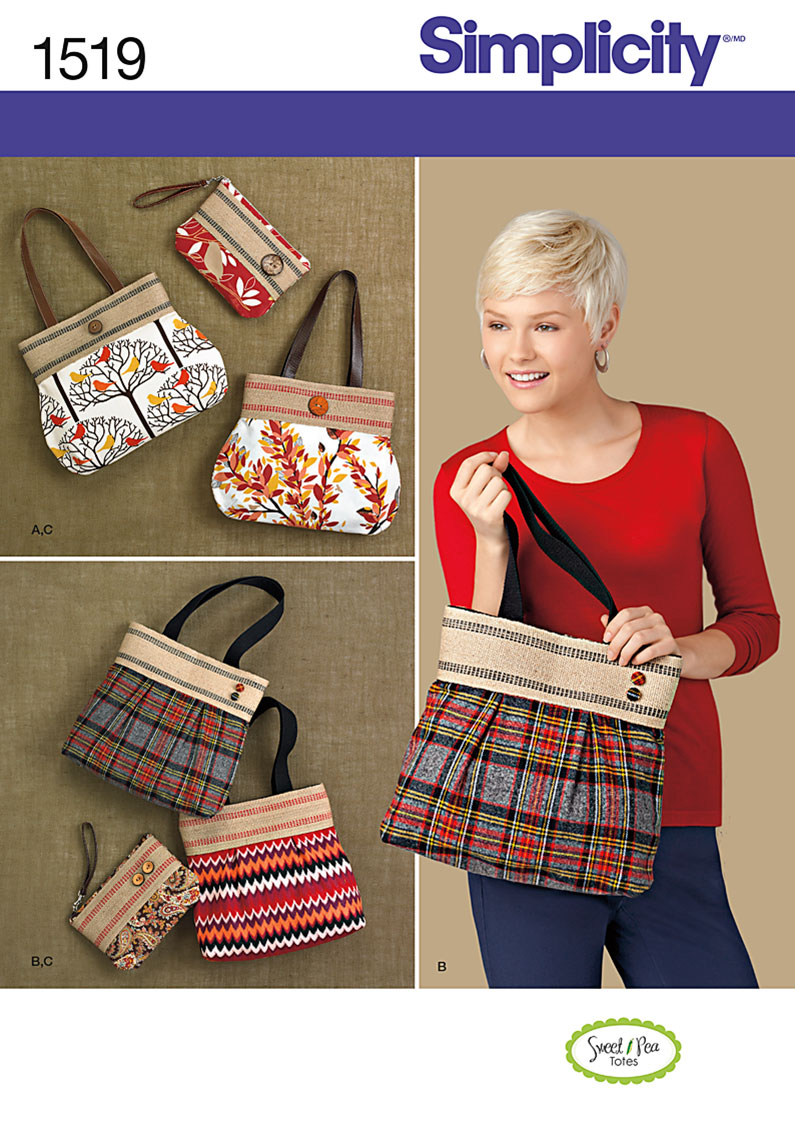
Pattern:  This is Simplicity1519.  As you can see on the pattern cover burlap upholstery tape is used as the cuff on all the bags. I bought the tape but once I got it home, I thought it was too rough and I wanted something just a bit more sophisticated, so I used fabric instead. This design is SO simple. The pattern shows a pleated version and the more sculpted version that I did in several sizes from wristlets to larger bags. 
Fabric: This was the fun part! I used a piece of barkcloth that I picked up at a flea market a year to so back. In case you don't know, barkcloth is a fabric from the fifties. It is a heavy cotton with good drape. It has lots of slubs and texture and is usually made in designs featuring huge florals, like camelias and magnolias. I can remember this fabric in draperies from my very early childhood. I can say we never had bark cloth in our home. Was it expensive? But I do remember a couple of friends who had it in theirs and one particular home that had very dark paint colors and the barkcloth drapery. That seems appropriate based on the location in the deep South. Manufacturers today will occasionally have bark cloth designs but I've never seen it in the style of textile that the original had. That's what I like about it, all the texture and slubs. 


You can see how this fabric lent itself to drapery and dark interior walls. I think vintage bark cloth is just lovely and have a fair bit left of the piece I used for the bag. I would like to work it into some clothing, maybe a Katherine Tilton sort of layered thing with other linens. Time will tell. 

For the top band I used a heavy home dec linen I had on hand and it worked fine. The burlap edge did not appeal to me at all. 

The lining was a small piece of Ambiance I had leftover. Because I make so many bags I never throw  away leftover lining scraps. 

Construction: This was probably one of the easiest bags I've ever made. It didn't need the heavy structure required of a good tote bag as there is no formal bottom to the bag. The fabrics were easy to sew and the BC did not ravel as much as I thought it would. The print was large and I had to play around with the placement to  get it to feature the part of the design I wanted to feature. I didn't do a magnetic closure so that made it even easier. 

The BC was fused to fusible fleece, my standard bag interfacing. For the band I measured the upholstery tape and cut the same width in the teal linen with seam allowances added. The band was fused with fleece as well. I did quilt the band with a cross hatch  after seaming it together on one side. That helped unify it with the bottom part of the bag. The straps were triple zigzagged to keep them secure and down.For the lining I did not bag as per the instructions. Instead I simply sewed it up, pressed under the seam allowances and handstitched it around the top edge, easy peasy.


This was bag making 101. I highly recommend this pattern for any beginner. No pockets, no zips and something cute to toss your goodies into for a quick romp shopping or beaching on a summer's day. Sometimes you just need a palate cleanser.....................Bunny


The Ray Pinafore, 2025's Epic Fail

  Happy New Year and welcome to my epic fail of 2026. I guess you have to have one, right? This is the Ray Pinafore from Paper Theory Patter...