Sewing Vloggers

Friday, July 29, 2022

It was about time!


I recently decided that I needed to make two lists to keep myself focused. I needed a "Need to Sew" list and a "Want to Sew" list and as you can imagine, they varied substantially. The above project is way overdue and was tops on my "Need to" list. I needed to redraft my pants sloper. I figured I have been working from my original pants sloper, derived from a Sure Fit Designs Pants Kit, since about 2015 or about.  My body has changed substantially since then. Three years ago I moved and left a job I held for seven wonderful years. One of the perks was working in a magnificent old library that looked like it came from a Harry Potter movie set. It required that I go up and down three flights of stairs all day long, countless times, with stacks of books in my arms. To say this kept me in shape is an understatement. We library employees ALL had great legs, no getting away from it. Our job kept us quite fit. Alas, the ADA caught up  with our building and when I was leaving the architects were in there figuring out how to install an elevator in this historical beauty. I moved to New Hampshire, retired, and despite walking and exercise, haven't found the equivalent  of hauling 30-40 pounds of books up and down stairs all day. While that felt like a pleasant break and gave me lots of time for creativity, my booty sagged and eventually disappeared. Also in that time, I started treatment, successful, thank heavens, for years of nerve pain and migraines but it made me lose weight. I am on a constant battle to keep my weight up to this day. I am getting better at it. When I took out my summer clothes this year, it was time to face that none of my pants or more snug clothing options fit. Top on my "Need to Sew" list was to redo my pants sloper and I finished that project today. 

In the kit were all my original measurements I had taken. Waist, down a half inch, high hip down a half inch,  full hip down two inches, yikes,  crotch measurements exactly the same despite booty going down. Interesting, huh? 

I decided to pull out my Sure Fit Designs Pants kit. It had been a long time but I was glad I did. 
Making the pattern is not hard at all once you have your measurements. You simply find the dot next to your measurement numbers and then connect them. The instructions are very clear. The red arrow in the picture above points to what looks like a bar on the paper under the tissue. It is actually all the dots for each different measurement possible. They are tiny but visible. 

Next was tracing it all on to tissue and there are no seam allowances. 


I then used the tissue to draw the pattern out on oaktag and add the seam allowances and details, all a pretty simple process. I started yesterday afternoon and finished early this morning. I was so intimidated when I first got this kit but that was really ridiculous as it is quite simple to use and it took far less time than expected. 

I put the kit away and now have my basic pants pattern with a fly extension and some notes attached and ready to go. I made a muslin already as well and must say, the booty fits great. I have been really pleased with this product and used it with many a pattern for fit as well as on its own the past few years, well worth the investment. I like that it is not a one time wonder and that as your body changes you can just make another sloper. 


I made a copy of this page from Sandra Betzina's Power Sewing. I don't know if you have ever put one of these pants stays into your pants but they are wonderful and feel great. Highly recommend. 


I've also tried numerous fly front installations over the years and prefer Betzina's fly front as well. It is so easy and so quick, so a copy of that is with my personal pants kit as well. I am ready to go! 

Next step is to sit and go thru my pants patterns. I am thinking maybe something cute like these joggers, McCalls 8099. We shall see!


Happy Sewing!.......Bunny

Thursday, July 21, 2022

Two tops and a hat!!

 Sounds like a title from Dr. Suess! Alas, it is just what I did during my blogging hiatus.  Sewing continued in that time and as it always has been, proved to be a great solace. Here is what you missed. There are two repeats and one new design so I won't get too deep into the weeds. 


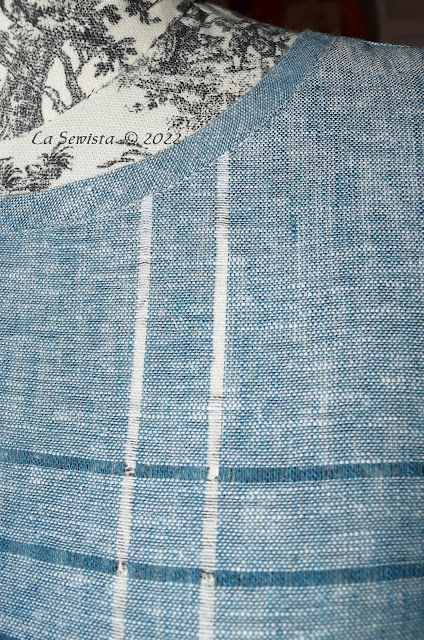
 Here we go with another Eureka Tee from the Sewing Workshop. This one is made from yarn dyed Brussels Washer linen by Kaufman in the smallest size. It is, I believe, my fourth iteration. As far as fit, my sis says I need to make it narrower. I'm OK with the wider style of it all but will try a narrower fit next time around just to see what happens. I have a muslin and may just baste out some width.  What you see above has been worn and washed a couple of time as I am finding it a great summer top. 


 I decided to embellish this simple top by pulling the threads. I knew that the warp and weft were different colors and this could be interesting. The thread pulling was easy and I pulled five threads to get the effect of one row as you see directly above. If you look at the rows in the pic above this one, the smaller pic, you will see the thread pulling looks quite different. The washing had an effect on the look of the pulled threads and actually all the fabric. It didn't appear to shrink but it got "crepe-y". I'm ok with it but just be aware that if you want to keep the crisp look of the pulled threads you can either further hem stitch them  or hand wash this fabric.  Either way, I think it is a nice feature on a simple top that begs for detail. 


Construction on this was as suggested in the pattern: machine stitched, pressed to the side and serged for a finish.  Further details on my original Eureka tee can found here: The Eureka Top

*****************


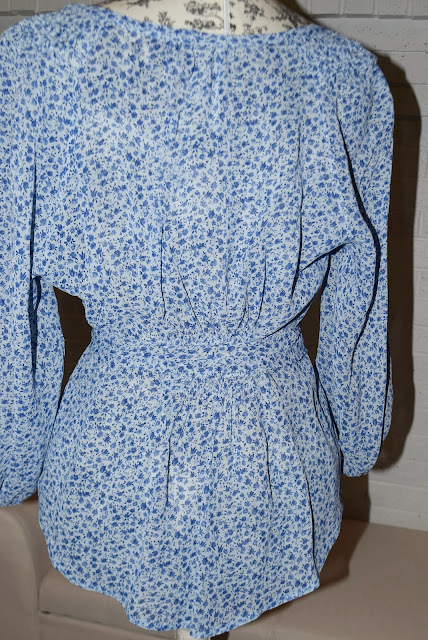
Next is my attempt to jump on the ditsy print bandwagon with second make of a sixties sort of tunic. This busy print makes it very difficult to see the details of the design. This is Butterick 5861, OOP, a classic tunic.  The fabric is 100% rayon in a crepe type finish, what was called "crepon" back in the day. It is well starched  in these pictures as it was extremely slippery to work with and I had to give it a couple of coats to make it a pleasant sewing experience. It has not been washed out yet so it all looks a bit "puffy."


You can see there is detail on the shoulder yokes and on the bib type inset at center front. I decided to do my own thing there which in hindsight was great looking but a total waste of time. You just can't see it among the tiny, busy print. It was fun and challenging getting it done, however. 
 

 Instead of plain bias strips the pattern recommended, I chose to make little knots in the center of each strip. I made bias tubes, knotted them, and cut so the centers matched up when places on the garment section, which here are the shoulder yokes.  Here is the bib inset:


It was very tricky binding the opening of this. I veered off the reservation to figure it out but it came out ok. 


Tunics cut me in half but if I wear a sash or belt they can work and bring the eye to my waist. I made a small wrap type sash for this top. 


It is bias cut, wraps around obi style and has a couple beads on the end to weight it down. 


The cuffs easily fit over my hands but don't look big so I did not elasticate them. 

To see my original effort on this tunic click here. It is quite different. I feel on this one I put too much work into to it for the fabric that it is. It will look ok with some jeans. In the end, I did enjoy the study in embellishment. 

************************


Last but not least, the one item made specifically for our vacation. In its short life it has already flown the friendly skies, covered my head as I avoided poisonous jelly fish in the North Atlantic, been mushed into a crowded knapsack and  protected the once cancerous skin on my skull. It has been a real work horse once home as well and I am wearing it everywhere.  I LOVE my bucket hat. 


No pattern here! Everything I looked at just wasn't quite right, whether a pattern or retail. Brim too wide, too narrow, etc etc etc.  Just when I gave up, a few days before leaving on vakay, I was in a local retailer and I saw this gaudy little number above. It has the shape I was looking for, one that fit my petite head. I tried it on, score! I bought. It might look cute with my periwinkle linen dress and I could use it to make my own bucket as well. 


I proceeded with a stash of oaktag, my padded smocking board and some heavy yelllow headed pins to copy each section of the hat. Pattern ready !


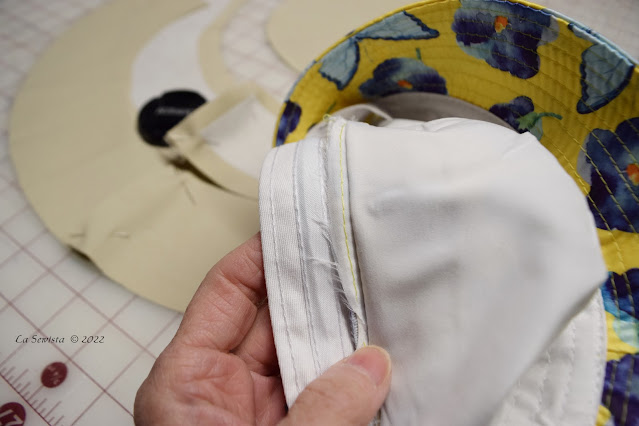
I inspected the guts of the original hat and after interfacing my khaki twill, tried to proceed in a logical order to duplicate its construction.  I self lined the hat with more twill. The original used a cotton lining. 


Row upon row of topstitching on the brim!


In the end, I think I got it. I plan to make more for winter, warmer fabrics instead, maybe with ear flaps! I will make a hat with a wider brim as well. 

This has been a long post. Thanks, if you have managed to work thru to the end. It is what I worked on while not blogging. I thought of you all during that time and knew I would eventually get back to you all and let you know what I was up to. I have lots of plans for future projects and the queue is long. More to come!


Wednesday, July 13, 2022

A Helpful Tip! Collars and Stands

 Right now I am working on a yarn dyed linen/cotton big shirt with a stand collar, my ode to the classic workshirt. I made a denim workshirt some years back and have worn it to death and will continue to use it around the house and in the garden. Love that shirt. This is it right here.  It was made from McCalls 6613, great, classic, unisex "bigshirt"  pattern.


The pattern has now been re-issued as a Butterick and has a different vibe being sent out on the cover. I think they would sell more patterns with the original cover photo. What do you think? Current cover below. I think the shape of View A is being made to look very A line, aka, tent-ish. It really is cut straight down from the armscye. 


It is now being marketed as the, are you ready for this? Butterick Mister and Mrs. Fitted Shirt on Amazon. Those Amazonians need some help with their pattern marketing. There is NO FIT on this pattern, anywhere! It is a big ole shirt.  There is not  a dart anywhere on this shirt to be sewn. It is a perfect match to the original McCall when I laid them on top of each other, sold as unisex. I was referred on the McCalls site to this Butterick pattern as its actual replacement. Oy,,,,,  rant over. 


Back to my handy dandy tip. This is a traditional collar with a stand. I use to sew quite a few of these but  have pretty much put them aside the last few years.  I needed to brush up on my skills for collars with stands. I remember Nancy Zieman literally drawing out the stitching line on that last inch on each side of the stand part of the collar. Doing that really helped me get equally sized matching shapes, once turned, and without points, something I was having a hard time with.  Today I went to work on this detail of my shirt. My cutting table was messy with bits and pieces of all sorts of sewing detritis. As I picked up some leftovers of oaktag, it occurred to me, why not make a template for the collar stand out of the oaktag? It could be a permanent, easily  trace-around-able object and kept with the pattern in the envelope for the next blouse iteration. Yes!! Why, I could even do this with every stand collar I ever make again, just paper clip the templates to the pattern piece for the stand and tuck those little templates right into the pattern envelope ! Here is how I went about it:

* I simply traced the last 4 or 5 inches of the collar stand pattern piece on to a piece of oak tag with a light pencil and the help of a curved acrylic ruler. 

* I marked thru the tissue to get my large and small dots, center front lines an notches. I used my eyelet cutter to mark my dots. Making holes makes them reusable. The dark hole is my "large" hole. I cut two of these  stand pieces out, one to copy the entire pattern piece end and one to make a template for the stitching lines. On the first piece we have marked all the needed markings and the template is used to match the cutting lines of the fabric and make the markings accurately. 

*On the second piece of oaktag we will measure a 5/8th inch seam allowance out and cut the seam allowance off. 


This piece will be used to mark the stitching line but can also be used to fussy cut the interfacing which I did not do here, just eyeballed it. 

* I will paper clip the collar stand pattern piece and the oaktag templates together when done using them and put them into the pattern envelope until the next time.  Fingers crossed! We'll see how the finished product affects accuracy. This is such a fussy area.....Bunny


We were lucky to be in the Azores when the hydrangeas were in full bloom. They were truly spectacular and miles and miles of roads are lined like this one. This is a simple farm road as seen everywhere. The hydrangeas run from the deepest purple to plums and bright blues and baby blues, breathtaking.  They are everywhere....Bunny

Saturday, July 2, 2022

McCall's 8220, Something Different


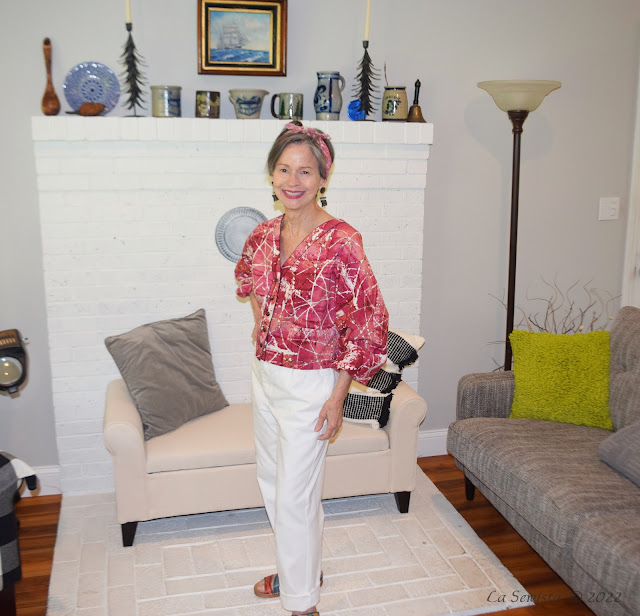
There is a lot that is different for me with this top. First the V neck. I rarely wear these as they are almost always way too low in patterns but this one worked out nicely without any adusting. 


It is McCalls 8220, one of their 2021 designs and suggested for wovens. It has a wide, boxy cut and dolman sleeves that are quite puffed. I like them pushed up a bit. As often happens with Big Four patterns, it is poorly photographed for the pattern cover. The garment is pushed back with the shoulder seams not settling where they should to give that half-tucked look. This is not a half tuck top. It is short and boxy, nothing extra to tuck so why fake it? That makes the top button pull the bodice out of whack, oy......


This line drawing gives a far better depiction of the pattern. Bust fullness is accomodated with gathering at center front. There was plenty enough to accomodate my bust, particularly given the width of the top, but with the fabric I chose, it literally steamed out as I pressed the garment. It wasn't shrinkage but more a matter of shaping. When I took class with Claire Shaeffer we did a lot of shaping with steam to hide construction details. On my top you will see no gathers but if you saw it up close there is a roundness in that area that appeared as I pressed the garment with steam and high heat for linen.  

*ETA: Just want to add that the gathering at the bust is very akin to a sleeve cap, at least it was in my size. It steamed out as I pressed.

Notice on the pattern that the full sleeve version which I used has far less side seam height. These are serious dolman sleeves. This is a great pattern to disregard some fit issues. 

Fabric:


Beautiful fabric purchased online  from Stylemaker fabrics. It comes in some glorious colors but I have been wanting to put some more red into my life. It's a good color on me, particularly if it is not a solid blob, but more softened as it is in this print. The fabric itself is yummy, a mid weight 100% linen but towards the lighter end, perfect for a top or dress. I might line a dress. This washed and dried beautifully and could easily avoid ironing but of course I did iron throughout the construction process and the end.  It's interesting how over the years I so often end up using Kaufman fabrics. 

Construction:


 This was an easy make and could even be made easier. It is clearly a top that I discovered, after installing my buttonholes, that could have just been a pullover. You could just stitch those buttons on and pull it over your head. 


The seams were stitched, pressed to the side and serged. I have been doing more of that lately, encouraged by Linda Lee of the Sewing Workshop.  This pattern has the band shaped to the neckline and center front. I had a bad experience with a Vogue pattern last year with a similar neckline that was just an on grain strip. If you ever see that in a pattern with this sort of neckline, it WON'T work. 

It was a journey to find the fabric for the binding, which was easy to assume was black but it really isn't. It is a wine-ish colored deep brown. Believe it or not, I found the exact color at Joann's in a 100% cotton. I prewashed and it worked out great. If you look in the pic in the middle of the facing there is a tiny line of stitching. This is where I stitched in the ditch of the piping to secure the facing. It does not show at all from the public side. 


This is the simple treetment for the hem edge of the sleeve, just folded up over elastic to make the gathers. 


Here you can get an idea  of how deep those dolman sleeves are and how wide this bodice is cut. I did no attempt at pettiting here. I have plans to make another by fall. I believe I will cut in a half inch on each side and go up and remove some depth from that armpit area as well, probably a half inch. I plan to make the next one in a nice white and gray knit stripe , a  barely 1/4 inch stripe. I think it will be really effective with the design. I also think I might add some very slight shoulder pads as well. 


In Conclusion:

I really like this top. I love the fabric and welcome the cut, color and style, something different for me.  I look forward to making it again and I know I will wear this a lot throughout the summer. It will definitely be cool and comfy. Without the piping and making the button band permanently closed it would be an even easier sew. I highly recommend.


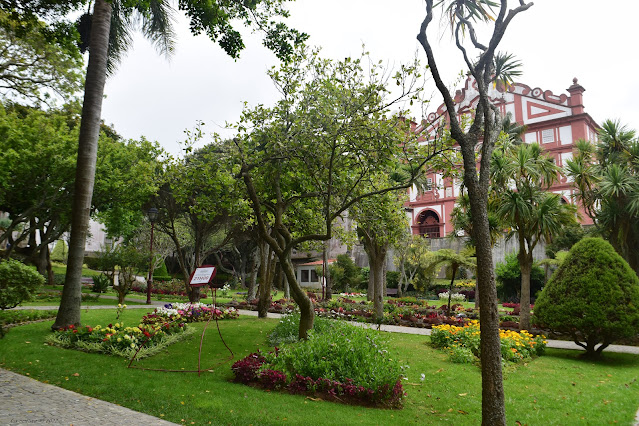
One of the many public gardens and beautiful churches found throughout the islands. This one is in Angra de Heroismo and much larger than this small segment. The sign announces a tour later in the day.  Happy Sewing,,,,,,,,,,,,Bunny

Close to being stumped with this one!

  Don't go shopping at quilt shops, even if they are the high end types like Quilted Threads of Henniker, NH. With tongue in cheek, I wi...