Sewing Vloggers

Showing posts with label LRD. Show all posts

Saturday, December 24, 2011

The Little Red Dress all ready for Christmas! (Simp 2771)


I think you can tell I am pleased. I like the dress but not the fact that I can't see the buttons on the camera without my glasses so sorry about the face glare!

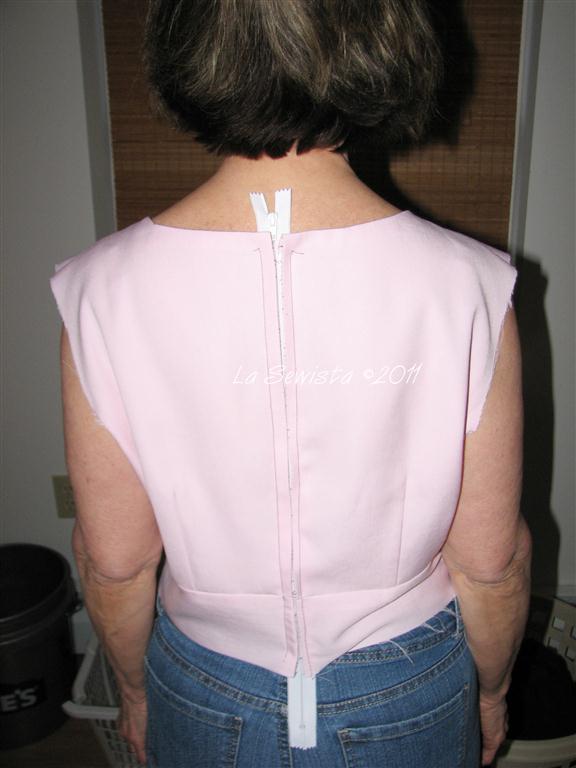
The dress is very comfortable to wear and a bit heavy. The waist stay makes a big difference. I did end up hand picking and then beading the zip. It looks really pretty and is subtle but noticeable. I used three red delica beads to a stitch so it definitely shows up. 

Pattern: Simplicity 2771, an "Amazing Fit" design. It gives you options for A-D cup sizes and can be cut slim, regular, or curvy. I would have needed the curvy but that was a moot point as I chose to do a full skirt instead. Be careful figuring out the correct size pattern. Don't use their chart other than to figure your cup size. Use the pattern by your high bust measurement or whatever size always works for you and just use the appropriate bust size. I think I got a pretty good fit on the bodice. 

Fabric: Silk purse out of a sow's ear? Hopefully! I purchased this red stretch lace off the clearance table at JAs for 2.00 a yard. I know, embarrassing, but the color was spot on. The only drawback with the fabric was the lack of scallops which would have really enhanced the design further. I bought the whole rest of the bolt so had plenty for the skirt which is about a 100 inches wide. The lining, in keeping with the quality,is a red poly charmeuse. I wasn't going to put Bemberg under this lace! Just my personal fabric buying philosophy....All in all the fabrics were not difficult to sew and really the lace was quite accommodating. 

Construction: Once the fit was worked out the directions were very clear, almost too much direction! I referred to them only a bit but there are pages of directions and this would be excellent for a beginner. I treated the lace and lining as one in the bodice and separately in the skirt, therefore the hand picked zipper. This meant that at the bottom of the zipper the seam allowances were slashed at an angle and each fabric treated as a separately hanging skirt with its own seam allowance. It came out very neatly in the end. My pic of the beaded zipper is somehow erased so I will try to get that to you all later. 

I attached a waist stay. Something told me (my gut) to add a section of non roll elastic to the waist stay. Was I ever glad I did! I know I would have had difficulty getting the dress on and off otherwise. I really like the way the stay  carries the weight of the dress adding to its comfort.

I really apologize for the picture quality. I am still getting used to this camera. Truthfully, like all of you, I am sure, I am under the gun and therefore the delay in getting the pics out to you as well as not fussing too much with getting the perfect one. At this point all sewing is done. I haven't shown you  the all the AG clothes I have been making. They are cute and all packed up in their new "case" including a smocked bishop for the new addition. That took some time. And there's been the cooking. If you were here  I would make sure you got some pistachio cookies and a glass of  holiday cheer. 

I will leave you with the view we woke up to this morning. Its very cold and crisp and just the perfect amount of snow for Santa to do his work. I wish you all a wonderful Merry Christmas and a Happy New Year. I may not be posting for the next week so drive carefully, enjoy your loved ones and may the holiday be all you hoped for. God bless you all!....Bunny

Monday, December 19, 2011

LRD continues

The sleeves have been installed. I bound the seams in the same manner that I bound the neckline using a bias strip and its raw edge.

This has turned into a bigger project than planned but aren't they all a week before Christmas? After some errand running today I will hit the dress again. Today will be the zipper and hems and then a belt for the waist, I think a bow belt. I used over 90 inches of width in the lace skirt and lining. It is heavy. The whole dress is heavy. To deal with this I will add a waistline stay when near the end and will use horsehair on the hem of the lining as well as some net ruffling underneath, all little details not originally planned on but seeming necessary. So, hopefully late today will be done! Here is the skirt and you can get an idea of the weight.


Saturday, December 17, 2011

Simplciity 2771, LRD continues...


 There are many different ways to do things in the sewing universe and I have been known to even do the same thing several different ways. What's the  Bobbi Brown song say? "That's my prerogative".   I  appreciate all the comments regarding passing on via the blog the details of sewing this dress so I will continue with something you may not have seen anywhere else. It's sort of not kosher, that's why, but it works, and I think it looks good. A little background:

The late Roberta Carr's book, " The Art of Fine Sewing" is one of my favorite references. It is all about couture techniques. She teaches in a down to earth manner and preaches in a repetitive way that makes you learn so much from reading her book. I think  I have read it cover to cover at least three times. One of her cardinal rules that oft gets repeated is "reduce bulk whenever possible". In parts of the book she may pose a problem and she goes back to that commandment to explain how to treat the issue. This saying has so stuck in my head and more than once I have dug in and followed those directions, despite what others may have taught me.  How I handled the bias on this dress is an example and I am glad I did it this way. I have also used this technique on some of my bias heirloom collars and they have worn and washed beautifully. But it is unorthodox. I warned you.

The problem: The combination of lace, lining,  and a "stay" selvedge" on the neckline is a bit of bulk. Adding the bias cut strip of poly (instead of a facing) adds still more bulk, particularly once turned to the inside. Here's what I did: Seams were graded with a pair of pinking shears. The bias strip was understitched and turned to the inside. Then came a good press to keep it there. If I turned under the raw edge of bias to sew it down to the lining there would be more bulk and a possible ridge from pressing. I DIDN'T TURN IT UNDER. I LEFT IT RAW.  No, the bias police did not haul me away. Bias does not ravel. Its edge will stay clean. So I just sewed that one layer to the underlining with a catch stitch (my favorite hand stitch) and ended up with a smooth neckline. I like this simple clean finish.

In the picture above you can see the understitching, the raw bias edge, and the catchstitching securing it to the underlining. There are many ways to do many things and I am liking this way more and more every time I use it. Point here: don't be afraid to think out of the box, particularly if an expert like Roberta Carr is nagging you from the back of your subconscious. You may come up with your own way of doing things that works just as well or  even better than somebody  else's....Bunny

Lunaloo asked in yesterday's comments:  "When you hand pick a zipper, how close are the picks to each other and does fabric choice figure in the decision to pick or not to pick?"  Fabric choice definitely plays into this decision but there are no hard and fast rules I am following here. More important is dealing with the zipper below the waist with the lace and underskirt. What I will end up doing are some samples before I commit the zipper to the dress. I will try out 1/4 inch and 3/8 inch stitches. I also purchased some beads for the zipper. I am not sure they won't just sink right into the lace so we will see. I have two size beads to work with. And after all that I may decide that I don't like the samples and may just do a plain pick. Remember what Bobbi Brown sang?....Thanks for asking, Lunaloo...Bunny

Thursday, December 15, 2011

LRD Muslin #2


A little better, don't you think? and here's the front:
Almost there! I ended up cutting a size 8 in a D cup and did the "petiting" I do to every pattern.  Upon seeing the pics I've decided  to add a bit more width to the side seams to get some more ease , gotta breathe, you know! And I will alter the shape of the shoulder seams, higher toward the neck, lower toward the bone. On the muslin the armscye seams have been cut off and the neckline seam folded under. the cleavage has disappeared. I am also going to drop the waist a tad as I want it just above my natural waist not this much above. And for all you non believers in muslins out there, yesterday's muslin took an hour and a half from cut to sewn and today's muslin the same. Is this not time well spent? I think so, even if I am under the gun here. I don't know if I mentioned it but I will be doing a full gathered skirt, not the slim one in the pattern, sort of a vintage vibe. I hope to get this cut this afternoon......Bunny

Wednesday, December 14, 2011

Simp 2771 and an LRD (Little Red Dress)

It's been busy here with much production happening in the cave. First I made my DGS some jammies he requested for his birthday.
 

Pattern: Simplicity 2771, my TNT. It is unisex and carries all sized from toddler to big guy. I like that this has no collar. No one would iron a collar on a pair of pajamas so I don't want one. 

You have seen me make this several times so I won't go into too much detail. 

Fabric: Wonderful flannel purchased at the Akwasasne Indian Reservation. The quality is super, selection huge, the prices high, and it helps the tribe. I try to get all my flannel there.  Its 100% cotton and did not shrink at all!  The piping is made from the blue flannel.

Construction: I have reviewed this on PR a couple of times as well as here. The only issue I recommend paying attention to is the neckband. When I bought this pattern I assumed the band was the facing turned outside. NO, no , no! I can't tell you how much time I spent trying to make that work and I even did that on two different pairs of jammies. That's what happens when you don't read directions. Read the directions! Becuase I thought it was the facing turned outward I only cut two bands, left and right. You need to cut four. The band is attached to the bodice extending the width and neckline further. You do that with the first two bands. The remaining two bands become the facing and it is on the inside like it usually is. 

My seams are stitched, serged, and topstitched for the most part. They can be washed to death that way and will hold up. Because the fabric is printed and has a white wrong side I didn't change the thread in my serger and left it white. To make sure little peek a boos of white didn't show at corners and edges, I just took a permanent sharpie in black and colored them as you can see above. If you enlarge you can better see the arrow I put in pointing to the Sharpie ink. I also used the Sharpie to color the insides of the buttonholes, something I often do. 

Highly recommend this pattern. One day I will have the time to make myself one of these pairs of pajamas. In the meantime I need to make an LRD, Little Red Dress. 
**********************************************************************************
DH and I will be attending a posh party New Years Eve. I have decided to make myself a red lace dress. This will be a one night opportunity but because I don't get many such opportunities, I am investing a lot of effort but few dollars. I have three yards of 60 inch red lace. It is a deep cherry red, not as bright as you see above. The lining will be a red poly charmeuse. The lace is flat, the charmeuse shiny which I think will work well. My pattern is this, the "Amazing Fit" dress.

It has been an amazing muslin! According to the pattern, which I read over and over, I needed a size 14 with a D-cup adjustment. Huh? OK, I went with it out of curiosity. I usually use a size 6 and do an FBA. The cleavage is OK with me. With some make up to hide those age spots I think it will be appropriate for the evening. Whats wrong here is the width. This is a princess seam design. I really think I should use either a six or an eight and use the D cup adjustment. Somewhere underneath that billowing fabric is my back. The width on this thing is HUGE. That happens when you put a size 14 on someone who weighs 114 pounds. Under my arms is at least 3 inches that needs to come out, no kidding. Tomorrow's plan is to re work the muslin to hopefully one that will fit. I am undecided whether to play with this one or just recut a 6 with a Dcup. I have to sleep on it. That's usually when I do my best problem resolution. More tomorrow.
*********************************************************************************
It seems the CJ for the AG caused a bit of a stir and I love that. Thanks so much for your comments. 

Belinda asked about my pants pattern being on oak tag and wondered where I got such large pieces. Well, Belinda, I use legal size manila folders and connect them with duct tape after double cutting. This way they can fold up if necessary but I have recently started hanging them in a more organized manner. I think, if you want, you may be able to get the large oaktag from Dick Blick art supplies. For me its easier to just go to Kmart and pick up a pile of legal sized folders. Thanks for asking.....Bunny

The Hanbok Vest

  I love this little vest. I thought about it for a long time. I am excited to tell you it's story.  Pattern: This is the Hanbok Vest by...