Sewing Vloggers

Showing posts with label Pattern Fantastique. Show all posts

Friday, October 10, 2025

Simplicity 2059 and the Mersis Top from Pattern Fantastique


Here are the two tops I just completed and their pattern review. First we will do a fun design with lots of potential for creativity, Simplicity 2059. This is a "lisette" pattern from 2011, their choice to not capitalize the name. In the fine print it says that "lisette" patterns are from LIESL AND CO. Not sure if they stuck with that branding. You can see from the pic that they are marketing with a quite youthful look but I think there are some really solid separates to sew in this pattern.  It is no longer available from Simplicity or Liesl and Co.  but there were quite a few on Etsy. 

Pattern:


I chose to make View B, the top. It has a wide and deep back yoke and princess seams in the back bodice. Below the yoke is a gathered panel. You can see how easy it would be to play with those two features. I already have ideas for the next one! The front is a plain, solid panel and the whole bodice flares out a bit so some good tummy camouflage if you look for that sort of thing. I did some color  blocking on the front bodice. The sleeves are long and cut generously. Half of the tops I make, I have to widen the biceps. On these I did not have to. They fit nicely.  The neckline is an open circle but not one that shows straps, just the right size, in my opinion.  One great thing about this woven top is that it had no closures at all, yay!  

Fabric:


This is where I had my fun.  I live near a true Shaker village and it is just 20 minutes and a beautiful ride from my home. My hubs and I went there last summer and in their lovely gift shop I picked up a beautiful tote bag. I had no desire at all to "tote" this bag. I was going to take it apart for the fabric. It was a cyanotype sun print of a group of young Shaker women laughing away as they sat in the back of an old pickup truck with their baskets of produce. It had the vivid blue of this type of fabric print and I just loved it and had it in a prominent place in my workroom waiting for the right inspo. I did not have a lot of this to play with so this took some time! When I did a pattern purge recently, which I pretty much undid later, I saw this pattern and thought it would be perfect. This could not be anything fussy or fancy, just casual like the cotton it was made out of and the smiling faces of the young women. I carefully took the tote bag apart and then started the journey for the rest of the top fabric. In the end I used nothing particularly attractive but it worked, a simple quilting cotton from my defunct and deeply missed local quilt shop, Quilted Threads. I would color block this and knew it would take some major Tetris to get it all to work.  I was working with a border print for the remainder of the fabric. 

Construction:

Fit adjustments were minor:

        *Took 1/4 inch off shoulders at armscye tapering to nothing at notch.
        *Cut a Size 8 and added 2 inches for the bust with an FBA using the Pivot and                  Slide method.  
        *Altered the yoke length and length of skirt below to accommodate the Shaker                   print. 
        *Shortened sleeves one inch. 

Design changes:
         
*  Did French seams wherever possible and serged the remainder.
         *  Faced the hem  to keep length it was before hemming. 
         *  Used scraps of the Shaker print to make a cuff look on sleeves. 


         *  The Shaker print was used for the gathered back panel as well as a color                          blocked yoke and faced cuffs. 

In Conclusion:

I've worn this a lot. It's a fun top and very comfortable. I think it is very conducive to some creativity. I would like to make it again and can see it in maybe an eyelet or white embroidery and then with a sheer panel gathered in the back or an overlay. Too late now, but next summer this pattern will definitely come back out. I loved the Shaker Ladies and it was great to use this textile this way. 

Next:

The Mersis Top


When I finished the first Mersis dress, which you can see here, I was determined to make another version, a top, to test out my fit theories. It was well worth the effort and I really like this second version and its updates. 

While trying to improve the fit I did a lot more research. There are many more pics of this pattern on Instagram that I did not see before. It is designed by Pattern Fantastique.  I found similarities with my fit issues on many versions. I had to figure it out on my own . 

It was worse IRL, as my shoulders slope much more than the dress form. My dress form is also 25 pounds heavier than I am now. 

I noticed this dress draped the best on more broad shouldered bodies which is not me. I saw a fair amount had the same draping issue of a radiant star falling from the bottom of the v neckline in the front and some the back as well. It did not seem to be a weight issue or size of the waist area or chest.  My opinion is that the weight of the heavy sleeves on a narrow, sloping shouldered torso with a v neck in the front AND back just pulled the invisible dolman armscye down. It caused the bodice to collapse at center front at the bottom of the neckline. I also noticed  in my web travels, while looking at patterns unrelated, that many garments with both a V-neck front and back, had some sort of tie or strap, some quite prominent, high on the neckline. They were on front or back in equal measure. One particularly attractive version was the Kajo sweater from Named. It has a thick strap across the back and V necks front and  back. I had to redeem myself and test my theory out with a new version of the Mersis. I gave the tie a try and it worked. Here's the back view with the fit wrinkles from the v neck. 

Pattern:


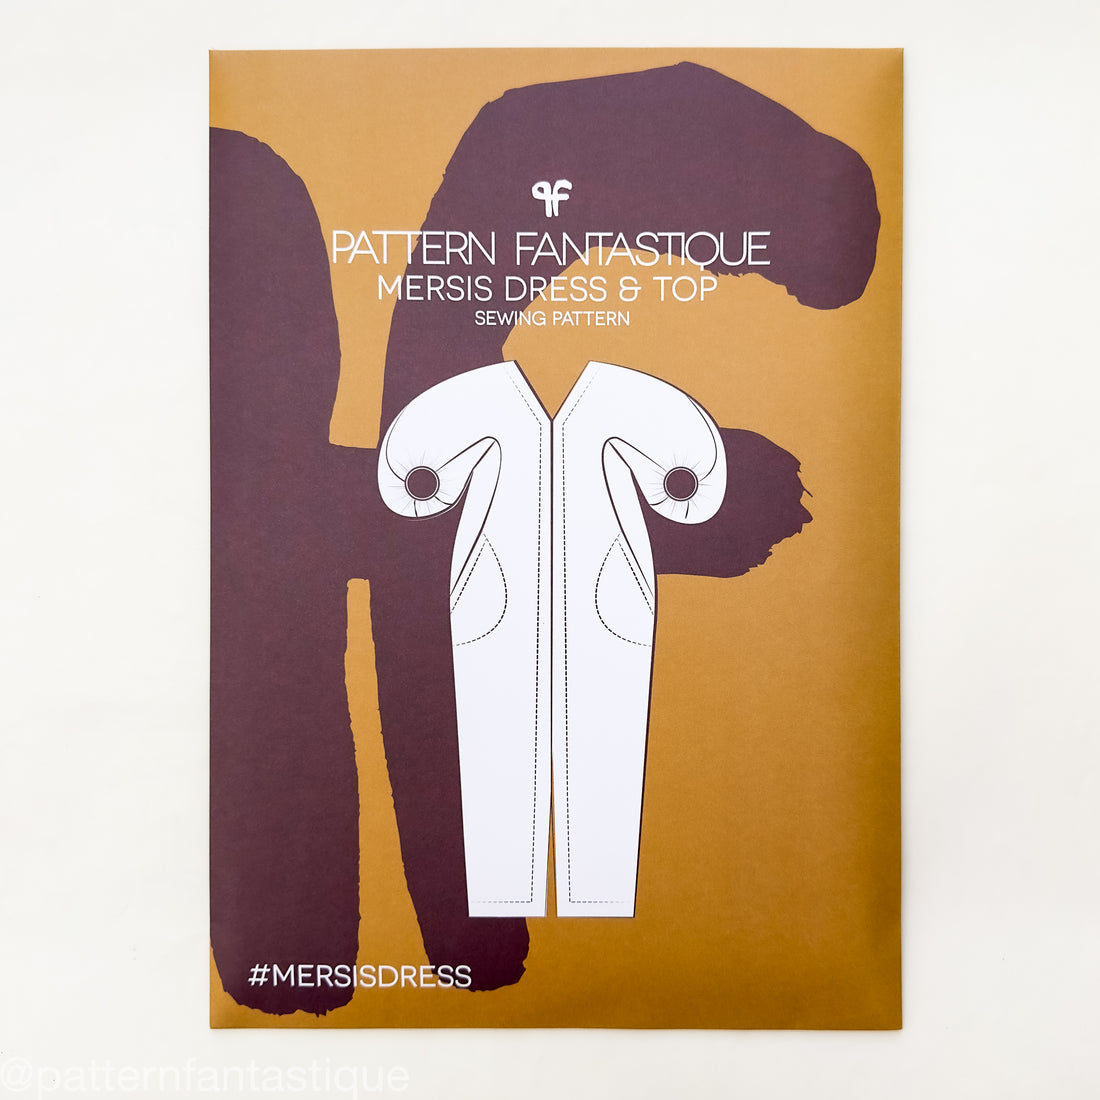
Here is the  Mersis Dress and Top from Pattern Fantastique. It is very unique in design with a full bodice made fuller by very interesting 3 part gussets. Two parts are on the front of the bodice and the back gets one part. They are VERY oddly shaped for gussets and I highly recommend you put tape on them and mark them  clearly as it will be very easy to misidentify them. 


Above are the two front gussets attached to each other and then installed into the front bodice. Stay stitch, snip, match and stitch!

I found with this pattern it is important to follow their directions explicitly and in their order with a few exceptions I will detail below. Serge or finish the pieces where and when it says to with exceptions I will mention, very important.  Your markings are very important throughout this construction so watch that carefully. I would cut each piece separately, serge the seams  and THEN mark the edges. Otherwise, markings will be cut off  by serging.  The directions are clear and the artwork good. Paper isn't wasted here on photos but it is clear enough. 

I had a glitch with my PDF and had to draft a missing pattern section but got thru that. It was a part of the neckline facing. I also  decided to redraft the facing anyway as it was just too low, beyond my bra band, for this petite. I followed Brittany J. Jones youtube on the subject, which is wonderful. 

Fabric:


This is a cotton broadcloth purchased at a machine dealer/quilt shop locally. It's a place I can go to  for thread now that JAs is gone. They have a small fabric selection which usually doesn't call to me but this collection from Cloth Works called "Painter's Joy" was abstract designs and unquilt like colors that really appealed. It sewed very nicely and was a bit heavier than many quilting cottons. I felt in the end it really showed off this design. 

Construction:

This went together much more smoothly than the last Mersis and part of that was knowing the pattern and now being able to anticipate any possible issues.  I also think the more substantive fabric helped as well. 

* I used 3/8th inch SAs as directed.

*I did not interface the center front or any other seam allowances with this fabric other than the point of the V which is not directed. It was substantial enough. I did interface the facings. 

* I stay stitched all seam allowances on the gussets just short of the SA. They were then serged and marked after. I did not gather the gussets as directed which I did on the first. Instead I clipped both sides to the the stay stitching and that worked much better than the the gathering for making things fit together. 

* Take your time with those gussets. It is very easy to install them incorrectly. MARK THEM WELL. 

* Do not overlock side seams together. Instead serge them separately and press open. This will pay off when you go to gather and connect to the cuff.  Otherwise you will end up with a bulky lump on the cuff. 


* I gathered my cuff before sewing up the sleeves/side seams. The cuff was then sewn in the round. 

* For petites I found a cuff cut 10 3/4 inches by 1 1/4 inch was just right. Check yourself for your own fit on the cuff  size. They look great with a narrow cuff and all that gathering. I love the finish that 3 rows of gathering gives to the bound cuff. 

* My top was hemmed 15 inches from the point of the front V.  I did a two inch hem.  I love deep hems.  I'm five feet tall. 

* I did not add any fish eye darts  to the bodice as I did in the first version. I like the fit now with no adjustment and a better bra. Fabric makes such a difference sometimes. 


* The front neck facing is the most difficult part of the garment to sew. This could have been done so differently by the designer but, alas, it wasn't. What they  want you to do is grab the seam allowance at the top of the center front seam and the seam allowance at the bottom of the neck facing and stitch them together. This is quite awkward with both of those being sewn already to the v point.  Many reviews agree that it was clumsy and like me, ended up doing their own thing. I ended up hand stitching it down. My neck facings ,  2 inch, in the end, did not match the 2 inch SA at CF, but I made it work. In the end all was smooth and pretty with hand stitching things flat, a bit of trimming and just doing what needed to be done. 


* Rouleaux ties  made the most difference in the fit. They were attached 4 inches up from the point of the front Vneck on each side of the neckline. I made a nice little ball to attach them publicly as the neckline was stitched and I did not want to take apart triple understitching to tuck in the ties. 

* I would suggest anyone with narrow shoulders to use the ties. I think I would go for the ties on the back next time, way high near the shoulder seam. It's easy to experiment if you can get help pinning the ties on. 

* A better fitting brassiere also contributed to the fit. 

I would say this pattern is not for the faint of heart but the payoff is there in the end. I have worn this blouse numerous times since I made it and have it on now for a wine tasting luncheon shortly with friends. If you are a courageous intermediate I say go for it.  Pick  some fabric with some substance for the first effort, nothing thin, and make just the top. Follow the directions closely with the suggestions given above. It will be a bit of a challenge but I feel worth it.  Happy sewing!............................Bunny


Tuesday, August 5, 2025

The Mersis Dress, FINALLY!


                                                                         It gets better than this, what a journey!


Ahhh,,,,the Mersis Dress from Pattern Fantastique.....  This dress was not made for my body but eventually I think I got it to work. It all started with my seeing it online on a tall, lithe 30 something. Her fabric I recognized to be a Lady McElroy print that I had been pining for  but is now out of print. She looked stunning. The sleeves, the slit on her tall body, the casual sandals, I wanted to make this dress so badly. My journey began. I think this took me longer to finish than any thing I can remember in a long, long time. It is now done and I am glad it is!

Pattern:

I found the pattern itself extremely frustrating. I printed it off at home on a 2 month old printer and with a new laptop. I've had no issues printing other patterns and docs. This pattern has little blocks with half triangles to indicate  the placement of the pages. That was fine  but there was no page one or any other page that would match up with the pattern piece needed on the first sheet. Being the first sheet with those silly blocks, the page could have gone in any corner but it  didn't even  come close to matching it's neighbor pages. I did have a first page and it was a logo page with a tiny section of pattern  piece that did not match up  to anything anywhere on any of the pages. So frustrating. Luckily the flow of the design let me draft my own continuation of the abutting pieces, with crossed fingers for sure. Buyer beware. Other reviewers did not mention this issue. 


Look at the outline of this shift type dress. It is the exact opposite of my shape. Throw in my diminutive height and we have a recipe for challenge. 

                                                                         Much better with the belt. 

The pattern gives the following ease for sizes 6 to 26:

Bust:     5 7/8 inches
Waist:   13 3/4 inches !!!
Hips:     2 3/8 inches

Loosest where I am  slimmest, tightest where I am broadest. And I thought this would work..............who am I fooling?

This is the exact opposite of how the Lord made me but I proceeded. I made a muslin which revealed much, too much volume, too low front v neck, way too long  dress and maybe sleeves, I made the smallest size, 6 and did major adjustments some of which I increased as I went along. This design is one tricky little momma to adjust! I usually get away with using a pattern company's smallest size and a bit more petite adjustment.  That did not suffice.  I still loved the potential of the dress, my gorgeous Lady McElroy fabric and those amazing sleeves. 

Fabric:

                                                     This neckline shot is a good one of the fabric. 


The fabric is a Lady McElroy cotton lawn called "Pansy".  I used Fusi Knit tricot fusible interfacing to stabilize EVERY seam on this garment. In making it again I recommend interfacing the center front seam with the same lightweight fusible if you are using a lightweight,  floaty fabric. This pattern would also be great in a lightweight linen as the structure would really emphasize the sleeves, its best asset. 

                                                                     Such a difference that belt makes!

I also fused the two inch hem with the Fusi Knit. There are a couple of reasons this dress is so tricky besides the fit issues. To achieve that beautiful hang of the sleeves and the shape of the dress control is had by GUSSETS.  That is not unusual but we are talking a four part gusset here. It is made of very unusual shapes, one shaped like an apostrophe, no exaggeration, and the other  like a weird triangle. There are two for each side front and 2 for each side back, 4 in all. They are bias and curvy. the front apostrophe one,  IMO, serves as a princess seam for the bust. If you need bust alteration, this pattern may not be for you. The curve of the apostrophe could be enlarged along with the dress bodice to accommodate, just thinking out loud  here. Care has to be taken not to put these pieces together backwards. The directions warn of a lot of ease to get them  to fit. I eased my heart out then realized it did not look right at all. I rechecked my notches,  not all of which printed, and realized this was in backwards. Once that was resolved, the gusset pieces fit in exactly, with no big easing.

When I cut out the pattern I raised the length 2 inches on the lengthen/shorten line.  Then I cut off 4 more inches from the bottom hemline. I raised the CF slit 3 3/4 inches.  After the gussets were in  I raised the hem another 3 inches for a total of 9 inches of length removed. I made sure I did not remove length across the gussets. 


Above you can see what I thought was the trickiest pat of making the dress.  You need to connect the neckline facing to the  two inch wide seam  allowances at center front. You have a 1/4 inch seam to do so and some confusing dots to match up.  It worked if I ignored the dots. The illustrations are small and have the overlocking stitches which makes for an unclear view of what you need to do. Many reviewers complained of this step and I agree. Why a traditional vneck facing could not have worked here, I don't know. 


This is the most brilliant part of the construction. The hem is also 2 inches. Rather than make you figure out how to miter a perfect corner, the pattern comes precut with the corner cut off  in the perfect spot at the perfect angle and all you have to do is stitch a 1/4 inch seam and voila! a perfect miter, no fussing whatsoever! Why can't all  patterns do that?

Now for the glorious sleeves.  You run three rows of basting  in the flat at thesleeve hem.  You then  pull up and quarter the sleeves, spreading the gathers evenly . After you have pulled and basted your gathering threads you press them hard on  those gathers only, as you see above. I know, not the usual. Then you trim them to 1/8th inch from the basting. Now you will  bind them with your bias strip,  sewing to the inside  first,  wrapping around  to the topside and then topstitching. Your sleeve is all  still in the flat when you do all of this.  Your sleeve is then sewn together from hem  to cuff and pressed. I pressed to the side and hand stitched down the SA at the cuff. It gave a lumpy finish there but was easier than  sewing in the round.  I really like the sleeve gathering finish in the end. 

What I Like:

* The design is elegant, unique, and gorgeous.
* The sleeves are exquisite, both in effect and detail.
* The cut,  along with the curved 4 piece gussets was interesting and quite challenging.
* I wanted a sewing challenge and got it.
* The fabric was gorgeous, worth every penny and a delight to work with. 


What I did to make it work for me:

* Drafted a new neckline facing
* Drafted/raised the center front neckline 1 1/2 inches.
* Raised  the back neckline 1 1/2 inches
*Took  2  inches out at lengthen  shorten line
* Raised hem  8 inches.
* Went from 12 to 11 inches on cuff bias strip
* Reinforced all seam allowances  with fusible knit tricot. 
* Added 2 fisheye darts, each one inch wide, to back bodice 

Next time I would: 

* Acknowledge fit issues of sloping shoulders and slight rounded back. 
* Add tucks or darts to front bodice as well as back bodice
* Shape the side seam
* Make the cuff strip shorter
* Use topstitching thread or two threads in one needle for topstitching
* Interfacing, knit, in hem
* Cut underarm  area higher  up


A few final thoughts: I dreamed about this dress for quite some time. In my dream it would go together so easily as well as look  amazing. Sometimes our projects don't quite work out that way. I had a dear friend/mentor who was so gifted and he told me one day, "you wouldn't believe what I throw out and how much just isn't that good. " Now I found that hard to believe  because he was just an incredible portrait artist which he loved doing. That love came out in his work. But he taught me to never feel bad about the mistakes, to just persevere and move on and that the great things will come. Anyway,  after trying on the initial muslin, I was disappointed. I decided to continue. It happened that night I watched the summer Ralph Lauren runway show on youtube. It was utterly fabulous and so my dream wardrobe. He had dress after floaty dress with loads of volume wafting thru the sea air and so many of these dreamy garments had his big leather signature belts at the waistlines and it looked fabulous. When my bag of a dream dress disappointed me, I ran upstairs and grabbed my wide leather belt, a la Ralph. It made the difference. My friend Si would be proud I persevered but I also thank Ralph for giving me the idea to belt my dress and make it work. Happy Sewing!........Bunny


The Ray Pinafore, 2025's Epic Fail

  Happy New Year and welcome to my epic fail of 2026. I guess you have to have one, right? This is the Ray Pinafore from Paper Theory Patter...