Pressing matters, that subject head has certainly been used before in the sew blogging community but it's true. Pressing really matters a lot. It is probably the most important thing you will do to contribute to a professionally sewn garment. And notice, the word is "pressing", not ironing.
Ironing is moving the iron horizontally back and forth over your garment or fabric to smooth out the wrinkles. Pressing action consists of pressing your iron down on the garment, hopefully with a press cloth in between, then lifting directly up. There is NO horizontal movement.




.JPG)
Ironing is moving the iron horizontally back and forth over your garment or fabric to smooth out the wrinkles. Pressing action consists of pressing your iron down on the garment, hopefully with a press cloth in between, then lifting directly up. There is NO horizontal movement.

June Tailor Press Board from sews.com
The more you sew, the more aware you will be of proper pressing. Your new habit will spur you to do it better each time and to help you get the best "evidence of effort", to quote Roberta Carr, there are tools out there to help you gain quality results. These tools pretty much have been around for generations and are time tested and worth the investment. If you see yourself getting into any tailoring efforts, they are necessary. They make the process easier.
Above is the June Tailor Press Board,aka, tailoring board. It is available at smaller vendors like Heirlooms Forever as well as places like Nancy's Notions and Amazon. Most of what I will mention is available from these vendors so won't link further on.
OK, this press board is quite impressive with all it's points, angles and curves. Why would you press a seam on a board like this? For one, the edges of the seam allowances hang off the edge you are using on the board and thus prevent show through ridges on the public side of the garment. Look at this thing and imagine pressing open hip curves, princess seams, tiny sleeves on heirloom children's garments, etc. An the point is priceless. A point presser like this can allow you to press open graded seams on collars to give you a beautiful point when turned. I also like to trim down my points while the collar, cuff, whatever is on the point of the board. It makes it much easier and less prone to accidental cutting. I know Santa's coming but if you don't want to spring the fifty-sixty dollars for this sweet toy, use what I use:
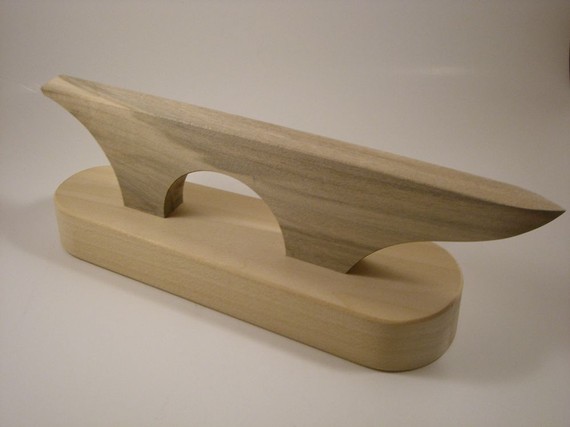
This tool is a point presser/clapper. I like how it has a really sharp point. The larger bottom is used to literally clap/slap/pound your garment details into submission. It is great for taming welt pockets and bound buttonholes and other details with various thicknesses. Over pounding can make your seams transmit to the public side of the garment. You can get around that by having a very well padded surface underneath like a doubled up towel. Other times you want that clapper to bang the fabric into total flatness and submission like on the edge of an edgestitched blouseweight. With practice you will learn what to have underneath your fabric before you pound. To prevent shine, always use a press cloth between the clapper and the garment. I use this a LOT. It's indispensable for collar making, IMO.
Then there is the lowly ham and the not so lowly ham:
Courtery stitchnerdcustomshop.com
courtesy bblackandsons.com
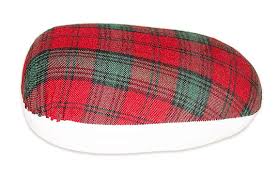
Hams are absolutely essential to sewing. All those curved seams, ie, princess seams, are pressed to perfection on a ham. It is probably best known for setting the shape into a collar which you wrap around the ham like a neck. The collar is securely pinned and heavily steamed while on the ham, no touching. I mean heavy steam. Then you can leave it overnight to dry before installing in your jacket or coat. I use the basic plaid ham but would I ever love one of those custom hams from Stitch Nerd. Wowsa!
( google hassling me on photo, I'll try later.)
Complimenting the ham is the seam roll, something I love but did without for a long time. My sub was a rolled up thick magazine which worked fairly well. Seam rolls are great for getting into pant legs and sleeves that are already stitched up.
There are items around the home or that you can DIY that will help your pressing a lot. There are wooden dowels for pressing long seams without ridges. Porch railings work the best as they have the curved surface on top and a flat area below preventing rolling. I use my dowel quite a bit.
Above is my treasured dawber, made from a tight roll of cashmere, and a cheap paintbrush. These are great for dipping in water and placing the water drops in the well of the seam on the wrong side to press open. This is done on fabrics that you don't want to overpress like cashmere or fine heavy wool coatings, suitings too. A word about cashmere: it is very sensitive to pressing, scorching and getting overpressed and damaged quite easily. I like to iron it as little as possible and use my daubers a lot to tame the details. An iron with a good point helps a lot here as well. You just place that iron tip in the well of the seam after it has been daubed with water. Once again, over a presscloth.
And speaking of press cloths, favorites are silk organza as it allows you to see the garment underneath and takes high heat. Poly organza will melt in this situation. I also have handy some old well worn men's handkerchiefs. You can buy them by the pack at the box stores and they make great press cloths.
My favorite pressing tool of all, partly because June Tailor doesn't make them anymore:
You can see my June Tailor Pressing Mitt is well worn. I literally place it inside an installed sleeve and steam from the outside. It does a great job of getting rid of any puckers in the sleeve head. I also like to use it to shape sleeves in tailoring like you see here:
For more on how I use this tool to mold sleeves you can check out this link. Stitch Nerd does make these but I think with a little creativity you can probably make your own.
I haven't gotten into technique much here and that is because others have done it all so much better than me. Ann Steeves of Gorgeous Fabrics ( and they are gorgeous) was so moved by the lack of pressing seen in the sewing community that she did a very funny and educational video on how and why to press. Check out her Pressinatrix Video. It truly is the best out there. (Scroll down.) And when she says to iron the seam as sewn to meld the seams, BELIEVE HER. There is a well known sewing instructor out there who says it is not necessary. Ann will show you the proof why she is wrong. Check out this blogpost of hers for proof. Another great pressing video is from Nancy Zieman and can be found here.
As Roberta Carr said, "Sewing is Pressing". Quality results are not achieved without pressing. I think my new motto is "effort in, evidence shown", to paraphrase Roberta once again. Please share you tips and techniques to help others with their learning curve on pressing skills. I greatly appreciate all your experiences, no matter how unique. What works for you?
*******************
Next Level Sewing will take a break over the holidays and will return on January 5th. Hope you have a glorious and wonderful holiday with your families. Maybe Santa will see this post and get a few hints for your sewing basket!..........Bunny