Sewing Vloggers

Showing posts with label notions. Show all posts

Friday, January 12, 2024

Notions, Patterns and Fabrics, Oh my!


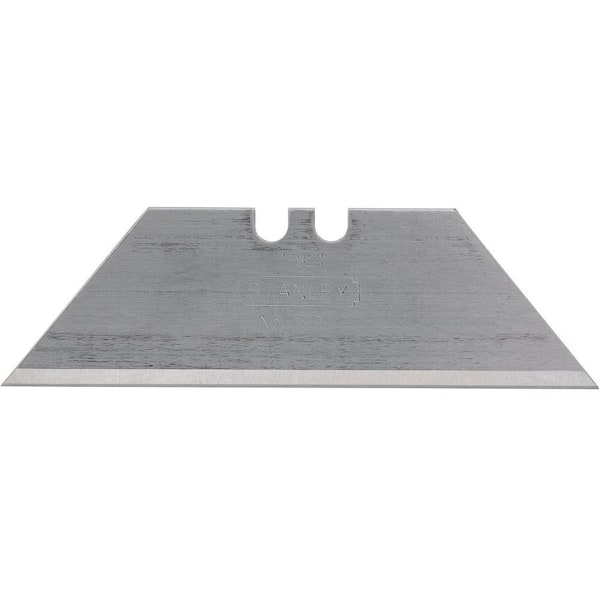
I haven't used one of these in 20 years. I don't even own one of the little red nosed thingies. Have I stabbed myself with one of them once or twice? Oh, yeah., right in that tender part of the palm. My first change of tool was the single edged razor blade. I used that for years. It had that cover on one side of the blade. It had to be safe, right? Well, it was. No accidents ever. But, I found better. For the past ten years my seam ripper of choice has been the scary to many but high performance box cutter blade. Those pointy corners were a dream for digging deep into jeans and such. 


Thanks to Jennifer Stern and an hour you-tubing. I have found something even better. I really didn't think anything could beat my beloved Stanley pack of 100 of these blades but thanks to Jen I have found it. It is safer, so effective, and works incredibly effortlessly. Meet the "Kai Seam Remover". As Kai says " Its unique design allows for fear-free "unsewing". It does. There is no tugging, digging or pulling. It works surprisingly smoothly, something you have to actually experience. 

 Closeup you can see the blade is sunk between the little concave indentations. You can't cut yourself. Is this looking familiar?


It might. Many women use this exact type of instrument to shave their faces, maybe  eyebrows or lip areas in particular or maybe the entire face as two women I know well do. (You'd never know.) So if you want one, go to the drug store or discount store and buy a pack in the eyebrow shave department, 3 to a pack for the same price, no shipping.  Get the longer face shaver not the short eyebrow only shavers. Next...............


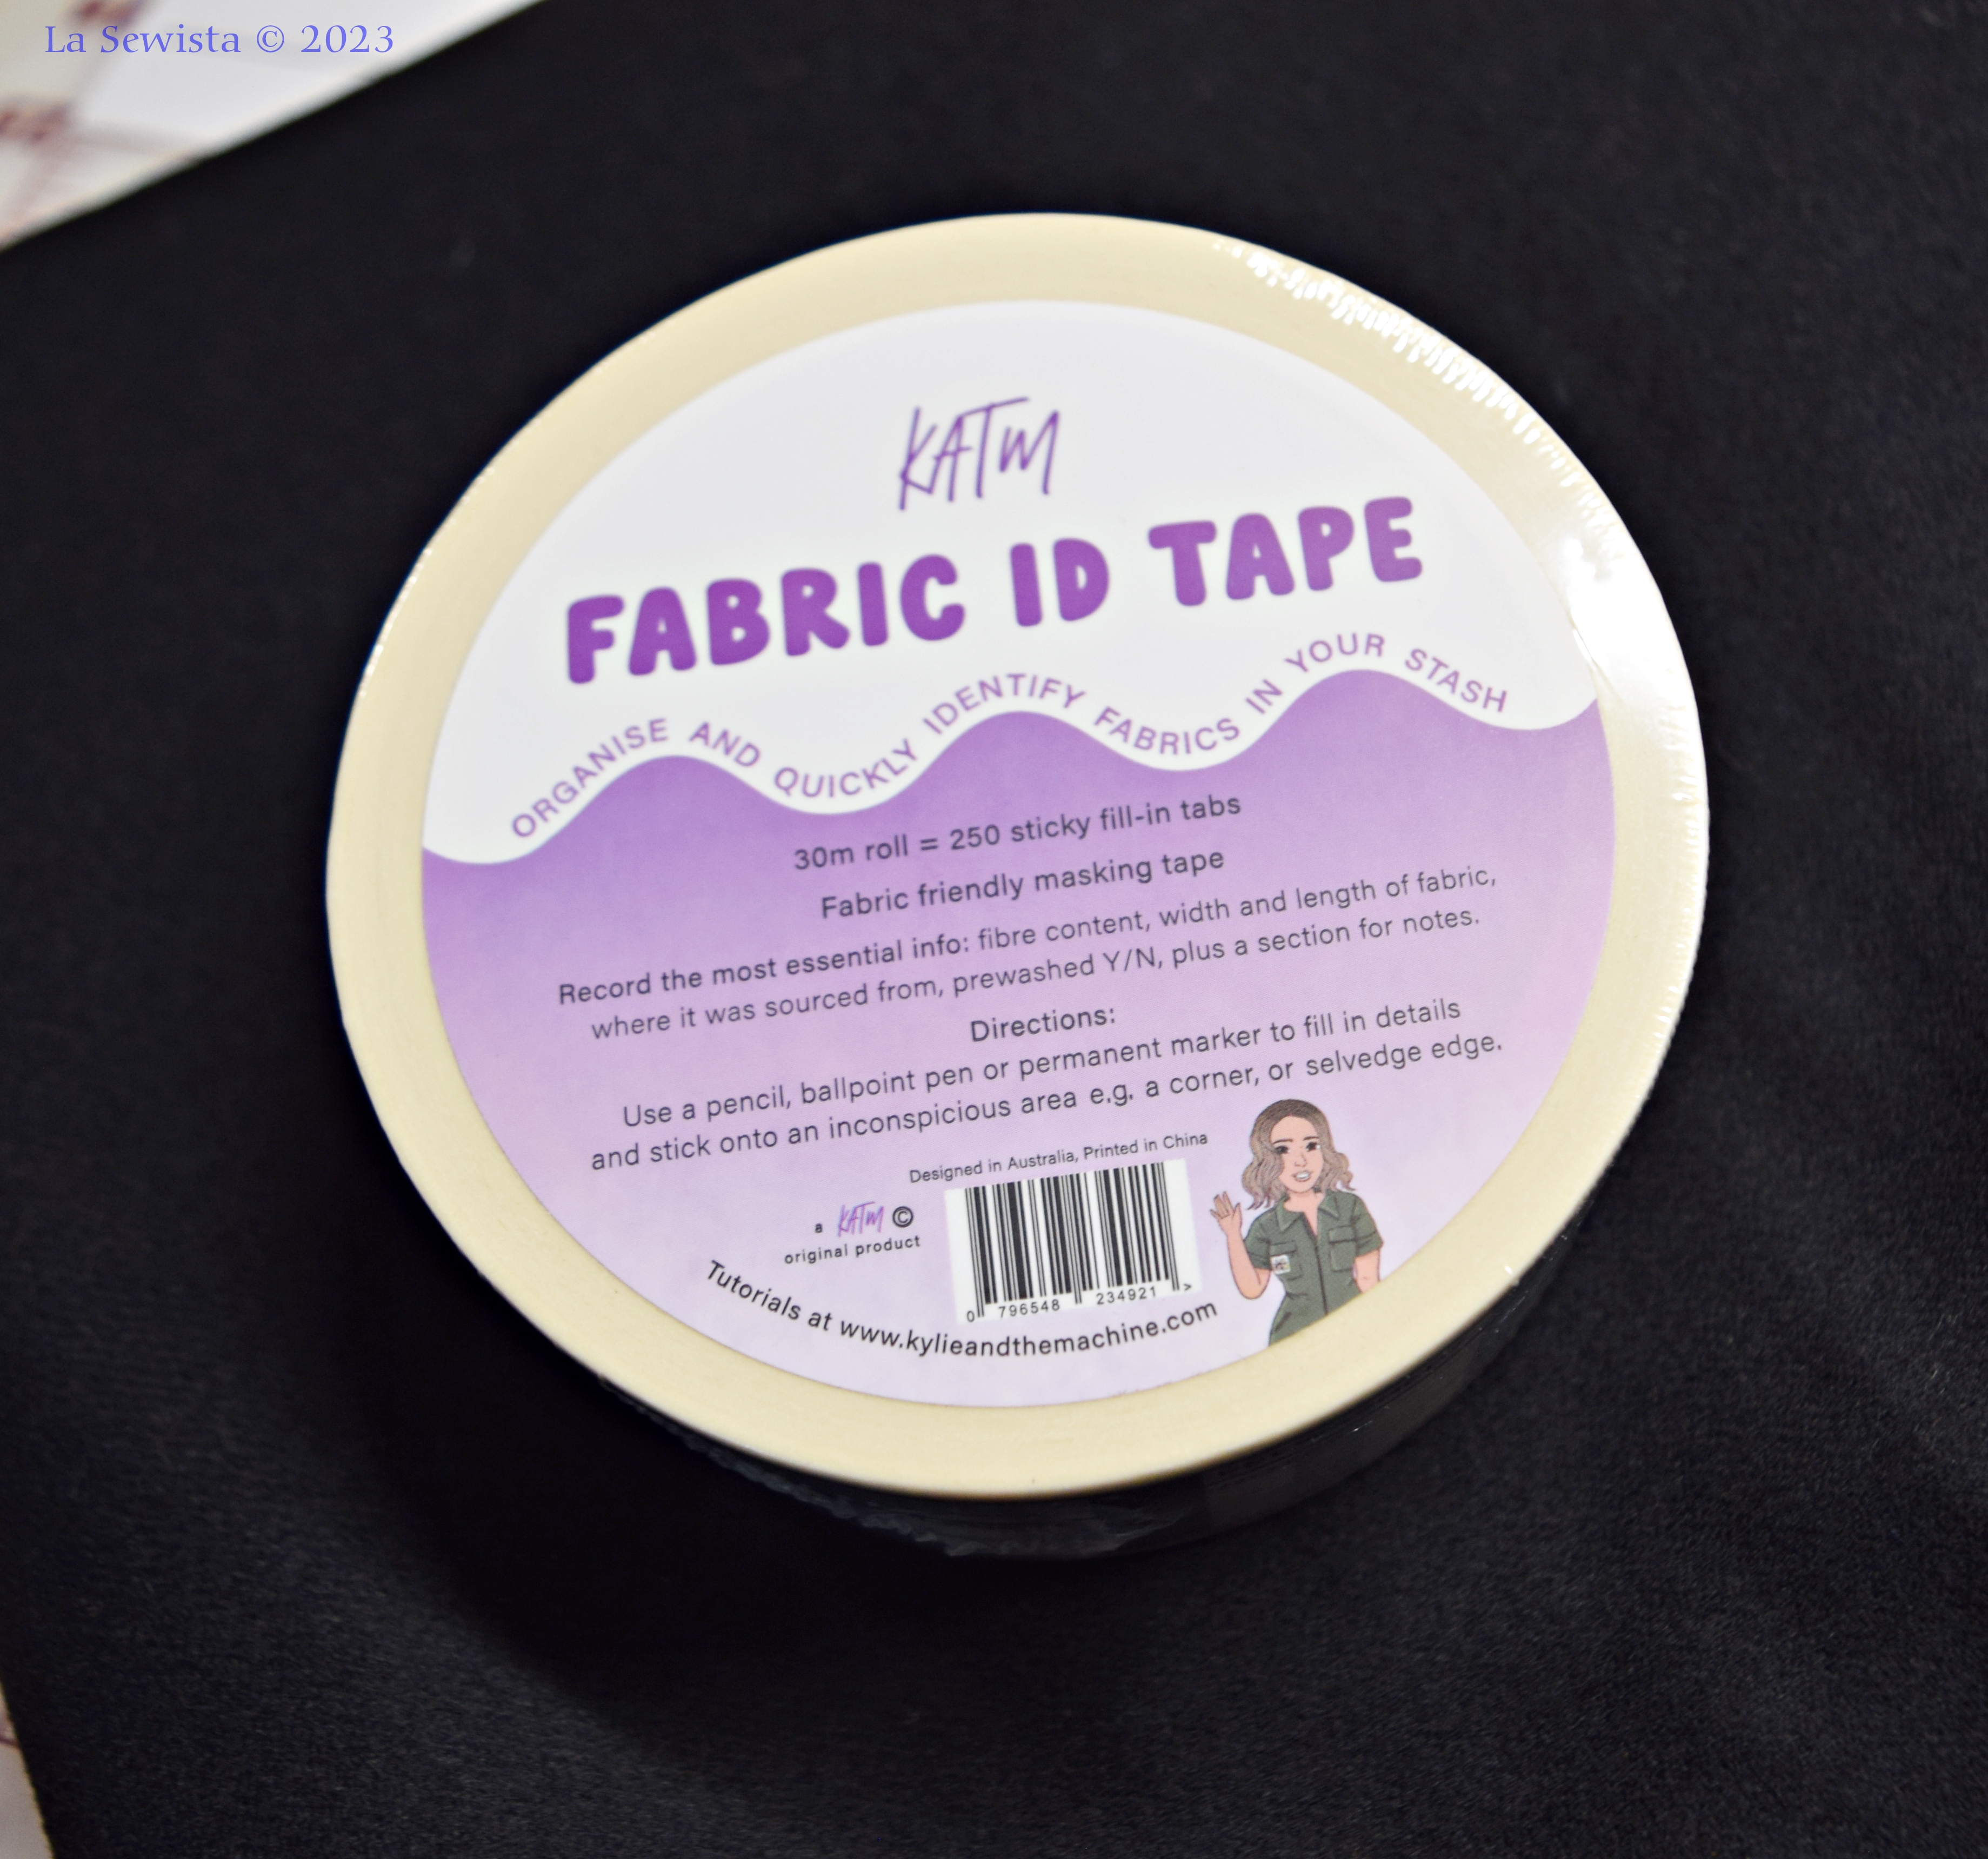
I think this is one of the best notions I've purchased in a long time. It is "Fabric ID Tape" from Kylie and the Machine. This big roll will have enough ID tape to label 248 pieces of fabric, yahoo! I've got about a 1/4 of my stash done so far and haven't made a dent in this roll.  As I've said before, my stash is not that big. ;)


Kylie promises it won't hurt your fabric and I test each label on a corner of fabric to make sure. This sticks and doesn't harm. It is very easily removeable. You are able to put fiber content, measurements, pre-washed?, source and there is plenty of space for additional notes . I added things like "fade line on fold" or the date purchased and such. Then I stuck on top of my nice folded fabric and put the fabric with its friends and can immediately know how much I have as I peruse options. I love staring at my folded fabrics on the shelves. As ideas hit me, I can know immediately if I have enough to make them work, no removing anything from the pile. Leave it


to Kylie to come up with this cleverosity. 

****************************************

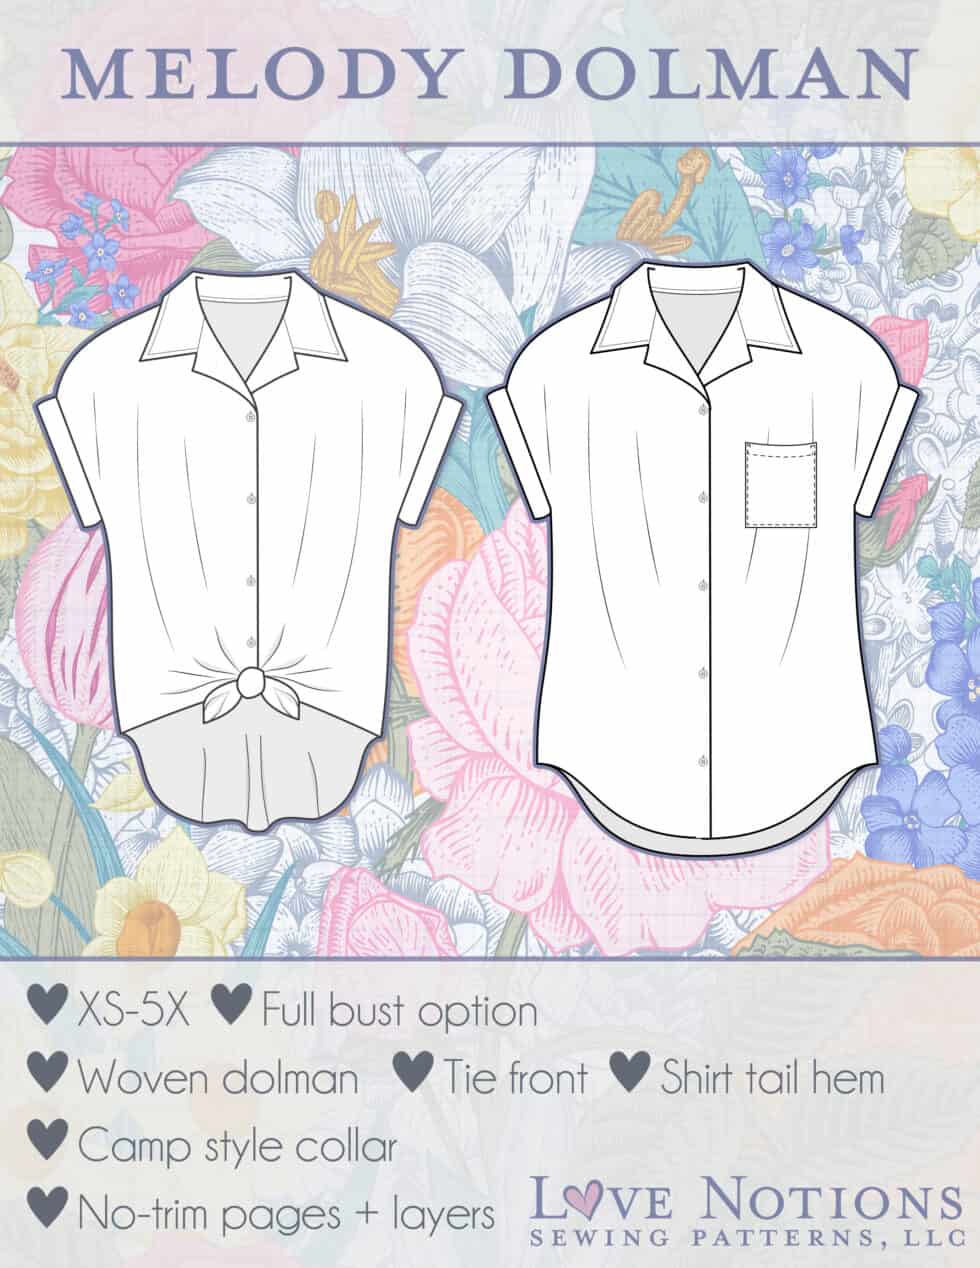
It could be her voice, so unique. It could be her impressive skill set. Maybe it's even the tropical birds chirping in the Bolivian background. Katrina Trinidad could sell me anything. She sold me the "Melody Dolman" top pattern by Love Notions. You know I am a born and brought up Big Four woman but I work in a few indies here and there. I like experienced designers, tested out by the masses with results I  approve of.  It's a short list. When I do buy an Indie, because of their heavier expense, they have to offer me options, potential for great creativity. A One and Done at 18.00 does not do it for me.  A perfect example would be my Sewing Workshop patterns. I've done 3 Picasso Pants, I think 7 Eureka tops (some yet to show you),  maybe three Tea Garden Tees and more. You get my drift. I want my money's worth. I've watched Katrina work magic with the Melody Dolman top and started to get my own ideas. I think it will be perfect for our summer vacation. I saw her make a thrift find into a Melody Dolman dress, her own invention. This type of creative possibility really sparked me. This is one of the two Indie Patterns I have invested in lately.  In my head I am already adding seams,  inserting yokes,  gathering ruffles, etc. Its what I like to do.  Thanks, Karina.  The design is so simple but I like that. It offers so much creative potential. 


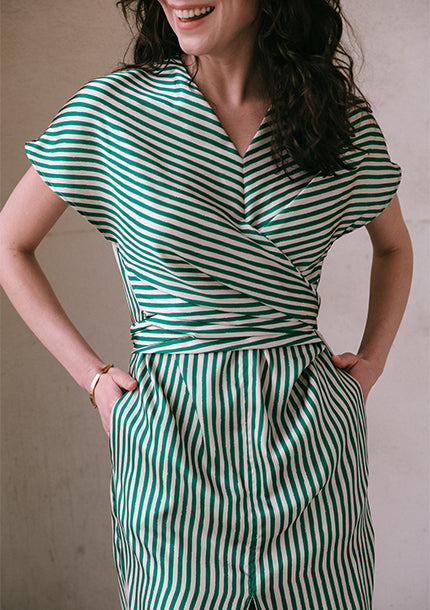
My next purchase was inspired by Sarah of Sew Sarah Style.  Now, Sarah looks great in all that she sews and wears. I liked the "Dila"  dress on her but her links to the designers from "Notches" and their designs really caught me. I chose the "Dila" dress for myself. It has 27,. yes, 27 different versions, no expansion packs to rip you off! I like it for its full length everything version in orange. I see it offering great opportunity for painting, embellishment, etc. It really sparked my creativity and again, offers lots of opportunity for many makes. I really look forward to making this and have great fabric in house ready to go. It's different and me.  The company "Notches" has an interesting and impressive pedigree. You might enjoy checking them out. 


These are the notions and patterns I am excited about right now. Both notions have been working wonderfully and the patterns will happen soon enough. I have lots to say about the fabric so that will get it's own post in a few days. There are some interesting pieces. I hope you will join me to share in the fun. Until then, Happy Sewing..............Bunny


Friday, October 29, 2021

Covered Buttons, Vogue 1644


It seems like Vogue 1644, really a simple jacket, is taking forever. It sort of is. I have been down with a nasty head cold for about a week now. It's not covid, so no worries there but it is "rhino virus". Yes, the jokes ensued and I kept sleeping. I am sewing but it definitely is slow sewing this week. These buttons are the end of it all and they are a bit of a mystery to me.


This jacket is not lined or underlined. It simply has facings and interfacing where traditionally needed. I chose to finish all the seams and hems with a Honk Kong finish. It is a Kathryn Brenne design and I really like the simple look. What I don't understand, that you can see above, is why the buttons are sewn on the front and then the actual closures are snaps inside on the facings. I just don't see a reason for this. Being the first time I used this pattern, I wanted to follow the directions, my usual MO. I thought some obvious reason would eventually pop up but none has. If anyone knows of a good explanation, please share and I thank you ahead for that. 

With all that said I needed 3 buttons. 1 1/4 inch specified and that's what I searched for. I really did not want a showy button.  The fabric color is tough. It is oatmeal and a very dark navy, easy to mistake for black but black it is not.  In the end I decided on a classic covered button in size needed.


If you've never  made a covered button you can easily find them inexpensively at the chains. This is made by Dritz and came  from Joanns'.  They have two parts, the public side which is either a flat or rounded cover with a loop and a back piece with ridges and a hole that snaps into the domed cover, just what you see above.  The domed cover has nasty little teeth inside and your job is to wrap the fabric over the dome and get it to hook onto those teeth, evenly all around and without tearing any human flesh. Sometimes this is easier said than done. I've made a lot of these over the years and you probably have too but for our newer sewists here are a few hints to save you some aggravation.

*Nothing is more disheartening than to get that fabric all pulled snug onto those little teeth over the dome in perfect fashion and when you turn your button over to admire your fine skills you realize that you can see the shine of the metal dome through your fabric. Suddenly your idea of a custom covered button looks horribly cheap and you have to start all over. To prevent that from happening cover the back of your fabric with a layer of fusible interfacing and then cut out your button cover. Your packaging will provide on the back a template to trace for your perfectly sized button cover. Trace this out after you have fused on the interfacing. I then cut my circle out with pinking shears. Now I have a sturdy piece to pull and shove on to those tiny teeth and nothing will shine thru and cheapen the look. 


* Next you will need a few tools to get this job done with minimal distress. Trust me on this. I've been there. Your next step is a pencil eraser. This is actually recommended on the back of the packaging. You will pull your circle of fabric over the button dome and using your nail try to get it stuck on a tooth or two. Next go onto the exact opposite side of the dome and do the same. I know, this is barely stuck in but that's OK. This is where your eraser comes in. Now I went thru two brand new pencil's erasers and watched them break off. Instead find a pencil with the style eraser you see above. It is PERFECT for pushing the fabric under and into the teeth. Just shove that long edge of the eraser into the fabric and push under the teeth. No ripped nails! Now  work opposite sides once a side is a bit secure, just like stapling a picture to a picture frame. Once the fabric circle is secured on 4 opposite sides by shoving in that eraser, work the eraser all around getting the fabric in nice and snug. 

* The next tool , #2, you will use is the E6000 glue. I use this for everything crafty and sewing. Nothing separates this glue once dry. Put a small dot of glue along the ridge of teeth down below. No need to go all around or near the top edge, just a blop on two opposites sides. On top of this lay your flat ridged part of the back button cover. Set it up so the little loop comes thru the hole like you see in my pictures. 

* Don't even try to push this together.  Just don't. Line up the hole nicely and grab tool number #3, the small flat head pliers. I use these for jewelry making but they come in handy for lots of things sewing. Put your button inside the flat "mouth" and give a gentle squeeze on just a side of the button. It will usually pop in the whole button. If it just pops in one side, turn it a bit and squeeze again. If it went in correctly you will hear a definite click before you are completely pressed in. Done. Leave to dry overnight before attaching to your garment. 

According to my pattern I need 3 "medium" snaps.  I am not sure what size these are. They are a half inch wide so that sounds medium to me. I need to install them on the facings under the buttons. Like I said, I don't understand why. Hope this covered button tute helps you. I do enjoy making them, sewing snaps, not so much!.....Bunny

Sunday, March 14, 2021

I've Got A Notion


I have been working away on the portrait project. I believe I've remade the eyes twice and the mouth at least 3 times but it does look like her. I've played with threads, stitches, paints and pencils and in the midst of my inexperience have come to some sort of agreement with all of that. One of the issues is that there are so many different techniques for doing this sort of sewing. All I know is that I will finish this portrait and do the next one differently. It is not that one method is any worse or better than the other. It is just that one technique is more likely to give me what my brain was envisioning. After all, this is a lot like making my first dress. So, lots more to come. I won't sew a garment until I am done this project. That decision is also fueled by the ability to shop for fabric down near Boston. I will be post my two vaccines soon and plan to make a day of it with my sister. I hope new fabrics will inspire as we get into warmer weather and get out of slouchier clothing. We'll see how that all plays out as well. I just know it is lookin' good out there now!!!  Each day we are closer to a happier, more huggable world and I can't wait! 


I've got a few notions for you to check out here, two new, one not so new but so indispensable. 


First are my Clover Pressing Strips. These are new to me. I saw them suggested somewhere on line and immediately went to order them. I cannot tell how many times I have ironed bias tubes and wished I had a strip to put in side that would take the heat of the iron and let me iron the seam open and then let me turn the tube and line that seam up evenly down the length of the tube. My vision has the seam line going perfectly down the middle or the side of the tube. Oh, I've done it but fingers get burned by steam, and it is a touchy, aggravating process. I have slipped a thing or two down a tube or two but they have always turned out to be something that got too hot and burned me or didn't come out of the tube very easily. I can't wait to try these. The package gives you lots of widths from spaghetti strap width to 18 millimeters, roughly a bit less than 3/4 of an inch. They are called Clover Loop Pressing Bars and are available in many places online with prices ranging from 8.00 to 9.50. I paid 8.00 and free shipping. 


My next great notion, and one I use A LOT, are my Derwent Inktense pencils. I know you have heard me mention these before. I've actually done a demo on them where I showed how to make a buttonhole on a print fabric a using a white thread, preferably cotton but poly can work too, and using the pencils with water to color the parts of the buttonhole thread  to match the parts of the print. The  BH literally disappears and it is really awesome. Another use is when you cut a buttonhole  and that white interfacing or that white back side of a fabric is showing on the front of the BH which may be made in a thread of an obvious color, say red  or blue. Once again, you can dip your pencil in a tiny dot of water to turn into paint and paint the inside edge of the BH where that white edge is sticking out. Looks so much better. Pressing anything you've painted with your Derwent pencils, which are technically "watercolor pencils" makes them permanent and I have had no problem with that. They are also great for mending and hiding those light thread ends. On this notion I say go  big or stay home. I have the 36 count tin which goes for around 50.00 but it is so nice to have all the colors to match up when I need them. I  have used them on my daughters face in my portrait project. They can be blended as well. I consider them a must have sewing notion at this point. I think if you get the smaller set you will wish for the larger one in no time. Make sure you get the INKTENSE pencils as Derwent makes many different kinds of pencils. 


My last is another new discovery and wow, do I love it! it is , let me take a deep breath here, "Acorn Precision Piecing Products Seam Align Glue", whew!  I must tell you, sewists, you do need to hang around the Local Quilt Shop. You will find amazing notions to really help any garment sewist that are not found in most places that have garment fabrics. OK, we've all heard of fabric glues. I've used many over the years from Aleene's  to Elmer's white school glue  to a fairly good product called Roxanne's Glue Gaste It and all in between. I use Wonder Tape a lot as well. This Acorn stuff, which my official name for it, from what I understand, is meant for people who do paper piece quilting. It is awesome for garment making as well. You have to use it in seams but that's the idea. It holds seams together. You put the tiniest dot imaginable  down in your seam allowance and then hit it with the iron. If you have one of those tiny applique irons that has sort of a leaf shaped end to it that gets really hot, that is perfect. (There is actually a picture of one on the front of the package of the pressing bars.) You heat that up and keep it carefully close by. You dot your seam allowance, press the fabrics together, hit with the tiny iron, or a big one, and boom! you're stuck and you can sew with no shifting. Needless to say, this has been great  for the tiny pieces on my portrait project. I also used it on a large mending project I did for a friend and it worked great. This glue has worked better than any I've tried over the years. It would be great to stick an underlining to the fashion fabric in the seam allowances before sewing to prevent shifting or to hold down those bias strips on Hong Kong seams that you wrap to the back and then topstitch, hmmmm,,,,How about some plaid matching too?  Warning, this glue looked ridiculously expensive on Amazon but it was in a 4 ounce bottle. My bottle is one ounce and from my LQS. I may have paid around 8.00 or so. I have used it a lot and it has barely moved in quantity. If you can find the one ounce bottle, I suggest trying that out first. I think you'll really like it. 

So these are some notions I am using right now, two of which I very recently discovered. I just have bumped into them and have no connection to anyone selling any of these products, just wanted to share a good thing.


There is something really weird about walking into your studio when you haven't been in there for a couple of days and turn on the light to see your daughter's face looking up at you from under the presser foot on your machine. Haunting,,.:) ............Bunny


Thursday, October 8, 2015

Saved by a pencil!


I found another use for my Inktense pencils: coloring elastic! I needed a strong answer to a button loop around a metal stud. The first one, of thread, wore out quickly. But a white piece of elastic would stick out horribly. So I took my pencil, drew on the elastic, and then painted it with water to  spread the color, which is what you do with these pencils. I then heat set it with the iron till dry and voila! Matching elastic loop, happy sewist! (NAYY)..............Bunny

Monday, November 17, 2014

NLS #7, What notions do I really need?


Here you are, just learning to sew, or maybe you are returning after having put sewing aside for several years.  What do you really need for notions to get yourself started? Well, I don't think you need that much. That big pile of measuring tools you see sheds a pall on my honesty but it's true. I think when starting out on anything new it is wise to get comfortable with a few simple tools and add from there as projects get more complicated and require more complicated tools to help you out. You don't need a ton of notions to start out. Get a few basics and add as your designs require. 

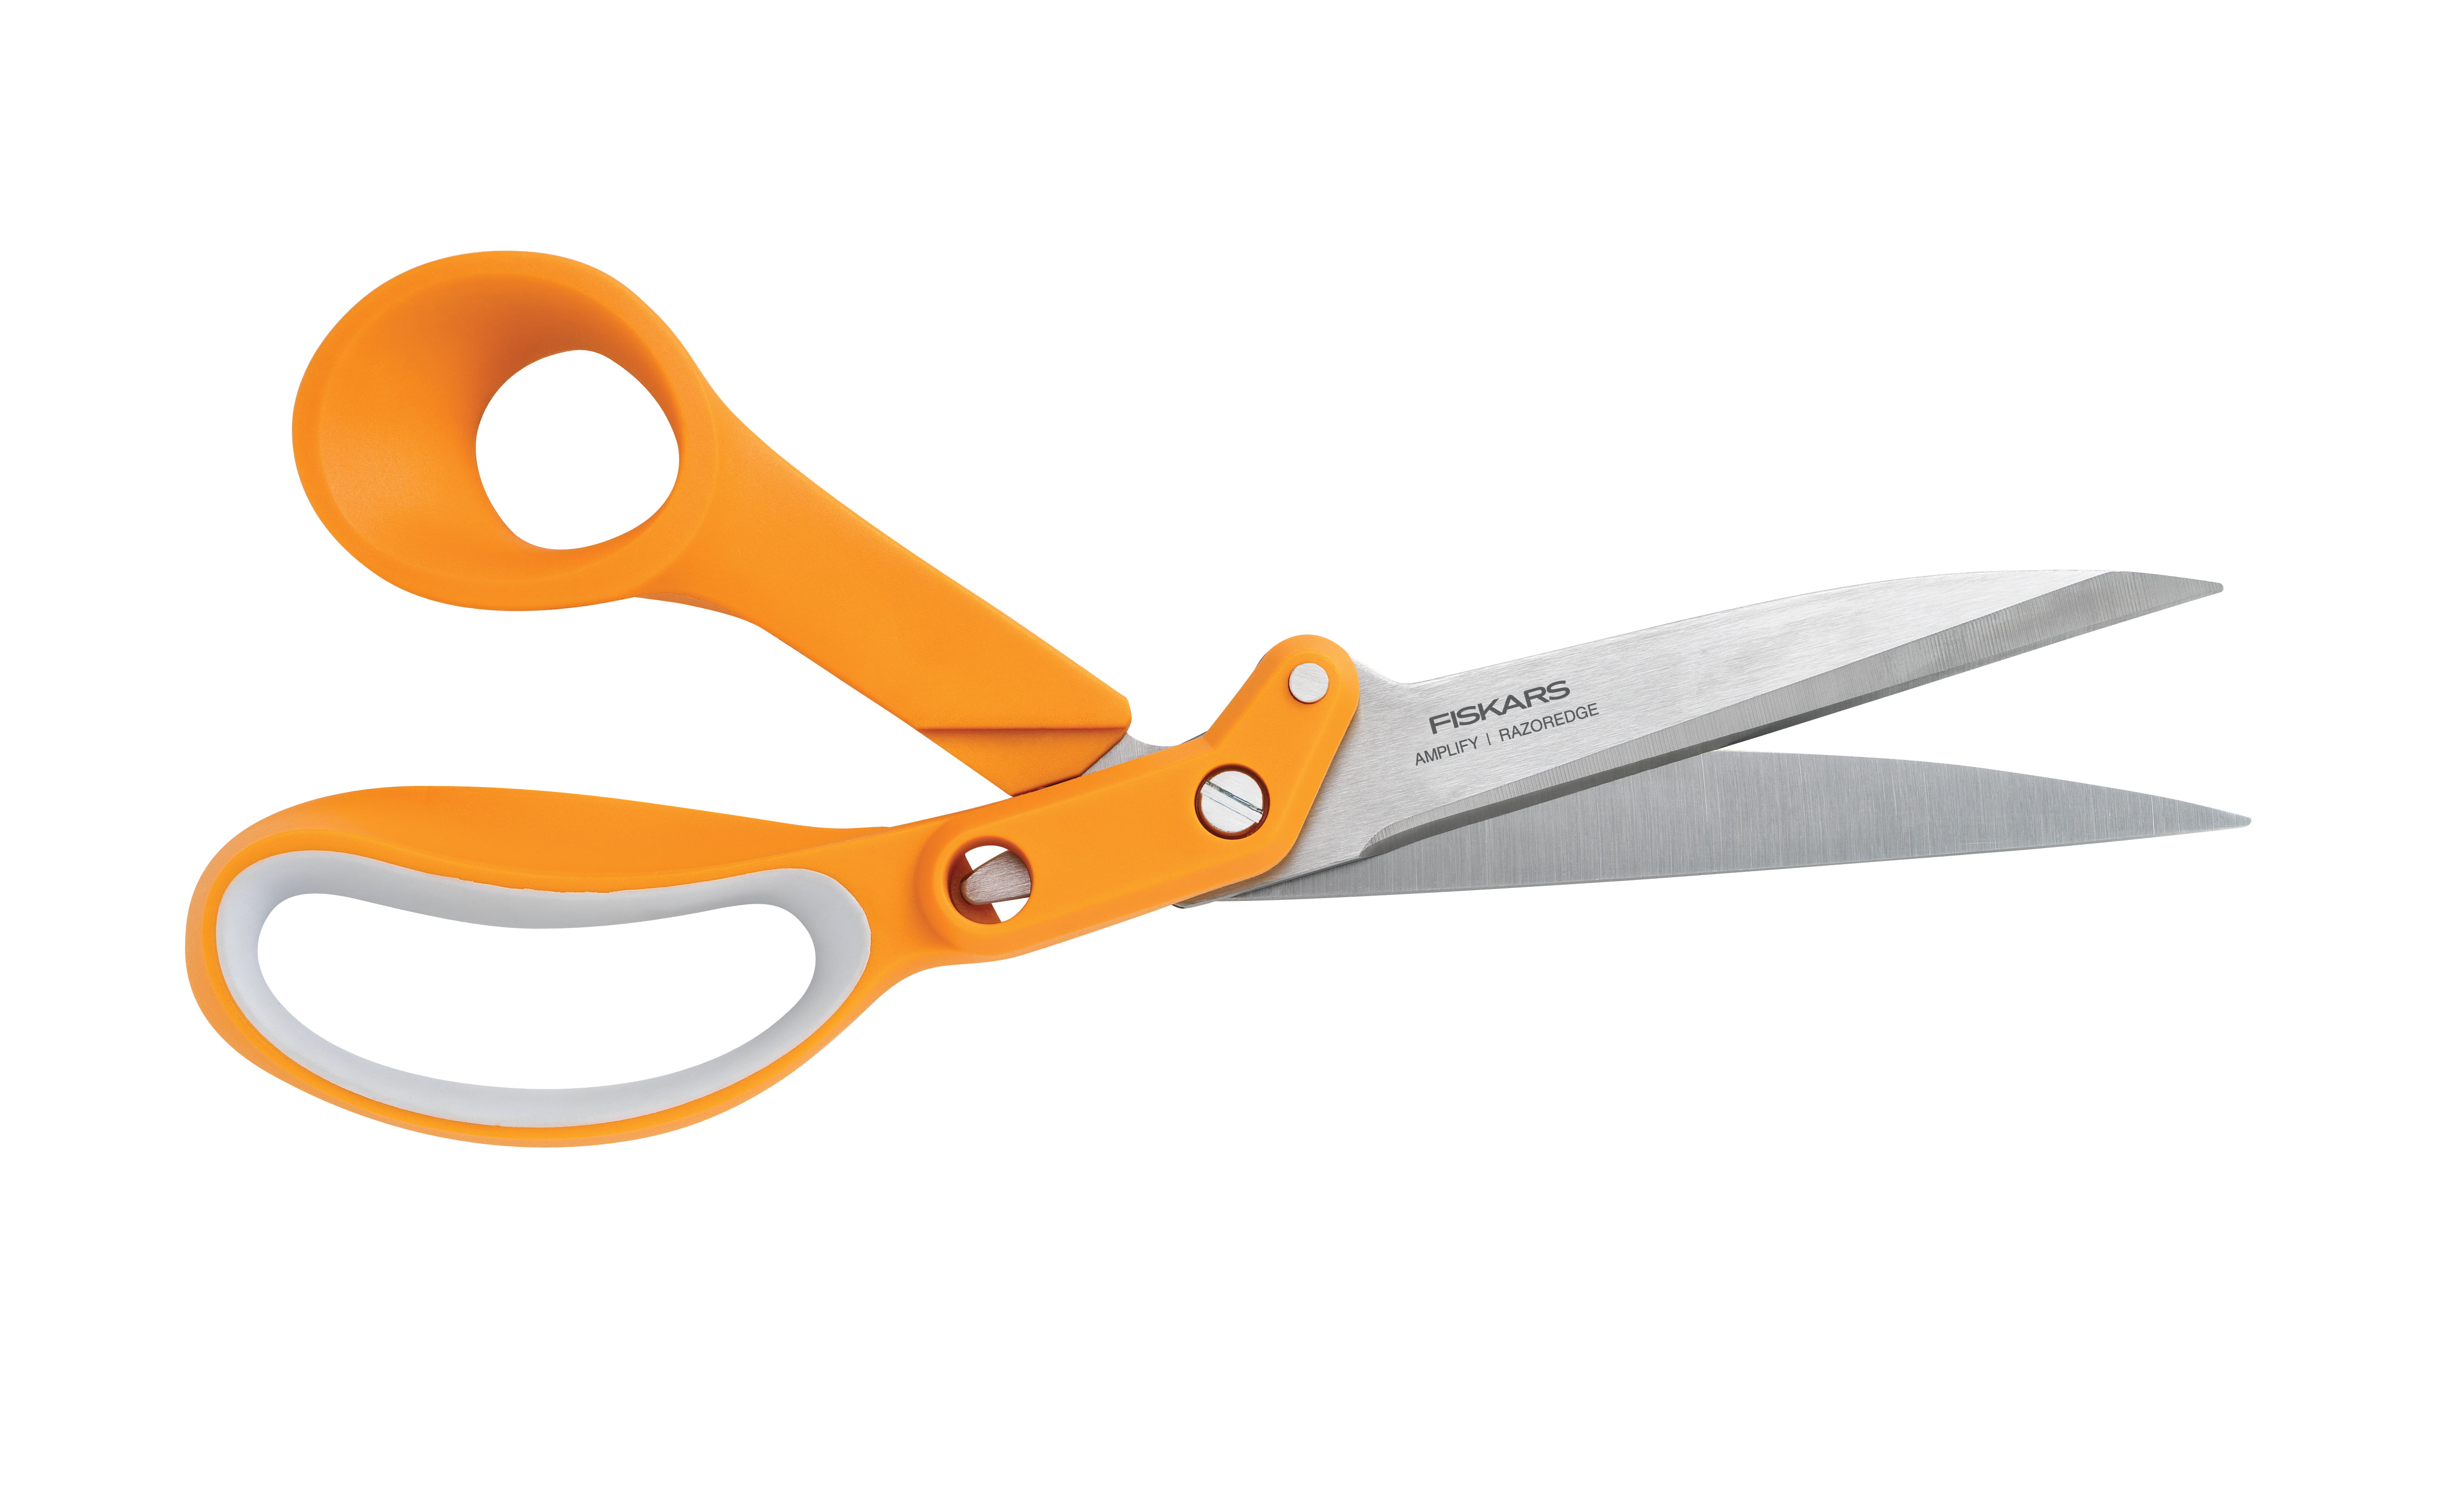
We've already discussed threads and needles and pins, so what's next? Let's start with cutting tools. At one time you would be advised what scissors to buy but today there are also cutting options that include rotary cutters and their mandatory mats and rulers. I don't think you need a rotary cutter to start. I firmly believe in laying a foundation and growing from there as time and skills accrue. So start with a good pair of shears.  Many moons ago I worked in a fabric store that carried really high quality shears. When the decision was made to discontinue the top of the line models I was able to pick them up at bargain basement prices. My scissor collection boasts TOL scissors by Wiss and Marks and Gingher that are wonderful. But truly, if you look in most scissor drawers, the pair that you see most often, gets the most use, and seems to hold is sharpness interminably are those orange handled shears from Fiskars.


An 8 inch pair won't set you back too much and they will last you a long while between sharpenings. These are basics. They are also lightweight and easy to spot in the notions drawer. If you are going to use your scissors in a class put a wine charm around the handle so you don't lose them to someone who thinks they are their's. Just about everyone has a pair of these in the drawer and they should serve you well. There are lots of other types of scissors but one pair of shears and two other suggestions I have are all you really need.  Scissors can run from five inches to ten inches long but the eight inch shears are the most versatile, IMO. 

Here are some of the different kinds of scissors that you might like as your sewing skills mature and you start sewing with more challenging fabrics;

Knife edge scissors:  These are  your basic shears as you see above. They are sometimes designed so the side that your hand goes in, as opposed to your thumb, is in line with the blade. This makes cutting our your fabric easier as the scissors can be held parallel  and next to the table while cutting. and therefore not lifting the fabric. Scissors that have the blades centered between the thumb and hand openings tend to lift the fabric as you cut and can easily give you inaccurate cutting despite the best intentions otherwise.  Look for the blades set up like you see above in the Fiskars so that one blade can be laid against the cutting surface as you cut. Many scissors come with blade covers which is nice for travelling back and forth to class, safer too! Other manufacturers are  are Kai,   Marks/Mundail   (vintage)  and Wiss. 


Embroidery scissors:  Embroidery Scissors are very sharp usually four inch blade scissors. This is the second pair of scissors of the three I think are must haves for new sewists. These are your life savers. Why? Because they unsew. You will use these time and time again to rip out your sewing mistakes. The sharper and pointier the better as they can slip under the stitches. You have to be careful with these as one slip and it is easy to mistakenly cut your good fabric. It has happened to all of us, you go to cut a buttonhole open and you put a gash across the front of your bodice on a nearly complete garment. Know you are not alone and will get over the pain in time. In the meantime, also know that you need a good pair of sharp embroidery scissors. I have several types but find I really prefer my little Fiskars.   Mary Corbet, esteemed embroideress, has a great blogpost on her embroidery scissors and all the different types which you can enjoy here. 

Paper Scissors,  Kitchen Scissors or any old junk scissors:  These can be any type of old scissors that you will relegate to all the scissor chores needed by the rest of the family. Your good scissors - HIDE THEM! Better yet, get some cheapies for the rest of the family. At one time the chains had bins of dollar pairs of scissors. Today we have Dollar stores.  I have lots of those dollar scissors hanging around for hubby to use. A good pair of Kitchen Shears is indispensable for heavy duty cutting that your fabric scissors would just faint over. Just know, the third type of must have scissors for any sewist are these, the junk drawer scissors. Make them easily accessible and you will be able to keep your precious sharpsters to your self, well hidden. ; )

Nice but not necessary


Serrated scissors:  Above is a pair of Gingher Serrated scissors. Most scissor companies make serrated scissors. Why? They make it much easier and accurate to cut fine difficult fabrics like chiffons, organzas and silks. Those little serrated edges, which you can't see here grab the fabric better and prevent it from slipping away while cutting. Get these when you get to the point of sewing a lot of silks and sheer fabrics. They are nice. 


Pelican Billed Scissors:  These are also called applique scissors. These are used to cut things that really need extra care. For example, you have done a hem on a chiffon fabric that is first folded up a half inch. Then the folded edge is zigzagged or roll edged in the serger. You now have to cut off that excess piece of chiffon right up to the zigzagged hem without cutting the skirt. These scissors will lift the chiffon and make for safer cutting. These are also great for cutting right up to the edge of machine applique and getting rid of those pokies.  The straight leg of the scissor is VERY SHARP AND POINTED. Don't use these to cut threads on the machine. Cutting threads repeatedly in the same spot will dull them over time and they won't work as well. This I personally know. Heirloom sewists use these a lot in their delicate work. These are a bit pricey but watch those coupons and deals from the chains and places like Nancy's Notions. 

There are also scissors out there that are more ergonomic and if you are dealing with something like carpal tunnel syndrome, that may be your way to go. They come under names like the Softouch  or Comfort Grip . They often don't look like traditional scissors but if they work for you and let you cut without  pain, who cares? 


Rotary cutters:  Frankly, as a brand new garment sewist, I would hold off on the rotary cutter until you have mastered cutting accurate even lines with your scissors when cutting out your patterns. Remember to trim the pattern first before pining it to the fabric and cutting it out. But if you do have some experience under your belt and are ready to handle what can be an extremely dangerous implement, go for it. 

Rotary cutters are more expensive. First you need the cutter. I like the smaller size for small curve cutting and the 45 mil size for the rest of my cutting. But you can do it all with the 45 mil cutter with practice. To use the cutter, you need the mat and if you are cutting out garments, you need a BIG mat which will go on a big cutting table.  I have used Olfa's, Fiskars, and whatever this plastic thing is that you can pick up at Joanns on sale now and then. I don't know if I bear down too hard. I  use only nice sharp blades. But I do a number on cutting mats and you can't imagine how many I have purchased over the years. Right now I am happy with the white plastic type mat from the chains, my second one of it's kind! 


Third, you need the rulers. As a newbie, do you need all of these shown above? Not really. Some are leftovers from my long forgotten quilting days. You do need a good straight edge and I love the large  5x24 Olfa ruler that has a lip to sit on the edge of the cutting mat. It really helps keep things lined up while cutting. As you get a little more discerning with your rotary cutter, I would add a Hip curve  and a Crotch curve if you can find them. I got mine at a fitting seminar I attended some thirty years ago and I would be lost without them. The crotch curve ruler just nestles perfectly into the curves of , well, crotches, armholes and necklines. A French curve will do similar. The hip curve is used for those longer, smoother curves you find on pants or skirts.  I use my triangle ruler a lot too. It is great for establishing lengthen/shorten lines at right angles to the grainline. Do you see how the cost of this rotary business is adding up? Just be forewarned about the expense.  It is fine to use scissors and never touch a rotary cutter and be an excellent sewist. Whatever works for you. What works for me is the rotary cutter at this point in time as I like it's speed and accuracy. 

Also know that a rotary cutter is a dangerous instrument. I cut off a good hunk of my finger tip and across my nail one time. Never felt a thing. That blade just zipped right through it all and the next thing you know the blood was spouting everywhere. I almost went to the ER, but managed to stick it back together. I have heard some really bad horror stories. I don't think I would use an RC if there were little ones in the house, just too dangerous IMO. I have learned that every single time you run the blade of the cutter down the fabric, you finish that run by immediately closing the blade. Realign things and open the blade again only right before you start cutting. At first it will feel odd and you  are opening and closing the blade constantly, but you shouldn't lose a finger. NEVER, EVER leave an opened blade on the table or anywhere, EVEN IF YOU ARE ALONE. Get into the habit of constantly closing that blade the second the cutting stops. If you are  at a class and see someone else leave a blade open, read them the riot act. Tell them I said so if you have to. Rotary cutters are not to be messed with in any way. Annnnnddd....you can sew as well as you want without one. 

A final update, 3/23/19, on scissors and about their sharpening. It has gotten harder and harder to find a good scissor sharpener. Gingher offers sharpening, for their products only, by their in house experts for a reasonable price and you can find out more about that here. I never could find a good scissor sharpener in the 13 years I lived in New York. Since moving back to New Hampshire, a new friend who hunts a lot hooked me up with the local gun and hunt shop. Hunters NEED SHARP KNIVES. These people are hooked up with excellent scissor and knife sharpeners. I now bring my scissors to the local gun shop and he sends them to his sharpener. I have them back within a week and they are the best sharpening job I have ever had on these precious tools. My pinkers never cut that good when new and if you can sharpen pinkers, you are good! So if you need scissors sharpened, look up your local hunting resource and give them a call. They were very very reasonably priced as well. Do I like going into gun shops? No, but I'll do it for my pinkers!

More notions:


Within the blue outline here you can see a rod holding all sorts of goodies. What do you, as a new sewist,  need of these? The three rolls to the left are wigan. You definitely won't use that until you get into serious tailoring of jackets, coats, etc. But next in line, black and white, are fusible tricot tapes. I use these a lot for knit sewing. They help stabilize the hems on knit garments and give a really nice look to the finished hem. You can find them online but if you go to the chain store and in the quilting department you will find "fusible batting tape". It is the same thing and often on sale. I like keeping this on hand and stock up when on sale. This adds a nice finish to the hems of  simple knit garments that many newbies enjoy sewing. So I would have this in the cupboard. That skinny roll with the red bull clip is "Wonder Tape". I would be lost without it and as a newbie it will help you immensely. It is a double sided tape that will wash out. It is great for holding zippers, buttons, trims, hems, all in place as you sew. It's a definite must have. If you've been sewing in your zippers with pins you will see a major improvement by using Wondertape. After that are rolls of real grosgrain ribbon. The real stuff is used in couture techniques so you hold off on that until your sewing heads in that direction. 


It's nice to have a drawer, but it could be a simple cutlery tray, next to the sewing machine. I am right handed so the drawer is on my right. I keep my most used sewing notions in there and they are always at the ready. No need to waste time looking for things. Set yourself up with this configuration and it will add to your efficiency sewing. It also decreases that frustration when you have to go hunting for something. 

Guard your tools. They are precious, not for play or  cutting chicken bones. They are an investment. They allow you to work more professionally. And above all, they are yours and no one else's.
*********************************

I am happy to say that Claudine of Rolling in Cloth will be a guest blogger  on our series within the next couple of weeks. Claudine is a spectacular ( no exaggeration) knitter, sewist, fabric dyer and all around sewing goddess. She is also very good at making sewing videos and has a really well done video as part of her contribution to NLS.  I know you will agree with me on this. 

When I started this series, Claudine immediately contacted me to do a guest post which hadn't been solicited. Seems she is passionate about passing along this art and feels very strongly that newer sewists should have the best information possible. With that in mind, she has put in a lot of work to provide you with a quality post and video. Stay tuned as I know you will enjoy it. If anyone else cares to do this at any time, just let me know. We are all motivated by just passing along these skills to all of our newbie and returning sewing sisters and seeing the craft continue.  Thank you,Claudine.

************************
Just a reminder here, I don't know everything. But, I am all about passing on what I do know. I am totally aware there are many ways and opinions about sewing techniques. I welcome your input on your methods so feel free to comment about them in the comment section of the posts. So many generous commenters have added so much to our skills and understanding of each topic. I thank you all and hope you will continue to share your experiences and skills. Thanks so much......Bunny


Monday, November 10, 2014

NLS #6, Mark my words!


Markers can spike a pretty controversial discussion. Seems every kind of marker, at some time, has ruined the best intentions of even the most able sewist. There are stories of marks reappearing like the Walking Dead. Some horror stories relate many many different ways to remove some despicable marker from some very expensive fabric.  Everyone has a technique. Brides with purple marks on their bustles, babies with marks appearing two hours before an heirloom portrait is to be taken, silk charmeuse marked with tailors chalk and wax permanently ironed into the silk, oyyyyy, I could go on and on but I am sure you have heard many of these near urban legends already.

Markers and marking are nothing to be afraid of. Above are all the markers I use, There is no perfect marker and the best you can do is use the proper marker for the appropriate fabric and task. Above,  you see in my marking stash wax tracing paper, Frixion pens, Chaconer marking tools, tailor's chalk, #2 "fine" mechanical pencils, Crayola washable markers, serrated and non serrated wheels to use with the wax marking paper and assorted water erasable and air erasable markers. Let's go through them one by one.


Frixion Pens:   
I love these and use them quite frequently. Frixion pens look and work like any pen. But heat will erase them. You mark, you sew, you iron it, the mark is gone. They make a fine line which is so important at times and often hard to come by with markers. One thing with all markers, ask yourself, "am I going to be sewing right over this mark?" If so, don't fret the erasing part too much. If you are tracing a pattern to embroider with  a marker and it will all be covered with your stitches, what's to worry?  Button going on top of the mark? No matter.
Back to the Frixion Pens, they are heat sensitive but they are also cold sensitive, pretty magical, So that tiny little spot that you ironed away into oblivion is really hiding in the fibers. Bring that fabric out into cold weather and the spot will come right back. However if you wash the piece after construction and with a bit of simple soaking remove the ink from the garment, it is gone and won't come back in the cold.  If you need a fine line, these are great. I use them all the time, no issues. Disadvantages: sometimes they dry out before you are ready to call them empty. I get mine at Staples but they are at any office supply place as well as notions purveyors online. They come in packs which are a better deal.

Waxed tracing paper and wheels:
This is great for marking darts, or long lines needing accuracy. There is waxed and unwaxed tracing paper. The unwaxed paper is powdery and when you lay it against your fabric the color will brush off on to the fabric. Only hitch is it is a bitch to remove. The more you rub and try to clean it off, the more it embeds. The non waxed paper is awful stuff and what is available at the chains. When you see it, keep walking. The waxed tracing paper I really like.
Let's imagine you have just cut out a sleeve. You have two sleeves right sides facing and on top is placed your pattern for the sleeve. Now it's time to mark. You slide one sheet of the paper colored, wax side up under the bottom sleeve in the stack. The color is facing the wrong side of the bottom piece. Now slide back the pattern piece and place another piece of tracing paper colored side down against the wrong side of the top sleeve in the stack. Put your pattern piece back in place. Take a serrated wheel and run it along the dart lines or wherever you have lines to be marked. It does a good fine line with usually just one pass. . Disadvantages? The wax marks will melt into the fabric once ironed, sometimes not a good thing. Other times they disappear beautifully.  Do a sample on a scrap before using. The serrated wheel can perforate your dart lines and tear the pattern piece. The wheel can also be tough on delicate thin fabrics like silk organdies and charmeuses. These papers and wheels are best used on solid medium weight fabrics like cottons, woolens, no silks. They are quick and easy to use and clear to see when sewing, giving a really sharp line. Where to get? I've been told that "Singer" tracing paper at the chains is waxed but I don't personally know that. Big sheets are available from Richard the Thread.


Wax Tailor's Chalk:
This is traditionally used in tailoring and great for marking wools. In my hand is a "sharpener". You run the edge of the tailor's chalk through that little metal piece and it will sharpen the edge, important if you need a fine line. This little sharpener holds a  piece of chalk and has a brush on the other side to brush the chalk away if desired. You can also iron the wax chalk away on woolens, Disadvantage: On silks the wax is absorbed into the silk and when ironed spreads and looks like a really nasty grease stain that will not come out. Once again, samples should be made, ironed and judged before using on your fabric. I like the way tailor's chalk feels in my hand when I sew. If nothing else, you look pretty professional when using it.


Fine point #2 mechanical pencils:

Don't swoon, but this is one of my favorite markers but it does require a bit of prep. You cannot beat a fine point mechanical pencil for a really really fine line. This is what I use, believe it or not, on most of the marking on heirloom garments. It is wonderful for marking fine linens,organdies, and voiles. How do you get it out? That's where the trick comes in. I starch the fabric well before marking. I do a light spray, iron, and repeat at least two more times. You are building up the starch layers which will make a barrier between the graphite and the fabric. These pencils also allow you to make a very visible fine line with the absolute slightest touch. Once your starch is dry, mark your linen with the slightest of touches. When the garment is complete the pencil should wash out nicely but again, the area may just be covered with a button or embroidery and no need to worry. I have marked many an heirloom garment with these pencils, my personal first choice. I know others don't agree with me on this and that is fine. Personally, I have never had an issue.


Chaconer or Chaco Liner:

These are chalk filled little containers that have a teensy serrated wheel on the end. You roll the Chaconer along and the wheel dispenses the dust and makes a really sharp line. I like these a lot. The line is clear and sharp. Disadvantage:  I don't use these on delicate fabrics because of the serrated wheel but on anything else they are quite good.  Advantage: they seem to last forever and do a great job. You can get refills for the red type, called a Chaco Liner. You can find these in the quilting department at the chains.


Other pencil type markers:

These are two pencils I like a bit. The blue washout pencil lasts a long time compared to the fine line marker type , although I am always a bit leery of washout pencils. And it's nice to have the tailor's chalk in a pencil form if that's what you are most comfortable with. Disadvantage: sometimes the leads fall out. Advantage: You don't replace them as often. 


Crayola washable markers:

It was an "aha" moment discovering these. I love these and use them quite a bit. They are great for when you want to mark squares, circles, triangles, etc. Make yourself a little "legend" on paper of the marks and their corresponding color used. It can really help when doing more complicated designs where matching is critical. And if you know any three year old who uses these you know they really are washable. Disadvantage: They won't give you a real fine line,  but often that isn't needed. As with any washout marker, do samples first that include ironing the sample. I think every sewing room should have a batch of these, and hide them from the kids!


Washout and air erasable markers:

I lumped these together because, frankly, these are the markers I use the least, unlike many sewists. The air erasable markers are only good for a limited time and if you sew in unpredictable or often interrupted fits and spurts, air erasable markers are not for you. They are temporary, sort of. There are many tales of them re appearing and the ensuing efforts to make them permanently disappear. The Mark B Gone  washout pens and others of their type disappear like the crayolas with water. Legends abound about those misfiring as well. Many claim washing them out with soap in the water actually sets them. Another urban sewing legend? The Mark B Gone does provide a really fine line which appeals to many,particularly embroiders. They are easy to "draw" with compared to other markers and therefore great for quilting and embroidery. Disadvantage: They don't last that long and need replacement more frequently than other markers. Samples need to be done to make sure  they will not come back on your fabric after the fact.

There are many options out there for marking your fabric. DO SAMPLES. Avoid unhappy accidents by testing and ironing the marker on a sample piece of your fabric. Try to get rid of it after ironing and before ironing. When you get into a sewing frenzy and start ironing and sewing it's hard to remember there is a little purple dot on the right side of the garment. Ironing could make it permanent.

My favorites and must haves: the Chaconer, the mechanical pencils, the Crayola markers, Frixion pens and the wax tracing paper and wheel.  Experiment and see what works best for you and your project.

( I have no affiliation to any of these products or vendors. Only in my dreams do people give me markers to endorse and try out. These are just my personal and honest opinions of the products based on years of use.)

Many of these products can be found at the chains, from Richard the Thread and Nancy's Notions. I am sure there are others as well. Happy marking!......Bunny

Thursday, September 25, 2014

Happy days are here again!

Out with the old:


In with the new:


This is one heavy iron. I like that. It also pushes out some killer steam, more than any I've had before. I think we will be good friends.......Bunny

The Ray Pinafore, 2025's Epic Fail

  Happy New Year and welcome to my epic fail of 2026. I guess you have to have one, right? This is the Ray Pinafore from Paper Theory Patter...