Sewing Vloggers

Showing posts with label Koos. Show all posts

Saturday, February 9, 2013

Koos Zipper 2.0

I LOVE the Koos Zipper as shown in the View B instructions of Vogue 1311.  It is such a crisp application that would be great on any bag or jacket. It is not difficult either and there is also a tutorial in the sidebar from my first Koos bag construction.


A couple of differences here from the original construction:

* In the original zip I did not fold under the long facing pieces at their ends after turning. In this one I did. It did telegraph through upon ironing so I would not do that. To solve the issue I just moved them out of the way when I did the final press.

* In Zip 2.0 I decided, after a bit of experimentation, to triple zigzag the long edges of the facing. This helped secure the zip more than normal which I think is important for a bag and it's heavy use. I like the decorative effect it provides.

* I was able to center the zip beautifully with the help of Wonder Tape. It just looks uneven due to the camera angle.Ever notice those raised lines on zips? They are perfect for following the stitching and getting it even and centered.

* The zip was topstitched using my edge stitching foot and one click to the right. 

* Last but not least and totally unimportant I loved this zip which is a recycle from a long gone jacket. It opened at both ends. I just removed one of the pulls and sewed it shut on both ends to make it work for the bag. Zipper reused! It had a great pull on it so was definitely worth it.

Now on to the straps and sides and then lining. Maybe, just maybe, tomorrow....Bunny

Friday, February 8, 2013

The Planet Earth Bag

I've started another Koos Bag, Vogue 1311     . This one is for moi. As I started putting together my fabrics and shapes I realized my colors looked like earth from space. That required I put a circle of hand dyed wool on the bag. Now it really looked like Planet Earth. I started to get more excited about the project.

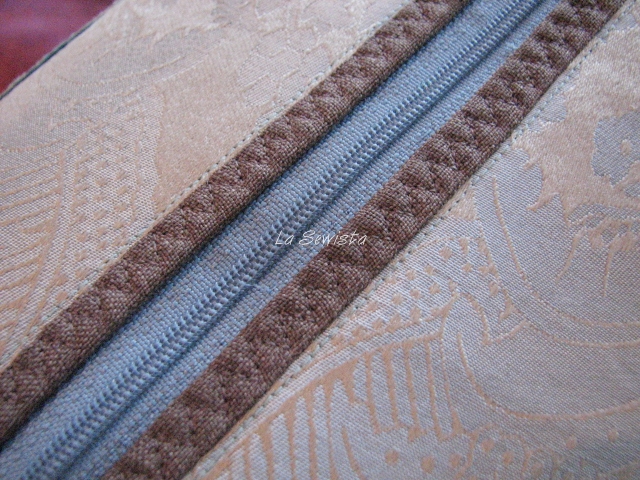
 This bag, like the other, has lots of textures going on. The bias strips are hand dyed rayons and the other hand dyeds are wool. You also see here a home dec brocade and a heavy corduroy. The brown is a poly suiting. All has been interfaced with fusible fleece. You can't see it but there is also some machine quilting happening here as well. Since I did a tutorial on the unique Koos Zipper already I thought this time I would focus on the Koos Buttonholes.

Koos Buttonholes

I followed the directions exactly on these, up to a certain minor point in the construction. My choice of fabric made a nice bias shape so I stayed with the three dimensionality of it all as you will soon see. 
The first requirement of the button instructions is to sew a 3/4 inch hem folded underneath. This did not fit on the bag and still leave room for the zipper. I decided to use a one inch hem and mitered the hem on the BH appliques.

You can see the pressed folds from the first attempt here.  The BH  appliques are placed RS of app to wrong side of the bag after marking. Here is how I marked the holes. The bag straps will eventually come through the BH when done.
 I marked the actual BHs with waxed paper and a serrated wheel. Then I realized it was exactly a quarter inch wide so outcame the 1/4 inch masking tape.

I stitched around the tape. The important thing to remember here is to not start in a corner. Start and end stitching on one of the long lines of stitching instead.
The buttonhole is now cut with a BH chisel and into the corners with the applique scissors. You will have to really push down on the chisel as there are lots of layers here. This is just like a bound BH. I guess we will call it a "faced" BH.

Now the fun part! Turn and press your applique. Pin down the folds as shown on the pattern instruction sheet. Rayon on the bias has a mind of it's own so I went for curved outer edges on one side here. As long as what you do is consistent from BH to BH it will look fine. I discovered I really liked the three dimensionality of this so made a decision to not press it down. Just my personal choice. Once pinned you are ready for topstiching.
The instructions have you not stitch the pleat. I disregarded that and stitched it all down all the way around the applique. It gave a nice tight finish.Here is my version, a totally topstitched, puffy BH:

I have a couple more to stitch down and then it will be on to appliqueing the sides of the bag. I need to get a silver paint pen today so I can swish my initials and date somewhere on this. Have you tried Sharpie's metallic paint pens? They are fabulous!

Thank you to everyone for all your kind comments and encouragement while putting together the new dress form who will now be called Tilly from this day forward. You really inspire me to new sewing levels all the time. Thanks so much for that and I treasure all of you......Bunny


Monday, November 12, 2012

The Koos Bag Finis!


We were blessed with a gorgeous day here for photos and DH did as directed so they are not too bad. The bag has nothing in it so is a bit puffy. I absolutely love it. I think this will be perfect for travelling to visit our children. It is BIG and has sort of a luggage-y feel all of which I love.  Here's the 411:

PATTERN: 

Vogue 1311, a bag designed by NY designer Koos Van den Akker. He is recognized by his collaging of fabrics,  love of bright color and simple designs. His designs function as a canvas to showcase a clear passion for fabric and color.  

I don't think I ever would have tried this pattern if it weren't for the inspiration provided by Shams of Communing with Fabric.     Her bag with it's vivid colors is TDF so please check it out. 


  FABRICS:

100% quilting cotton that I don't like for the applique base

 Fusible fleece

Assorted home dec fabrics that were inspired by the original tapestry chosen. There are embroidered taffetas, stretch velvet, two different faux leathers one of which became the straps, a tacky red metallic stretch fabric for a bit of highlight. That came from the  "Halloween department"  at JAs. My personal opinion, based on what I was taught years ago, is to always have a dominant fabric which will cover more than half of the area. Here it is the ginko sort of looking tapestry. Loved the colors in it. If an item is covered with an equal amount of every fabric it is not quite as interesting as one with a dominant fabric and accents. (From my days of interior design).

Some matte gold sequins. 

A brass upholstery zipper.

100% poly fabric for the lining. This is that nasty stuff called "Silk Essence" at JAs. I generally detest poly silkies. They are hot, clammy, and love to pucker when stitched, horrible for a lining. But this supposed lining fabric is great for bags as it comes in tons of great colors, is inexpensive and always available. I try to use light colored linings so items don't get lost in a big black bag hole.


 CONSTRUCTION:

This is really quite simple to construct. You can use Koos's plan for your collage of fabrics or you can simply use the basic shape as I did to do you own thing. The bag consists simply of a big circle for the top and bottom and a 8 inch band in between. Here's how I veered from the pattern:

  • Fusible fleece was fused to a base of cotton that was cut to the three necessary pieces, top circle, band, bottom circle  (not including straps and buttonholes). This then became my canvas on which to stitch the appliques.
  • There is a great, new to me, technique Koos specifies for the zipper. Love how it came out  and you can see that here on The Koos Zipper.  I can see a lot of potential for this technique on future projects.
  • The applique fabrics were basically stitched and flipped, a technique used in many quilts particularly Log Cabin quilts. 
  • In the SAs each sequin was cut to its center hole and slid off the connecting threads. I wanted to keep the threads so they could get caught in the SA. 
  • Once the applique work was done this went together quite quickly. On the shell I had stretching issues despite carefully stay stitching and clipping. On the lining the pattern matched up perfectly, proving a nice draft. So be careful with all the handling of your fabrics and take all the precautions to not stretch those edges.
  • The straps were made of faux leather. I used a size 14 stretch HS needle for that. Sewer's Aid, a silicone sort of thing, was rubbed on the needle shaft, under the presser foot and on the Fasturn tube used to turn the straps to the right side. I don't use any special foot when I sew faux leather. 
  • I blew the wonderfully unique Koos buttonholes. I found myself in the zone and unconsciously proceeded to stitch down the appliques for the BHs instead of making the neat "butterfly" version that Koos teaches. Oh, well, maybe the next one. And there will be a next one! This was too much fun. 
  • I added extra stitching to the area where the straps connect to the bag as suggested by Shams. How much weight does she put in that thing? I'm glad to know I'm protected for heavy loads!
  • I wrote my initials and date on one of the F leather applique with a paint pen that I wrongly attributed to Sharpie. It is made by Krylon and works really nicely. No bunny tags on this one.
 
CONCLUSION:
I will definitely make this again. It is just too simple and too much fun. One thing I would suggest that is different from my beginning post on the construction (a few posts back) is the choosing of the fabrics. I went through a whole process of imagining and then labeling each fabric with the piece I wanted to use. That was no fun. I chucked that idea and just piled up all my fabrics and picked them out piece by piece the way a painter picks his paints. That's a lot more fun!


I highly recommend this pattern if you want a bit of a challenge, some great fabric play, and a super new big bag.
********************************************************************************* 

 These are fabrics I am considering for my next iteration, greys, soft brown, pale turquoise. Have more searching to do before firming up the pallette.

***********************************************************************************

No new floor yet in my space but it's coming. In the meantime I played with my lights over the machine. I really want my dominant neutral to b white. I have been drooling over some of those lace covered lamps on Pinterest. Here's my attempt. I simply sponge painted the glass shades with white acrylic paint. It looks like lace from afar and gives a prettier glow to the light.


Friday, November 9, 2012

The Koos bag continues...construction notes

The entire outer Koos bag, Vogue 1311,  is complete and I must  say I love it, particularly it's ability to function as a backpack as well. This is a BIG bag. I am a small women, and with the fabric I have chosen it has a luggage-y look, albeit rather funky. I should have pics up as soon as I get that lining in over this long weekend. In the meantime just a few hints about construction that I wanted to pass on:


This bag consists of two large circles with a 8 inch wide band in between, major bias connected to major straight of grain. The seam allowances are half inch. 3/8 of an inch from the circle's edge I staystitched and clipped back. Watch your clipping here. It should be on the bias to prevent fraying and as you clip your way around the bag the grain changes. The angle of your clips should as well.

I put the circle and band together as any circular piece, quartering both pieces and matching up the quarter marks. Despite my best efforts something stretched somewhere. I stay stitched. I recut each pattern piece as I went along to keep it true. I used a tight cotton backing to prevent stretching which is not called for in the pattern. I still was left with an odd amount of "band" at the end of working my way around the circle. Because this happens so often when stitching bias to straight grain I did not close up the band until it was nearly all pinned in to the circle. Here you can see what was leftover.

Not quite a half inch seam allowance! And it wasn't even from one side to the other. But it worked and in the end all got fit in and then the SA clipped back to a half inch.

To attach the circles to the band I worked with those quarter marked areas sewing and pressing the SAs open on only one quarter of the bag at a time. This made it much easier to get my ham in and press the SAs open. Sew a quarter. Press a quarter open. Move to the next quarter of the bag, repeat until done. Sounds like a cake recipe, huh? Also remember to keep that zipper open as you sew up the bag. It  will give you more room to maneauver around the machine and won't let you get "locked out" from turning the bag when done. Yup, I've done that one more than once!

Once this shell was complete I had the fun of "signing" my bag, WTH! I use a "gold leaf" pen by Sharpie and  signed the bag on one of the faux leather sections. If you ever decide to do this, and you should, do several practice attempts before committing your initials to your project. It will help clear the pen of blobs and you will get a feel for the technique before signing. That signature made me feel good! You'll get to see it when done.

So this weekend will be put the lining in and Tah Dah! See ya then........Bunny


Friday, November 2, 2012

Koos bag continues......


The bottom of this drum shaped bag is collaged as well. I decided to have a bit of fun, again, not quite following the pattern. One curved inlay was triple zigzagged over the raw edge and then topstitched on the side. Another section was stitched right sides together, flipped and pressed and then topstitched (the tapestry). I wanted to bring a bit of the green to this side of the bag. The tapestry has some floral shapes and I thought mimicing them with a green taffeta applique would be fun. 
First I traced the flower shape onto tracing paper.

Then the shape was cut out and pinned to the tapestry.


The applique was then triple zigzagged and free form stitched to mimic the flower on the tapestry. I like how I now have that little pop of green.


Now it is on to the sides of the drum, more fun opportunity to play with textures and shapes!...(Don't you just love my joint compound spattered cement floor? At least my room is usable for now.)
...Bunny

Tuesday, October 2, 2012

The Koos Zipper, I Love It!


I am doing View B of the Koos Bag, Vogue 1311. View A has your basic slot zipper installation that you see in most bags, but View B has a very intriguing zipper technique that I have not seen before. A large facing is stitched, right sides together, in much the same way a bound buttonhole "hole" is done. The facing is outlined with the whited dotted line. I stitched the facing using a 1.5 stitch length around the ends/corners. Once stitched the "buttonhole" is cut down the center within a half inch of the ends. From there it divides and is cut into the corners, like any welt pocket or bound buttonhole.  Now, the neat part, cut the long seam allowance back to about a healthy 1/4 of an inch on the long sides ONLY. This will leave you with a 1/4 inch space between the two seam allowances. Step 2, Cut the facing at an angle, the green arrows, from the outer edge to the corners of the "buttonhole".

Take that end piece, the parallelogram, and push it only to the wrong side of the hole. Pin in place

 Here you can see the facing turned in on the ends only and pinned in place. Now comes the fun part!

 The long facing piece is wrapped around the remaining long seam allowances. In other applications as well as View A the entire SA is turned in with the facing. Here the SA stays where it is and is wrapped with the facing. Pin in place. This is going to leave a nice edge to butt against your zipper.


This is what the wrapped SAs look like from the wrong side. You have two options now. One is to topstitch the facing in place and the other choice is to ditch stitch from the right side in the well of the seam between the wrapped SAs and the bag. This leaves you with a clean slot to just place your zipper behind and topstitch into place. I think it is pretty cool and hope you do too! I love it when I learn something new in sewing. Thanks, Koos! I think this one belongs in the tute column, don't you?.....Bunny

ETA, 02/12/13: I did another Koos bag and the post contains additional hints for  installing this zip. You might want to check it out. Here's a link: Koos Zipper 2.0


Fall sets in on the Deer River.......

The Hanbok Vest

  I love this little vest. I thought about it for a long time. I am excited to tell you it's story.  Pattern: This is the Hanbok Vest by...