Sewing Vloggers

Showing posts with label linings. Show all posts

Saturday, October 7, 2023

McCalls 8406, the Bias Sequin Dress


Chalk up another one! A bias cut dress out of sequined fabric.  I have a lot to say about this project. First, it was perfect for the wedding. I had anxiety over whether I would be over/under dressed for the event.  It was j u s t right!  Second, it is hard to photograph this fabric. I took tons of pics and these two were the best. It just caught the light so weirdly in the photos and every time I moved in the slightest, the bias fabric had other ideas and movements. But in the end, it was perfect for the venue. Speaking of venue, the day was pouring buckets, foggy, just awful weather so the pics I planned on taking there just did not materialize. So let's get going on the sewing here!

Pattern

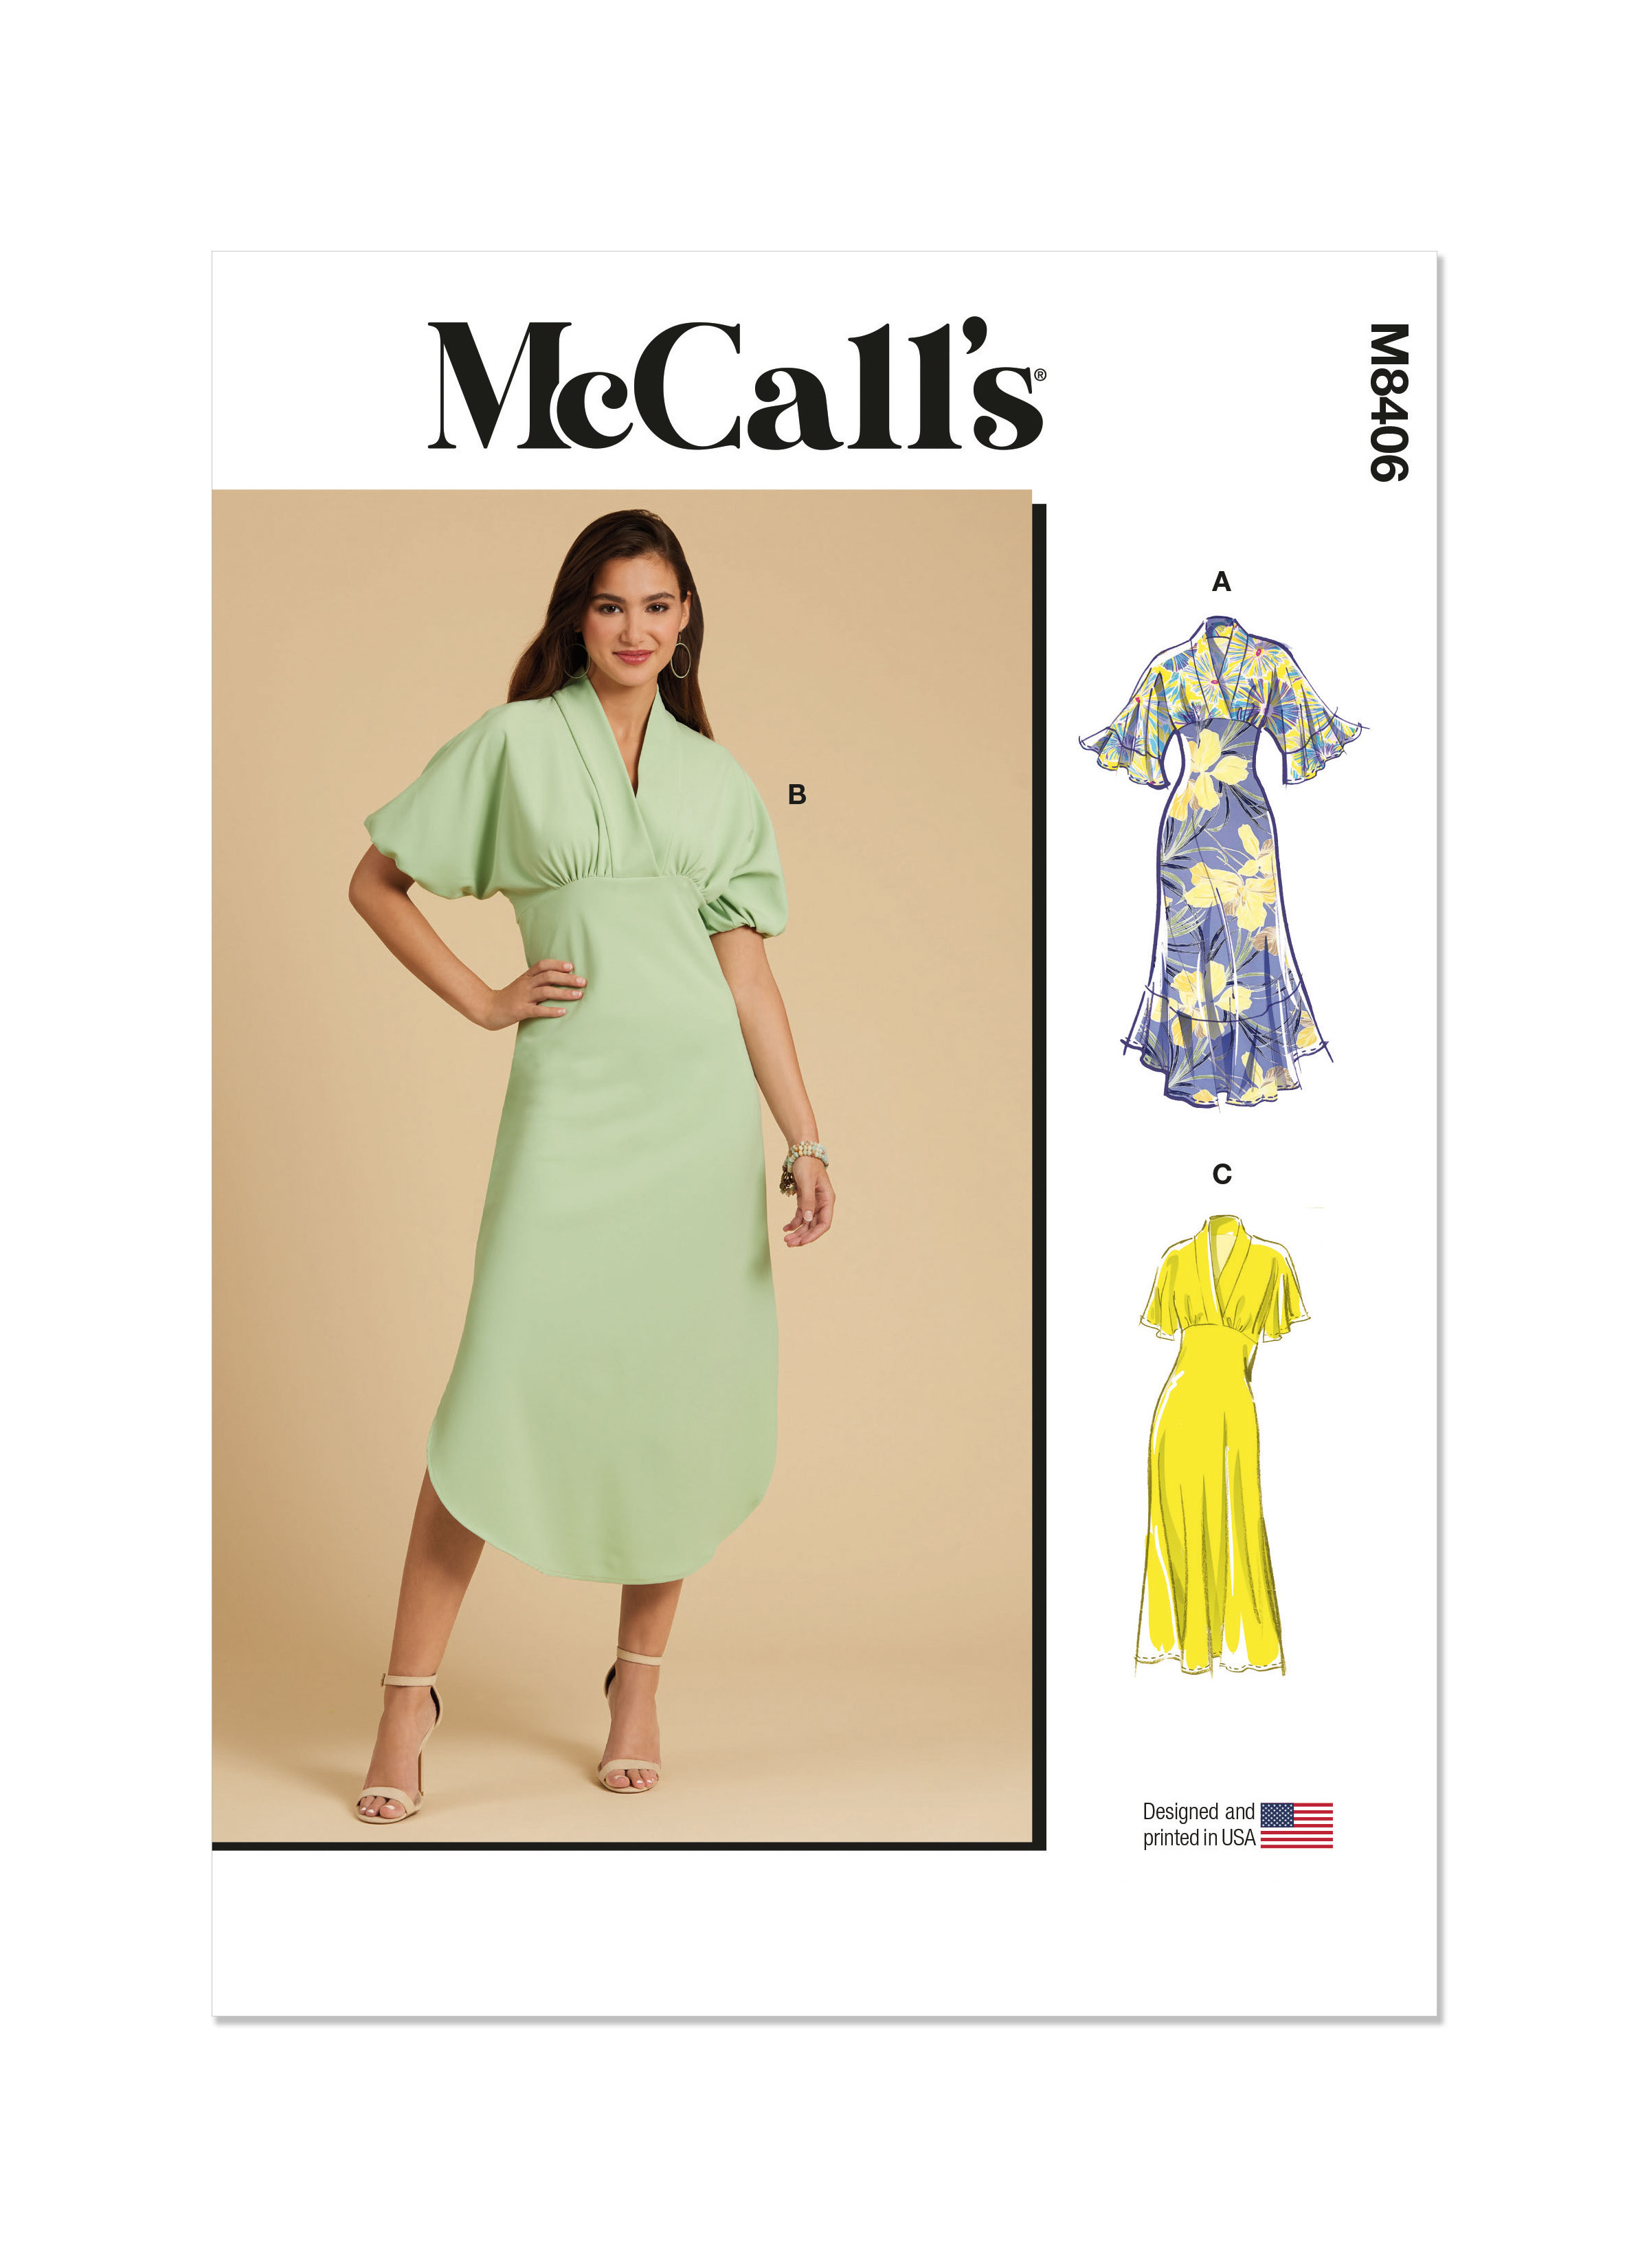
This is McCalls 8406.  Here is their description, "
It is McCalls 8406. They describe it as "Empire waist dress with sleeve and hemline variations has shawl collar neckline, narrow hem, bias skirt and invisible side zipper." 

First, this dress needs a muslin created first.  There are fit challenges here despite looking quite simple. For me, I needed to discover if I could even pull off a bias skirt with my hips and I could. But previous experiences at a heavier weight were otherwise so I was not going into this with confidence. I found the bias cut flattering and my husband really liked the fit, too. Next, there is a lovely empire curved rise to the bodice that under the arm dips down on the back bodice, very pretty. However, I needed  a bit of Full Bust Adjustment and it is not easy on this pattern. The dolman sleeves are very deep but the bust fullness comes from those gathers below. I did a cheater FBA by adding a 3/8th inch ellipse curve in the gathered area below the bust.  You can see what I mean with the red lines below. 


This pattern is fairly simple and should be a breeze, but my fabric choices and vision definitely complicated things. I also wanted to do the fabric justice so used techniques to achieve a more couture finish. It took time and three muslins. More on the muslin  process is two posts back  here. 

Fabric


This was made with Ambiance lining and a sequin net fabric from Fabric Place Basement in Natick, Mass., the burbs of Boston. The sequins are tiny and trailing and on a net that is stronger than tulle and that does not stretch, unlike the mesh nets so prevalent right now. I learned a lot about sewing with sequins and you can read it in my last post here.

Construction

The dress consisted of two parts. The bodice was dolman sleeves and a bias folded collar band. Under the arm would be the start of an invisible zipper installation that would continue down from the waistline another 10 inches into the skirt The bodice was underlined with the Ambiance and all bodice seams were Hong Kong bound finished.  Each pattern section was block cut, thread traced, stay stitched next to the thread tracing and then finally cut out. This was to make sure there was no shifting while cutting  and no bubbles between the fabric layers. Lots of handwork and fussing! Using silk  thread for the basting made things easier.


I made a change in the collar construction. I have discovered, in more than one project, that a large BIAS band collar changes direction of grain in relation to the body as it wraps around. In the three muslins, I always had a large wrinkle on one side. I decided to split the neckline band in half at the back neckline and put a seam there and then reverse the grain of the band. This way the grains would mirror match as the came around the neck. Big wrinkle eliminated! The collar went in beautifully and all match points were spot on with this pattern.  I made no petite adjustments to this pattern other than length. 


On to part two, the skirt.  On the pattern you see an exaggerated shirt tail hem. I liked that. My lace had beautiful lace bordered selvedge edges. I carefully cut them off to attach to the hem of the skirt. But, first the lining. It was easy to sew but I made the skirt too large. The top was a size six and the skirt was a twelve and way too big. It had only two seams , each side. I went back and took it in to a size ten and it was just right. You can see the original stitching in the seam above. You can also see that with these seams being cut on true bias, there is absolutely no ravelling. I made the decision to do no further finish on them. It would only add bulk and time. I'd been at this for a while now and wanted to get it finished. I have seen numerous vintage cocktail dresses finished exactly this way, of similar fabric,  and was comfortable with my decision.  I was using a size ten microtex needle but it still left holes. I think a finer thread would have helped as well but none to be found in this color.

Back to the hem. When I originally made the muslin I knew I did not want a full length dress. Below knee was fine but the shirt tail was deep. I moved the hem up before cutting by five inches. I wanted to maintain the shape of the hem and slit look. You can see how I did that here in this post.   I then went on  to deal with the edge of the net hem. I spent an afternoon attaching the border lace, about an inch plus wide, by hand, in a very weak gather, just enough to make the curve of the hem. It was hand basted on then machine stitched.  Looked pretty enough, but, alas, I had to deal with it again later. 

Next was dealing with the zipper, my most challenging situation. I had to transition at the waistline seam from a traditional installation in the bodice to one in the lining that was only in the lining and hidden by the netting so  it would still be invisible. Now, I have seen and worked on these often in formal gowns, but there has always been a heavy fluff of gathered tulle or organza to hide the zip in the lining below the waist, easy peasy. I had no fluffy gathers. I wanted to maintain a smooth line from the waist to hem, all the while having access and hiding the zipper in just the lining layer. What's a sewist to do? 

Very tiny snaps and Fabric Fusion adhesive to the rescue! I installed the invisible zip above the waist as per usual. I then folded the netting out of the way and continued to install the zip in the lining. I just placed my needle back in the zip area on the other side of the netting. Zip installed! Now to hide it.................I searched my notions and found some very tiny black snaps. I tested and found they totally hid in the netting. But they were so small I could not get them to cooperate with my fingers while sewing. Frustration! I used my forceps to hold them and a bit of fabric fusion to place them. I walked away for an hour. I came back and the snaps were stuck just enough for me to easily sew them on. 


First, I had cut my seam allowance on the net skirt extra wide to accomodate the zip. I then sewed it shut traditionally with regular stitch length in the seam and long basting stitches in the zipper area. The seam part was pressed open. The zipper part was pressed to the side to make sort of a placket. That is on the right in the picture. I cut a slit between the two. This netting does not ravel.That folded to the side seam will now become the placket and home to 5 teensy snaps.  


You will need to blow the above pic up to see what's going on. Red arrows point to the glue drying snaps. The rocks hold fabric out of the way. Once dry they were easy to stitch on. I then did this again on the other side with their matching snaps and then we were good to go. You can see it all transitioned smoothly, although it requires some serious bending to reach the little buggers and get them shut. 

I tried the dress on now that the zip was in. It flowed smoothly in that seam and I was pleased. I was not pleased with my dress. The length of the hem I had put all the lace on looked frumpy and the slightly ruffled lace edge made it look like lingerie.  Hubs totally agreed.  I shortened the skirt another 4 inches,  no lace ruffle edge and it looked much better. He agreed on that as well. I trust his judgement after all these years. But talk about adding more work. I had to shorten the lining too. 


I also discovered, as well suspected, that I needed shoulder pads, just some little skinny ones.  My shoulders seem to be drooping with age, a new development in that onward journey. The dolman sleeves really accentuated it. So I got to work. 


While I had 1/4 inch pads in my resources, I did not like how they shown thru the dress. I made my own. 


I measured the dress while wearing it to see how large to make these. I then laid out a layer of Fusi Knit tricot fusible interfacing. I cut a large shape and graduating smaller ones out of batting. I put a straight strip of batting, about an inch wide, across the pad. It did not extend all the way, just built up the middle. The Fusi Knit was then folded over and pressed to the batting sandwich. I then stitched very close to the pinked edge. I took a small tuck in the center of each pad to force the curve. I pinned them to my ham, gave them a good steaming and left them overnight. they made a definite positive difference on how this dress draped on my sloping shoulders. Don't be afraid of thin should pads!

In Conclusion:


This dress was a lot of work. All of that is of my own making and choice. As far as the pattern, here I will share something that I have deliberately held until the end. I found this dress EXTREMELY difficult to get in and out of. I have very narrow shoulders. I used the size zipper recommended. I installed exactly where the dot was for that purpose. It barely got over my shoulders. I have a very narrow torso,  you all know that. I can't imagine how anyone else could get in and out of it. If I made another here are my suggestions: 
* Run that underarm zipper a good four inches into the lower sleeve seam.  I can't see any other way to make it work otherwise. 

* Consider making this dress out of a knit. Then you will get the stretch for getting it off and on. 

* Last of all,  add a center back seam to the neckline as I did, and run the invisible zip to the top as you do have a center back bodice seam to work with. I think this is the best option. 

I love the style of this dress and would consider making it again, possibly in a knit. I like the bias cut of the skirt. If I made it again I would had a triangular godet to the upper sleeve seam, begining at the outer shoulder edge, to make a fuller sleeve. I felt they could use more volume.  I definitely recommend the pattern but with these mentioned caveats. 

******************************************
 I am on to my next project, the Imby Flowy top.  I am starting with a muslin. While digging in my muslin fabric tote, I found this and decided to play with it for my Imby. More to come...........Happy Sewing..............Bunny


Tuesday, August 18, 2020

Mimi G Style S8889 and pants


As soon as I saw Simplicity 8889, a MimiG Style pattern, there was something about it that said "petite" to me. I loved the detail, the high collar buttoned shut, the interesting hem band. I even liked the high low bottom edge, not my usual taste in hem finishes. It all just seemed a bit downsized for a petite shape. I also thought it would be the perfect foil for the rayon print pants I just made.  It would go well with some pale green I had in the stash. It would also allow the full length of the cropped pants to show. The sizing would  require a bit of adjustment for petiting but that was nothing new.  I will review the top first here and then the pants. 

The top

Fabric:  

This is made with a fabric that someone, can't remember who, gave to me. It looks like Brussels Washer Linen, or so I thought. Once I started working with it I realized it had a fair amount of Spandex fiber and that was all on the crossgrain. I DO NOT LIKE Spandex but it was in there and I was emotionally vested in the project so went with it. It was a pain to iron and at the end drove me nuts on the last horizontal collar stand buttonhole. ugh. I found it behaved like a linen blend on the straight of grain but had a springy bounce to itself as well. So, in the end it was OK but I would not have bought it. I thank whoever gifted it to me. The hemband, collar and placket were interfaced with sf 101. I bought a bolt of this for bag making and it was handy. It worked fine enough. If I did it again I would interface just behind the specific buttonholes as the three layers of cloth for the hidden placket plus the interfacing made for a lot of thickness. Add in the spandex spring and it was a bit thicker than I would have liked but it came out OK. 


Pattern:

This is where it got very interesting. This pattern has no darts. It is what I call a box top or box jacket style. If you are anyone who has a C cup bust or more you know a dartless woven top does something special. It hangs straight down from the peak of the boob as you see above. This extends the bodice out into space as you can also see on the dress form. Do you want to show skin? Wear a light cami as I will ? Does it flatter? Did you forget this style does this? Did you notice how this was hidden on the pattern cover photo?


 Here's my version:


See that skin peeking out?  You can also see the top trying to make a bit of a dart, extending out, and hanging straight down from my boobs. Do you see my flesh at the side slit? I brought that slit down an inch or so. It is what it is. I have a white chiffon cami I will wear with this next time. Don't get me wrong. I still really like the  top. What get's me is that I didn't follow my own often spoken advice to really read the pattern photo on the cover. Guilty.  I'm not sure I would recommend this pattern for a newer  sewist. The directions are excellent, very clear, nothing missing. It is a bit challenging on the step where the hidden placket meets the hem band but it is all laid out. The good thing is MimiG has a youtube video sew along and you can follow the entire construction if you like.

Fit:

I flat pattern measured and actually decided not to petite the upper chest of this pattern. It worked out fine. 

* I did an FBA adding  1 1/4  inches to the bust. I take a C cup. 

* I shortened the back length by 2 inches. Why? The hem it came with would have put the hem edge right at a full part of my hips and shortened my "leg look length". By raising it, it ends up in a more flattering spot for me.  Five footers fight for all the leg length they can get!  It is still very hi-lo.


Remember, if you shorten the length of the top, do it in the area above the hem band and below the armscye. 

* The last fit issue I dealt with was adding more room in the hips. I found I wanted just a bit more ease in the back so the easiest way was to just make the pleat deeper. I added one inch to the depth of the back pleat and to the hem band in back at the same spot.  


Construction:

This is a pattern where you really need to follow the directions. There were 26 steps. I liked the challenge of all the detail. I chose to topstitch most edges with the heinous "stretch stitch" , aka, triple stitch. It is great for topstitching,  giving a thicker look to this seam finish. For the less experienced sewist, the curved hem band meetings at side seam can get a bit futzy and there is always the fun of a traditional collar with stand in this pattern as well. That is the one place I veered from the pattern and did the Nancy Zieman method which you can find in my tutorials. It gave a nice crisp finish as it always does.


Once again I did my buttonholes without a buttonhole foot and they came out beautifully, except for the one on the collar stand. That part of the stand is on the bias. That and the stretch spandex insisted on a wavy BH. I ironed it away but it was definitely  not as nice as the ones hiding in the placket. I would use a lighter interfacing or just behind the BHs, next time I do a hidden placket like this. I cut down the pocket a 1/4 inch all around, the petite scaling thing. I didn't do the collar as I liked it as it was. The construction went smoothly, just following directions. They were well written. 

The Pants

Fabric:

The pants fabric is Telio Kahlo slub rayon in "seaweed" coloration. I was inspired by a pair of loose, cropped pants I saw Linda Lee wear on a video. Matching this print was a near impossibility. It would have worked just fine if I went the no match route. but my inspiration pant had a soft large print match around the knees and I wanted that. I found in this fabric a couple of large motifs matched but there were tons of random splotches that defied any sort of repeat. I went with the large motif I wanted to match and didn't worry about anything else.  Results below. 


This fabric, 100% rayon,  is quite lightweight, I believe in the low 4 ounce range. It is near sheer. Lee suggested lining these near sheer rayons with polyester mesh. I'd never heard of such but gave it a try. It worked out great and I will do that again. The lining is a relatively heavy fabric so hangs nicely, doesn't ride or stick to anything and does it's lining job well. There is a lot more information on the fabrics I used HERE.

Pattern:

For the pants I used my Sure Fit pants sloper to start. I did a simple gathered waist and cropped leg with a 1 1/4 inch deep machine hem, no pockets. I rarely do pockets in pants as they add bulk and width to my already wide hips. I love this style and it's soft folds on the hips and legs help even out my proportions. I do think a short top makes it work. 

Construction:

These pants were very very easy to construct. They were classic  drop one leg into the other pants sewing. I have seen people on youtube making pants in such difficult other ways. Most patterns tell you to do the leg in leg method. It is so fast and easy. I don't get it. Oh, well, to each his own. 


For these pants the toughest part  was establishing the print layout. Once I had that done it was pretty easy. I made the lining in the exact same method. I dropped the lining into the pant and basted them together at the waistline, not the seam.  I attached non roll waist elastic, cut 2 inches smaller than my waist, to the top edge of the pant with a triple zigzag stitch. I turned it to the inside,covering up the top raw edge of the lining. I stitched the bottom edge again with a triple zigzag. Done and so easy. 


The hem was serged , then folded to the inside 1 1/4 inches and stitched down at the top edge. I liked this deeper hem on such thin fabric. The extra weight of a deeper hem helps it hang better. Oh, I let this rayon hang out for several days before hemming.  The mesh lining was simply cut with a rotary cutter about an inch and a half shorter. 
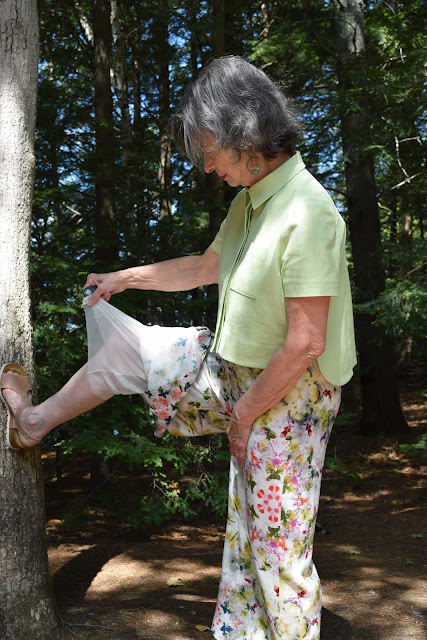

I love this outfit. I like MimiG's  pattern and it's clear directions.  While I wouldn't recommend this normally for a newbie sewist, if they want to sew along with MimiG's video on youtube, I think they can pull this off. I'm not crazy about my top fabric of these coordinates but I do have a lovely and short sleeveless top in olive green linen that I made a couple years back. It  goes really well with these pants.  I think I will get a lot of wear out of them. I liked this fabric so much that I went right out and bought another few yards of a different print but still Telio Kahlo slub rayon. it will become a tunic. I recommend this pattern with the caveat about the fit of the bustline that happens to box type tops. I will live with it and wear  a cami underneath. 

****************************************************************************


My husband and I have been devoting nearly every spare minute lately to painting our home. I'll post before and afters when we are done. This is a 1962 ranch house that was painted  mint green with maroon trim. I can honestly say I lived in a very ugly house.  You can see we've gone whole different route. We love how darker homes look in wooded settings and it worked out well here. This cedar sunburst was black with mold and had never been cleaned or treated since the day it went up. My husband got off all the years of crud and will be sealing it tomorrow.That will bring out the beautiful cedar even more. My job will be painting the last side of the house on the left, yay!  Almost done!........Bunny


Saturday, August 1, 2020

Rayon Slubs and Stretch Mesh


All my youtubing found me falling in love with a pair of cropped pants made from drapey rayon in a very soft but assertive print. I went on the search. The youtuber, Linda Lee, no longer had it in stock and it was no longer available. Left to my own devices and disappointment, I went on the search and decided it would be ok to just be a soft and assertive light weight rayon to make my vision materialize. It took a while but I eventually found this Telio rayon from Fabric.com, aka, Amazon, and put in my order. 


Above you can see the fabric spread out. At the corner that is cut there are big starbursts. While I think the pants would be just as lovely if this  fabric was not matched at all, I was determined to match it. It was near impossible. I found that I could match the two largest elements, the cutout star and the large green kaleidoscope design you see above, one or the other.All the other  bits and blobs were randomly floating on the fabric and would never match, a really interesting design. Up close it is a lot like a Rorschach test. 


If you click on the photo and look closely you will see why  it is called "slub rayon". I remember this fabric from way, way back in the day, albeit a bit heavier weight. You can see that some of the threads are thicker and give a bit of texture to this already interesting fabric. I liked that. Those are the slubs.  I am in love with this fabric but you have to admit this definitely looks like an hallucinogenic experience. I guess I'm channeling the Sixties......sigh....

This fabric did not give me much grief to sew. Before I started cutting, I pulled threads to get the straight of grain. I then cut along the pull. Once the straight of grain was established I went to the ironing board and sprayed the crossgrain edges I just cut with Niagara spray starch. I sprayed, let it soak in for a few minutes, patted down the bubbles, and then pressed, up and down. Don't iron this back and forth while there is starch on it. It will pull and wrinkle. Just do and up and down motion.  Once my pieces were cut out I went back to the ironing board and did this starch treatment on every edge of the rayon, iron with a dry iron and organza press cloth. Now all my edges were ready to be sewn.  I went to the serger and serged every edge. Seams would simply be pressed open with serged edges. 


Back to Linda Lee, who really knows her sewing, she suggested lining these wispy rayons with stretch mesh. Now she called it "power mesh". She described it and I did some searching  before buying. This is not the mesh one uses for compression in lingerie and swimsuits. That is power mesh according to my research. What you see above is stretch mesh. It is used in bridal gowns, dance and skating costumes, etc, to give the illusion of skin where there really is this fine layer of fabric. It can make a bride or a ballerina look like lace appliques are glued to their perfect bodies. Stretch mesh to use for lining a thin rayon? What the heck - I'll try it. I'm always up for something new in my sewing. I knew I had seen this fabric at the chains  in the bridal department. THIS IS NOT NYLON TULLE. This is made of 100% polyester and stretches every which way possible. It has weight. It is not floaty. It is drapey, just like the rayon and doesn't pouf. It is decently priced for a lining, ending up at 5.99 a yard in the end. 

Got the rayon slub fabric. Got the lining, Good to go. For a pattern I used my Sure Fit sloper once again and did a straight leg pant with it that has a gathered waist and cropped length, easy peasy. Now when Linda suggested her lining she said to just make another pant out of the mesh and drop it in, no other info. Easy enough.............uh....no.


I did some reading on the fabric and went straight to the machine and uses a zigzag. I ended up with very lettuce crotch seams. I pressed out a lot of that but it was not good.I then walked away, came back and tried to maneuver that into a French seam, using paper underneath, This was a bit better and you can see the crotch seam to the left and inseam going horizontal above. It's full of paper.I was scared  to play with it too much. It could do but this just was not nice. 


I walked away again. Upon returning I decided to just takes some long scraps and serge them, no paper.  Above you can see perfection. There was no waviness and the seams were strong and pretty. I went with simply serging the seams. 


They look really nice from the right side, too.  Now I can "just drop in the lining" and attach the pants and the lining and proceed. 


These pants are near done.Once again, I've decided on a coordinated outfit.(Yes, that is paint on my thumb.) This will make three in a row. I am enjoying the concept of having coordinates. I still don't see myself doing a swap, however, and that's another story for another day. I will share both pieces of the ensemble with you when  they are complete.I am using a Mimi G pattern for the top and excited about that. It may be from one of these fabrics. The pants are lookin' good. I would like to add that I LOVE the lining.It feels divine and just floats with the pants so nicely. More to come............Bunny


Monday, March 11, 2019

The Top of Many Colors Part One


Yesterday I spent 7 glorious hours working on the Top of Many Colors. I made my muslin first. Let's get a few things out there about muslin making. First, it is to establish fit, and maybe, just maybe, pocket placement and such, but really the focus is fit and not much else.  Because you are making the muslin all about the fit, it doesn't need collars, facings, buttons, zippers and other extraneous details. So don't do them. Pin it shut, don't do a zip! Don't stitch a hem, just pin. For this muslin, I did a front and a back, baboom! The whole process took way less than an hour and when it was complete I knew the length I wanted and the neckline changes, for the most part. I made my pattern and away I went. I did not muslin my sleeve, but simply measured from my shoulder bone to where I wanted the sleeve to end. When I tried on the muslin I measured where on the muslin that shoulder bone would be and figured the length from there. I proceeded to put the front and back of the top together. My muslin also told me that the neckline would fit over my head, a big concern. Now I knew I didn't need any closure and my top just got a bit quicker to make.

The next challenge was figuring out how to finish the neckline as well as how far I wanted to go with a lining. I definitely wanted some sort of lining but really wanted to keep it light. In her latest post here, Tany of Couture and Tricot makes a beautiful rendition of the latest pattern from BCN - Paco Peralta.  Her lining treatment really inspired me and I sort of replicated it here in my own fashion. Tany lined her top but simply left the sleeves unlined and the armholes beautifully bound and unattached.. The link will show you how she did that. I am going to do similar. The lining will be connected at the neck, I think, understitched, and hang freely in the bodice with thread chains in the side seams to keep everything secure. The armscye and hem will be finished with a shell stitched finish, a technique often used in heirloom sewing and great on lingerie. Here is a pic of the lining all cut and ready to go.  I've been using clips for a while but just started using them for patterns and really like them for that.


You've hear me many times talk about making samples. If there ever was a case for sampling, it is the shell stitch in combo with the poly anti static lining. Here you can see my beginning attempts. They are horrid, I agree. But, with sampling you keep playing until you get it right and eventually I did.


You can see some rows just aren't doing a "shell" effect. That is the work of the tension and to make this work I used a tension setting of 8. Other rows have me fiddling with width and length, just nasty, but I kept at it. I  eventually got it and when I did, I tried it out with matching fine machine embroidery thread as used in heirloom machine sewing.


You can see the pretty little shell effect in the row the arrow and the scissors are pointing to. It has a stitch width of 4.0, a stitch length of 1.5 and a tension setting of 8. The fine thread disappears into the fabric so prettily. The shoulder seam of the lining will be sewn  first. Then the armscyes  will be the shell stitched and once those are stitched the side seams will get a French seam. Last but not least the hem edge will get the shell stitch treatment, all a light and lovely secret hiding under the top.

My next session will have me making the lining, connecting it to the neckline and re-cutting the neckline a bit for a more attractive curve. The back neckline is very horizontal and needs a bit more shaping, IMO. I have really been enjoying this project and sharing it with you! I bet we all have lots of 1/4 and half yard pieces we could put to good use this way!............Bunny

Saturday, March 9, 2019

A Top of Many Colors

Courtesy Susan Eastman

The work of fiber artist Susan Eastman  caught my eye when it popped up in my Pinterest boards. 


I think what appeals to me is the short length. I  like tops that just skim the top of my hips, making my legs look longer!  I have loads of linens and lots of hand dyeds that I've done over the years. It's time to put them to use. As many are small pieces, this sort of patch work-y garment could really make great use of their uniqueness. I can also see this style in some woolens for winter with a black turtleneck, sort of sweater style but we're moving into Spring now so linens and cottons are my focus.  

I've started working out the pattern. I really liked the way Vogue 9305 fit me, but I had to get rid of the big slit and bias drape. I worked on that today and think I may have it. The other change I wanted was a wider, higher neckline, as you see in the two examples above. I've marked one out but I'm not sure where it will land. A muslin is in order to get this all right. A muslin for what's basically a fat tee shirt out of patches? Well, I figure if I can work this out well enough I will make it numerous times so a muslin is definitely in order. I also don't want to waste any of my hand dyeds on a garment I won't wear because the fit is off. The original 9305 has cut on sleeves as do many of the Eastman designs and the pattern also provides an extension for full 3/4 length sleeves as well. I will probably use three fabrics in the sleeves. Here are my fabric choices. 

Clockwise from 9 o'clock is a Kaufman linen/cotton yard dyed, a silk hand dyed by myself at 12, a 100% home dec linen in turquoise, a 100% cotton batik, and a gorgeous periwinkle Kaufmann yarn dyed. My dominant color, I think, will be the navy but we will see how it all lays out. The batik will be just a tiny accent as it is quite bold. 

I am debating exactly how to construct this. I really don't want exposed seams inside so a lining is in order but I've been pondering the "stitch and flip" technique. I get the idea, just have to work it all out in my head first so I have no surprises or I may just do a traditional lining. I am keeping this simple, no topstitching of the pieces or neckline, I think. I don't want this to look like a quilt. This shouldn't take long once I get going. 

********************************

Also in the queue are some desperately needed window treatments for our guest room. I haven't been fabric searching for that yet, time, and all, but that will happen right after the top. 

*****************************

Portrait update:  It's coming along. It's a project that really requires unbroken extended time once I get into it so it's good to have this simple top to work on in between. The top is a project good for "spurt" work, which I have more of than uninterrupted time work right now. I've worked out my fourth mouth at this point and figured out that the dimension I was seeking for the teeth comes later in the process. I was fraught trying to get the fabric to do what a combination of techniques is really going to do later in the process. Sometimes we learn slowly and stubbornly and that applies here. What's interesting is the feeling I get when working on the tee top by vivid comparison. It was as if I could do it blindfolded, manipulating pattern paper, adjusting for design, arranging limited fabrics to their best advantage, etc. it went quickly,my hands flitting around the cutting table and with fingertip muscle memory just moving unencumbered, great fun. Whereas the portrait really takes  a learning mindset, with muscle memory not even existing yet but trying to be imprinted. It can feel awkward. I do like the idea of having these two distinctly different projects going. They enhance each other's process. I should get a lot done this weekend. I think I'll hit the top first!.........................Bunny

Saturday, August 9, 2014

The lining solved and a flutter sleeve


I made my decision regarding the lining/underlining quandary with this knit dress. The nude lining will be treated as an underlining for the neckline, shoulders and sleeves, being sewn into the seams as if it were one with the fashion fabric. Then from the armscye down the lining and dress would be sewn separately and hang freely. How's that sound? Now that it is all done I am really pleased with the results. I put wrong sides together of the FF and lining for each of the front and back and proceeded per the start of the pattern. 

Clear elastic was stay stitched into the back neckline. Then it was  turned in on the 5/8ths seamline as the pattern instructed. I then topstitched it twice. After that I put some cotton selvedge stay tape on the shoulder seam line which basted the lining to the FF there.


Just to keep it real here, this is my cowl facing snafu. Just between you and me, ok? We really sew here and I don't try to gloss over my mistakes. Most of the time I read through a pattern once or twice before even cutting it out then it is pretty much put aside. This time it was a mistake.  I lay my pattern out on the fashion fabric and as soon as I cut the armscye out on the dress front I looked and just knew it was too short. As usual I lined up the hemline of the pattern with the bottom left of my yardage. I had plenty of fabric but to move both pieces, front and back, past that cut armscye to get the additional 15 inches would not work, no matter how I tried and I tried everything.  I walked away. I went back an hour later, looked at the fabric and immediately had my solution. All of the blue you see above is the inside facing of the cowl. No one is going to see that, right? By piecing the cowl facing, I could, with fingers tightly crossed, squeeze out enough fabric to get the lengths I needed for the back and front. This is a floor length dress. It worked and I am beyond thrilled. We really sew here, to paraphrase Emeril.


Again the lining is being treated as an underlining here. But I decided to cut it off at the fold of the cowl. I thought it would look "thick" otherwise. So the blue cowl facing you see will fold at the edge of the nude lining and be caught in the sleeve construction. I basted the edge of the lining to the FF so it wouldn't fall in and droop inside the cowl. I felt that was really necessary and it worked well. Once this was done the dress was put together at the shoulders with the cowl facing wrapping around the shoulder seam and giving it a really nice finish. 
******************************************

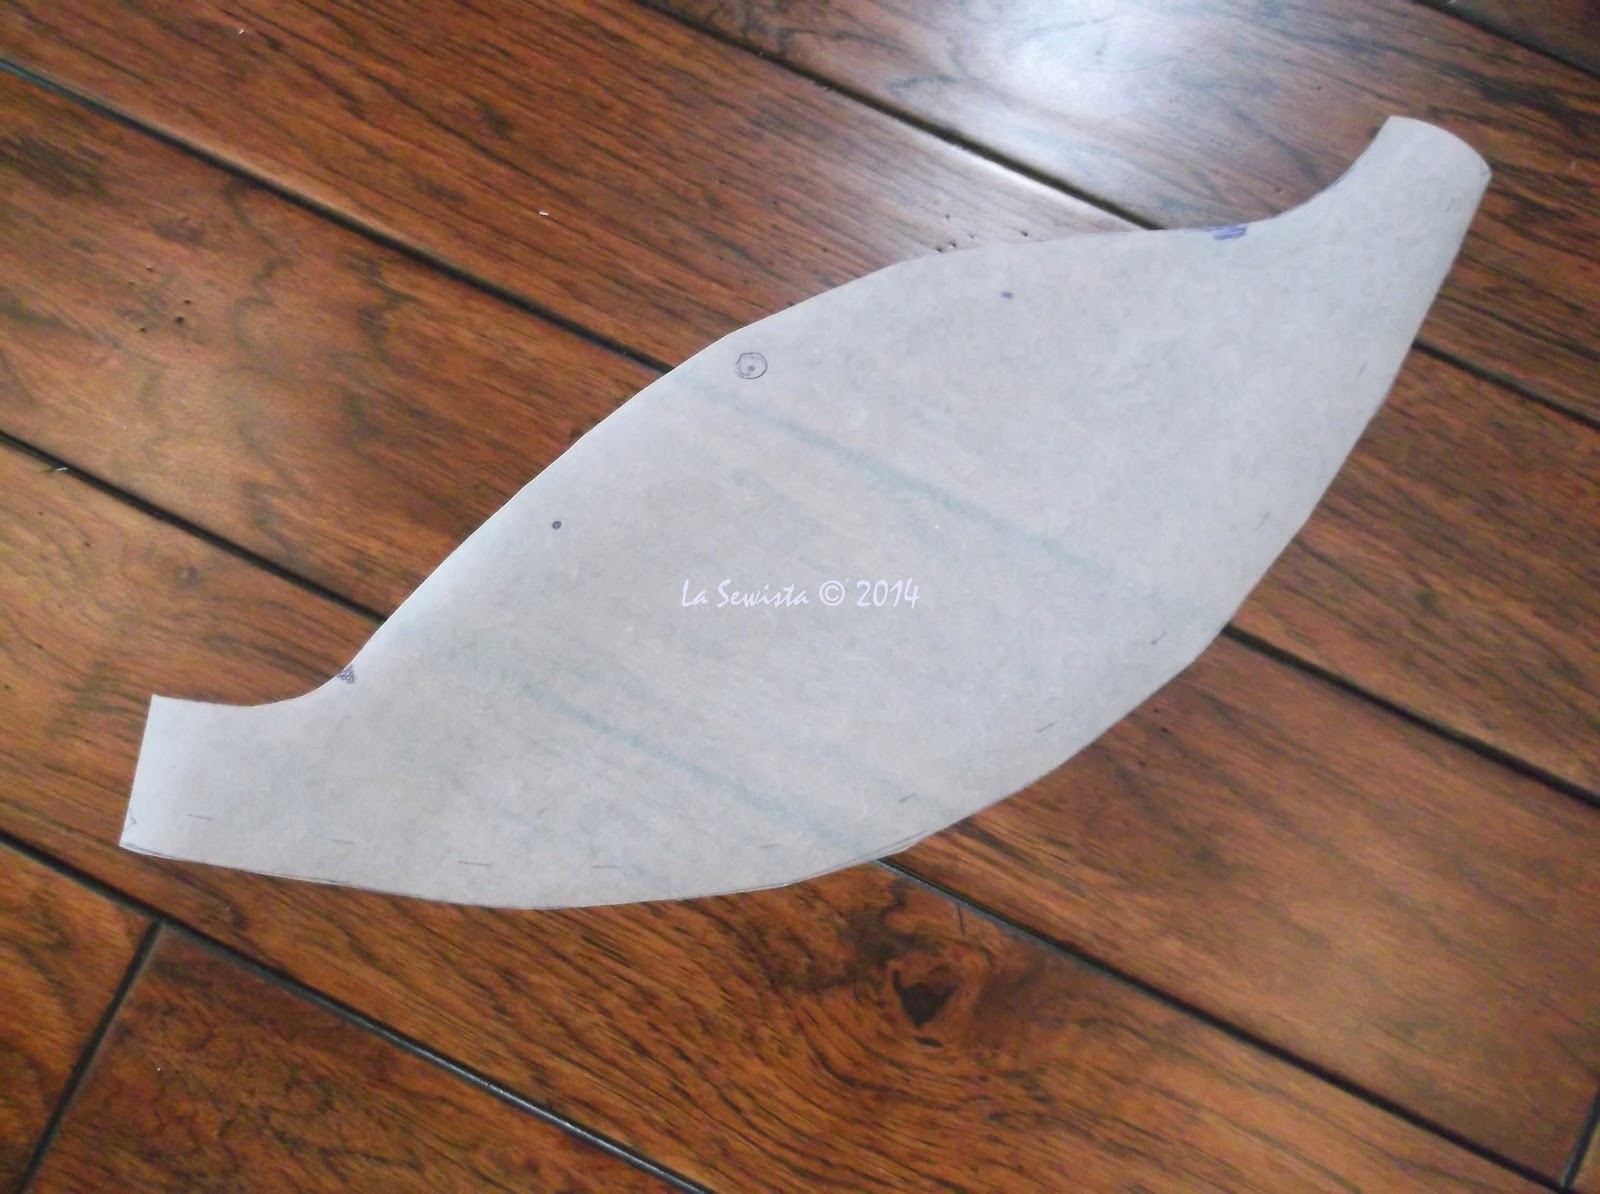
My next challenge was to draft a flutter sleeve, really quite easy. The sleeves on this dress would be faced with the nude lining. In the end it gave the sleeve a really nice drape and look. Here's how I made the flutter sleeve. I first took the short sleeve of the pattern and at the sleeve center and three more times left and right of center I drew a red line from the cap to the hem. These lines were one inch apart.  Most instructions out on the web show these lines continuing to the underarm seam. Don't do that. That contributes to excess floppy fabric in the underarm area. You really only want the flutter on the "top" of the sleeve where everyone can see it. This line was then cut from the hem to about a 1/4 inch from the sleeve cap edge. This gives you a hinge to keep your sleeve cap shape and still spread out the sleeve. 


I taped the top of the piece, at the cap, to the tracing paper. Each slit was measured and taped to the mat at 1 1/2 inches apart. When all is measured, spread and taped, draw the outline on your tracing paper.  

Mark all your dots and notches. I decided this sleeve was too long and measured back an inch and a half. In researching this sleeve project I found that a flutter sleeve that is too long can look EXTREMELY frumpy. So I cut this one back. Luckily, my friend is the same height as me so I was able to proceed without her on this length issue. 


Here is the final pattern with which I cut the two sleeves and their facings. I sewed the FF to the lining at the long curved edge and pressed toward the lining. I then understitched the lining. This gave me a really pretty, soft edge to the sleeve. This is a lot more work than one would usually do with a knit but I did not want this thin knit to look like a tee shirt. So I kept the finished edges clean of topstitching, at least everything except the back neck which needed it and looks OK. The dress has a softer more formal look this way. I would take pics but this dress is too large for my form. I will definitely get pics on my friend. 

After the sleeves I sewed the lining side seams together and then separately, the dress side seams together. It hangs and looks lovely and I am really pleased with the cowl. It came out better than I thought. That trauma of miscutting had me wondering but no more.  Next I'll put the sleeves in the dress and then bring it in for my friend to try on . I'll measure for the hem, sew that, and then it will be on it's way. I think she'll be the prettiest bridesmaid there..............Bunny

The Hanbok Vest

  I love this little vest. I thought about it for a long time. I am excited to tell you it's story.  Pattern: This is the Hanbok Vest by...