Sewing Vloggers

Friday, October 29, 2021

Covered Buttons, Vogue 1644


It seems like Vogue 1644, really a simple jacket, is taking forever. It sort of is. I have been down with a nasty head cold for about a week now. It's not covid, so no worries there but it is "rhino virus". Yes, the jokes ensued and I kept sleeping. I am sewing but it definitely is slow sewing this week. These buttons are the end of it all and they are a bit of a mystery to me.


This jacket is not lined or underlined. It simply has facings and interfacing where traditionally needed. I chose to finish all the seams and hems with a Honk Kong finish. It is a Kathryn Brenne design and I really like the simple look. What I don't understand, that you can see above, is why the buttons are sewn on the front and then the actual closures are snaps inside on the facings. I just don't see a reason for this. Being the first time I used this pattern, I wanted to follow the directions, my usual MO. I thought some obvious reason would eventually pop up but none has. If anyone knows of a good explanation, please share and I thank you ahead for that. 

With all that said I needed 3 buttons. 1 1/4 inch specified and that's what I searched for. I really did not want a showy button.  The fabric color is tough. It is oatmeal and a very dark navy, easy to mistake for black but black it is not.  In the end I decided on a classic covered button in size needed.


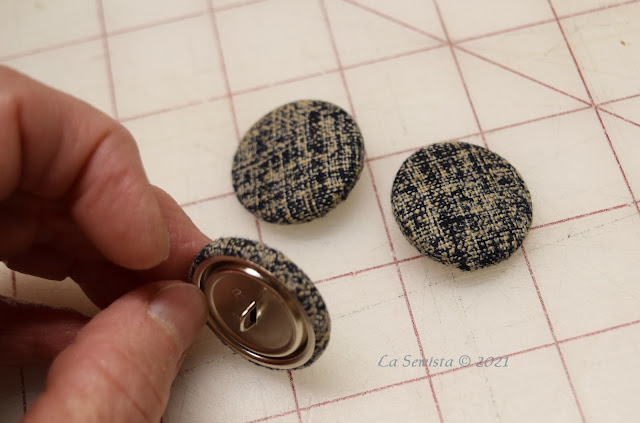
If you've never  made a covered button you can easily find them inexpensively at the chains. This is made by Dritz and came  from Joanns'.  They have two parts, the public side which is either a flat or rounded cover with a loop and a back piece with ridges and a hole that snaps into the domed cover, just what you see above.  The domed cover has nasty little teeth inside and your job is to wrap the fabric over the dome and get it to hook onto those teeth, evenly all around and without tearing any human flesh. Sometimes this is easier said than done. I've made a lot of these over the years and you probably have too but for our newer sewists here are a few hints to save you some aggravation.

*Nothing is more disheartening than to get that fabric all pulled snug onto those little teeth over the dome in perfect fashion and when you turn your button over to admire your fine skills you realize that you can see the shine of the metal dome through your fabric. Suddenly your idea of a custom covered button looks horribly cheap and you have to start all over. To prevent that from happening cover the back of your fabric with a layer of fusible interfacing and then cut out your button cover. Your packaging will provide on the back a template to trace for your perfectly sized button cover. Trace this out after you have fused on the interfacing. I then cut my circle out with pinking shears. Now I have a sturdy piece to pull and shove on to those tiny teeth and nothing will shine thru and cheapen the look. 


* Next you will need a few tools to get this job done with minimal distress. Trust me on this. I've been there. Your next step is a pencil eraser. This is actually recommended on the back of the packaging. You will pull your circle of fabric over the button dome and using your nail try to get it stuck on a tooth or two. Next go onto the exact opposite side of the dome and do the same. I know, this is barely stuck in but that's OK. This is where your eraser comes in. Now I went thru two brand new pencil's erasers and watched them break off. Instead find a pencil with the style eraser you see above. It is PERFECT for pushing the fabric under and into the teeth. Just shove that long edge of the eraser into the fabric and push under the teeth. No ripped nails! Now  work opposite sides once a side is a bit secure, just like stapling a picture to a picture frame. Once the fabric circle is secured on 4 opposite sides by shoving in that eraser, work the eraser all around getting the fabric in nice and snug. 

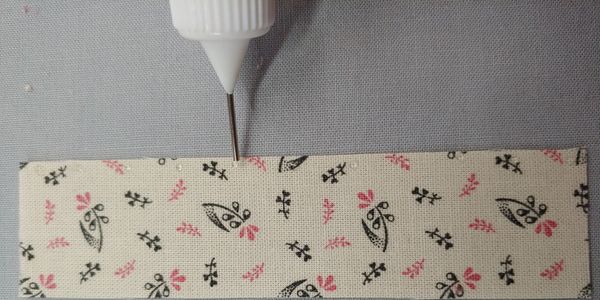
* The next tool , #2, you will use is the E6000 glue. I use this for everything crafty and sewing. Nothing separates this glue once dry. Put a small dot of glue along the ridge of teeth down below. No need to go all around or near the top edge, just a blop on two opposites sides. On top of this lay your flat ridged part of the back button cover. Set it up so the little loop comes thru the hole like you see in my pictures. 

* Don't even try to push this together.  Just don't. Line up the hole nicely and grab tool number #3, the small flat head pliers. I use these for jewelry making but they come in handy for lots of things sewing. Put your button inside the flat "mouth" and give a gentle squeeze on just a side of the button. It will usually pop in the whole button. If it just pops in one side, turn it a bit and squeeze again. If it went in correctly you will hear a definite click before you are completely pressed in. Done. Leave to dry overnight before attaching to your garment. 

According to my pattern I need 3 "medium" snaps.  I am not sure what size these are. They are a half inch wide so that sounds medium to me. I need to install them on the facings under the buttons. Like I said, I don't understand why. Hope this covered button tute helps you. I do enjoy making them, sewing snaps, not so much!.....Bunny

Tuesday, October 19, 2021

So not a planner, but.............


I am not one of those sewists who does modules or plans out their wardrobes. I am one of those crazy babes who is always looking for the next shiny object. Really, isn't that just as OK? It works for me. I see a great bottomweight, I buy it and then maybe find a top fabric and pattern that will be perfect.  Or I will get seduced by a print, and will move all of creation to fit it into my wardrobe.  Bottom line, I love textiles of all sorts and I fall in love with them and fit them into my wardrobe. When I was a teen I had a neighbor who designed textiles for a manufacturer in neighboring New Bedford. I forget how this arrangement happened but my mom became very good friends with her.  Next thing I knew I was cleaning her apartment, at the age of 14, for  TONS of fabric samples, hot off the looms. She designed them and had to run samples before the company would commit to manufacture. Some made the cut, some failed. Either way, she discovered  I was an easy touch and thrilled to receive yards and yards of fabric every week, straight from the mill, her original designs. all for the price of dusting and vacuuming her home.  A little swish and and swipe in an already clean bathroom and I was had. 

I never knew what Marsha would bring me. I don't think she even knew. But it all made me happy. I would have fabulous conversations with this 50 year old about fabrics and dyes and the process and I was only 14. We would talk about her working as a very young woman in the garment district in NY city and working her way up the ladder. I remember, that as a single woman doing business in a tough industry my parents often accompanied her on dinner meetings with international contacts. She said she felt "safer".  Bottom line, I will blame the incredible Marsha Shear and her amazing design talents as well as her mentoring of a young girl who loved fabrics for the fact that I just don't do "plans".  I am ready for whatever comes in my door to be sewn and I will love it, enjoy sewing it and will make it work in my wardrobe. That gives me joy. Thank you so much, dear Marsha, for inspiring me with those amazing bags of your original designs. You so loved color.


Fabrics paired of with patterns:


I am currently working on this Kathryn Brenne pattern that I have been drooling over forever. Once again I am using the Sevenberry fabric found at my LQS and sold by Kauffman.  This version, however, is an oatmeal and navy colorway despite it looking different in the pic. It is a Japanese fabric and 100% cotton. All seams are being Hong Kong'ed with the print fabric you can see peeking out, a Nicolle Miller design. I am near done and can't wait to share with you the completed project. This is a great pattern.  I am really pleased with the fit. 


My sister came up recently for a visit and we are now both retired and both crazy garment sewists. I took her to my Local Quilt Shop, which is amazing, and has some quality fabrics for garments as well. They get more all the time and are often of high end Japanese origin. We had a blast shopping and compare notes each week since. She is up in Maine. What you see above is a cotton knit with a tiny bit of spandex that I will make into Mimi G turtleneck. I think I will need to tighten up the collar and may ditch the corner detail for the first effort. I love her details but am on the search for a basic Turtleneck. 


I fell in love with this flannel the minute I saw the deep, intense  red. I recently had seen this blouse made up so that the upper right corner of the bodice had narrow ties to the shoulder seam and there were also ties holding up fold up sleeves. I loved the casual look and look forward to making this. I know I will get a lot of wear out of this pairing. I have so many bottoms that will work along side this top. 


Another paired fabric is this Telio rather Picasso-esque rayon challis that I will turn into this floaty top below. 

This one will  happen soon as I love this print and you can see there is not much going on in that department right now. This is a really interesting pattern. 


Unpaired fabrics:


I have been holding on to this fabric for a couple years now. I think it came from Apple Annie's and I am determined to sew it up for this winter. I am considering the Kathryn Brenne top in the second photo. It is an exquisite cotton velveteen. Sigh,,,,,,,,The fit on the Brenne pattern is wonderful so I am ready to go on this one. Next.....


 This is a very fine wale, I'm guessing 21 wale, picked up at my LQS, again. It is superb quality and of course I am thinking slacks, some pleated trousers. I have already made a slouch hat out of a small amount but there is plenty left to play with. I will probably just use my Sure Fit sloper. It really is lovely. 


Another piece of corduroy, this time no wale and in a tiny blue and black houndstooth check. It will be great for slacks or a barn jacket, aka, "Shacket". This is not high on the list but it will get used soon enough. 

The SCORE of all SCORES:

In accumulating fabrics for winter sewing I am not above considering all sorts of opportunities. The blue cord above was gleaned from a local church affiliated thrift shop. I haven't gone to GoodWill in sometime as I am finding their clothing simply donated fast fashion and other than household needs, their merch just doesn't interest me. Yesterday I needed a basket. I am doing a donation for a group I belong to and wanted a big nice basket for bargain prices. I went into Goodwill, straight to where the baskets usually are and there was ONE, just one basket! Luckily it was exactly what I needed and three dollars. So what they hay, I decided to pour thru the racks. I was on my last rack and something caught my eye. 


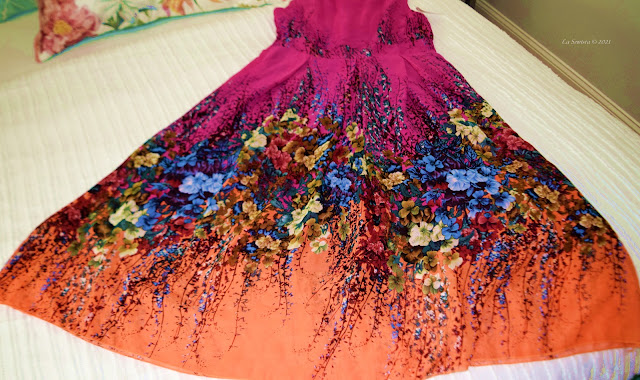
 This garment had Asian tags on it, even a price, all of which meant nothing to me


What took my breath away, however, was the fabric. I could be wrong and the label may say otherwise but it looked like silk chiffon to me. It just did not have that poly feel at all and was light as air . It was nicely made, fully self lined and held lots of yardage in an amazing border print. 

The fabric was gorgeous, the colors saturated and if ever there was a digital print this was it so the age of this garment had to be recent. This skirt would be close to my ankles. I have been mooning over similar digital prints from Lady McElroy lately and then this jumps into my line of sight!  It was meant to be. 


It is very floaty and would make a lovely top. At the least it could be an amazing scarf or two for gifts. It won't get forgotten. 

I have much to keep me busy all winter. Did you notice how nothing is part of anything else, no plans, no modules? Did you also notice how happy it all makes me feel? Life is too short for me to structure my sewing . I could care less if I have six pieces that make 36 outfits. I want amazing. .............Bunny


Tuesday, October 12, 2021

The Academy Awards of Sewing Tutorials

In recent years I've referred so many to videos and tutorials by some of our biggest sewing experts. These are people who have been editors in Threads magazine and been  published in sewing magazines internationally. Some have had their own television programs on sewing, lovingly videotaped on our VCRs in those early days before youtube and DVRs. Several have written  excellent books on our wonderful art form, the type that are staples in our sewing spaces and that we depend on so much for clear and solid instruction. Several had done all of the above or several as with genius often goes a lot of hard work, for years and for many, decades. Year after year they amaze us with their knowledge, skill, creativity and generosity. 

As I try to help newer or returning sewists I refer back to this group of "Stars" all the time and pass their brilliance on to those who need it. As I pondered putting the work of these artists, the links they are already sharing, into one convenient page, it dawned on me that these are our "Stars" and this post is my way of giving them their much needed Academy Awards of Brilliant Sewing and Teaching. I don't have a lot here because, as with any award, this is for the best and most notable. It is also for the most helpful tutorials. How do I know they have been the most helpful? The number of views they have gotten over the years, for one. Then there are the clicks on Pinterest as well as the immediate appreciation when offered  to someone I don't even know on a forum or FB sewing group. 

Our "Stars" share some commonalities. They are all great teachers. Not everyone who can sew brilliantly is a great teacher. These people are. They reduce the issue to the simplest terms in clear language. They are all warm or funny and with personality to engage us and they are incredible at what they do. I see so many youtubers and bless 'em, they work hard and many are quite good. I will leave it at that and just say they are not in this league. 

Without further ado here is the list of  tutorials, video-ed and posted by them or shown by others giving them full credit. May we have the envelopes, please?


     #1 - "Solving the Pattern Fitting Puzzle, Part One"

               Not a day goes by when I have been on the web and a sewist screams, is frustrated, or politely asks about how to get the right size pattern. These always generate a huge response which often just confuses everything. Eventually this video from Nancy Zieman is  the answer given by someone and will suddenly generate understanding, support and clarity. There is enough testimony about her fitting techniques to start a tent revival. So, if you wear a size 16 and don't get why that size 16 pattern doesn't fit you perfectly, YOU NEED THIS VIDEO from  sewing guru, Nancy Zieman.      


#2 - "The Kenneth King Hem". 

          This is a tiny hem that is easy and quick to do. You would use this in place of a rolled or baby  hem on any lightweight fabric but particularly on chiffons, lames, fine silks, etc. It is just the answer for prom gowns and bridesmaid dresses.  Anyone can do this without frustration. Years ago this blogpost had over 50,000 hits on this technique. I stopped counting at that point. I give Professor King full credit for this.  You can link to see my tutorial on his brilliant technique. I take no credit as I had nothing to do with it's creation. I would share his original link which was up for years but is now behind a pay wall.                Kenneth King Hem


#3 - "Sarah Veblen's Neckline Binding for Knits"

          Let's face it, we have all had the floppy, stretched out knit neck binding, maybe even a lot of them. Do they ever really lay perfectly flat all the way around? Well, once you learn Veblen's method, they will! This technique is such a game changer. Seriously, you will experience perfection with her method and it is not hard. Again, Sarah shows the clarity of a great teacher and you will achieve success with this video, 


This is not your Momma's divide in quarters and stitch. Follow Veblen's method and you will be forever grateful. 

#4 - "Kenneth King's Invisible Zipper Installation"


      For years I followed a well known and respected invisible zip tutorial. It was the simplest I could find. I still seemed to get that dimple, however, at the bottom of the zip. Professor King's video will rid your inviz zip installations of that dimple ever more! Again, he is an amazing teacher and this is clear and easy. You will need a notion to help but ever since I have used this technique my zips have been smooth seams and truly invisible. This is the only way to go and I have recommended this technique to so many and have seen many other sewists do the same. Rush to watch! 

#5 - "Kathy Dykstra's French Seam Tutorial"


     Kathy Dykstra, reknown teacher of heirloom sewing, can sew as well as  teach how to sew a French Seam in all of it's glory. I have seen French seams used to the sewist's dissatisfaction on corduroy trousers and other inappropriate applications. Use them in your lighter fabrics, your viscose rayons, your lawns and batistes. Remember the goal is the smaller the better, not wide, clunky seams, as you are inserting bulk in the seam tube to make the seam strong and beautifully finished. Watch Kathy's brilliance and gifted hands as she teaches you the correct method of using and sewing beautiful French Seams.   French seams by Kathy Dykstra   I recommend this to all struggling to get their French Seams right. 

To these five techniques and to Kenneth King, Nancy Zieman, Sarah Veblen and Kathy Dykstra, congratulations!!!  You have won, in my opinion, with these techniques and your great teaching skills the Academy Awards of Teaching Sewing. You help make a new generation of sewists better and even great. You are generous and you are gifted and we so appreciate that. Thank you and may you continue to grace us with your knowledge and skill.


Saturday, October 2, 2021

I made a Tabard, Vogue 1569!


Brrrr, it was chilly and breezy the day I took these pics and my tabard was just perfect for the weather. Think of a tabard as one of the placards outside of a restaurant that lists the special of the day or something similar to get you to come in. It is a front, a back, simple like a board, and a chain or strap to hold the two pieces together and prevent them from falling apart.  I have a lot to say about this pattern.

Pattern:


I did View B of  Vogue 1569, the longer length, but shortened it to be just above my knees. I love long sweaters and sweater vests. The longer view has pockets as well.  This was a fun  make, mostly due to my fabric choices and I am happy with those in the end. 

This is a Sandra Betzina pattern. Some of you may remember her sewing program on HGTV in its early and golden days, "Sew Perfect". I watched every time I could and taped it when I couldn't. Sandra is a very knowledgeable sewist. What I often found is that she was delightfully "ditsy" and a bit disorganized. I love her Power Sewing books but when I read them, I want to reorganize the content. It is the same for her patterns and their progression of instruction but that's me. What can I say? They are still great patterns and books. I will give you some suggestions further on about how I would make the next one to make for a simpler construction. 

There are lots of clear illustrations here. There is also clear emphasis on specific technique. Sandra is obviously a fan of Steam A Seam and the half inch wide type is used generously in the pocket and hem instructions.  Sandra often reminds you to press and pound your seams as well. 

The pattern was dated 2017 and the tissue used was really nice. It was bright white with vivid blue ink, very easy  on the eyes. It specifies knits or wovens and has a stretch ruler on the outer envelope, why I don't know as there really is no fit here. Two different fabrics are specified. One is for the center sections of the tabard, the "boards" as I call them. The second fabric is for the side fronts and backs and their facings, what I call the "flanges". My flanges and my boards contrasted as the pattern specifies. One thing I really liked about the pattern is how the flanges shape nicely to the curve of the shoulder. They are not cut straight at all. 

sorry, odd pose and extremely lightened to show the uneven tabs.

The two "boards " are held together by tabs but those tabs are at different levels. I don't like that and would make them level on the next one.  See in the pic above. Installing the tabs is the hardest part of the construction, IMO, so they will stay where they are. 

I love this design and it's uniqueness. 

Fabric:

For my center panels I used the back side of a "throw", a woven cotton number depicting a scene by Thomas Kincaid of people loading Christmas trees onto wagons and his every present home with wasted lighting from within. I did not like the artwork. What drew me to the fabric was the woven floats on the back side and their colors, lovely. I did a blog post on this and how I was going to make it work and you can read it here. 

The throw is fused on the back with Fusi Knit tricot fusible to stabilize the woven throw and hide the imagery of the Kincaid design. The little dot you see is the back side of a Chicago Screw. More on that............There is no interfacing specified anywhere.  You can see the pockets. They are made with a nice quality knit from my stash that I believe is rayon. You can see the topstitching showing thru.  The flanges are made from a really nice black wool flannel. 


Construction:

When the tabard was complete I tried it on and I liked it but something just was not right. I started pinching it here and there and it looked so much better with a bit of shape built in so I decided it needed darts. I decided to put them on the front and back in more of a dart at the top and a tuck at the bottom and I would put a copper Chicago screw in the middle for some intentional design punch, subtle and  major improvement. I think this was a petite issue and I needed this shape to make the 'boards" not overwhelm me.  Chicago screws are what I call wonderful whimpy rivets. They are for people who don't like rivets, like myself. They screw into places where you could use rivets and lots of bag makers use them. Chicago screws always work. Rivets can be unpredictable. You can get them from most purveyors of bag making products. 

I am going to go thru the pattern and point out some things that I thought could use some improvement or updating or organization. You be the judge. 

* Betzina suggests serging the edge of your pockets. By using a knit, I didn't have to. Knits don't ravel.

* SB recommends turning in  the  "Board" pocket edges 5/8ths of an inch, baste and topstitch. This leaves a raw edge. I serged my "board" pocket edges, turned and topstitched.    Further on when the flanges are attached the pockets are not addressed in how you sew around them, over them, thru them, whatever.  Be careful you don't sew thru them. Pin the tabard pocket edge out of the way when you attach the flanges and their facings. sew the flange to the pocket only, being careful not to catch in any of the opening on the "board" part of the pocket. 

* She has you attach the pockets to the front panel  with Steam A Seam. 


I used Acorn Seam Align. I placed down my pocket, lifted up the edge and laid down two or three dots, pressed the dots and did a few more until the pocket was pressed onto the panel. This made for an easy and stuck to the panel pocket that I took to the machine and topstitched no  problem. You can certainly use Steam a Seam tape but I found this very easy.  


* She has you trim the facing flange back to a 1/4 inch and then ditch stitch them the full length from the top side. I did not do that at all.  My flange facings were all understitched at the edge to the other flange. Then I catch stitched the flange facing to the panel the full length of the flange. I did this before finishing the hem corner. THEN, I gave the flange shoulder area a good steam press and as you can see above, or better yet, can't see, I ditch stitched in the well of the shoulder seam on the flange. It is all very secure. That little area is the only ditch stitching I did on this garment. 

* Here is how I would make big changes to the sequence of construction. 

   I would sew the collar.

   I would sew the shoulder seams of the back and front panels.

   I would sew the collar to the front and back panels. Set that aside. 

   I would completely sew together the flanges, tabs and flange facings, understitching the facings. Move the tabs to be even. When  you make the tabs, turn them so the seam is on the back in the middle, not on the edge. Topstitch the edges, not mentioned in the pattern. Be REALLY careful about the flanges, marking them clearly when you cut them out with painters tape and descriptions. It is very easy to mix them up especially if they are all black like mine were. Put "left", "right", etc. Doing it this way will make the tab installation so simple you will wonder why I mentioned it. Trust me . The way the pattern has you deal with the tab installation is like a giant, awkward burrito method. Once you have your completed side flanges all done with facings and tabs, simply attach the  outer, public flange to the front panel starting stitching from the shoulder seam down. When done, go back to the shoulder seam and stitch the flange to the back panel all the way down to the hem, just like you did in the front.  After that, do the other side of flanges, same method. 


Hems: When you get to the hems, SB has you enclose the facings and stitch around the hem and turn, like you would do a facing on most blouses. I ripped mine out after doing that. I found I got a much nicer finish by simply cutting the facing hem to about 3/4 of an inch, pressing it under and folding over the panel hems. I then hand stitched it in place and on the edge.  I ended up with a sharper edge than sewing and turning. 

In Conclusion:

I really think this is a great design. I don't think this pattern is for beginners,  but those of middle/average experience should definitely be able to handle it with a little thought as to the logical sequence of events and perhaps a bit of googling to get the best results. I really enjoyed making it and I know I will enjoy wearing it this winter. It will be perfect with a turtleneck and some leggings. I can also see it in some floaty chiffon and light linen for the summer. I think it's a great design that an experienced sewist can definitely work with and make something quite special. 
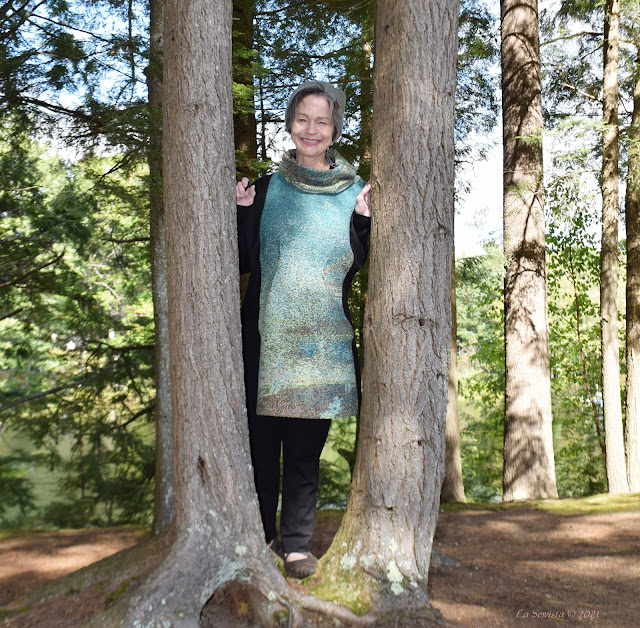

My sister came to visit for a few days this week. She just retired from a lifelong career as a high risk OB-GYN RN that included in its final days working with young moms in a covid clinic who had covid. She came to celebrate and we had a ball. She is as passionate about sewing as I am and we shopped and shopped and are ready to sew all winter with our purchases. I took her to my favorite thrift shop, my secret amazing little place in the woods that is always mobbed as a lot of people know this secret. We scored quite well but my favorite was this luscious oversized, wide and long and fringed velvet burnout scarf. It appealed to all the Janis Joplin inside my sixties soul. ....Busted flat in Baton Rouge, waitin' for a train.....................Bunny


It's All In The Details!

  A simple button down shirt, right? Oh, no. This shirt has a lot more substance than meets the eye and  is definitely worthy of discussion....