DH and I have been doing a great deal of hiking lately and I wanted to share some pics I took today. These are of Lake Meacham in upstate NY in the Adirondack Park. This is about 20 minutes from our home. We drive there, park, and get out and hike. This is one of our favorite places to go. We do about 5 miles around the edge of the lake. There is a wonderful campground there.
Tuesday, April 28, 2009
Adirondack Moments !
DH and I have been doing a great deal of hiking lately and I wanted to share some pics I took today. These are of Lake Meacham in upstate NY in the Adirondack Park. This is about 20 minutes from our home. We drive there, park, and get out and hike. This is one of our favorite places to go. We do about 5 miles around the edge of the lake. There is a wonderful campground there.
Friday, April 24, 2009
Ombre Wedding Skirt and Then Some.....
Design Dreamer asked how I was going to treat the back zipper opening. Els suggested see through snaps which I thought was a great idea and part of my original plan. When I did my initial sampling I played with some some selvedge edge and came up with my eventual solution, therefore, when planning my cutting I set up a center back seam with the two selvedges meeting. I did my triple zigzag to close the seam like I had done the other. In the area that would be the bottom of the back pseudo placket I stitched off the edge at an angle.
The lining had an invisible zipper installed. The unfolded right selvedge (from the right side) and lining were stitched into the waistband about an inch from the waistband short edge. This left and underlap for the waistband "hook".
The folded other edge was put in the waistband right up to the sewn short edge as you can see in the photo. When the skirt closed it stacked up perfectly so then I sewed on the hook and eye, the large, flat skirt type, also in the picture. This lined up so nicely and laid down well enough that I won't need any further snaps down the placket. I think the less fussing on this floaty fabric the better. You can still see the width of the placket changing to the narrow seam but I think this is the best solution. It floats and hangs well and stays shut.
The waistband required a bit of treatment as well. It is a layer of lining and chiffon with a layer of interfacing fused to the lining. To keep the layers from shifting I pressed the lining to get a fold on the upper waistband edge. I then put the chiffon on top and basted down this edge. I then pressed it all flat and basted all the edges together on the seamlines. I did not fold under the inside SA. I did not serge it either, all to eliminate bulk. Instead I did the same triple zigzag on the inside edge of the waistband and trimmed it back the same. Once the band was sewn to the skirt and folded to the back I catchstitched to the seam, all to keep the bulk down. The basting was removed from the folded edge of the waistband. I'm pleased with it all.
*************************************************************************************
Who knew?
I prefer Fray Bloc to Fray check as it goes thru the wash better in my opinion. I also like the much finer tip for application. It prevents waste and this stuff lasts a long time for me. I HAVE NEVER READ THE DIRECTIONS, just rip the package open and squirt. Did you know you were supposed to put it under hot water 3 minutes. Well, maybe you did. Sometimes my unbridled enthusiasm gets in the way of directions. I do know I felt like I had to knead the tube sometimes to get it out. So now, I will bring a hot cup of tea for me and a hot cup of water to the Fray Bloc down to the studio when I sew. Hmmm.........
**************************************************************************************
After I got three rows done on my smocking I decided I just did not like it.
It did not have enough texture and there was too much negative space. I ripped it all out and started over with a different plate, one that is much more dense. I have been stitching away and like it much better than the previous attempt. As ye sew, so shall you rip....................Bunny
*************************************************************************************
Who knew?
**************************************************************************************
After I got three rows done on my smocking I decided I just did not like it.
Thursday, April 23, 2009
Thursday Throwback
Got a Thursday Throwback here for you today. This jacket was entered and won an Honorable Mention in the annual Hoffman Fabrics contest Maybe in 92-93. In this contest, each year Hoffman Fabrics would pick a fabric, usually a nightmare one, that had to be in 2/3rds of the garment or quilt submitted. For whatever reason, I tried to put in so many techniques in this one. I started by quilting the fabric with metallic thread.
The edge has a braid of another Hoffman fabric that abuts piping of the same fabric. I like how that came out. My pockets, real ones, are faced shapes with the edge deliberately left showing. They back of the opening is fabric I made with bits and pieces of silky fabrics and assorted sparklies underneath a tulle layer and then stitched thru. The bottom of the pockets are a piped piece of silk. Overkill? Why I used fell stitches to attach the piping to the outer pocket gets me. Looking back on these things really makes you see where you have gone wrong.
I do like the shoulder treatment here:
I think when my kids find this one day it will be "what was she thinking?" But then again, they have learned long ago not to even bother asking that question.....Bunny
Tuesday, April 21, 2009
Simplicity 2912
Monday, April 20, 2009
In the Queue
My sewing time has cut down the past few days as DH and I have been doing some serious hiking. Today we did ten miles. We are trying to rid ourselves of the winter excesses and this is such an enjoyable way to do it. Isn't there anything we can do to make sewing burn a few more calories?......Bunny
Saturday, April 18, 2009
Grey Gardens
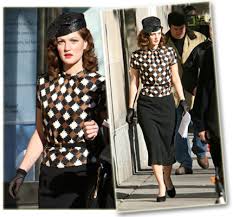
The reason I share all this here is because the fashions, from their youth and wealthier times, were just fabulous, as this cute little striped number shows. There were lots of great hats and designer clothing. I really enjoyed this visually. It was one fashion feast after another as they went thru their primes.
Thursday, April 16, 2009
Ombre Wedding Skirt, Style 2327
Wednesday, April 15, 2009
Organizing Hint
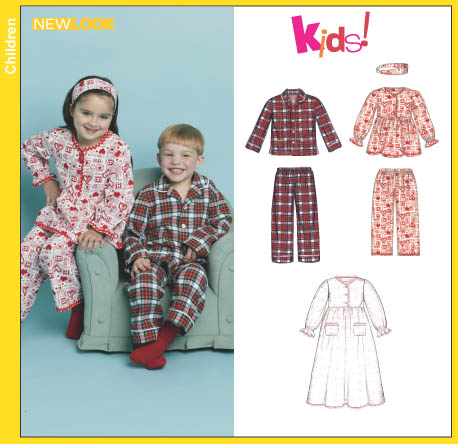
My copy of New Look 6421 has been well used. You can see I have traced off several different sizes of this pattern. My latest effort, the camo jammies, was the largest size so did not require tracing off. Now, how to store these patterns? You may have seen my tute on pattern folding. But this pattern is beyond that. There are three different sizes traced off. I fold them up laying the pieces in the largest piece of the bodice. Then it is pinned together as shown in the pic. I know I will be using this pattern again in the not too distant future for my little twin Zackie.
At Staples I found the envelopes that you see in the photo on the left. It is made of a product similar to page protectors. I had to buy it in a group of various colors. The envelopes are see thru and close, envelope style, with a piece of velcro. These envelopes are page size and clear. You can tuck in the traced off patterns as well as place the original pattern envelope in the front for viewing. I think this is a great solution for TNT heirloom patterns where you are tracing off various sizes over several years. I stumbled onto this solution yesterday while finishing up filing some tax information.
My next organization challenge are my magazines. I have a few ideas on that one.
************************************************************************************
Martha, of Southern Matriarch, has done an incredible tute on seaming bishops. She gives two methods, both of which she has used. This is the stuff of heirloom legend so check it out....Bunny
Tuesday, April 14, 2009
A Camo Jammo!
We have gone from frilly hats to macho jammies this week! My grandson wanted what he calls "army jammies" and of course Grandma acquiesced. This was made with a pretty heavy flannel from Joanns. It was washed twice and really held up well so props to Joanns for a decent flannel. I know sometimes they are not the greatest but what do you expect for 2.00 a yard? This one was a few dollars more. Anyhoo, this was made with my TNT jammie pattern, New Look 6421. I can't tell you how many times I have cut this pattern. I have traced off nearly every size at this point so need to do a little reorganizing to store it.
On these jammies I usually do piping on the sleeve cuffs, pants cuffs, CF, collar, and pocket. This time, I decided to pipe just the collar and pocket. I didn't want to add much more bulk to the fabric, just accent those two details. 99% of the time I do a mini piping, made with my pintuck foot. But because of the heft of the flannel, I decided to do a regular size piping and used my Creative Foot which worked very nicely. One thing unique about this pattern is that they have you slant back the piping as it reaches the bodice. You can see a picture here:
Tuesday, April 7, 2009
Vogue 8052 Hat
ETA: DH took some pics of the hat on his favorite hat model this morning, so I have done some delete, cut, and paste here.

My little retro hat is done. Today is a bad hair, no makeup day so I definitely would not do it justice. It does look cuter on but I find I also need to get a comb and stitch it in the hat so it will stay on a little better.
This was really fun to make. The fabric is an embroidered dupioni from the stash. Yesterday I did the stuffed, wired tubing. The pattern has you do the "double the cord needed and use the uncovered half to pull the fabric over the cord" method. Oh, did I say a 19 gauge wire goes in here at the same time as well? I fiddled and diddled way too long with this and decided to just do it "my way." That way was using a Fasturn tube turner. I had to cut more bias. I was able to stuff the cord and easily turn it at the same time. Then I folded the tip of the wire so it wouldn't be sharp and just easily pushed it up and thru the stuffed tube. Moral? Go for the Fasturn, forget the pattern. I also was a little paranoid before starting it "my way" and decided to stitch the tube a little wider. I didn't get tight firm tubing because of that but what I got worked just fine.
Next the pattern has you cover the wire form. It does suggest a "designer's tip" that to be authentic one might want to sew the cover to the frame. It doesn't offer any alternative so make sure you follow the "Designer Tip". The cover has to be on the bias with center front. That way it can be stretched easily where needed most. I pinned and pinned.
This looks pretty messy but it got much better. First I pinned the cover to the frame. Then I cut it back to about an inch. Then, very important, I basted the cover to the frame. Trimmed again. Then I was able to turn the hem and stitch it to the frame.
I would release about 2 inches of basting, roll and whip, then release two more inches.......Next the pattern has you cut out a circle on the center of the attached cover and glue a fabric circle in its place. The reason being? Ya got me. What I decided to do, because I wanted a smooth finish to the top of the hat, was take a circle of fabric, fuse two layers of fusible fleece to the wrong side, and then gather up the edges, yo yo style.


Now I could put the flowers on. I got a silk hydrangea from Joanns. The flowers were pulled off one by one and glue gunned to the hat. Thinking it looked just a little blah, I came up with some shaded organza ribbon. I made leaves out of the ribbon and tucked them here and there into the hat. I think the leaves really add to the finished product. What you see below is the view from above the hat.

DH gave me a wonderful camera a couple of years ago with all the bells and whistles. I only discovered a couple of weeks ago that I have a remote for it. Once I get cleaned up I am anxious to try the remote to take the pictures. I think a bit of manual reading is in order first..........Bunny
My little retro hat is done. Today is a bad hair, no makeup day so I definitely would not do it justice. It does look cuter on but I find I also need to get a comb and stitch it in the hat so it will stay on a little better.
This was really fun to make. The fabric is an embroidered dupioni from the stash. Yesterday I did the stuffed, wired tubing. The pattern has you do the "double the cord needed and use the uncovered half to pull the fabric over the cord" method. Oh, did I say a 19 gauge wire goes in here at the same time as well? I fiddled and diddled way too long with this and decided to just do it "my way." That way was using a Fasturn tube turner. I had to cut more bias. I was able to stuff the cord and easily turn it at the same time. Then I folded the tip of the wire so it wouldn't be sharp and just easily pushed it up and thru the stuffed tube. Moral? Go for the Fasturn, forget the pattern. I also was a little paranoid before starting it "my way" and decided to stitch the tube a little wider. I didn't get tight firm tubing because of that but what I got worked just fine.
Now I could put the flowers on. I got a silk hydrangea from Joanns. The flowers were pulled off one by one and glue gunned to the hat. Thinking it looked just a little blah, I came up with some shaded organza ribbon. I made leaves out of the ribbon and tucked them here and there into the hat. I think the leaves really add to the finished product. What you see below is the view from above the hat.
DH gave me a wonderful camera a couple of years ago with all the bells and whistles. I only discovered a couple of weeks ago that I have a remote for it. Once I get cleaned up I am anxious to try the remote to take the pictures. I think a bit of manual reading is in order first..........Bunny
Monday, April 6, 2009
Some Q & A
All of the comments on Sophie's Easter dress have been lovely. I really want to thank you all for your encouragement and support. It amazes me how this community makes us all better at what we love to do and I thank you for that.
If anyone is contemplating some bullion work, I have a fabulous book to recommend. I pull it out whenever I start some bullion embroidery. A book on bullions? Yes! It has such explicit, beautifully photographed pictures of all you need to know and more. I dig it out and open it up next to me whenever the bullion bug calls. This book is invaluable, having more info than you could ever imagine. It's a great addition to the embroidery library.


I have had some questions since I have posted the sailor outfits for the twins and Sophie's Toile dress. Let's see if we can do some answers here. For those not familiar with AS&E, it stands for Australian Smocking and Embroidery and is published by Country Bumpkin in Australia.
Martha asked which plate I used for the smocking. It is "Pretty Poppet" from AS&E #81. I love this magazine. It really sets the bar.
Cissie asked about my email. It is Bunnypep at wildblue dot net. Remove the spaces and change the at to @ and the dot to . You may get caught in my spam catcher so that could explain the difficulties but I know a few posters have come through.
Julia asked how I learned to smock. I taught myself for the most part, as is the case with most of my sewing. DD announced the birth of their little girl and I decide it was sewing fantasy time. I bought and read every book and magazine I could find. I did take a class with a lovely teacher named Kitty in New Hampshire at Peggy Ann's. I also joined a SAGA group when I lived there. With all my sewing, I research, I study, I sample, I try and try again. It is a constant quest.
Julia also asked about back smocking. Back smocking is done on the back side of the bodice. It holds all of those little pleats in line. For a long time I did a cable stitch to back smock and this would "split" the pleats on the front. Now I do an outline stitch, repeating each row exactly as the previous. This helps the rows line right up like soldiers. It is really important, whether cable or outline, to repeat each row exactly. That is unless you are going for the split pleats.
Gwen asked if I did any heirloom sewing for myself. I do try to transfer the techniques of heirloom to clothing I can wear myself and yes, they are definitely wearable. I love linen and it works up beautifully with pinstitching. You can see some efforts on this post.
Julia mentioned purchased piping. I don't think I have ever used purchased piping. It is just too easy to make your own. I had some difficulty finding the proper color fabric for the piping on Sophie's dress. I had to settle for a poly cotton blend to get the right color for the piping. It rippled like crazy no matter what I tried. I threw out more piping than you can imagine. The moral here: Use natural fibers!
************************************************************************************
I have started on my next project and it should be a quicky. Today I did all the wired, corded tubing for the Vogue hat I am making for the wedding. More tomorrow.........Bunny
If anyone is contemplating some bullion work, I have a fabulous book to recommend. I pull it out whenever I start some bullion embroidery. A book on bullions? Yes! It has such explicit, beautifully photographed pictures of all you need to know and more. I dig it out and open it up next to me whenever the bullion bug calls. This book is invaluable, having more info than you could ever imagine. It's a great addition to the embroidery library.
I have had some questions since I have posted the sailor outfits for the twins and Sophie's Toile dress. Let's see if we can do some answers here. For those not familiar with AS&E, it stands for Australian Smocking and Embroidery and is published by Country Bumpkin in Australia.
Martha asked which plate I used for the smocking. It is "Pretty Poppet" from AS&E #81. I love this magazine. It really sets the bar.
Cissie asked about my email. It is Bunnypep at wildblue dot net. Remove the spaces and change the at to @ and the dot to . You may get caught in my spam catcher so that could explain the difficulties but I know a few posters have come through.
Julia asked how I learned to smock. I taught myself for the most part, as is the case with most of my sewing. DD announced the birth of their little girl and I decide it was sewing fantasy time. I bought and read every book and magazine I could find. I did take a class with a lovely teacher named Kitty in New Hampshire at Peggy Ann's. I also joined a SAGA group when I lived there. With all my sewing, I research, I study, I sample, I try and try again. It is a constant quest.
Julia also asked about back smocking. Back smocking is done on the back side of the bodice. It holds all of those little pleats in line. For a long time I did a cable stitch to back smock and this would "split" the pleats on the front. Now I do an outline stitch, repeating each row exactly as the previous. This helps the rows line right up like soldiers. It is really important, whether cable or outline, to repeat each row exactly. That is unless you are going for the split pleats.
Gwen asked if I did any heirloom sewing for myself. I do try to transfer the techniques of heirloom to clothing I can wear myself and yes, they are definitely wearable. I love linen and it works up beautifully with pinstitching. You can see some efforts on this post.
Julia mentioned purchased piping. I don't think I have ever used purchased piping. It is just too easy to make your own. I had some difficulty finding the proper color fabric for the piping on Sophie's dress. I had to settle for a poly cotton blend to get the right color for the piping. It rippled like crazy no matter what I tried. I threw out more piping than you can imagine. The moral here: Use natural fibers!
************************************************************************************
I have started on my next project and it should be a quicky. Today I did all the wired, corded tubing for the Vogue hat I am making for the wedding. More tomorrow.........Bunny
Subscribe to:
Posts (Atom)
The Ray Pinafore, 2025's Epic Fail
Happy New Year and welcome to my epic fail of 2026. I guess you have to have one, right? This is the Ray Pinafore from Paper Theory Patter...
-
I love this little vest. I thought about it for a long time. I am excited to tell you it's story. Pattern: This is the Hanbok Vest by...
-
For some time now I have wanted to do a post on washing silks. My dear friend Ima gave me some lovely silks she picked up "somewhere...