Sewing Vloggers

Showing posts with label heirloom clothing. Show all posts

Tuesday, July 31, 2018

Lany's Dress Complete, McCalls 3063


Our little knock off is complete. It has been very hectic here, lots of company and we went back to New York state to tie up some loose ends for a few days as well. I finished Lany's dress the minute I got home. This is the first child's garment I've done in some time. My piping skills were rusty. I threw out the first collar then reviewed my own tutorial to brush up on my skills. The second one came out fine and if there is a soon third, that one will hopefully  be even better.

This was an easy sew. I tried to honor the details of the original but wanted to finesse it up a bit. I think I have done that. Rusty skills or not, this is much nicer quality than the treasured original which I posted about here. I know it will be greatly appreciated by Mom and her tiny new daughter to be.

Pattern:

I used the bodice and sleeves from McCalls 3063, a Christening gown pattern. It is a size "small" and the way the Big Four run in children's sizing, I would say a size one. The original dress was a three. The skirt is simply gathered. and connects to the bodice with a classic fold over placket. ( I really need to do a tute on those.) The sleeves on the pattern are VERY full, too full and too long in my opinion. I cut back the sleeves by reducing the top and bottom edges  a 1/4 inch, so a total of half an inch out of the height.  I didn't want to take a full half inch off one edge out of such a tiny garment and by balancing it out I think it gave me the results I envisioned. 

This pattern has lots of different Christening gowns including a cute one I have used in the past for a boy. Other than the too large sleeves, which I think is a sign of the time of the pattern, ca 2007, it is fine. 

Fabric:

This fabric was gifted to me by Kristine Balinski of Couture by Kristine. She has a great blog, BTW.  Some time  back when she saw a post about the original dress she let me know that she had leftover fabric from a project for her daughter that was almost the same and would I like it. Her generosity is so appreciated and without it I could not have pulled off this very special project. It is a near perfect match.  Thanks so much Kristine. You just never know how what we do affects people. It is one of those shoulder taps that reminds what waves we make with just a little kindness. 

The fabric is a 100% cotton. It is a white and very soft blue floral, so quite traditional. I may have a fuzzy memory but I think back when the original dress reigned, so did chintz. My own daughter's first prom gown at the time was chintz.

Construction:


I did make a few changes particularly on the sleeves. The pattern shows long lace attached to the bottom of the sleeves giving a 3/4 length effect to the dress. Perhaps that is why the sleeve was so long. Whatever the reason, I cut back 1/4 inch on the top edge and 1/4 inch on the bottom edge of the sleeve where it hits the cuff. I also cut the cuff width by half. The pattern specs 4 cuffs be cut, two being facings. This would give you a cuff twice the width of what you see above, too much. Instead I threw out the facings and  interfaced the remaining cuffs completely. The piping was then attached in a 3/8th inch seam and the cuff and piping were stitched to the gathered sleeve bottom. The bottom half of the cuff was folded to the inside and handstitched  to the sleeve, encasing the bottom edge of the sleeve and giving a clean finish. 

The most important thing I did to alter the appearance of the sleeve was to cut them on the true bias. There is nothing fluffing up the inside of the sleeves. I think because of the bias they fall in much softer gathers and truly doubt that I will cut one of these types of sleeves ever again on the straight. They have not been ironed either. The bias just lets them curve so sweetly. This was a lemonade out of lemons situation as I just did not have enough to cut the sleeves on the straight of grain but could accommodate the true bias, Yay!

The collar was changed. I struggled with the piping on the corners until I finally threw that out, too! I got out my trusty small Gutterman spool of thread and used it to trace a curve around the corners of the collar, much prettier than sharp corners. The original dress had a foofy little pink flower in the middle. My knock off has a pompom made of cherry colored silk charmeuse. 


Back to the original---being from the eighties, the era of all things logo, the dress's tag was on the front of the skirt. I did the same with my Bunny tag. Normally  on this type of garment it would have gone inside but again, just trying to mimic the original. 


I am really pleased with the back placket as it falls perfectly and was made with no grief. The bodice is lined. The skirt gets a simple bound placket. If you've made these you know they are prone to puckers at the bottom or not lying flat and being hidden. Seems this was one of the skills my fingers didn't forget, unlike the collar. I think I may do a tute on that in the near future. ( I haven't forgotten the knit hem tute, either. )

I cut the hem extra long and actually did not need all the length. I removed about six inches and that still gave me enough to have a double turned 3 inch hem which I catchstitched in. I love those deep and heavy hems as they make the skirt stand away a bit yet hang nicely with all the weight. In other words, they don't look cheap like a 3/4 inch machine stitched hem would have. None of that for this sweet little girl!

The seams were French seams. 


Conclusion:

I hope you have read two posts back to the original "Lany's Dress" post. If not, there you can find the story behind this cutie and why it is so special. Mom is two days overdue and we are all waiting. Once she is settled in with her new daughter, I will visit and bring her both dresses. I have really enjoyed making a garment that has been in my thoughts for years. Thank you for letting me share it's story with you all......Bunny

Monday, July 16, 2018

Lany's Dress


Grab a cup of your preferred beverage and bear with me as I tell this story of my next project, one in the making for over twenty years.


Let's first check out this little dress.  I didn't make it. It has been put away in a special place for a long time, however. Now it's time for it to come back out. The fabric is a basic soft cotton.


Do you see the proportion of the sleeve compared to the narrow bodice yoke? Huge and puffy was the way back in the day. . Notice how the collar doesn't meet at center front but that is quickly remedied with the addition of the pink satin rosette. I suspect the manufacturer uses pre made eyelet collars that got put on garments no matter the size. There's no top stitching and yes, it is sorely in need of a good press but I pretty much just unpacked it.


This pic give s better view of the "interesting" proportion. Huge buttons can often be cute on a more whimsical child's garment but here, with the delicate blue and white print, they are just too heavy.  Ugh. Again, notice how the collar doesn't meet at center back either.


In the logo conscious early 1980s, this label was put on the front skirt of the dress, but of course!

Now go back and look at the picture with the buttons down the back. Right about center, to the right of the dress, you will see on the wall a blurry picture of a lovely, smiling brunette. This was my sister in law, Terry. That's right, was. Terry is no longer with us, having suffered instant death from an aneurysm at the age of 32 in front of her young daughter and husband, my brother. I love this smiling picture of her as she smiled a lot and laughed a lot. We miss her tremendously. Life went on. My brother added an apartment to his home so my parents could care for his little daughter now that her mother had passed. It was a really happy arrangement but choices were made fueled by grief and wife number two came on the scene far too quickly. She removed any reminders of Terry and my mom found them in the trash. She pulled out the framed portraits from a big trash can and also this dress. Terry, loved this dress. It was sweet, feminine and the colors went beautifully with her daughter's dark hair and eyes. She had her daughter's portrait taken in it. It was her favorite picture of Lany and she never failed to mention that. My mom remembered that as she pulled the framed image from the trash. My  mom knew where the dress had been kept and was afraid that it would be tossed as well. She went into the home while they were out and took it out of the closet and brought it to her apartment. She packed the picture and the dress away. My mom and Terry were extremely  close and my Mom missed her terribly. The marriage to wife number two lasted six months, as one would expect in these grief driven situations.

Life went on. I never knew my mom had the dress or the picture. As my mom's health declined she called me in one day to her bedroom and went into her closet and pulled out the dress and the picture. She gave me the dress. My mom asked me to promise to give it to Lany when and if she ever had her own  little girl. I told her I would. I took the dress and packed it way carefully with my best sewing fabric. It hung with velvets and hand smocked Christening gowns for years, moving through three homes.  I took it out this week. Lany is due any minute for her second child, a girl. I will give her the dress......... But  more.........

This is where the incredible community of sewing bloggers steps in. Some of you may remember a blog by Kristine  B. from the Chicago area, husband firefighter, made gorgeous garments, particularly gowns. She no longer blogs but we still keep in touch. She now has a terrific business making formal wear and SHE IS GOOOOOD. Back when she was blogging something came up and I told her the story of the dress and even showed her a picture. Out of the heavens, Kristine told me she was pretty sure she had the same fabric or at least something very close to it. She had made her own daughter a dress out of it and would gladly send me what was left if I was interested. Her generosity will tell you what a lovely person she is.  She sent the fabric. It was extremely close to the dress fabric and I decided I had enough to make something work that could be worn by Lany's  own daughter, should she ever have one. For Kristine B.'s generosity, I will always be grateful and so appreciative.

Today I pulled the fabric out and dug for patterns. I will do a similar back opening yoked dress. It will have puffy sleeves but hopefully more in proportion. I will do a plain white linen collar and sleeve bands.  The bodice will be lined. The skirt will be fuller. If I can find the right color, there will be piping on the dress as well. The back will have buttons but a much smaller scale.I will make a size one. My plan is to give it to Lany for her new baby girl as soon as she arrives. My mom took care of Lany through my brother's tribulations and grief and the two were always very close until my Mom's passing. I know she will love to have this.

*********************

Back to the picture of the back of  the  dress... It kept twisting around and I took tons of pics. I never noticed that her mom's photo, on the wall of my sewing room, was also in the photo,  directly looking at the dress. I sure pray my hands pull this off and it goes well......Bunny


Wednesday, February 5, 2014

The latest fabrics and plans!


My BFF will be welcoming her third grandchild into this world shortly. This little angel did not come by her arrival easily but will  be here by caesarean in a couple of weeks. I always make something in a sixth month size as new moms just get tons for the newborn but maybe not so much a bit further up the road. A cute little smocked dress is planned.

My coat is done for the most part. I have found that since  where the facing meets the lining, where that colorful little strip is, well since that facing is not secured to the shell of the coat it BILLOWS and I am not likeing that. I can see this ballooning out on one of our windy cold days up here. So I have pinned together the facing/lining SAs to the shell/coat SA and will hand stitch them together. They are pinned together and it hangs much better now. So there is that handwork to do, make the belt, and fussy up a label. We will see what the weather provides for weekend pictures and hopefully will have those up soon.

My next big project will be jeans. I have to master them. We are allowed to wear jeans to work but they must be with nice shirts or sweaters, jewelry, etc, nothing sloppy or looking ready for floor washing duty. Since jeans do age and not look so well after a while I use a lot of them and need to get this down. I have taken the RTW Fast pledge and these jeans are a big priority. In the meantime I will have some fun with this little baby project. I always like to have a hand project and machine project going at the same time anyway. This little dress will be hand smocked. I haven't settle on the design yet and need to do a bit more research.
The fabrics are a quilter's cotton in a rose pattern that I just fell  in love with and two white eyelets from the collection. One eyelet is 24 inches deep so I cut off the some of the plain batiste to do my smocked insert. There will be an eyelet underskirt and maybe something special going on with the rose top skirt. I am not finalized on this design yet. I also have an allover eyelet that I will use for the sleeves . The eyelets match perfectly.

The pattern is McCalls 6015 and you see the area on view F that will be perfect for the smocked insert. I will do the little cap sleeves from view E. I love that type of sleeve on chubby little baby girl arms. There will be some white eyelet panties too. All in all, this will be vivid and fun to make so stay tuned for this one. At this point the batiste is backed with a tricot interfacing and ready to hit the pleater. I won't cut out the rest until that is complete. 

I need to make a muslin for my jeans. I picked up this stretch cotton twill at Joanns for that. I'll be using my Sure Fit Designs sloper and the Sure Fit DVD for jeans. I figure that fit won't be too off but if it is, this print will hide things so I can still wear them and get in some good practice on the topstitching, rivets and such. Then it will be on to heavy denim. Does anyone have a preference as far as the weight of the denim? I'm not a big fan of stretch denim so that will affect the fit also. I really don't want stretch denim. And the weights, it's looking like an 8 ounce might be right? Any input appreciated. 

This is the state of my sewing right now. I should be able to get a lot done on this weekend and am planning it. The next weekend, a long one, I will be travelling to the Boston area to get my implant finished, I hope. It will be great to see family and hopefully wear my new coat!.........Bunny

Wednesday, November 30, 2011

The Comfy Christmas Dress, Simplicity 2377

I think I accomplished my goal here, a comfy, soft feeling dress that says "Christmas" for my little clothing fuss budget, Carly. Here is the low down:


Pattern:  It is Simplicity 2377, a classic little look, what my grandmother used to call a "gypsy dress". There is no zip, buttons, or placket. The neckline opening stretches quite large and it will fit over her head with no little aggravations to her skin. The pattern comes with a tiered or plain skirt. I found the skirt pieces just not full enough but was also constrained by the amount of fabric I had as well as Miss Carly. I knew if I used all the fabric I usually do in an heirloom dress she would find it too heavy and not wear it. Been there, done that, saw the dress on the floor.

Fabric:  I took Carly with me to the big Joanns in Middleton, Mass, not far from her home. "We" decided, with great discussion, to use a cream stretch velvet for the bodice, an embossed stretch velvet for the overskirt, and a poly tafffeta  for the underskirt. My last post showed how I texturized the poly tafffeta to mimic the original texture off the knockoff. I like it better than the knockoff.

The dress is fully lined using "Posh" from Joanns, something you would never want to line a summer garment with. But, here I knew she would be wearing this in winter and probably coming and going in the cold weather. She also liked the way it felt compared to the other linings we put on our cheeks.


Construction: I basically constructed two dresses. One was of the posh lining fabric, full length. The poly taff underskirt was gathered and triple zigzagged to the lining skirt. It sits between the lining and the public dress. From the inside you can't feel  or see the taffeta, only the "posh" lining. All seams except gathering were French seams on the lining.

Then I constructed the public dress. This consisted of the cream bodice and just the overlay. To get the proper size of the overlay I just sort of measured what I thought was right and cut. I didn't want a "ridgey" hem on the embossed velvet. I did various samples and found the best looking and very solid technique was simply applying Steam A Seam Lite and folding up and pressing  over a terry towel, just on the 1/4 inch hem area. I really like how that came out and am glad I tried it. The taffeta skirt has a traditional hand worked hem.


I differed from the original inspiration also with the sash. I felt the white bodice was not balanced with the rest of the dress. You can see the inspiration dress here. I liked how the red velvet sash added length to the overlay skirt when just simply tied in the back. I decided not to put any embellishment on the sash, as in the original, and just move my embellishment up to the neckline which I think balances the design much better. I made a flower and leaves out of scraps, attached it to a covered piece of peltex, and put a brooch pin on the back. If she doesn't like the way it feels we can just take it off and maybe move it somewhere else but I really like it at the neckline.

Oddly enough, Miss Carly loves to wear hats and will often put one on and still have it on at the end of the day. So I made her a headband to wear with her dress. This I know she will love. Can't wait to see my little platinum blonde in these colors. One more in the holiday queue done, yippee!

My next post will show a tute on how I made the sash keepers for this dress. Stay tuned.....Bunny


********************************************************************************

While at DD#1" home over the hodiday, Sophie and I did a lot of beading. Because of aging eyes as well as tiny hands of hers, we weren't using beading needles. I forget what I used but they worked fine other than maybe 20% of the beads wouldn't let the needle go through. I complained to my daughter about how I needed to buy a bead reamer, what it was, and that a decent one was stupidly expensive, at least IMO.
The next day she came home from work and handed me the above and said, "Mom, I think you can use these for a bead reamer". Well, I certainly can! Ever have a root canal done and the roots get filed by progressively larger teeny files by the dentist? Tah-Dah! I now have root canal files to use a bead reamers on those tiny delica beads. Thanks, darlin'.....

I want to send a big Thank You shout out to Rett of The Gazebo House who kindly walked me through screen shots and how to deal with the  zooming right click on the Simplicity and Macy's sites. Thanks so much, Rett. Please check out her gorgeous blog. She is a Tablscaping Diva who hoards dishes like I do fabric....Bunny

Saturday, November 26, 2011

First in the Holiday Queue

 
These are the fabrics I have chosen for Carly's Christmas dress. I got them at the huge Joann's in Middleton, Mass. The off white and the embossed velvet are both stretch velvets, very important to our little miss who likes all things knit. The green taffeta will be the underskirt. All will be lined with "Posh" that poly lining from Joann's that you couldn't pay me to wear but as this dress will only be worn for short periods in cold weather its OK. Carly was involved with picking everything out and it all got rubbed on her cheeks waiting for opinion. Tha taffeta passed the test and was even softer after washing. This is not a garment with heirloom sewing or extensive hand techniques. Comfort is the big issue here and the Posh was the softest option for the lining and she approved. 

For the pattern I will use Simplicity 2377, a pretty close knockoff. The sleeves are longer and fuller than the original which is what I wanted. I really do think the original dress pic is probably an infant's size as it just sits so small on the hanger. The bodice will be the creamy velvet. The taffeta underskirt will be attached and hanging freely from the bodice lining. The embossed velvet will be attached to the velvet bodice on top. The sash will be a bit different than the original dress and hopefully cuter. I hope to get cutting today. I think this will go fairly quickly and the sash will probably take the most time. 

I am also hoping to make a headband with a big silk flower matching the sash or somesuch. Carly LOVES to wear hats and would definitely wear the band all day. Her Momma got her a pink wool beret with a flower on the side in Paris and she wore it to school and most of the day there. This girl's got a piece of my heart with her hat lovin'. 

I am finding with many of the "zoomable" photos out there on the web it is not possible to get the url info by right clicking. It just "zooms." Does anyone know a way to do this? ...Bunny


Friday, November 18, 2011

From the Field, achooo ooo !


This is my ninth night down in New England having already hit Cape Cod, NH, and now the North Shore of Massachusetts. All has gone well with babysitting duties but grandma has one heck of a non-departing cold. Hopefully it will be over with soon. I need it like a whole in the head!

Above is a dress I plan to knock off for Carly. It is from Zulilly who has some darling children's fashions. Carly is very very fussy about her clothes. She is a grandma way before her time choosing to live in non encumbering knits with leggings underneath. She detests any sort of label, seam or thread aggravating her prescious tender skin. She fell in love with this little dress before I even told her I had plans to make it. She picked it out as her favorite on my pinterest board. I promised to make it with soft fabrics so she would like it and she promised to wear it. Fingers crossed here. I engaged her in the washing and ironing as well as the cutting out of the pattern so she is buying into the project and is actually  quite excited. We actually cut out the bodice pattern and fit it on her. She cooperated and I adjusted. Its looking like a promising project.


While I brought my camera, I don't have my usb cord so can't upload on this strange computer. Fabric pics will wait till I get home. For the bodice I found an almost white stretch velvet, more of a velour, no "crushed" look. The red skirt will be a gorgeous deep deep red stretch velvet with paisley embossing. The underskirt and sash will be a lime-ish green taffeta, well maybe more Granny Smith apple green. It's not quite the traditional red and green and I like that. I can't wait to get home and start this project. I could start cutting it all out now and I even have the machine with me but keeping tabs on twins and big brother with no other "help" has got me booked full time. Add in a tiring case of the sniffles and you can see why it will wait till I am home.

Oh, the original Zulilly dress cost? Curently its on sale for 34.95 down from 80.95. Am I nuts? Should I just get out the plastic and spring? I don't think so. You don't make memories with plastic and appreciation can be even harder to come by. And the moments my grandaughter is enthralled with her grandma measuring her? Priceless! Besides, I think once you see the fabrics I have chosen you will agree it should have a "richer" look when complete, not 34.95. Can't wait to show you all...Bunny

Thursday, November 3, 2011

The "Butterfly Back" Dress is complete!

While this dress has bullions and a big bow, it also has a "butterfly back", an additional layer attached to the back skirt. It is cut on an angle using a "wavy" acrylic ruler and rotary cutter. I have seen this back treatment on a few designer coats out this year and thought it would be a nice feature to translate to a child's dress. The two "butterfly" pieces are slightly gathered  then pleated with a couple of large pleats. They are then treated as one with the gathered back skirt. The end of the "tail" is embroidered with several bullion roses and a few are placed along the wavy edges as well.
The front of the dress is pretty traditional. It has a center panel of smocking done on the horizontal and princess seams. I draped little Sophie on my last visit and got this bodice all worked out. Once the smocking was done I wanted a bit more length in the panel so decided to add the ruffle at the top.

 Pattern: Other than the sleeve, and I truly don't remember where I got it from, the design is original. I was inspired by this Kate Spade trench with its back bow and panel.
                                             and Kathy Dystra's gorgeous pinafore from AS&E. Some of the details were worked out as I went along as is often the case when working out your own design.

Fabric: The fabric is a quilting cotton from a new to me quilt shop I discovered this summer. There are two separate yardages, the allover print and the stripe. It was a pleasant challenge to figure out how to work out the print. The only thing I would redo on this is maybe cut the back butterfly panel on the bias to give it further emphasis. The piping and ruffle are from a dark red silk dupioni. I think it is the perfect foil for the gray. I used DMC floss for the embroidery and this time I am happy with the colors I chose.

Construction: The Butterfly Back panel has a baby hem and assorted bullions here and there. It is in two sections so that it could accommodate the placket which I showed how I did in yesterday's post. The bow is interfaced with bias cut hair canvas.

For buttons I used vintage mother of pearl buttons. The bow is attached on the left with some tacking stitched and on the right with fabric covered snaps. This way it can be opened to put the dress on.

One Christmas dress done. Audrey has several occasions where Sophie will wear this dress over the holidays.  I am on the hunt for fabric for one for Carly now. I will need some white velvet and hope to pick that up while in NH in a couple of weeks. I have lots of fabric shopping planned for that trip. Hopefully I will find all on my list.
********************************************************************************

Since I completed the dress yesterday I have been pleating away on strips of silk. I have also dyed quite a few. These will be used for more Christmas presents. More to come on this.

Next project is a window treatment for Audrey. Back with more soon....Bunny

Tuesday, November 1, 2011

The BB Dress, near completion

The dress just needs a hem and a good press. I should have it up tomorrow. Today I will share a couple of construction details. Above its the wrong side of the bodice. On the left is the back side of the smocked insert. You can see I fused interfacing to the back of the insert fabric before pleating. This helps plump up the pleats. I was limited in the amount of fabric I had and while I thought I had enough the interfacing just helped with a little more insurance. So when you want your pleats thicker with less fabric, FUSE.  On the right side of the pic you will see the side bodice. That is also fused with interfacing. I find when you have an insert, particularly if you have used piping, the adjoining fabric needs to be interfaced to hold up to the weight and stiffness of the piped insert. It helps prevent ripply seams along the join of insert and bodice or yoke.
Here you can see how I understitched the neckline seam. The piping adds bulk.The seam is graded and then understitched with a triple zigzag, a Nancy Zieman trick.
Above the waistline the bodice closes with buttons. Below the waistline it has a placket. On the other skirt seams I used French seams. On the CB seam of the skirt I used serged seams. This is pressed open and a cut is made to the seam line where you want the bottom of the placket to be. I cut the serging off of the placket seam as I didn't want the bulk or show through when pressed.
I cut a piece of fabric one and a half inches wide by the length of the placket, nine inches. The placket piece and the placket seams were placed right sides together. I start by sewing a half inch either side and across the clip. Then I sew the rest of the seam. It was then trimmed and graded. You can see how smooth it is.  The placket piece was folded and pressed to make a finished edge and then hand stitched down.
 

Once it is hand stitched down and pressed in place it all smooths out as you will see on the next post.

*******************************************************************************
I organized my interfacings. They are in a white trash bucket. I modpodged fabric to the top edge of the bucket. Each roll is labeled so all can be found quickly. I like the way it looks. Bit by bit I am getting things organized and changed in my little studio. On my next trip south I will hunt out some fabric to slip cover my office chair. I have figured out how to take the behemoth apart and it should be pretty easy to do......Bunny

Saturday, October 29, 2011

The BB Dress Bow

This morning I finished the bow for the back of the dress. It' an important feature of the design as you will see. I have decided to also do some additional embroidery on the BB part of the dress so it will be a bit longer before the full unveiling. Hmmmm, what's that BB stand for?
The bow is interfaced with a hair canvas that has been preshrunk. The HCanvas is cut on the bias. This will be attached to the back of the dress with a few tacks on the left and on the right with snaps so it won't interfere with putting the dress on and off. No big fussy sash and bow. Sophie is getting a bit older and this tailored bow will be more appropriate I think. Now to go work on the BB part. ...Bunny

Friday, October 28, 2011

BB Dress Sleeves

I am determined to finish the BB dress today or early tomorrow. Then it will be moveon.bunny. There are a lot of gathers  where the sleeve meets the sleeve band. To space them out properly I used my oaktag pattern piece, aka template. Little clips came in hand to clip the ends down and then spread out the gathers evenly. I have one row of gathers (2)  riding each side of the 3/8th inch seam line, NOT on the seam line. This will allow for more even pleats that stand up nicely.

 
Next, I lay a strip of Wonder Tape to one side of the piping. The ends of the piping get snipped off to fit. I can now remove the sleeve from the template. All is to the correct size. The piping gets sewn down but not snug up to the cord, maybe a couple of needle widths away. Then the band is placed on top. Yay, it fits just right! Flip the pieces over so you can see the stitching line you just made to attach the piping. Stitch the band on going a needle's width closer to the cord. I find an edge stitching foot can help here as you just run the blade down the first stitch and move your needle one click to the left towards the cord. Now inspect your work. Do you see what I see? 

Yes, I have already ripped out a section of stitching. Do you see how the print snuck out of line? That looks nasty. So I unstitched, pulled the band back to where it was supposed to be and stitched the line again. It worked. My point here is something I have found out about piping that nobody ever mentions. After stitching you must inspect your work. Is some fat, some thin? More than likely it is. Even with today's great machine  feet I still almost always have to do some adjusting to the width of the piping. Don't get mad and walk away. Just expect it and just redo it. To me, if you want tiny piping you need to work at it till its just right. So inspect and redo. That's the piping game. Now I know some of you, I won't mention any names, can do it all perfect the first time around. But for us more mortal sorts this is the reality. I also find piping requires slow sewing so don't do this when you are in a hurry. I love doing piping and sure hope I haven't discouraged you. Now two sleeves are complete and it is back to my cave to keep moving on....Bunny

Sunday, October 23, 2011

The BB Dress , #5

 
Here is where we are with Sophie's BB Dress. All smocking and embroidery is complete. The insert will be hand then machine stitched to the bodice side panels. Piping is made and installed on the bodice. There will be more on the sleeves and back. For the bullions I used a solid floss for the centers and first ring. The next bullions were made with a combination of the original floss choice and a variegated deep red floss, one strand of each. This helped give the flowers a bit of dimension. I did not want this to go the pink colorway. The bullion roses needed to match with the silk of the piping. 

I had an "aaack" moment while stitching the piping. I got one section on the insert and went to snip a wayward thread with my pelican billed scissors. Wrong choice! That damn pelican took a bite right out of the piping so this needed unsewing and a total redo. All is well now but I did have a walk away moment. 
******************************************************************************

We have had great company the past several days  and a wonderful visit with them. They left this morning and now it is back to the regular routine which you know includes lots of sewing. I have SO MUCH in the queue. It will get done, it will get done, it will get done.........Bunny

Wednesday, October 5, 2011

Much in the Queue, S2771 and S2284

Yes, its been a few days since I have posted. I have worked through more of the same "cushion" work so did not feel I  could post anything you hadn't already seen. I  have also been working away on Selena's Bishop and that should be completed and up on the blog tomorrow, so thanks for your patience on that one. I've also had some local client work as well as some big issues in DH's family so it has been hectic and not much time to focus on anything new, BUT I DID! Oh, throw in how we need to prepare for winter, seriously, up here and you can see why not as much has been completed or started around here. Monday, our plan is to get all cordwood possible stored in the house ( a lot) and more stacked outside. Gardens need to be dealt with as well with much needed cleanup. 

Now that all my disclaimers have been laid out on the table here is what is coming up. You can see on the cabinet door a muslin bodice and separate sleeve. I will bring this down to New Hampshire this weekend to fit on Sophie. I already know that the sleeve is big. It just looks it, maybe too full. Once this is fitted and I am back home I can get going on her Christmas dress. I am really excited about it as it will sport some very on trend aspects despite being an heirloom smocked dress. More to come.

Also on the cabinet is the pattern I will be using for the boy's jammies. I have decided this will now be my go to TNT for the boys instead of the traditional New Look with its collar. Why? I do love that pattern but when I see the boys in the jammies the collars are just hither and yon and could benefit from a good press. A good press for jammies for little boys? No Way! It's just not going to happen so when Grandma Bunbun goes to visit they look a bit sloppy in their granny mades. This Simplicity pattern,  2771, has no collar and the piped facing look stays looking fresh through lots of wearing. So 2771 is my new TNT go to for the boys. 
 
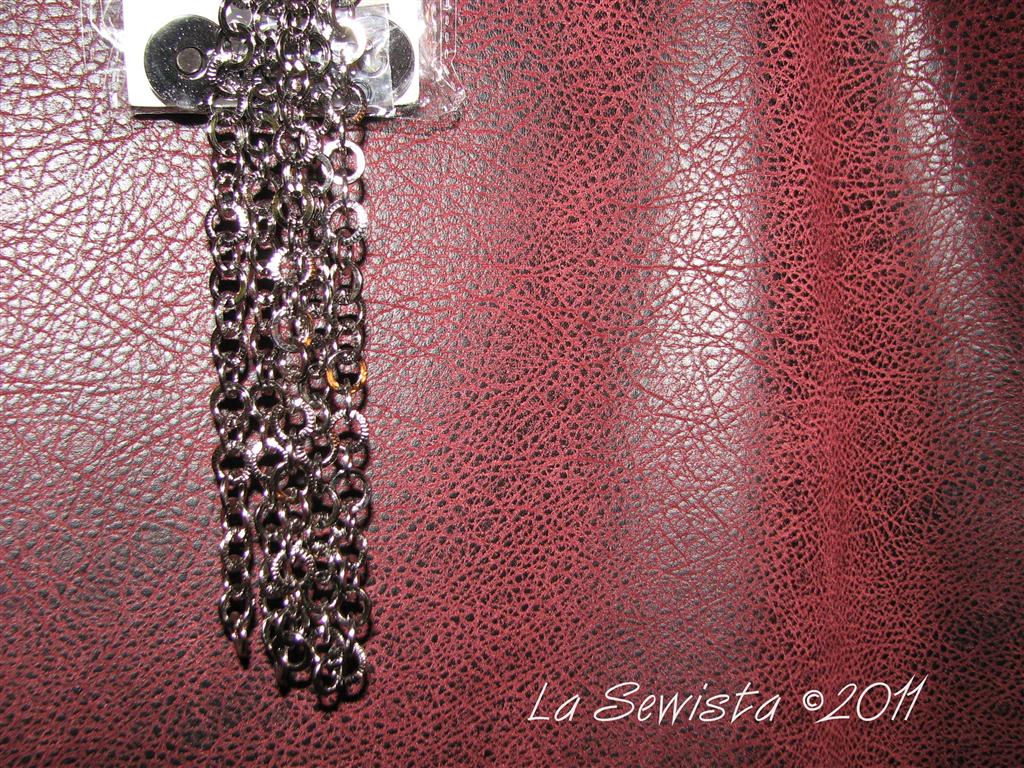
Also in the queue is this red leather. It is just waiting for me to turn it into a clutch bag with some chain embellishment. The findings are an onyx metal finish and look really sharp with the red F. leather. I am  VERY excited about this project. I know it will lead to more clutches. That's good because the gift of the season this year will be clutch bags. Be forewarned. You will see a bunch coming.
Many irons are in the fire. We will be leaving early Friday for Boston and NH. We will bring Audrey her window treatments, watch our grandson play baseball, and enjoy all the grandchildren.  We will watch our daughter Jen and her hubbie pull down a half marathon starting at  Franklin Park on Saturday in Boston. Let me know if any of you will be there. Then Sunday evening it will be back to NY and a good nights sleep before facing that wood pile on Monday morning.  Hopefully Tuesday will bring on some serious uninterrupted sewing time. Wahooooo! I hope you all get to have a glorious fall weekend.....Bunny

ETA: It just occurred to me that I didn't mention 2282 from Simplicity. This is for the Dolce & Gabana jacket and I need to work up a muslin. That will happen soon. In the meantime, the leaves are falling but we are not near peak color. I am thinking maybe Monday peak color will be here and I can get some good photos....Bunny


The Ray Pinafore, 2025's Epic Fail

  Happy New Year and welcome to my epic fail of 2026. I guess you have to have one, right? This is the Ray Pinafore from Paper Theory Patter...