Sewing Vloggers

Monday, October 13, 2014

Let's Talk Thread, NLS #2


Welcome to Next Level Sewing #2. What is more basic to sewing than thread? Yet using it well can definitely add a bit of polish to your garment. These are simple skills that you won't find in a pattern and if lucky will stumble upon on the internet. I've tried to gather them together here for a more cohesive lesson for you.  If you have any questions or would like to share your experience please feel free to do so in the comments. There is a definite dirth of info on the web about thread.


Thread from the spool.   Whenever handstitching, always thread your needle the way it comes from the spool. Cutting a length of thread, letting it fall in a loopy situation on your work table, and then picking up any cut end is not a good habit. By feeding the leading cut end of the thread into your needle and knotting the end that is closest to the spool you eliminate aggravating knots and kinks. Thread is made with a twist. When you thread the needle with the end that is closest to the spool you are constantly fighting the natural twist and it is a battle between you and the thread's urge to get back in line with it's twist. Guess who's going to win?

Want to make your handsewing a bit couture? If your handstitching is for finishing, like a hemline or buttonhole, run your thread through a piece of beeswax. Beeswax is available from any of the chains. Then pass the thread under a warm iron to meld the wax into the thread. I would not use this technique for heirloom sewing of lightweight fabrics but it is wonderful for finishing hems on anything wool or more tailored like a jacket. When I iron the thread I do it over a few layers of scrap fabric. I don't want that wax to telegraph to the ironing board cover where it will later be released while ironing something else, not good. So do this over a towel or a few layers of cotton scraps.

Thanks to the late Anita Boucher who taught me this 25 years ago when she saw me thread my first needle for hand stitching a quilt! The end of twisting, knotting thread was glorious!


Knot those puppies!  In the past few months I have seen two very well known sewing teachers topstitch a pocket and just snip the threads off at the corners when done. No, people, No! Once this garment is washed, and in both cases seen it was washable  jeans and pants, I promise you those unknotted threads will pop out and fray. Then the pocket or whatever will come lose from it's stitching and in no time that garment you put all that effort into will look like Walmart's latest fast fashion after a run through the washing machine. Again, not good.


How to do this correctly? Simple. I always keep a pincushion next to the machine with a couple of crewel needles in it. Why crewel needles? They have big eyes and are quick and easy to thread. I don't want to futz with needle threading while at the machine so make it as easy as possible.  When finished stitching a seam, one that is on that outside and will show, leave about 8 inches of thread before cutting. One thread, the bobbin thread, will already be  on the back. The other is on the top and gets threaded with the crewel needle. Run that thread through to the back of the garment in a way that looks  like another normal stitch . Once on the back do a square knot  with the two threads. Square knot? Right over left, left over right. Clip the threads now.  A more couture finish?  Run the threads between the garment and come back up on the wrong side about an inch away. Clip them  to keep the ends hidden. You now have your threads tied off and your beautiful topstitching will hold up to cleaning and look good for a long time. To make my point here I sewed up a simple pocket, a la quick, and on the right  side I tied the topstitching threads to the back. On the left side I clipped them as I saw the two well known Craftsy Profs do, down to the quick. Then I put the pocket in the wash for one wash and one dry. Look how this came out after one washing. The stitches on the right that were tied to the back are solid and holding. The stitches on the left are a mess. This pocket is doomed to separate from the garment with a few more washes. This is what happened after one wash. You work too hard and put too much into your sewing to have it fall apart and look shabby like  this.

Don't Backstitch.   I know. This is against what you have been doing for maybe years. But backstitching, particularly at crossed seams, can add bulk and make for a not smooth seam intersection as well as uneven seams. Remember Couture Sewing Maven  Roberta Carr's number one rule of sewing, "Reduce bulk whenever possible". Not backstitching reduces bulk. But my seams will fall apart!!! NO! See the next paragraph.


Dial down your stitch.   OK, this takes a little getting used to but the results are worth it. I promise you, in no time you will be doing this without even thinking. When you get between a half inch and a 1/4 inch away  from the end of a seam STOP.  Same goes for starting seams. Dial down your stitch length to 1.5 or even 1 and continue stitching till you meet the edge. This will give you strong seams and will eliminate the bulk of backstitching. Cut your threads right at the edge. Once pressed, intersections will have a smoother appearance than those that are backstitched  and seams will lie flatter. Have you ever seen backstitching in a retail garment? While I really don't think they do anything to strengthen stitches in manufacturing other than hand the piece off to the next stitcher in the process, we continue to bulk up our seams with all this unnecessary thread. So dial down that stitch length for a more professional look to your seams.

In the pic above you can see the difference this makes.  This is a cotton chambray.Do you see how the backstitching has added bulk to the right seam and is not letting it lay flat? This has been pressed open just like the seam on the left. By dialing down,  the stitch length the entire length of the seam is exactly the same width and presses beautifully. By backstitching, three rows of thread are making the width of the seam unequal and pressing flat not doable without bubbling. Yes, you could press the life out of this and probably bring it back to look a little better but it will return with each washing. You don't want to do that every time you iron, do you?

How old is my thread?   If it's on a wooden spool, too old! Save those and put them in a lovely glass jar to admire and accessorize your sewing space. All decorating aside, THREAD GETS OLD. At least once a year, usually twice, I will go through every spool I have and give it a yank. If it breaks pretty easily, it gets chucked. You could save it for basting but there are better options and how many spools do you need  just for basting? Thread gets dry rot. I have heard of people actually keeping their thread in the freezer to prevent this. While I don't go to that extreme it is important to be aware that thread has a lifetime, like us, and does age. You inherited a huge collection of thread from 97 year old Aunt Ida who recently passed. Better give those babies a yank before using them to sew a garment on your new age machine. If they don't pass the test, into the pretty glass jar they go! This is particularly important with sewing children's clothing where you want strength and hopefully a garment made well enough to pass along to the next child. Cotton threads are more likely to dry rot than the  polyesters. Yank test on your threads once a year!

Thread fades, particularly cotton thread. All those lovely thread holders that hang on the wall next to your big window over the sewing machine? Not the best thing for your thread. It is best stored in a dark space, free from dust. You can get thread organizers that stack and fit into cabinets nicely. Mine are stored with each color in its own box and inside of a cabinet. Sewing in the basement? I did for years. Fluorescent  lighting will fade your threads, particularly the silk ones. BTDT. It does a wicked number on silk and silk thread.

***************************

There is a surprising lack of information on threads on the web. There are many different kinds of threads, too.

The poly or poly blend threads most of us use to do our sewing are quite strong and have elasticity built in. They are great for knits because of that factor. But because of that elasticity, extra care has to be given to winding your bobbins. Wind your bobbins at a slightly slower speed. We are always in a rush to fill a bobbin, an aggravating interruption to our sewing. Slow down with the poly threads. At high speed the thread is stretched before being wound on the bobbin. Then when you go to sew you see the puckered pulled tight seams. That is because the thread is too taut on the bobbin. So wind the bobbin at a touch slower speed. Careful, too slow and your bobbin won't be tight enough and the next thing you know there is looping in the bobbin case.

Our newer computerized machines can be temperamental. They don't like thread lint so you need to clean your machine after each garment. Some machines definitely have a preference for their thread brand. At one time my machine would only be happy with Gutterman thread. Now it will use both Gutterman and Coats and Clark. Turns out C&C implemented some change that made my machine like it again. So experiment to see what works with your machine best. DON'T use cheap thread. It is made with very short staple fibers that will lint up your machine and can cause an expensive week or two at the machine spa. It's not worth it. Good newer  thread only!!!
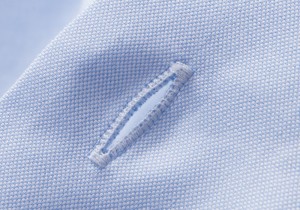


Cotton threads have a matte finish and offer a rich look for button holes and topstitching. Their bit of fuzziness helps fill in the spaces on machine buttonholes and can make a lovely finish. I've heard more than one expert suggest cotton thread for sewing silk blouses. I've done this and really like the way it works and looks. Cotton thread is not for the construction of much used children's clothing.
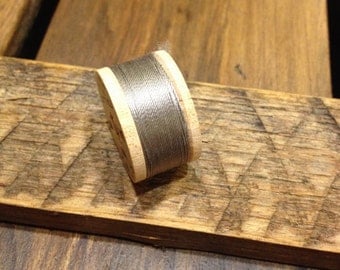


Silk threads are lustrous and extremely strong. They are what you use when doing  basting that will then be pressed in as in a hem or other tailored applications Why? Because they do not leave indentations in the fabric when steamed. Heavy steaming is required in many steps of the tailoring process and regular sewing thread will leave indentations in the garment that are hard to remove. Regular silk sewing thread avoids this. You can get Gutterman silk threads for this at the chains. Silk buttonhole twist is what you want to use when going to the effort of hand buttonholes on couture garments like a Chanel style jacket.The next sentence is a bit controversial but I agree with it. Because it is so strong, the silk can actually cut threads in your garment fabric and is often recommended to NOT  be used for actual construction. I would use a high quality cotton like Mettler silk finish thread on silk fabric, not silk thread.

Threads come in different sizes. The higher the number the finer the thread. For  heirloom sewing size 80 and even a 100 threads are used. They disappear into the fabric when doing pinstitching and other heirloom treatments, so lovely.  This allows the "holes" to be seen and not clumped up with thread.  These are sometimes called "fine embroidery thread" but are not machine embroidery threads. That is a whole different animal that I know nothing about as I don't do machine embroidery.

Most regular threads are size 50, Machine embroidery threads tend to be size 30. Remember, the lower the number the thicker the thread. Remember though, other than for heirloom sewing, I haven't found the number to be particularly important to know. What you do need to know is that threads are marketed not by size but by use as in multi purpose, buttonhole twist, topstitching thread, quilting machine thread, etc, etc, etc. There is a thread for each type of sewing being done out there and it's not hard to find the correct thread without knowing a size. Just shop for thread by it's eventual use and fiber content. Heirloom sewing is the exception. Specific thread sizes are often recommended and are available from heirloom purveyors like Farmhouse Fabrics.

Basting threads are a wonderful thing to have on hand and not available in most stores. I thank Claire Shaeffer for introducing me to the wonders of skeined basting threads. They have a loose twist and a very soft finish. They won't leave indentations when pressing. They are also easy to remove and break easily so you don't have to bother picking up and putting down your scissors when all you want is a quick baste or are thread tracing. The soft thread is great for tailor tacks as they don't pop out like regular thread tacks can. This stuff is hard to find and is Japanese in origin. I bought mine through Claire's class. Susan Khalje sells it in her web store here.  Spoil yourself and get some great basting thread.

I hope this post about thread has helped you improve your skills and knowledge. Join in the convo and let us know your tricks, experiences or questions. Till next Monday...............Bunny


Wednesday, October 8, 2014

A Textile Mill


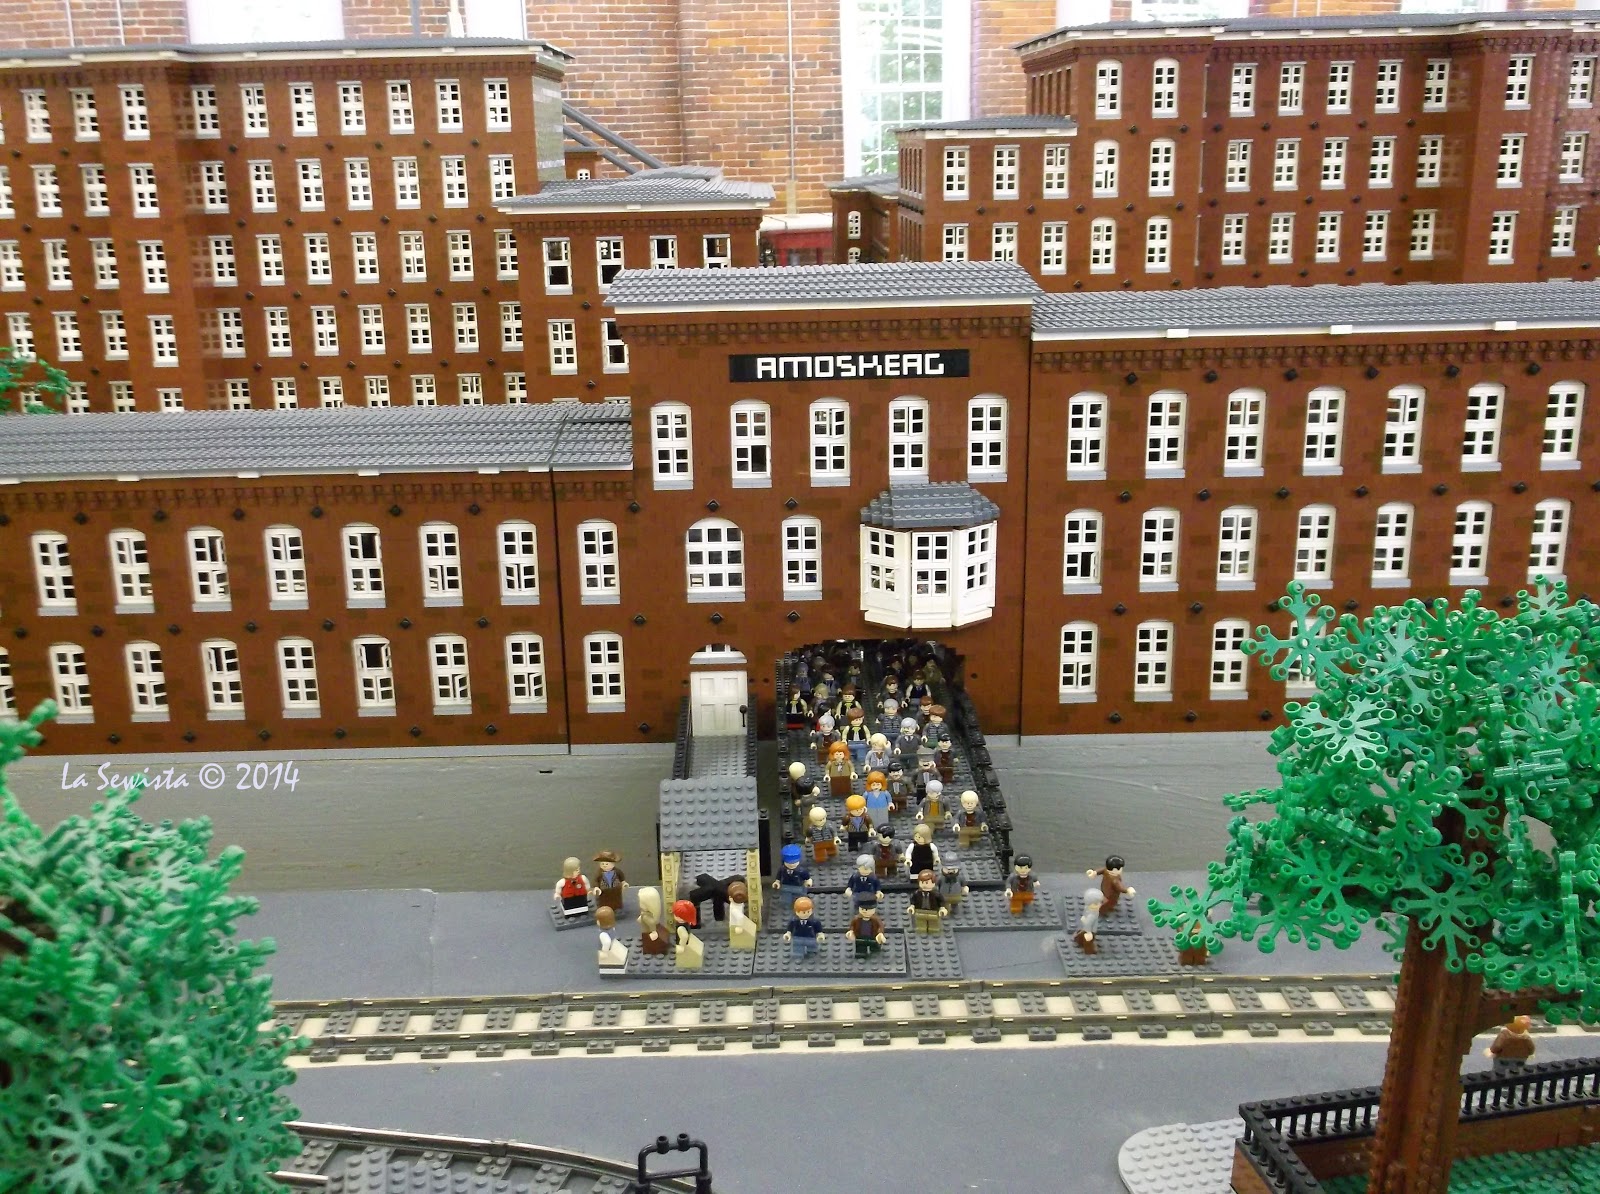
Saturday I had a wonderful date with the cutest young guy, my grandson Zackie. On DD's recommendation Zack and I went to the See Science Center in Manchester, New Hampshire. It is in the area known as "the Millyard" by the locals, one of whom I used to be. Neither of us had ever been there before. It was fabulous. The Center is a totally hands on experience and the children are highly encouraged to handle everything. It is great fun and every child there seemed to be having a ball. The Center was built by the genius, Dean Kamen, the man who invented heart stents, insulin pumps, omni theatres, segways, and much much more that touches our lives daily. I can remember when the Millyard was two miles of empty textile mills, known as the Amoskeag Manufacturing Company. Kamen bought up most of the buildings and they now house museums, tech companies, a university, restaurants and more. It is a vital area of the city and quite unique. This was the largest cotton textile mill in the world in it's heyday. You can read a lot about it here. It's a very interesting history.

The picture above is from 1911 and I can tell you it doesn't show the entire length and breadth of the mill.  But what I wanted you to see most at the See Science Center was a replica of the Millyard in it's heydey, ALL OUT OF LEGOS. It is the largest Lego exhibit ever built taking 2 1/2 years to build. It is so exact and is totally alive with 3500 figures, trains, bridges and building going thru a day in the life of the mill. It is huge!

In this pic bales of cotton are being loaded on to the flatbed trains. The canal runs through the length of the complex and so does the Amoskeag River on the right.


Below is a cross section of one of the buildings showing the looms and workers. There were over four thousand looms going at once. Can you imagine the noise? The clock tower, like much of the complex, stands today.


The bridge on the right brought many of the workers over to the West Side, an area of Manchester known at one time for the large French Canadian population. Young Quebec women would leave the farm to come work in the mill. The mill supplied housing but there was a long waiting list.


Below you can see in the center some of the row houses on that waiting list. Today they are expensive condominums and really lovely with so much character. Each unit has a lovely porch and gardens. Today the area is filled with trees and beautifully shaded.

This building below, which still stands as most do, is still a landmark known as the Cigar Factory and the sign is just as legible today. 


Everything is based exactly as it existed at the turn of the century when the mill was in it's heydey.  Here you can see the lovely park the benevolent owners provided.  There are over 3500 people placed in the display and that alone took 3 days to set up. 


Here you can see a parade honoring the soldiers coming back from what I would think would be WW1. I love the people on the roof watching. These buildings are all there today and the display has been built detail by detail from actual photos.


And this is my favorite spot in the display, all the people flowing out of the building after their shift is over. There were 17,000 employees. This was very hard work. People breathed copious amounts of cotton fibers into their lungs. They often went deaf from  working over the clang of 4000 looms. Many were young girls who had left the security of their families and farms in Canada and couldn't speak English. Many were the ancestors of the Manchester population today. 

While the mill is spectacular with it's foundry, train station, parks, housing, etc, it is the people who made it great and the vision of the owners who were known for their benevolence to their employees. It was the glory day of textile manufacturing in the Northeast. As transportation changed, the mills moved to the South for cheaper labor. Today they have moved from the Southern United States to off shore countries. Today's foreign mill owners are far from benevolent and workers are used like yesterday's newspaper. 

The photos  I've shown are only a small indication of the vast display. If you ever get the chance to go to the See Science Center in Manchester, NH. do visit. It is well worth the trip and I promise, little ones will love it. Hope you've enjoyed this visit..........................Bunny 


Monday, October 6, 2014

Next Level Sewing, #1, calling all Sewing Newbies!


Around the blogosphere lately I have seen a fair amount of chatter regarding sewing books. There are so many new sewists and I personally find that thrilling. But it seems many newbies now want to up their game and pick up the next level of skills. On forums there is talk of the lack of middle level sewing manuals. While I disagree with that thought and will talk more about it in a moment, I do think many of our newbie sewists have really caught the passion and are looking to better their skills. They don't want to sew couture  and many don't have the time for epic garment sewing at this stage of their lives. Even if they did "To everything there is a season and a time for every purpose........" While one day couture level sewing may intrigue today's newbies, many realize they need to learn a bit more of the every day sewing before jumping that broom.

It energizes me to see our newest sewists looking for the next level of sewing. It is actually something that has been really calling for my attention for some time. I've started keeping a list of things that come up as I am sewing that might be of interest to someone who wants to get better at this craft.  What I have read on several blogs and forums is that the newest sewing books are not filling that need. Reports are many are one dimensional, or are single project oriented  or just simply have the basics. Many books I've seen ( remember, I work in a library) are rehashes of the same ole, same ole. Do you want the info A-Z, or the one with a ring binding, or the one with the funky trendy artwork?  Many new sewists are wanting more. It's exciting that new sewists want to get better at this passion. It makes my heart skip a beat.

I've really thought about this a lot. As I am working on my own projects, often simple practices come up that really make a difference. These are not epic sewing moments, but the small little techniques that you don't see mentioned in patterns or sewing books. They are the things the patterns assume you know. They are what you learned the hard way or from a dear mentor. So my list began. And once that list got started I knew I would have to address this on the blog.

The things I would love to share are mostly pretty simple. They are all those techniques that, as a young sewist myself, I thought were a waste of time, too much trouble, or just didn't seem necessary. Some are methods that I learned over the years as my sewing progressed. Now they are techniques I can't imagine not doing as they add so much to the finished quality of a garment. Nearly all take little extra effort but make such a difference in the final result.

With all that hoopla I have decided to write a series on "Next Level Sewing". It is intended to help our treasured new garment makers produce more professional results. No promises here but the plan is to publish this series once a week, on Mondays. So tell your sewing friends, those who are just beginning, those returning to sewing after a hiatus and all your sewing friends that on Mondays La Sewista  will be having her series: "Next Level Sewing". If there is anything particular you would like addressed, please let me know.

I am going to start this first post in the series discussing books. There are tons of newbie books out there. Most are very enthusiastic and inspiring. They often are one dimensional and you read them feeling like something is left to be said when you have completed the book. It's as if you learned a lot about making tote bags, or aprons, or skirts, or hats, or whatever, but did you really learn to sew?  Lots of books like this are out there and my suggestion is to get your new sewing books from the library. Unless money is no object, save your dollars to invest in some of the classic writings as well as some vintage sewing books. In case you're wondering how I formed this opinion, my work in the library gives me great access to books and I process all the incoming new books personally as well. 

At the other end of the spectrum are the highly detailed couture or textbook type sewing books. These really should be read. Again try them at the library but definitely invest in one or two so there is a reference for that special garment you know you will make one day, a wedding gown, prom gown, little black dress, or a couture inspired suit. These books are fun to read and inspire also. They will be there when you need them. So a newer sewist may want to have one in her sewing library for now even if she/he is not ready to try couture. It's always great to have inspiration as well as something to strive for.  My recommendations would be anything by  Claire Shaeffer, Kenneth King  or Susan Khalje.

So what's the in between you ask? the meat of  "middle" sewing?  My recommendation for the newbie sewist is GO VINTAGE! Many new sewists are fans of vintage clothing so why not vintage sewing books? Other than a few newer notions and tech fabrics, sewing has not changed much for a long long time. The garments and styles change but easing in a sleeve is the same concept and skill today as it was in those gorgeous 1930s tailored suits of yesteryear. Matching plaids is the same skill today as it was many decades ago. Edith Head, my favorite vintage designer, had skills that would make her an excellent designer today as well. The vintage books may have a different vibe but the information in them is just as good today as when it was written and many are specifically that next level of sewing reference that the newbie is looking for.

Look for them at your library  and/or pick them up on Amazon or from Alibrus.   Those two sources vary wildly in their pricing so be a sharp shopper. Read all the reviews. Because these books have been time tested, no gushing faux designer worshippers are reviewing the books and stacking the reviews in their favor. These are time tested tomes.   Try them out from the library. Then invest. Some of my favorites:


Anything  by Adele P. Margolis. She has numerous books and is a sewing icon who passed away last year in her nineties. She is very easy to understand, hilariously opinionated, and fun to read, not what you'd expect from a book teaching sewing. I recommend any of her books and keep your eyes peeled for them at thrift shops and yard sales. While the pages may be a bit yellowed and the illustrations a bit of a hoot, these are priceless. I guarantee you will learn a lot, never will feel overwhelmed and will enjoy her writing style. She's an amazing teacher.

The Singer Sewing Series by Cy Decosse   These books came out in the 80s and 90s if my memory serves me right. They are just as relevant today as they were then. What sets this series apart from other and newer sewing books is the clarity of the teaching and the phenomenal photography, some of the best I've ever seen in a sewing book. The pictures are glossy, in color, large, and very  very close up. Explanations are simple to understand and work perfectly with the photos, no need to reference or back track.  There are many books in the series. My favorites are "Sewing with an Overlocker", aka, serger, " Sewing Knits",   "Tailoring",  "Sewing for Children" and numerous others. Each topic has it's own separate book. The great photography and clear lesson planning are consistent in all the different volumes. There is a logic to the chapters that makes so much sense as one skill builds on another.  I still pull out my pants book and the serging book quite often. Concepts that are difficult to visualize and therefore understand in other books are clear as a bell in the Singer Sewing Books series. Highly recommend, again, a bit vintage but worth seeking out.  You will refer to these a lot, promise.
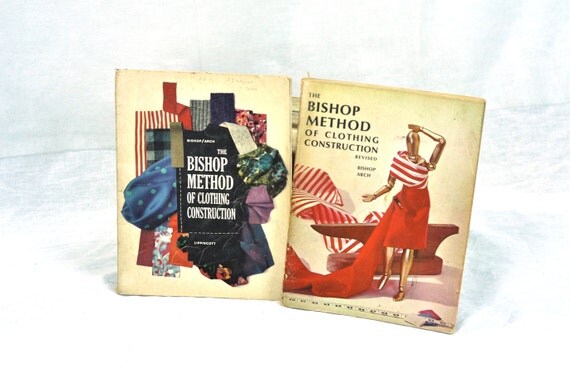
courtesy etsy.com

The Bishop Method of Sewing by Edna Bryte Bishop is a classic that starts with the absolute most basic information. It is very logical in it's progression and by the time you are done reading the Bishop Method you have an amazing font of sewing knowledge to help you along. Bishop is the queen of GRAIN and will stress that every chance possible. She also teaches directional sewing. Mastering just those two subjects alone will kick your sewing up big notches.

The Simplicity Sewing Book(s)  These books were released periodically by Simplicity from the 1950s through the 1970s. They carry good solid information in a clear format. The big advantage here? They can be found very inexpensively on Etsy and Ebay. Search for your best price. These are worth having in your sewing library. I think the covers are a hoot. Love that price too! So much info for one dollar!


The Vogue Sewing Book  This book has had many reincarnations with the 1970 issue being the most desirable among the cognoscenti. This is a great solid reference that will take you from starter sewist to tailoring expert if that is where you want to go. You need a book like this on your shelf. It is a go-to reference that will not let you down when you have a sewing quandary. I highly recommend. Again, shop around for the best price. Look on Ebay, Etsy, Alibrus and Amazon used.

Our first post on "Next Level Sewing" is now complete. I hope you get the opportunity to put some of these sewing books into your library. If you are looking to jump out of newbie mode with your next garment, any of these recommendations can help take you there. Good luck! Thanks for reading and I hope you are able to follow along with this series. Until next Monday when we will discuss some really simple techniques that can make a big difference...............Bunny

Edited to add:  Reader Valerie, from France, high up in the Alps, has been kind enough to hook us up with links to some wonderful bilingual sewing books, some French and English, some available in Italian and Spanish as well. I would like to add her email to this  lesson so our European sisters can have some excellent sewing references as well. It does sound like these books could benefit us all, however. Thank you so much, Valerie. Here is a note:

"........... We have a lot of books in France like in USA, but some are more technicals because they are edited by the French Schools of Modeling, especially ESMOD in Paris. I found some in "Amazon USA" because these books are bilingual.
I let you the links of my search if you are interested (although these books are expensive):
http://www.amazon.com/s/ref=nb_sb_noss?url=search-alias%3Daps&field-keywords=Claire+Wargnier&rh=i%3Aaps%2Ck%3AClaire+Wargnier
(more on pattern drafting): http://www.amazon.com/s/ref=nb_sb_noss?url=search-alias%3Daps&field-keywords=become+a+pattern+drafter&rh=i%3Aaps%2Ck%3Abecome+a+pattern+drafter
And finally, we also have Teresa Gilewska, well-known in France for her books in sewing. Some were translated in English, some in Spanich, Italian or German, but unfortunately, not all the collection:
http://www.amazon.com/s/ref=nb_sb_noss_1?url=search-alias%3Daps&field-keywords=teresa+gilewska&rh=i%3Aaps%2Ck%3Ateresa+gilewska
Maybe you will find something useful for you or your readers...
Kind Regards,

Valรฉrie M........"

Again, thank you so much, Valerie, for your contribution to Next Level Sewing. We all appreciate it....Bunny
**************************************************


This was the last stretch of road, near my home, when I drove back from New Hampshire today. The blue cable on the left, actually a tube,  is used to transfer the sap from the maple trees to a main "sugar house" where the sap will be boiled down to make maple syrup in the spring. A glorious fall day with a hint of chill in the air, perfect!.......... Bunny


Thursday, October 2, 2014

Vest or Jacket, Madame?

Thank you so much, everyone, for the lovely comments on the Ikat Jacket. I just love Ikat fabric and think it should be used more in clothing. This link will show you tons of Ikats that are available by the yard. As in my case, most are home dec prints, but a pass through the washer and dryer and you will be good to go with them. I always recommend a sample wash first, however, so please do that before throwing it all in the machine!


On to the next project. I have really not been sure what it should be. As I stare at my fabric resources there are so many options but I want the jump up and grab me fabric to start yelling my name. One possibility is this yummy wool gabardine. It is a gorgeous color that sits between cobalt blue and very deep purple. Patterns have not been clicking with me lately but I think I may be on to something with Vogue 8932.  I actually am thinking of making the vest, View C. There is a great version on PR that you can see here.

I am going to do a felting sample of the fabric to see if that will work. But then my mind really got going with maybe felting some orange wool roving and doing striped piping and before I knew it, excitement set in. I am thinking of a bit of change with the hemline. I am also concerned with the seams narrowing in toward the neck. That's fine, brings the interest up to the face, but it also means they widen at the hip so I will have to figure out a way to balance all that. The big question is how artsy do I want to get with this?

The other Marcy Tilton pattern is artsy from the get go without any further embellishment from me. My concern with this pattern is doing an  FBA. I need an FBA but there are 17 pieces in this little vest and it would be a real test of mental agility to figure that fitting conundrum out. But I like it........

Sometimes I want to go full out artsy. Then I find I don't always wear the garment as much, not because I don't like it, but because artsy colorful garments are not as versatile as solid simpletons. So there are decisions to make. We will launch something soon. Speaking of,,,,,,,,,,,,,,,,,,,,,,,,,,,,,,

Monday evening I will  have what I hope you will find is a very interesting post. A clue: I will launch what I hope will be a great new series of posts. More to come Monday. In the meantime I am traveling to visit my daughters and families and get some dental work done as well. Hubby will keep the homefires burning and the wheels of the little bus turning as he delivers his precious charges.  Didn't know my hubby drove a little bus? It's his part time retirement job, one he picked up a few years after selling his business and retiring. I don't think I've ever seen a man so happy to do his daily work. He has a handful of physically and mentally challenged children that he brings to school each day. I used to go with him. He is wonderful with these 3-5 year olds and treats them so lovingly. I never thought my husband would ever be doing something like this but it has filled his retirement years with a lot of joy. We are blessed and he is surely earning his crown in heaven......Bunny


Monday, September 29, 2014

The Ikat Jacket, Simp 2153, again!


This really is meant to be a lightweight summer jacket but Mother Nature and my constant recent delays made for some Autumnal modeling shots today. I really like  this jacket and will get a lot of use out of it. Our summers are generally in the fifties at night so a lightweight jacket is a must. Factor in a lot of jeans wear and I think this will become a staple in the closet. Here's the 411:

Pattern: 
This is Simplicity 2153. It is the same jacket I used for the Threads Fall Jacket Challenge last year. A good anorak pattern is a great thing to have in the stash and this may not be the last time I make this. I can see me making it in some rainwear as well.

The pattern itself is fairly easy but I made quite a few changes and because of those changes did not follow the sequence in the pattern. More on that..........

Fabric:
This is 100% cotton home dec fabric, maybe, just maybe from Fabric.com. I do know the selvedge says it is a Raymond Waites design called "Tincia" (?), can't tell. It's hard to read. It also says it was made for Mill Creek Fabrics. I love the texture. It is like a heavy textured linen which you can see better here.

I prewashed this fabric removing the "soil and stain repellant finish" listed on the selvedge but it got a really nice soft hand to work with after that, more like clothing. I love to sew with home dec fabrics. I can't remember one, even tapestries, that I didn't throw in the washer and dryer. It softens them up and makes them much more wearable and sewable. Don't hesitate to look at home dec fabrics next time you are shopping. 

The lining is rayon Bemberg lining. Interfacing is a woven from Fashion Sewing Supply. Have to get more of their product as I am close to out!

Construction:

I made quite a few changes. The pattern does not specify a lining. I did a bound lining (formerly named flat lining) that you can see how to do here. It gives a really nice finish to a more casual garment like this. This fabric was quite ravelly and I am glad the seam edges were bound from the beginning.  The bodice pieces were all flat lined before starting construction. The sleeves were lined using the Nancy Zieman method which can be found in the tutorials. The armscye edges were bound with Bemberg lining. 

This pattern does not have a facing that goes around the neckline. I made one and much prefer how that finished up with the bound edges compared to a partical facing and lining run up to the neckline. I've never been a fan of that technique. 

I dropped the casing down a half inch as I felt it was a touch too high in the first iteration. 

Pockets were cut on the bias simply to add a bit of interest and to help the fabric move away from the home dec vibe. The hip pockets were cut at a slant with cuff. Rivets were used to secure the pocket corners and were intentionally put in upside down as I liked the back of the rivets better than the front. Pockets were topstitched with a triple stitch. 

I used simple drapery cord for the cording which I may change if I find something better. I am not 100% happy with that and am still looking. There is a pony bead at the end of each cord, simple, and cord locks at the waistline . 

I added two inches to the length which I find kind of interesting as I am only five feet tall. So watch the length if you make this. I faced the hem instead of folding it up. 

Split cuffs were added to the sleeves with a deep facing. The sleeves on this run huge. I took a good inch out of the width. Usually I am adding width to accommodate those late in life accumulations under my arms but this pattern actually had to be made smaller, so beware. 

It took extra effort and fabric at the cutting stage to insure that all the prints matched and were symmetrical throughout. 


Conclusion:

I am pleased with the pattern, once again, and the outcome. I love Ikat designs and this project let me express that choice. I highly recommend the pattern but suggest lining it one method or another and making a full facing that goes around the neckline. If I find the right rainwear fabric I may give this a go one more time!


*****************************************

I've had some questions regarding the iron I just purchased. I used it throughout this project and knocked down my ironing pile today as well. I am very pleased with it. It pushes out more steam than any iron I have ever had,no drips. It is a Rowenta "Steamforce" which I got through Amazon. My favorite feature, however, is that skinny little point with the steam holes in it. It is wonderful for ironing seams open effortlessly. No burned fingers! And those are all steam holes, not dimples, unlike my last Rowenta. 

******************************


I often get asked about my little bunny labels. I picked up this roll, half of which has been given away, quite some time ago. I got it at the much missed "Fabric Fix" store for one dollar for the entire roll. I would love to think that one day I will actual run out of little bunny labels. Now that's a sewing fantasy!...................Bunny

Thursday, September 25, 2014

Happy days are here again!

Out with the old:


In with the new:


This is one heavy iron. I like that. It also pushes out some killer steam, more than any I've had before. I think we will be good friends.......Bunny

Monday, September 22, 2014

Mr. Lauren, Please!

This week the Sunday Style magazine in the New York Times was devoted to men's clothing, clothing worn by men with stunning looks and come hither gazes. Hmmmm, this was going to fun to look at. The coveted inside cover and first and second page were plummed up by Armani, beautiful clothing and men. The next two pages were devoted to a Ralph Lauren advertisement. A man about as handsome as handsome can get is in a classic power suit with hands evenly placed on what one would imagine is the board room table. Then it took my breath away.


OK, first, please forgive these pics. If you can get your hands on this Sunday's NYTimes Style magazine, you will have much better photos to see than what I could take here. I took pics of the glossy pages as best possible. While not good, they still make my point so I decided to publish them anyway. Now that the disclaimer is out of the way..............

What's up with this suit? Here's what I see:

* the roll line on the left facing lapel is like, where? The lapel appears to be just one big folded over flap. The right lapel looks fine.

* Is that lumpy fusible in that left lapel? It sure looks like it. It is far more evident in the actual magazine photo.

*The right shoulder appears Ok but that left one ----a little droopy?

* Wrinkles  where the chest shield would/should be?  Maybe that's why the left lapel is folded over so far!

* What do you see? Am I imagining, being too critical of probably my favorite American designer, a man whose clothing I would love to wear every day? What do you think?


Now, if you keep turning pages in this mag dedicated to the peacock in every male you will see Burberry, Gucci, etc...... There garments all fit exquisitely and are beautifully tailored by comparison. Here is some Gucci for you:


See the difference?

And here's a Botega Vanetta coat with gorgeous tailoring.


I think the difference in quality, fit and tailoring is near embarassing, Mr. Lauren. What happened here?  Who had editorial control? And if a little old sewist in the boonies notices these things, is there something deliberately being fed to the readers of Style NYT? I am just so surprised at what I see.

If you continue throughout the magazine it is page after page of exquisitely tailored, beautifully dressed men, none of whom are photographed in less than perfect, albeit photoshopped (?) perfection.  Every designer imaginable is represented. The Lauren suit fell far short. I am disappointed. I love Ralph Lauren's esthetic, his all American signature style. His garments are classy, tasteful and so very American. I even think this power suit is beautiful but the fit and technique are surprising me. Sigh,,,,,,,

Again, these photos were the best of many I took and to really appreciate this try to pick up the Style magazine from Sunday's New York Times. Anxious to hear your opinions.......Bunny

Sunday, September 21, 2014

Simplicity 2153, cuffs and a zip issue

First off, my iron died yesterday. As I was ironing the sleeves water literally poured out of the steam holes and soaked the sleeve and ironing board and my feet. It also stopped heating and I couldn't bring it back. I have had 3 Rowentas over the past 20 years and they alway end with a bang. I have felt they provided me with good service during that time. I liked that they were heavier and therefore did some of the work for me. This is the world of Pinterest, Pattern Review, Amazon and Epinions. Based on a few sewists I respect I have been gunning for the Reliable for some time. But then I read the reviews. The current top of the line Rowenta came out quite a bit ahead so that's what I chose. One click later and it will be here Tuesday morning by noon! Love that Amazon prime! In the meantime I am stopped in my tracks without an iron but did sew on the facings and the sleeves were completed. Here's the end result and how I got there.


I figured out I needed a facing of five inches to make this work and attached that to the sleeve lining with a seam. Stitching followed the lines I had drawn. you can see the front and back below.


When the stitching approached the slit I dialed down the length to 1.5. This fabric is really ravelly. I Fray checked each point on both the facing and ironed dry before cutting. Loved those drops of Fray Check shining in the photo!


The edges were ironed favoring the sleeve side so that when the cuff is rolled up there is a smooth look.


Done!

To finish the sleeve construction I did the Nancy Zieman sleeve technique that you can find on the Tutorial Page. Easy Peasy! The sleeves will then be put in and bound with the Bemberg lining. At this point the iron croaked and I decided to have a beer and call it a day. This morning I dealt with what I consider an issue with the pattern that I would like you to know about.

I remember from the first jacket I made from this pattern that when I got to the point of attaching the collar and facing the result of the junction of the collar, facing, and zip was very messy once sewn and turned to the right side. I had to do some back peddling to make it presentable. 

The pattern has you stitch the separating zipper to the center front seam at the 5/8ths line all the way up and down. Fine. Then it has you butt the collar right up to it. Fine. The facing is placed on top  and stitched all around. Not fine. What this does is cause the zipper to twist over the collar and look totally bad.  I have actually looked at some reviews of this pattern and you can see the issue if you see any closeups. Here's how I handled it this time. If you plan on making this pattern I would definitely keep this info somewhere. 


On each side of the zip I folded back the zip at a 45ยบ angle. With just twisting it to the side it was not easy to get each zipper top matching on each side of the bodice. With this sharp angle I could measure and bend them both back equally. This will now get sewn into the facing seam and here's the results. Hope this helps any who decide to make this jacket.


There are some green arrows showing how the zip would twist over the collar and then back to the facing if done the way the pattern leads you. Hopefully I will have this all ironed nicely for you to see soon. The iron death sure took care of my finishing this today. One of the great things about bound linings is that when you are done, you are done. No making a second garment and putting it inside. Love that.

I think the gremlins are in my house. We are going this afternoon to buy a new stove, dishwasher and hood. Seems they and the iron all decided that living in this house for ten years was enough.......Happy sewing!........Bunny

Thursday, September 18, 2014

What's wrong with this picture?


One of the suggestions on this pattern was to use rivets at the corners of the pockets. I liked that idea and had some nice silver ones. These are flat with concentric engraved circles not visible here. I chose them because I really like the look. Hammer away!


The next morning I went to wear my recently made print jeans and looked at those rivets which I installed after watching a few youtube videos. Have you figured it out yet? I put these in backwards. ugh.....but I did that because I thought the back of the rivet was the "pretty" public side. Clearly there is minimal rivet experience here but I have learned a lesson.  OK, the rivets could have been installed with the little nipple side out but they weren't as shiny or as interesting. So while I made a mistake here, it was that "wild enthusiasm, unencumbered by the thought process" that had me make by decision by the look I liked, not by the "rules". So while my ego has been bruised by my lack of knowledge, I am comfortable with a look I chose from the outset because I just  liked it. Do you really think the rivet police will come after me?

Next snafu was the yoke. It is well installed but not the way I wanted it to be. Again, wild enthusiasm took over. I was doing the burrito technique for the yoke which is in the tutorials. But I topstitched the yoke before closing it up. This meant I didn't have a free seam allowance to connect with the wraparound lining yoke. Whahhhhhh......So I just did the traditional handstitched yoke finishing you see here and all is fine, just not quite what I wanted. I will adjust the tutorial to reflect my stupidity   eagerness.


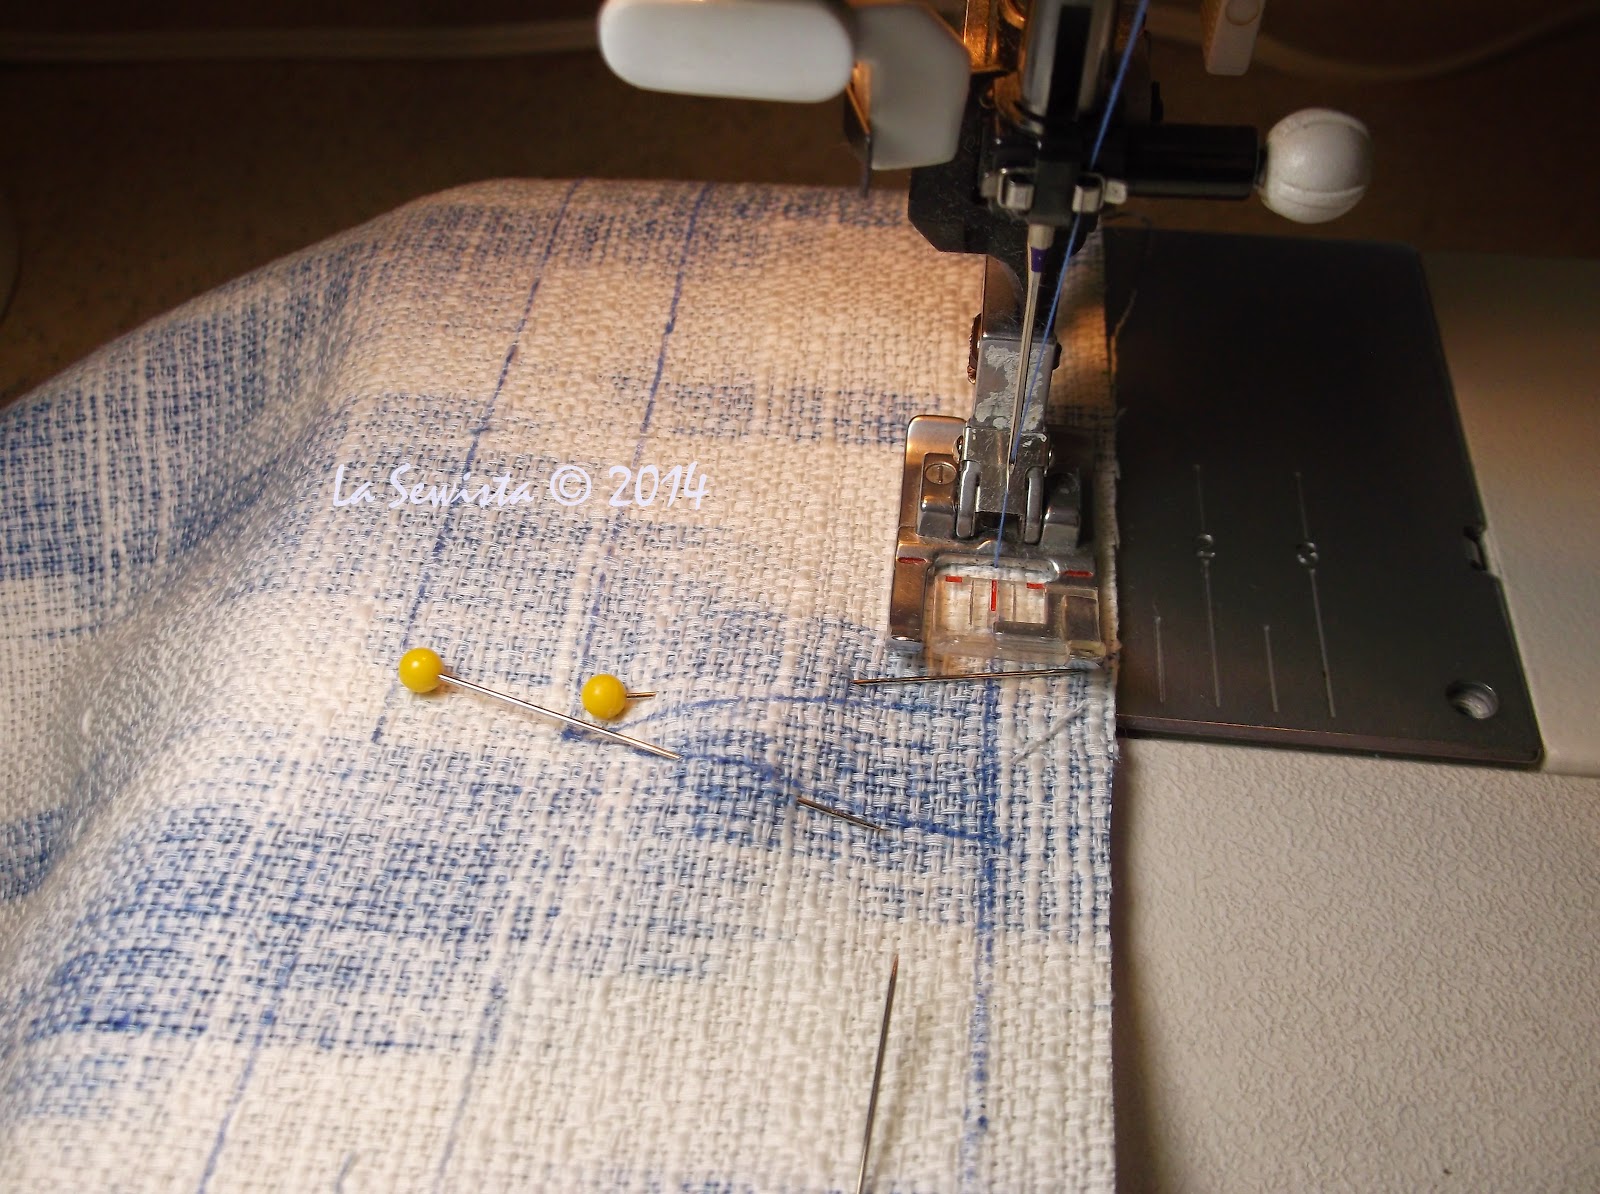
I am on to the sleeves now, s l o w l y  on to the sleeves. I want them to have a fold back cuff with a slit.  I've adjusted the photo so you can see my markings a bit better. The top line is the hem fold. I added another 3/4 inch for turn options. How deep did I want it to turn? Then the cuff which has a slit in the middle, then the final seam allowance. I haven't cut off the surplus yet. The lining will have a facing that will be two inches wider than the "cuff" space. They will be placed right sides together and stitched on the drawn lines. Fingers crossed. Go away unbridled enthusiasm, go away...........Bunny

The Ray Pinafore, 2025's Epic Fail

  Happy New Year and welcome to my epic fail of 2026. I guess you have to have one, right? This is the Ray Pinafore from Paper Theory Patter...